 To Create a Copy of a Project
-
Start the CAPS Repository.
-
Start the NetBeans IDE.
-
On the NetBeans toolbar, click Tools, point to CAPS Repository, and then select Connect.
The Connect to CAPS Repository dialog box appears.
-
Enter the connection information and click Connect.
Note –When connected the icon in the status bar turns from red to green.
-
Export the Project you want to copy:
-
On the Projects window, right-click the Project to copy, click Export, and then click Project.
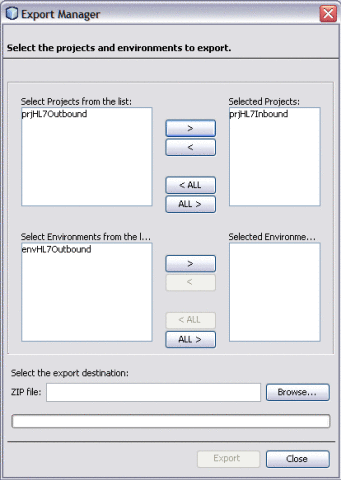
The Export Manager dialog box appears.
Figure 2 Export Manager

-
Select the Projects and Environments to export.
The selected Project appears in the Selected Projects: pane of the Export Manager.
-
Select the Project or the Environment from the left pane and click the right-arrow button to add the Project to the Selected Projects pane.
Tip –Click the left-arrow button , if you want to move the selected projects from the right pane to the left pane.
-
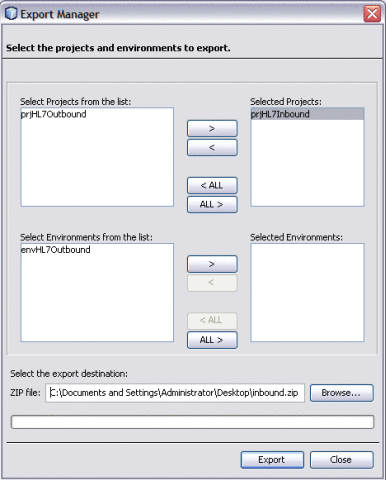
Click Browse and select an appropriate directory to save the exported Project.
Figure 3 Export Manager — Browse Option

-
Click Export.
The Project is compressed and saved to the specified directory and file name.
-
-
Rename the original Project in the NetBeans IDE.
Note –The NetBeans IDE will not import identically named Projects to the same root, so you must perform this step before importing the Project back in.
-
On the NetBeans IDE, click Save All.
-
Import the Project back in to the Repository.
-
On the NetBeans menu bar, select Tools, point to CAPS Repository, and then select Import Project from the drop-down menu.
A confirmation dialog box appears asking if you need to save any changes.
-
Click Yes to proceed with importing a project.
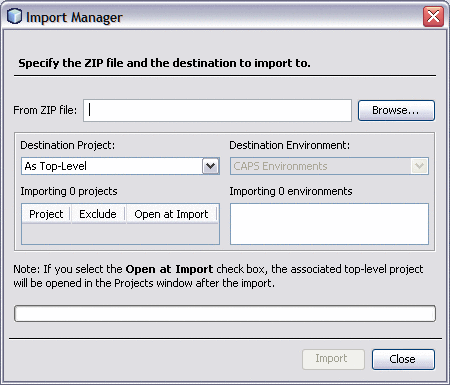
The Import Manager appears.

-
Click Browse, navigate to the location you specified for the export, and select the Project you just exported.
-
Click Import.
It may take a few seconds to import the project. When the project is imported, the Import Status dialog box appears.
-
Click OK on the dialog box.
The CAPS Repository is refreshed, and you now have two copies of the same Project in the Repository.
-
- © 2010, Oracle Corporation and/or its affiliates
