 To Create and Connect to the Database
-
Create a database instance using your database platform tools. If you are using a Java DB database, perform the following steps to create the database:
-
On the NetBeans Services window, expand Databases.
-
Right-click Java DB, and then click Create Database.
The Create Java DB Database dialog box appears.
-
Enter a name for the database, along with a login user name and password.
-
Click OK.
The database appears in the list of databases on the Services window.
-
-
Make sure your database instance is running.
-
For Oracle, DB2, SQL Server, and Sybase databases, do the following:
-
Copy the database driver file to JavaCAPS_Home/appserver/lib.
-
Under Databases on the NetBeans Services window, right-click Drivers and then select New Driver.
The New JDBC Driver dialog box appears.
-
Click Add, and then brows to and select the database driver file.
-
Select or look for the driver class to use.
-
Accept the default name or enter a name for the driver.
-
Click OK.
-
In the Drivers list on the Services window, right-click the driver you just added and click Connect Using.
The New Database Connection dialog box appears.
-
Enter the connection information for the database instance you created for MLLP and then click OK.
The new database connection appears in the Databases list.
-
-
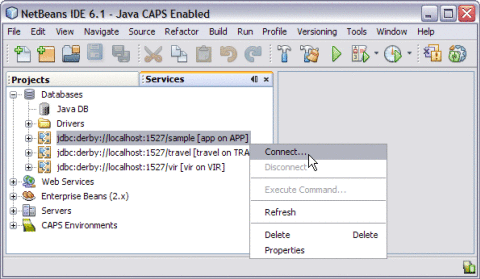
On the NetBeans Services window, right-click the MLLP database, and click Connect.
NetBeans connects to the database and the icon changes for that database. The following figure illustrates a Java DB connection.

Note –A broken icon represents that the database is not connected.
- © 2010, Oracle Corporation and/or its affiliates
