Creating a Connectivity Map
A Connectivity Map provides a canvas for assembling and configuring a Project’s components.
 To Create a Connectivity Map
-
In the Project Explorer, right-click prjBatch_Inbound_FTPIn_LocalFileOut and select New ⇒ Connectivity Mapfrom the context menu.
The new Connectivity Map appears and adds a node on the Project Explorer tree labeled CMap1.
-
Rename the CMap1 Connectivity Map to cmBatch_Inbound_FTPIn_LocalFileOut.
 To Generate the Connectivity Map
Once your Java Collaboration Definition is completed you can use it to generate your Connectivity Map. Generating the Connectivity Map will automatically populate the canvas with the correct components and bind the components according to the information provided by the Java Collaboration Definition.
-
Drag and drop the jcdBatch_Inbound_FTPIn_LocalFileOut Java Collaboration Definition from the Project window to the Connectivity Map canvas.
The cmBatch_Inbound_FTPIn_LocalFileOut_jcdBatch_Inbound_FTPIn_LocalFileOut1 service is added to the canvas.
-
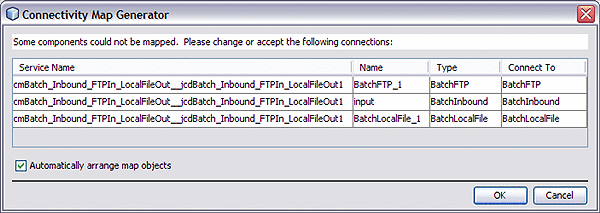
Click the Connectivity Map Generator icon. The Connectivity Map Generator dialog box appears listing the necessary components and bindings to generate the Connectivity Map. Click OK.

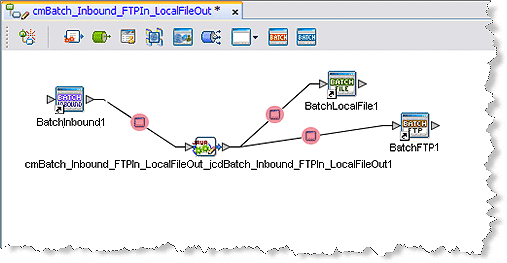
The External applications are added to the Connectivity Map and the Bindings are created. The red squares in the bindings represent the Batch Adapters. The red color indicates that the adapter properties have not been configured.

-
Save your current work.
- © 2010, Oracle Corporation and/or its affiliates
