Adding a Java CAPS JBI Component to a Cluster
You add Java CAPS JBI components to a cluster using the GlassFish Admin Console. The process for adding a component to a GlassFish cluster is the same for most components, though some components require additional configuration once they are added. Most components are dependant on one or more shared libraries, which need to be added to the cluster first.
Note –
Java CAPS JBI components can only be added to a cluster and configured for clustering using the GlassFish Admin Console. NetBeans does not currently recognize or support GlassFish clustering, so any runtime configuration changes made on NetBeans are not seen by the cluster.
 To Add a Shared Library to
a Cluster
Before You Begin
Make sure the cluster and all server instances are created and running. To verify they are running, select Nodeagent in the left navigation bar on the Admin Console and review the cluster information.
-
Launch the GlassFish Admin Console.
-
In the navigation bar on the left, expand JBI and then expand Shared Libraries.
-
Select the name of the shared library to add.
The Properties page appears.
-
Click the Targets tab.
-
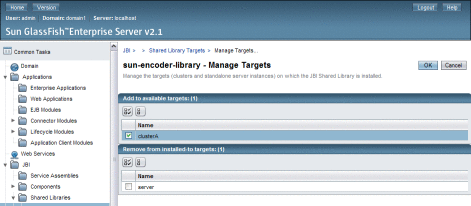
On the Shared Library Targets page, click Manage Targets.
-
Under Add to Available Targets, select the cluster to which you want to add the shared library.

-
If the shared library is already added to another cluster or server to which it should not be, select that cluster or server under Remove From Installed-To Targets.
Note –Removing a shared library from the default “server” target removes the library from the NetBeans Services window.
-
Click OK.
Note –Validations are performed to ensure that no dependencies are broken when adding or removing a shared library. In order to successfully remove a shared library from a server or cluster target, you might need to shut down service engines or binding components that are currently running on that target.
 To Add a Java CAPS JBI Component
to a Cluster
Before You Begin
Make sure the cluster and all server instances are created and running. To verify they are running, select Nodeagent in the left navigation bar on the Admin Console and review the cluster information. Also be sure any libraries on which the component is dependent have been added to the cluster.
Note –
The BPEL SE, IEP SE, and Database BC require additional steps before and after adding them to a cluster in order to configure and create the persistence databases. In addition, most components require some configuration steps. Be sure to review the sections for each component you add before you begin. Links to each section are provided at the end of these instructions.
-
Launch the GlassFish Admin Console.
-
In the navigation bar on the left, expand JBI and then expand Components.
-
Select the name of the service engine or binding component to add.
The Properties page appears.
-
Click the Targets tab.
-
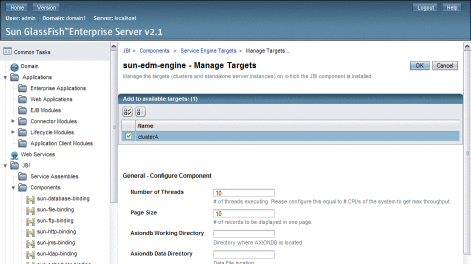
On the Targets page, click Manage Targets.
-
Under Add to Available Targets, select the cluster to which you are adding the component.

-
Configure any runtime properties that appear below the target.
-
If the component is already added to another cluster or server that it should not be, select that cluster or server under Remove From Installed-To Targets.
Note –Removing some components from the default “server” target removes them from the NetBeans Services window.
-
Click OK.
The Targets page reappears.
-
In the Targets list, select the check box next to the cluster, and then click Start.
Note –Many components require additional configuration or have certain requirements. Refer to the topic for each component for more information. Below is a link to each component:
- © 2010, Oracle Corporation and/or its affiliates
