 To Select Components and Languages
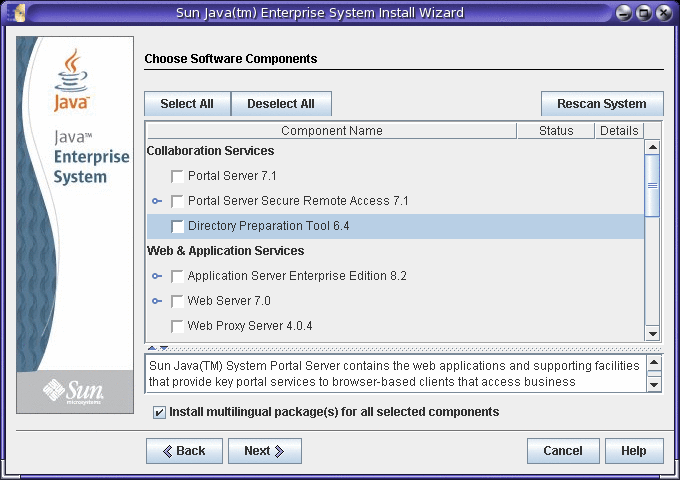
After you have accepted the terms of the license, the Java ES installer surveys the software on your host and displays the Choose Software Components page.
-
Select the software you want to install.
Note –HP-UX does not support Sun Cluster components, Directory Preparation Tool, HADB, or third-party web containers. Linux does not support Sun Cluster components, and only supports the BEA WebLogic third-party container for Configure Now installations.
The following example screen shows the Choose Software Components page.

Note –Monitoring Console cannot be run on any host where its monitored Java ES components are located. Because the installer does not prevent you from installing them together, it is important that you always run a separate installation session to install Monitoring Console on a host separate from the other Java ES components.
-
If your installer window is too small to view all the text, you might need to resize the window manually by dragging the corner.
-
To see information about an individual product component, hold the cursor over the item. A description of that item is displayed in the text box at the bottom of the page.
-
To see information on the compatibility status of a product component, click the ellipsis (...) in the Details column, if available.
-
Product components that are already installed are disabled (grayed out). If they can be upgraded by the installer, their Status is Upgradable.
Note –Application Server, Message Queue, Java DB, and HADB are the only product components that can be upgraded by the installer (Solaris OS only). For instructions on upgrading Java ES components, refer to Sun Java Enterprise System 5 Upgrade Guide for UNIX.
-
Click the Help button to view online help for the page.
-
On Solaris 10. If you are running the installer in a non-global zone, any components that cannot be installed into a non-global zone will be disabled.
Tip –There are some specific issues to be aware of when installing or upgrading in Solaris 10 zones. For guidelines, refer to Solaris 10 Zones Examples.
On the Choose Software Components page, you can select components for installation as follows:
-
All components. To select all product components and their required shared components, choose Select All.
-
Some components. To select some product components, individually select the product components. As you make each selection, the installer automatically selects any product components that the component you selected depends on.
-
Subcomponents. To select subcomponents, expand the subcomponent list by clicking the expansion turner to the left of the component. As you make each selection, the installer automatically selects or deselects any product subcomponents that the component you selected depends on.
-
Shared components. To upgrade all shared components to the current Java ES release, select All Shared Components. If you do not select this item, only shared components for the product components you selected will be installed or upgraded.
-
Language packages. By default, multilingual packages are selected for the components you selected. Each additional component you select causes additional multilingual packages to be installed, adding to the disk space required for installation. If you choose not to install multilingual packages, you will be queried to confirm this choice and warned that you will not be able to install localization packages later.
-
-
If applicable, select a web container.
-
If you are not sure which product component to use for your web container, you can select both Application Server and Web Server, then choose Configure Now when prompted for configuration type. You will be offered a choice of web container on a configuration page later in the installation session.
-
Access Manager and Portal Server must use the same type of web container on a host.
-
To use Web Server as the web container, the Web Server Configuration Type mode must be set to Server, not Agent, when you are queried during Web Server configuration. The default value is Server.
-
-
If applicable, select a third-party web container.
Note –HP-UX does not support third-party web containers. For Configure Now, Linux only supports the BEA WebLogic third-party container.
To use a third-party web container, do the following:
-
If applicable, specify any remote dependencies.
To satisfy dependencies by using product components installed on other hosts, do the following:
-
After you select your product components, expand to display subcomponents and scan the entire list of components.
Examine the selected components to see what the installer has automatically selected that you might not be aware of.
-
Deselect any product component that you are planning to access on a remote host.
For example, a previously-installed and configured Directory Server is commonly accessed remotely.
-
Click Next, to see the Dependency Warning popup.
You are presented with choices.
-
Choose Use a Version Installed on a Remote Host.
-
Click OK.
-
- © 2010, Oracle Corporation and/or its affiliates
