Component Version Compatibility
If incompatible versions of product components exist on the host on which you are installing the software, you must remove the incompatible components. Product components generally cannot be upgraded by the installer, but there are some exceptions. For detailed information about version compatibility issues, see Does it Matter if Other Java ES Components are Already on My Host?
During installation, the installer automatically installs the required shared components if they are not already installed on the host. If some shared components are already on the host but the versions do not match the Java ES release requirements, the Shared Component Upgrades Required page is displayed, listing the incompatibilities. You cannot proceed in the installer until compatibility issues are resolved.

Take the desired action:
-
To direct the installer to automatically upgrade the shared components to the correct versions, click Next.
-
To specify you do not want the installer to automatically upgrade the shared components, click Cancel to exit the installer. Upgrade the incompatible shared components and then run the installer again.
-
To proceed without exiting the installer, click Back and modify the selection of components you want to install, removing those for which there are compatibility issues.
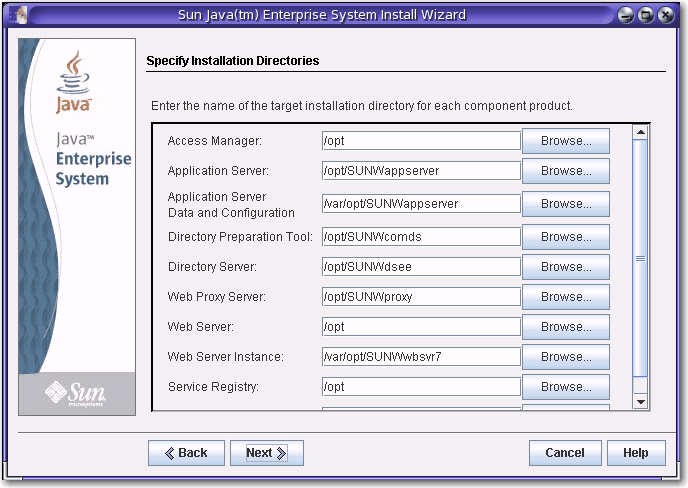
After you click Next on the shared components page, the Specify Installation Directories page displays the default installation directories for the selected components.

If the default directories are not acceptable, browse for alternate paths and change as needed. Make note of these alternate path names because you must specify the information whenever path names are requested by the installer or a configurator. To see a complete list of default directories and ports, see Default Installation Directories and Ports.
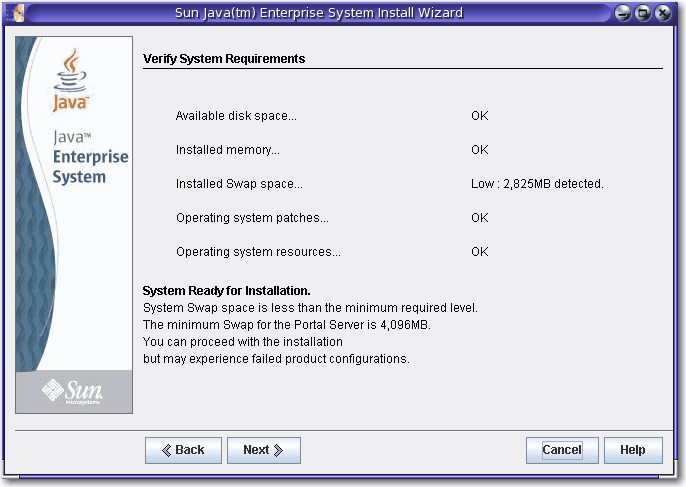
When you click Next, the installer runs a system check to verify that all system requirements are met. This process checks system resources such as disk space, memory, swap space, and patches based on the components you selected. When the installer completes the check, the Verify System Requirements page is displayed and lists the results.

If requirements are not met, messages tell you what you need to do. Take the desired action based on the system check:
-
If your system meets requirements, System Ready for Installation appears on the page without any qualifications. Click Next to proceed with the installation.
-
If your system does not meet the minimum memory or swap space recommendation, System Ready for Installation appears on the page with qualifications (as shown in the previous screen capture). Click Next to continue, but add memory or swap space when installation is complete or you might encounter degraded performance and other serious problems.
-
If your system does not meet the requirements to proceed with the installation, System Not Ready for Installation appears on the page and you must take action before you can proceed. Click View Report to identify the problems, then fix the specified errors and click Check Again to recheck the system (if the problems can be fixed without stopping the installer). If your system continues to fail to meet the requirements, click Cancel to exit the installer, troubleshoot and resolve the problems, and then run the installer again.
When the system check is complete and you are satisfied with the state of the system, click Next.
- © 2010, Oracle Corporation and/or its affiliates
