|
Software Installer Module |
This document explains the features and services available by using the Software Installer control module, which is part of the Sun Control Station software. This module enables you to do the following:
You can also use the filter option to narrow the types of package files you want to view and manipulate.
After logging in to the Sun Control Station, when you click Software Installer  Packages, the following window opens.

In this manual, the term package file refers to a Red Hat Package Manager (RPM) file for Linux-based servers (such as the Sun Fire V60x server).
The following sections describe the functions that you can perform with the Software Installer module.
The Upload function enables you to load a package file from either a local repository or the Internet to the Control Station.
The Details function enables you to view specific information about a package file, such as the name, version, release, vendor, file name, summary and description of the package file, and other relevant package file information.
The Edit function enables you to add and remove supported operating systems for a single package file.
Similar to the Edit function, The Reassign OS function enables you to add and remove the supported operating systems for multiple package files.
The Delete function enables you to remove a package file from the list of available package files. Since the package file is located in the local repository on the Control Station, the entry for that package file is removed from the list of available package files and the package file is deleted from the repository.
The Install function enables you to install package files on selected hosts. The package file is copied from the local repository to the managed host and then installed.
Before installing a package file, you can test the installation and the Control Station performs a preliminary test to verify the correct RPM, checks that the package file is not previously installed, and checks for other general errors.
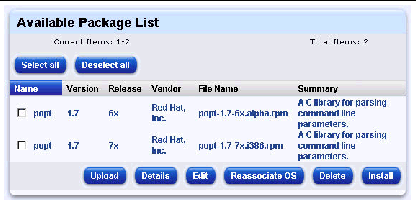
The Packages option enables you to manage the package files on local repositories. The Available Package List window shows all of the software packages known by the Sun Control Station. The software packages are stored locally on the Control Station.
For an explanation of the functions that are available under this menu item, see Software Installer Functions.
The following example shows the Available Package List options in the packages portion of the Software Installer window.
To upload a single package file, do the following:
1. Select Software Installer  Packages.
The Available Package List window appears.
2. Select the package file(s) in the list of available package files that you want to use.
The Upload Package window appears.

4. Select RPM from the Type drop-down menu.
5. Click one of the radio buttons and enter the location of the package file.
The Task Progress dialog appears.
7. Click either Done or View Events when the upload is complete.
If you click Done, you are brought to the Edit Package Info window, where you can enter the supported operating systems for the package file you installed.
To view the detailed information about an available package file, do the following:
1. Select Software Installer  Packages.
The Available Package List window appears.
2. Select the package file(s) in the list of available package files that you want to view.
The Detailed Package Info window appears.
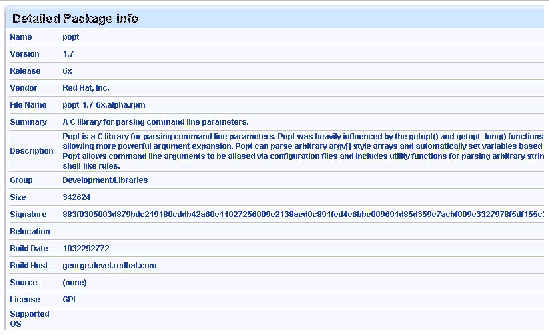
The Detailed Package Info window provides the following information about the package file:
4. Click Done to return to the Available Package List window.
|
Note - Detailed information is available for each package file that you chose in the Available Package List window. |
To add or remove supported operating systems for a single package file, do the following:
1. Select Software Installer  Packages.
The Available Package List window appears.
2. Select the package file in the list of available package files that you want to use.
You can only edit one package file at a time.
The Edit Package Info window opens.
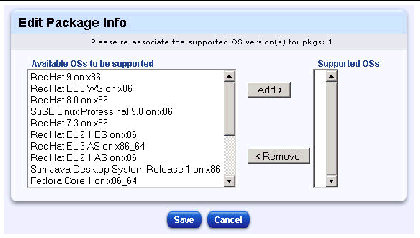
4. Configure the options to set the applicable operating systems:
5. Click Save when the edit is complete.
You are returned to the Available Package List window.
To add or remove supported operating systems for a multiple package files simultaneously, do the following:
1. Select Software Installer  Packages.
The Available Package List window appears.
2. Select the package file(s) in the list of available package files that you want to use.
You can edit multiple package files at once.
The Edit Package Info window opens.
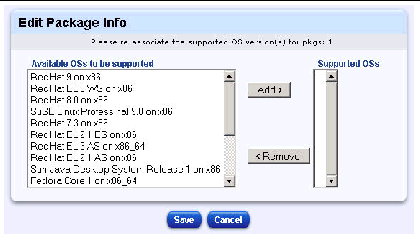
4. Configure the options to set the applicable operating systems:
5. Click Save when the edit is complete.
|
Note - If you previously assigned operating systems to package file(s) using Edit, that information is not retained and you must perform this operation again. |
To remove a package file from the list of available package files, do the following:
1. Select Software Installer  Packages.
The Available Package List window appears.
2. Select the package file(s) in the list of available package files that you want to delete.
A confirmation dialog appears, asking you to confirm the package deletion.
The package file(s) is deleted and you are returned to the Available Package List window.
To install a package file, do the following:
1. Select Software Installer  Packages.
The Available Package List window appears.
2. Select the package file(s) in the list of available package files that you want to install.
The Select Hosts to Install Packages on window appears.
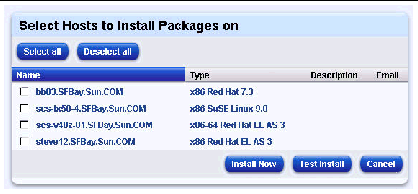
4. Click the package file(s) you want to install.
You can choose the Select all and Deselect all button depending on your needs.
5. Click Test Install to verify and test package file(s) before installing them.
This option will check the installation's viability and when complete, you click either Done or View Events to return to the installation.
|
Note - If you selected an operating system that was not supported by the selected package file, an error message appears and you need to update the supported operating systems before continuing. |
The Task Progress dialog appears.
7. Click either Done or View Events when the installation completes or stops.
|
Note - After you have installed a package file, the system updates the list of installed package files immediately. |
You can use the Filter function to limit the number of package files that are displayed at once in the Available Package List window.
To use the Filter function, do the following:
1. Select Software Installer  Packages.
The Available Package List window appears, with the Filter function accessible in the lower portion of the window, similar to the following.
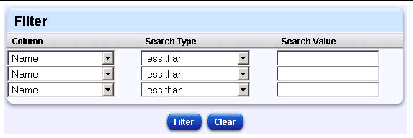
2. Choose an option in the Column drop-down list.
The following are available as search criteria in the Column drop-down list:
3. Choose an option in the Search Type drop-down list.
The following are available as search criteria in the Search Type drop-down list:
4. Enter an option in the Search Value text box.
You can enter any keywords or terms to help define your search.
The Filter function searches the package files according to your parameters and returns results in a refreshed Available Package List window.
Copyright © 2004, Sun Microsystems, Inc. All Rights Reserved.