Chapter 1 Planning and Starting Your Installation
This chapter describes how to plan and install the SolarisTM operating environment.
Note -
The Solaris software may be pre-installed on your system. For information, see your hardware documentation.
To Plan Your Installation
-
Make sure these instructions are for you.
If You Are Installing Solaris Software From ...
Then Go To ...
A CD-ROM drive attached to your system
Step 2. A remote CD-ROM drive on the network
-
Does your system have a previous version of the Solaris operating environment installed?
-
If yes, go to Chapter 5, Upgrading a System in this book.
-
If no, go to Step 3.
-
-
If your system is attached to a network, gather system information.
Use the following table to gather system information that you may be asked to supply during installation. Collecting this information now will save you time during installation.
-
If the system you're installing already has a previous version of the Solaris operating environment, you can find system information by using the commands shown.
-
If the system you're installing does not have the Solaris operating environment installed, get this information from your system administrator or whoever has set up your network.
System Information You May Need to Supply
Example
Command for Finding Information
System's name (host name)
crater
uname -n
Primary network interface
le0
ifconfig -a
IP address
129.221.2.1
ypmatch system_name hosts or
nismatch system_name hosts.org_dir
Domain name
chandy.West.Arp.COM
domainname
System part of a subnet?
Yes
Check for existing subnet in /etc/netmasks
Netmask
255.255.255.0
more /etc/netmasks
-
-
Plan disk space.
Before installing the Solaris operating environment, determine your disk space needs. Consider the following items:
-
Solaris software group
See the following table for software group space recommendations.
-
Co-packaged software
See the co-packaged software documentation for estimated space required. Also, if you run Admintool to add the software to your Solaris system, the Add Software screen displays estimated package sizes if available. See Chapter 7, Adding Software After Solaris Installation for instructions on using Admintool to add software to your system.
-
Vendor or third-party software
See the vendor or third-party software documentation.
-
Space for home directories
Home directories may store user files such as mail, text or data files, or application files.
Software Group Recommended Space (32-Bit Support) Recommended Space (64-Bit Support) Entire Distribution Plus OEM 801 Mbytes 909 Mbytes Entire Distribution 787 Mbytes 895 Mbytes Developer System Support 716 Mbytes 837 Mbytes End User System Support 438 Mbytes 532 Mbytes
Note -Swap space is already included in the disk space recommendations.
-
To Install the Solaris Operating Environment
-
Decide which method to use for installing the software in your product box.
-
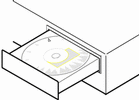
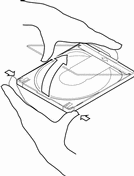
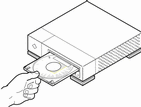
Insert the Solaris CD into the system's CD-ROM drive.
-
Boot the system from the Solaris CD.
If Your System Is ...
And You Want to Use. ..
Then ...
New, out-of-the-box
Solaris Web Start or the Solaris Interactive Installation program
Turn on the system and follow the instructions on the screen.
Existing
Solaris Web Start
Get your system to the ok prompt and type:
boot cdrom - browser
Note -Spaces are required before and after the minus sign.
Solaris Interactive Installation program
Get your system to the ok prompt and type:
boot cdrom
Note -For older SPARC systems, use the following boot command: boot sd(0,6,2).
If you experience any problems from this point on, see the module Troubleshooting in this book.
-
Wait for booting to complete.
After you type the boot command, the system goes through a booting phase where hardware and system components are checked. This lasts for several minutes. The following screen provides an example of what you will see:
Type b (boot), c (continue), or n (new command mode) >n Type help for more information ok boot cdrom Booting from: sd(0,6,5) SunOS Release x.x Version [UNIX(R) System V Release] Copyright (c), Sun Microsystems, Inc. Configuring devices Starting the desktop...
-
Follow the on-screen instructions to install the Solaris operating environment.
The Solaris installation program is a menu-driven, interactive step-by-step guide to installing the Solaris operating environment. It also provides online help to answer your questions.
-
Decide if you want to install other software:
-
To add other co-packaged software, see Chapter 7, Adding Software After Solaris Installation.
-
To install Solaris online documentation, see Chapter 8, Accessing Online Documentation.
-
To install patches to the Solaris operating environment, see the Solaris Release Notes.
-
- © 2010, Oracle Corporation and/or its affiliates


