Tape Tool Window
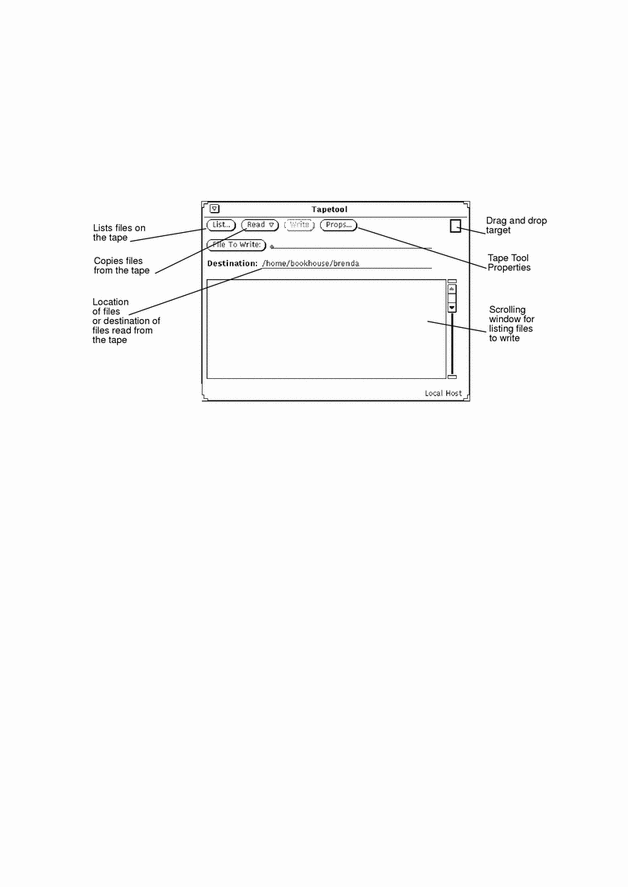
The Tape Tool base window is shown in Figure 12-2.
Figure 12-2 Tape Tool Window

You can perform the following operations from the Tape Tool window:
-
List the files from a streaming tape cartridge or archive file that have been archived using the tar command.
-
Read some or all of the files from the tape or archive file into the directory that you specify.
-
Write specific files or directories that you specify onto a streaming tape cartridge or into an archive file.
-
Display a window in which you set the properties for the tar command from the Tape Tool Properties window.
The control area provides controls for listing, reading to tape, writing from tape, and setting Tape Tool properties.
Use the File To Write button and text field to type in the names of files that you want to write to tape. The scrolling list displays a list of the files you specify by typing file names or by dragging and dropping icons from the File Manager.
If files were archived without a path name or with a relative path name, you can specify in the Destination field where those files are put in your file system when they are read from the tape. The default destination is your current working directory.
If the files on a tape have a complete path name (absolute path name), the files are always put in the directory specified on the tape, regardless of what you type in the Destination field. To strip files of their absolute path name when you archive them, set the Strip Path option in the Tape Tool Properties window to All and click SELECT on the Apply button.
Each of the Tape Tool operations is described in more detail in the following sections.
- © 2010, Oracle Corporation and/or its affiliates
