10.5.4.3 To Calibrate a Monitor
-
Click on Calibrate...
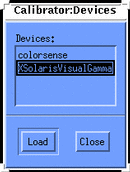
A separate window is displayed asking you to choose a device as shown in Figure 10-2.
Figure 10-2 Calibrator Devices Window

-
Choose a device.
If you have a puck that correlates to a device in the list, choose that device.
If you do not have a puck, choose XSolarisVisualGamma. The calibrated profile is based on the gamma values stored in the LUT for your specific frame buffer.
-
Click on Load.
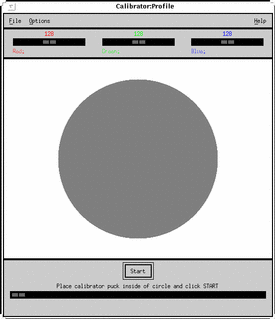
If you have a puck, a separate window will be displayed as shown in Figure 10-3. It is the Calibrator Profile window with a medium gray circle. This circle will be in the middle of your screen.
Figure 10-3 Calibrator Profile Window

The center of your screen provides the most accurate readings. Do not move the window, and since calibration takes several minutes, be sure that no extraneous window (like a pop-up dialog) will obscure the calibration window until calibration is complete.
If you do not have a puck, the Calibrator Profile window will be displayed. You do not need to worry about moving the window or pop-up dialogs. Skip to step Step 5.
-
If you have a calibrator puck, place it firmly in the center of the circle.
-
Click on the Start... button.
After a few seconds, the circle becomes cyan and calibration begins.
Depending on the type of frame buffer you have, the measurement cycle (for red, green and blue) may repeat a second time. If your frame buffer supports both PseudoColor and TrueColor visuals, two sets of measurements will be taken. If the frame buffer implements only one of these types, only one set of measurements is taken.
If a pop-up dialog appears in the middle of the color circle, you must restart the calibration. The calibration data is now contaminated and will produce inaccurate measurement data. See "10.5.4.4 To Interrupt Calibration" for information on halting calibration.
When the tool has completed reading measurements, the monitor's profiles are updated and a message is displayed informing you that calibration is completed.
-
Remove the calibrator puck from the screen.
Once calibration is completed, remove the puck from the screen. Store it in a position that prevents dirt and dust from gathering on its glass faceplate.
- © 2010, Oracle Corporation and/or its affiliates
