| Sun Blade X6270 Server Module Windows Operating System Installation Guide |
| C H A P T E R 4 |
|
Post Installation |
After completing the Windows Server installation and rebooting the operating system, you should review the following post installation tasks and, if necessary, perform the tasks that are applicable to your system.
This section describes how to download the server-specific driver packages needed for Windows Server installations.
| Note - The Sun Blade X6270 Tools and Drivers DVD contains all of the server-specific drivers required for Windows Server installations. If you are using the Tools and Drivers CD, you can you can skip this section and proceed to Installing Server-Specific Device Drivers. You can also obtain the latest version of the Tools and Drivers DVD for the Sun Blade X6270 Server Module by downloading the updated Tools and Driver DVD image at: http://www.sun.com/servers/blades/downloads.jsp |
|
1. Download the drivers for the Sun Blade X6270 Server Mode at: http://www.sun.com/servers/blades/downloads.jsp
2. Choose one of the following download options:
| Note - The _x_x_x number identifies the version of the package (for example, FloppyPack_1_1_4.zip). |
3. Proceed to Installing Server-Specific Device Drivers.
Sun provides a wizard to install Sun server-specific device drivers and supplemental software. The server-specific device drivers are provided to support optional devices that you added to the server when you completed the hardware installation or that you may want to add in the future.
The Sun Server Installation Package wizard may be started using one of the following methods:
| Note - Using a recently downloaded InstallPack_x_x_x.exe to update the drivers ensures that you update the server-specific drivers with the latest versions available. |
|
1. Start the Sun Installation Package software using one of the following methods:
The CD will automatically start.
At the main menu, select Install Drivers and Supplemental Software.
The Sun Server Installation Package dialog box (shown below) appears.

2. In the Install Pack dialog box, click Next to accept the default installable items.
| Note - You should always accept the “platform-specific drivers” to ensure that the most recent versions of the drivers are installed. |
The Install Pack notice dialog box appears.

3. In the Install Pack notice dialog box, read the message then click Next.
The Mass-Storage Driver Disk Creation Wizard dialog box appears.
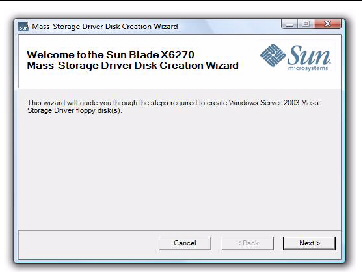
4. In the Mass-Storage Driver Disk Creation Wizard, click Next.
The End User License Agreement page appears.
5. In the End User License Agreement page, select “I accept this agreement”, and then click Next.
The platform-specific drivers are installed. A green check mark verifies that each driver has been successfully installed.

6. In the Driver Installation Pack dialog box, click Finish.
The System Settings Change dialog box appears.

7. Perform one of the following:
TABLE 4-1 identifies the optional supplemental software components available for your server.
During the supplemental software installation wizard, you can choose to install all the supplemental software (listed in TABLE 4-1) on your system by choosing a Typical installation; or, you can individually select the supplemental software (listed in TABLE 4-1) to install by choosing a Custom installation. For instructions for installing the supplemental software, see Install the Supplemental Software.
|
Allows you to configure, monitor, and maintain RAID on the SAS internal RAID Host Bus Adapter. |
|||||
|
Allows you to configure, administer and monitor RAID on the Adaptec SG-XPCIESAS-R-IN integrated RAID controller. For information on the Sun STK RAID Manager, see the Sun documentation web site at: |
|||||
|
This utility reads the sensor data repository (SDR) and displays sensor values, System Event Log (SEL), Field Replaceable Unit (FRU) inventory information, gets and sets LAN configuration parameters, and performs chassis power control operations via the BMC (also called the Service Processor). |
|||||
|
IPMI System Management Driver (Sun Microsystems)-- Windows driver that reads the sensor data repository (SDR) and displays sensor values, System Event Log (SEL), Field Replaceable Unit (FRU) inventory information. This driver is available from the Install Pack media only. Note - This supplemental software is intended for Windows Server 2003 SP2 only.
|
|||||
|
Enables the network interfaces on a server to be grouped together into a team of physical ports called a virtual interface. |
|
The Supplemental Software dialog box appears. Proceed the next step.

2. In the Install Pack Supplement Software dialog box, click Next to accept the Typical settings, or select Custom to choose the options to install (see descriptions in TABLE 4-1).
The Component installation wizard will guide you through the installation of each of the selected supplemental software components.
3. After the supplemental software has been installed, click Finish.
4. Click Yes at the System Setting Change dialog box to restart your system.
If you ran the Sun Server Installation Package software from the Tools and Drivers CD, remove the CD from your system now.
5. If you are running Windows Server 2003 R2 SP2 and you have installed the IPMItool supplemental software, you need to configure this driver before you can run the IPMItool.
For instructions, see‘Configuring Microsoft’s IPMI System Management Driver for Windows Server 2003 R2 SP2.
If you are running Windows Server 2003 R2 SP2 and you have installed the supplemental software driver for the IPMItool, you need to configure this driver before you can use the IPMItool.
|
Follow these steps to configure the IMPI driver on the Windows Server 2003 R2 SP2 operating system.
1. On your Windows Server 2003 R2 SP2 system, perform the following steps to configure the Microsoft IPMI System Management driver:
a. In Control Panel, open Add/Remove Programs.
The Add/Remove Programs dialog appears.
b. Click Add/Remove Windows Components.
The Windows Components Wizard dialog appears.
c. Highlight Management and Monitoring Tools component, and then click Details.
The Management and Monitoring Tools page.
d. In the Management and Monitoring Tools page, perform one of the following:
The “3rd Party Drivers” warning dialog appears.
The Management and Monitoring Tools page appears.
e. In the Management Monitoring Tools page, click OK.
The Windows Components Wizard dialog appears.
f. In the Windows Component Wizard, click Next to install the Hardware Management Component.
2. Instantiate the IPMI System Management driver by performing these steps:
a. In the Taskbar, click Start, and then click Run.
The Run dialog box is displayed.
rundll32 ipmisetp.dll,AddTheDevice
The IPMI System Management driver is instantiated.
3. Open Windows Device Manager to verify that the Microsoft Generic IPMPI device drive exists under the System section.
For information about using the IPMItool, refer to your Sun Integrated Lights Out Manager 2.0 User’s Guide (820-1188). For more information on standard IPMItool commands, see:
http://ipmitool.sourceforge.net/manpage.html
After installing the operating system, you can optionally enable the Wake On LAN (WOL) option in the BIOS Setup Utility. This feature enables you to power on the server from another location over the network. For details about the requirements for enabling WOL, see “Wake On LAN - Remote Power On” in the Sun Blade X6270 Server Module Service Manual (820-6178).
If you intend to use the Trusted Platform Module (TPM) feature set that is provided in Windows 2003 and Windows 2008, you must configure the Sun Blade X6270 Server Module to support this feature. For instructions, see configure support for TPM in the Sun Blade X6270 Server Module Service Manual.
| Sun Blade X6270 Server Module Windows Operating System Installation Guide | 820-6177-11 |
Copyright © 2009 Sun Microsystems, Inc. All rights reserved.
 Download the Server-Specific Drivers