| Sun ONE Application Server 7 Administrator's Guide to Security |
Chapter 3
Administering CertificatesThis section describes how to set up and administer the trust database, certificates, and certificate-related lists for your Sun ONE Application Server 7 environment.
This section addresses the following topics:
About Certificates and AuthenticationAuthentication is the process of confirming an identity. In the context of network interactions, authentication is the confident identification of one party by another party. Certificates are one way of supporting authentication.
A certificate consists of digital data that specifies the name of an individual, company, or other entity, and certifies that the public key, included in the certificate, belongs to that entity. Both clients and servers can have certificates.
A certificate is issued and digitally signed by a Certificate Authority (CA). The CA can be a company that sells certificates over the Internet, or it can be a department responsible for issuing certificates for your company’s intranet or extranet. You decide which CAs you trust enough to serve as verifiers of other people’s identities.
In addition to a public key and the name of the entity identified by the certificate, a certificate also includes an expiration date, the name of the CA that issued the certificate, and the digital signature of the issuing CA. For more information regarding the content and format of a certificate, see Introduction to SSL at the following location:
http://docs.sun.com/db/prod/3802#hic
The task sequence for setting up basic security is:
- Create the trust database.
Refer to "Creating a Trust Database".
- Request a certificate.
Refer to "Requesting a Certificate".
- Install the certificate.
Refer to "Installing a Certificate".
- Activate encryption.
Refer to "Administering SSL/TLS Encryption".
Other administrative tasks associated with certificates are discussed in "Managing Certificates" and "Managing CRLs and CKLs".
Implementing the Trust DatabaseIn the Sun ONE Application Server, the Admin Server and each server instance has its own certificate and key-pair file, referred to as a trust database.
Note
Before requesting a server certificate, you must create a trust database for identifying your trusted entities.
In the trust database you create and store the public and private keys, referred to as your key-pair file. The key-pair file is used for SSL encryption. You will use the key-pair file when you request and install your server certificate, which is stored in the trust database after installation. The key-pair file is stored encrypted in the /config directory of the instance.
The Admin Server has only one trust database, while each server instance can have its own trust database. The certificate and key-pair database files are named after the server instance that uses them. Virtual servers are covered by the trust database created for their server instance.
As the administrator, you manage the trust database and its constituent certificates, including the server certificate and all the included CAs.
This section addresses the following:
Creating a Trust Database
When you create the trust database, you specify a password that will be used for a key-pair file. You will also need this password to start a server using encrypted communications.
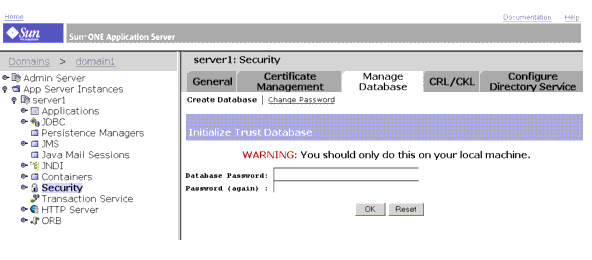
To create a trust database on your local machine, perform the following steps in the Administration interface:
- Access App Server Instances and select the server instance.
- Access Security.
- Click Manage Database.
- Click the Create Database link.
The Initialize Trust Database page is displayed.
Figure 3-1 Creating a Trust Database Page
- Enter a password for the database.
- Repeat the password.
- Click OK.
- Access App Server Instances and your server instance in the left pane, then click Apply Changes.
- Stop and restart the server for changes to take effect.
Changing a Trust Database Password
To change an existing trust database password, perform the following steps in the Administration interface:
- Access App Server Instances and select the server instance.
- Access Security.
- Click Manage Database.
- Click the Change Password link.
The Change the Key Pair File Password page is displayed.
- Select the cryptographic module from the dropdown list.
- Enter the old password.
- Enter the new password.
- Repeat the new password.
- Click OK.
- Access App Server Instances and your server instance in the left pane, then click Apply Changes.
- Stop and restart the server for changes to take effect.
Implementing a CertificateAfter creating a trust database for your server, you can request a certificate and submit it to a CA. If your company has its own internal CA, request your certificate from them. If you plan to purchase your certificate from a commercial CA, choose a CA and ask about the specific format of the information they require.
The Admin Server can have only one server certificate, while a server instance can have its own server certificate. You can select a server instance certificate for each virtual server.
The following topics address implementing certificates:
Required CA Information
Before you begin the request process, make sure you know what information your CA requires. Whether you are requesting a server certificate from a commercial CA or an internal CA, you need to provide the following information:
- Common Name—The fully qualified hostname used in DNS lookups (for example, www.sun.com). This is the hostname in the URL that a browser uses to connect to your site. If these two names don’t match, a client is notified that the certificate name doesn’t match the site name, creating doubt about the authenticity of your certificate. Some CAs might have different requirements, so it’s important to check with them.
- email Address—Your business email address. This is used for correspondence between you and the CA.
- Organization—The official, legal name of your company, educational institution, partnership, and so on. Most CAs require that you verify this information with legal documents (such as a copy of your business license).
- Organizational Unit—An optional field that describes an organization within your company. This can also be used to specify a less formal company name (without the Inc., Corp., and so on).
- Locality—An optional field that usually describes the city, principality, or country for the organization.
- State or Province—Usually a required field, but can be optional for some CAs. Most CAs won’t accept abbreviations, but check with them to be sure.
- Country—A required field that contains the two-character abbreviation of your country name, in ISO format. The country code for the United States is US.
All this information is combined as a series of attribute-value pairs called the distinguished name (DN), which uniquely identifies the subject of the certificate.
If you are purchasing your certificate from a commercial CA, you must contact the CA to find out what additional information is required before they will issue a certificate. Most CAs require that you prove your identity. For example, they want to verify your company name and who is authorized by the company to administer the server. They might also ask whether you have the legal right to use the information you provide.
Some commercial CAs offer certificates with greater detail and veracity to organizations or individuals who provide more thorough identification. For example, you might be able to purchase a certificate stating that the CA has not only verified that you are the rightful administrator of the www.your_company.com computer, but that you are a company that has been in business for three years, and has no outstanding customer litigation.
Requesting a Certificate
After you have created your trust database, you are ready to request a certificate.
To request a certificate from a CA, perform the following steps in the Administration interface:
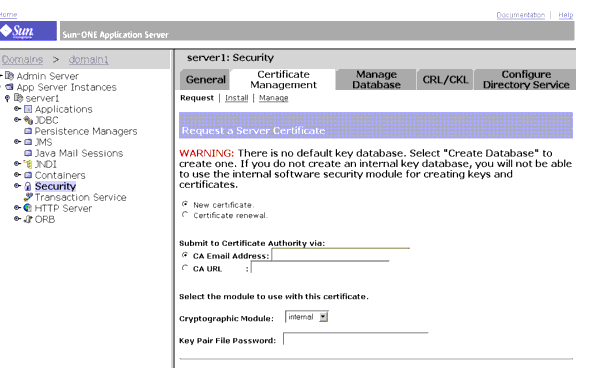
- Access App Server Instances and select the server instance in the left pane.
- Access Security.
- Select Certificate Management.
- Click the Request link.
The Request a Server Certificate page is displayed.
Figure 3-2 Request a Server Certificate Page
- Select if this is a new certificate or a certificate renewal.
Many certificates expire after a set period of time, such as six months or a year. Some CAs will automatically send you a renewal.
- Perform the following steps to specify how you want to submit the request for the certificate:
- If the CA expects to receive the request in an email message, check CA Email and enter the email address of the CA. For a list of CAs, click List of available certificate authorities.
- If you are requesting the certificate from an internal CA that is using the Sun ONE Certificate Server, click CA URL and enter the URL for the Certificate Server. This URL should point to the certificate server’s program that handles certificate requests.
- Select the cryptographic module for the key-pair file you want to use when requesting the certificate from the drop-down list.
- Enter the password for your key-pair file.
This is the password you specified when you created the trust database, unless you selected a cryptographic module other than the internal module. The server uses the password to get your private key and encrypt a message to the CA. The server then sends both your public key and the encrypted message to the CA. The CA uses the public key to decrypt your message.
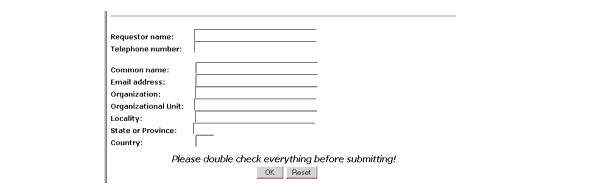
- Enter your identification information.
Figure 3-3 Request a Server Certificate Identification Information
The format of this information varies by CA.
- Verify your work to ensure accuracy.
The more accurate the information, the faster your certificate is likely to be approved. If your request is going to a certificate server, you’ll be prompted to verify the form information before the request is submitted.
- Click OK.
- Access App Server Instances and your server instance in the left pane, then click Apply Changes.
- Stop and restart the server for changes to take effect.
The server generates a certificate request that contains your information. The request has a digital signature created with your private key. The CA uses a digital signature to verify that the request wasn’t tampered with during routing from your server machine to the CA. In the rare event that the request is tampered with, the CA will usually contact you by phone.
If you choose to email the request, the server composes an email message containing the request and sends the message to the CA. Typically, the certificate is then returned to you using email. If instead you specified a URL to a certificate server, your server uses the URL to submit the request to the certificate server. You might get a response using email or other means, depending on the CA.
The CA will notify you if it agrees to issue you a certificate. In most cases, the CA will send your certificate using email. If your organization is using a certificate server, you may be able to search for the certificate by using the certificate server’s forms.
Once you receive the certificate, you can install it. In the meantime, you can still use your server without encryption.
Installing a Certificate
When you receive your certificate back from the CA, it will be encrypted with your public key so that only you can decrypt it. After you enter the correct password for your trust database, you will be able to decrypt and install your certificate.
There are three types of certificates:
A certificate chain is a hierarchical series of certificates signed by successive certificate authorities. A CA certificate identifies a CA and is used to sign certificates issued by that authority. A CA certificate can in turn be signed by the CA certificate of a parent CA, and so on, up to a root CA.
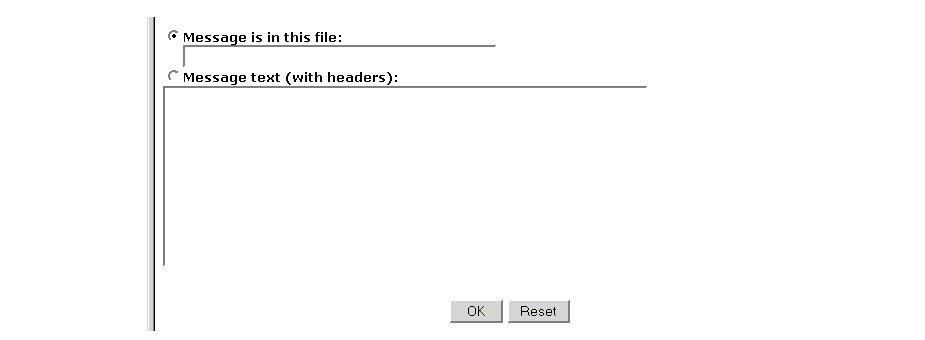
The server will use the key-pair file password you specify to decrypt the certificate when you install it. You can either save the email somewhere accessible to the server, or copy the text of the email and be ready to paste the text into the Install Certificate form, as described here.
To install a certificate from a CA, perform the following steps in the Administration interface:
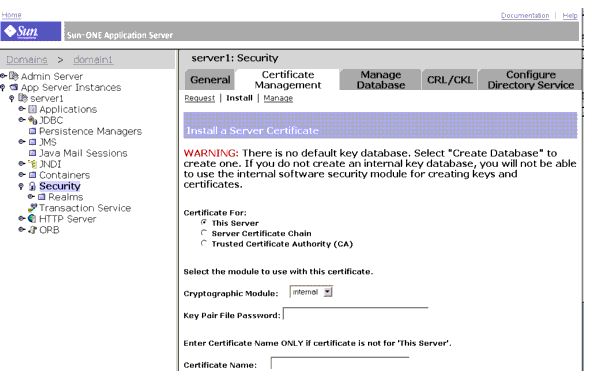
- Access App Server Instances and select the server instance in the left pane.
- Access Security.
- Select Certificate Management.
- Click the Install link.
The Install a Server Certificate is displayed.
Figure 3-4 Install a Server Certificate Page
- Select the type of certificate you are installing:
- Select the cryptographic module from the drop-down list.
- Enter the password for your key-pair file.
- Leave the name for the certificate field blank if it will be the only one used for this server instance, unless:
- Multiple certificates will be used for virtual servers. In this case, enter a certificate name unique within the server instance.
- Cryptographic modules other than internal are used. In this case, enter a certificate name unique across all server instances within a single cryptographic module.
If a name is entered, it will be displayed in the Manage Certificates list, and should be descriptive. For example, “United States Postal Service CA” is the name of a CA, while “VeriSign Class 2 Primary CA” describes both a CA and the type of certificate.
Figure 3-5 Certificate Installation Message Information
- Select one:
- Click OK.
- Select one:
- Access App Server Instances and your server instance in the left pane, then click Apply Changes.
- Stop and restart the server for changes to take effect.
The certificate is stored in the server’s certificate database. The file name will be cert7.db.
Using the Built-in Root Certificate ModuleThe dynamically loadable root certificate module included with the Sun ONE Application Server contains the root certificates for many CAs. The root certificate module simplifies upgrading your root certificates. To install well-known CA certificates, you can update the root certificate module file to a newer version as it becomes available through future versions of the Sun ONE Application Server, or in service packs.
Because the root certificate is implemented as a PKCS11 cryptographic module, you can never delete the root certificates it contains; the option to delete will not be offered when managing these certificates. To remove the root certificates from your server instances, you can disable the root certificate module by deleting the following in the server’s alias file:
Managing CertificatesYou can view or delete the trust settings of the various certificates installed on your server. This includes your own certificate and certificates from CAs. Certificate information includes the owner and who issued it.
Trust settings allow you to set client trust or unset server trust. For LDAP server certificates, the server must be trusted.
To manage certificates, perform the following steps in the Administration interface:
- Access App Server Instances and select the server instance.
- Access Security.
- Select Certificate Management.
- Click the Manage link.
- If you are managing a certificate for a default configuration using the internal cryptographic module, a list of all installed certificates with their type and expiration date is displayed. All certificates are stored in the instance_dir/config directory
- If you are using an external cryptographic module, such as a hardware accelerator, you will first need to enter your password for each specific module and click OK. The certificate list will be updated to include certificates in the module.
- Click the Certificate Name you want to manage.
An Edit Server Certificate page is displayed with management options for that type of certificate.
- In the Edit Server Certificate window you may select:
- For certificates obtained internally—Delete Certificate or Quit
- For CA certificates—Set client trust, Unset server trust, or Quit
Note
Only CA certificates will allow you to set or unset client trust. Some external cryptographic modules will not allow certificates to be deleted.
You are prompted to confirm your edits.
- Select OK or Cancel.
- Access App Server Instances and your server instance in the left pane, then click Apply Changes.
- Stop and start the server for changes to take effect.
Managing CRLs and CKLsA certificate revocation list (CRL) and compromised key list (CKL) publishes any certificates and keys that either client users or server users should no longer trust. Typical situations include:
Both CRLs and CKLs are produced and periodically updated by a CA. As the administrator, you can install new CRLs or CKLs that you obtain from the CA, or delete existing CRLs or CKLs from your system.
The following topics address managing CRLs and CKLs:
Installing a CRL or CKL
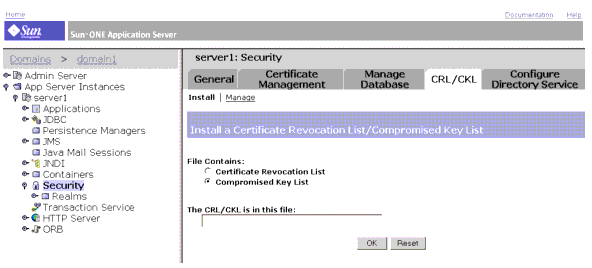
To obtain a CRL or CKL from a CA, perform the following steps in the Administration interface:
- Obtain the CA’s URL for downloading CRLs or CKLs.
- Enter the URL in your browser to access the site.
- Follow the CA's instructions for downloading the CRL or CKL to a local directory.
- In the Admin interface, access App Server Instances and select the server instance.
- Access Security.
- Select CRL/CKL.
- Click the Install link.
The Install a Certificate Revocation List/Compromised Key List page is displayed.
Figure 3-6 Install a Certificate Revocation List/Compromised Key List Page
- Select one:
- Enter the full pathname to the associated file.
- Click OK.
- Click Add.
- Click OK.
- Access App Server Instances and your server instance in the left pane, then click Apply Changes.
- Stop and start the server for changes to take effect.
Deleting a CRL or CKL
To delete a CRL or CKL, perform the following steps in the Administration interface:
- Access App Server Instances and select the server instance.
- Access Security.
- Select CRL/CKL.
- Click the Manage link.
The Manage a Certificate Revocation List/Compromised Key List page is displayed with all installed Server CRLs and CKLs listed along with their expiration dates.
- Select a Certificate Name from either the Server CRLs or Server CKLs list.
- Select one:
- Access App Server Instances and your server instance in the left pane, then click Apply Changes.
- Stop and start the server for changes to take effect.