Creating Classes
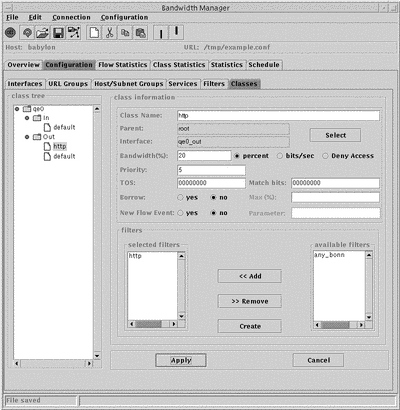
Once you have created all the filters you require, you can create classes using them. When you open the Classes window (click the Classes tab) there is a navigation pane on the left hand side of the window. The class qe0 already exists. This represents the interface you configured earlier. The expanded class hierarchy looks like this:

Note that a default class has been created automatically for each interface, as you specified when creating the interface that there would be a default class. To create the class http as a child of the Out class:
-
Click to highlight the Out class in the navigation window. A new class is always created as a child of the highlit class.
-
Click the new icon to create a new class.
-
Assign a name, for example http, to the new class.
-
Specify the percentage of bandwidth to be allocated to the new class (20%) and the priority (5) it should be given.
-
From the list of available filters, choose the filter(s) that define this class and add them to the selected filters list.
-
Click Apply.
-
Choose Save from the File menu.
The completed new class looks like this:
- © 2010, Oracle Corporation and/or its affiliates
