
After installing the Serial Parallel Controller card, install your device driver. The device driver is software that interacts with your SunOS Operating System to control up to three Serial Parallel Controller cards and the peripheral devices connected to them. This chapter explains how to:
To install your loadable device driver, complete the following steps explained in this chapter:
If your SPARCstation 1, 1+, or IPC does not have a hard disk, you must have read, write, and root access to the following directories on your system before installing your device driver:
If you have a 4.0.3c system, you must also have read, write, and root access to the /usr/diag/sundiag4c directory.
If any of these directories are links to other directories, you must also have read, write, and root access to them. If you do not have proper access to all the necessary directories, the installation of your device driver will be unreliable.
The installation script, configuration script, and device driver are contained on the release media: the 3 1/2-inch (88.9 mm) diskette or the optional 1/4-inch (6.35 mm) tape. The release media contains the script which installs the device driver on a SunOS release 4.1 or 4.0.3c system for you. The script also automatically installs the Sundiag Serial Parallel Controller on your system. If you have Sundiag installed on your system, you can use the Sundiag Serial Parallel Controller to test your Serial Parallel Controller card and device driver for correct operation. For a list of files stored on your system by the installation script, see Appendix H.
Follow the installation instructions for the type of release media you have.
To install your device driver from a diskette:
The installation script asks you for information. As you answer its questions, the script proceeds to install the device driver on your system.

The location of your diskette must be local. You cannot install the device driver from diskette from a remote system.

The installation script responds with the following messages:

The installation script copies the install files from the diskette to your system in a directory it creates, and begins the installation:

The script displays the disk space requirements for your device driver. The /usr directory is the recommended place to store your device driver files. The script informs you about how much space is available in this directory on your system. The amount of space available depends on your system.

After confirming your choice, the script gives you the option of discontinuing the installation.
If you choose Q to quit now, you must install your device driver manually at some future time by typing the extract_unbundled command as explained earlier in this chapter.

The installation script copies the files containing the device driver and Sundiag Serial Parallel Controller from the release media to the /usr directory on your system. Among the files copied are example programs written in the C and Forth computer languages.

To install your device driver from a tape on a local system:
The installation script asks you for information. As you answer its questions, the script proceeds to install the device driver on your system.

In the following example, the address of the tape drive is st0.

The installation script responds with the following messages:

The installation script copies the install files from the tape to your system in a directory it creates, and begins the installation:

The script displays the disk space requirements for your device driver. The /usr directory is the recommended place to store your device driver files. The script informs you about how much space is available in this directory on your system. The amount of space available depends on your system.

After confirming your choice, the script gives you the option of discontinuing the installation.
If you choose Q to quit now, you must install your device driver manually at some future time by typing the extract_unbundled command as explained earlier in this chapter.

The installation script copies the files containing the device driver and Sundiag Serial Parallel Controller from the tape to the /usr directory on your system. Among the files copied are example programs written in the C and Forth computer languages.

To install your device driver from a tape on a remote system:
The installation script asks you for information. As you answer its questions, the script proceeds to install the device driver on your system.

In this example, the remote hostname is baton.
In the following example, the address of the tape drive is st0.

The installation script responds with the following messages:

The installation script copies the install files from the tape to your system in a directory it creates, and begins the installation:

The script displays the disk space requirements for your device driver. The /usr directory is the recommended place to store your device driver files. The script informs you about how much space is available in this directory on your system. The amount of space available depends on your system.

After confirming your choice, the script gives you the option of discontinuing the installation.
If you choose Q to quit now, you must install your device driver manually at some future time by typing the extract_unbundled command as explained earlier in this chapter.

The installation script copies the files containing the device driver and Sundiag Serial Parallel Controller from the tape to the /usr directory on your system. Among the files copied are example programs written in C and Forth computer languages.

After installing your device driver files in the /usr directory, the installation script runs another script to configure the driver into your system. The configuration for a SunOS 4.1 system is different from a SunOS 4.0.3c system. You must tell the configuration script which system you are using:

If you are using a SunOS 4.1 system, press the Return key to accept the default configuration. The script confirms your choice with the following message, and restores the Sundiag test file saved before the installation began:

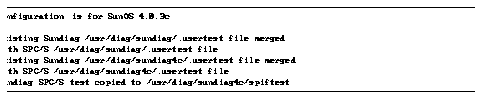
If you are using a SunOS 4.0.3c system, type y to reject the default configuration. The script confirms your choice with the following message, and restores the Sundiag test files saved before the installation began:
The configuration script gives you the option of loading your device driver into your system or adding it to your system kernel. Loading the device driver is recommended because you do not have to reconfigure your system kernel. However, if you routinely load a number of device drivers into the system, you might wish to add the device driver(s) to your system kernel to decrease the time required to boot your system. You must tell the configuration script which method you prefer to use:

To load the device driver into your system, press the Return key to accept the recommended default to run the configuration script. The script loads the device driver into your system for you.

To add the device driver to your system kernel, you must have kernel reconfiguration experience. Type n to reject the recommended default. See Appendix B to learn how to add the device driver to your system kernel. Then see "Testing the Serial Parallel Controller" later in this chapter.
If you see the following error messages, the device driver was installed before your card.

To correct the problem:
If you are unfamiliar with this command, see your Sun System & Network Manager's Guide.
Your system displays halt messages followed by the Monitor prompt >.
After installing your card and device driver, you can test them to make sure they are working correctly. If you have Sundiag installed on your system, you can use the Sundiag Serial Parallel Controller tests (installed on your system by the installation script) to run various tests. If you wish to use any of these tests, see Appendix E.
If your card is not working correctly, see Appendix F for information about troubleshooting card problems. If your device driver is not working correctly, see Appendix G for a list of error messages and probable causes.
For more technical information about your device driver, see the Serial Parallel Controller Man Page, located in /usr/man/man4/spc.4s on most systems. To view the Man Page, type man spc and press the Return key.
If you are upgrading to a new release of the Serial Parallel Controller device driver or no longer wish to use it, you can remove the driver from your system by following the instructions explained in this section.
This command removes the device driver and the devices created in the /dev directory by the installation script.

The installation script displays messages to confirm that your device driver has been removed from your system:

