
The OpenBoot PROM tests (test-all, watch-net-all) and UNIX tests (ifconfig, netstat, ping) described in the first chapter of this manual are normally sufficient to test the SQEC card and verify its functionality. You may choose to run Sundiag for further test coverage.
Note - The SBus Quad Ethernet Controller is not supported in Sundiag for Solaris 1.x.
Sundiag, a system exerciser, runs diagnostic tests on Sun(TM) hardware. Sundiag verifies the configuration, functionality, and reliability of most Sun hardware controllers and devices.
The Sundiag TTY interface makes it possible to run Sundiag from a terminal that is attached to a serial port or from a modem. For detailed instructions on using Sundiag, see the Sundiag User's Guide that was shipped with your operating system documentation.
The SQEC card can be tested with Sundiag on any system that is running Solaris 2.x, revision 2.3 or later, or any other compatible operating system. The operating system kernel must be configured to support all of the peripherals that are to be tested.
The amount of swap space required varies with the type and amount of
hardware being tested. Sundiag requires a minimum of 8 MBytes of swap
space. Frame buffer tests require additional swap space and the virtual
memory test requires special swap space considerations. See the Sundiag
User's Guide for the swap requirements.
Use nettest to check the Ethernet hardware on the system and the Ethernet controllers.
To start the nettest:
Make sure that only SQEC nettest is selected. If other items on the menu are selected, point the mouse on the box item to deselect the item.
To run Sundiag, refer to the Sundiag manual that was shipped with your operating system documentation.
Note - Examples in this section show Sundiag running in the OPEN LOOK® environment. Sundiag run in the SunView(TM) environment will look different.
After you enter the sundiag command, the Sundiag window is displayed on your screen. This window is the primary interface for running Sundiag. Refer to Figure D-1.
The Sundiag window is divided into four small windows:
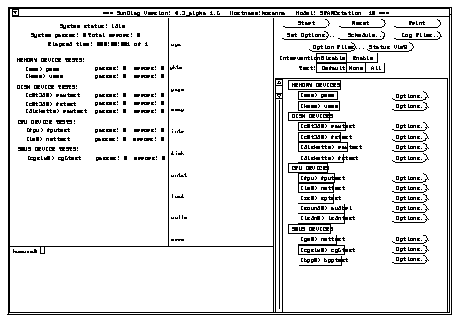
Figure D-1 Sundiag Window
Your selection is confirmed with the display of a highlighted box next to the device name.
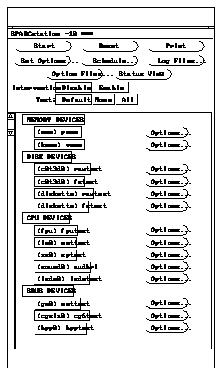
Figure D-2 Sundiag Control Panel
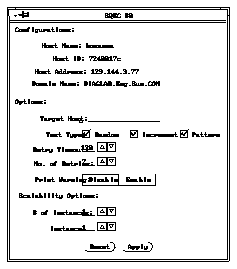
Figure D-3 Pop-Up Option Menu
If no problems are identified during the testing, the SQEC card is ready for operation in your system. Click on the Quit button to exit Sundiag.
