
This chapter describes some of the applicable diagnostic software used to test the Desktop Storage Module.
The diagnostic software available includes the following:
You should use the appropriate diagnostic tool to solve specific problems. Table 2-1 summarizes the available diagnostic tools, and indicates the correct use of each one.
Table 2-1 Summary of Available Diagnostic Tools
Caution -

You are presented with either the prompt or the ok prompt. The prompt is the default prompt. If you want to change the default prompt to the ok prompt, see the Introduction to Open Boot PROM 2.0.
If you see the prompt, go to the next step. If you see the ok prompt, go to Step 4.
The ok prompt shows that you are in the Forth Toolkit.
The following figure summarizes the steps you need to take to halt the system, enter the Forth Toolkit, and list the diagnostic tests.

Figure 2-1 Halting the System and Displaying On-Board Diagnostics
These on-board tests allow you to test the network controller, the diskette drive system, memory, the SCSI bus connections, and the system clock. See "Diagnostic Routines" in the Introduction to Open Boot PROM 2.0 for a detailed description and step-by-step instructions of the available on-board diagnostic tests.

The SunDiag System Exerciser, which runs under SunOS, displays real-time use of system resources and peripherals such as Desktop Storage Packs and Desktop Storage Modules. To verify that the system is functioning properly run the SunDiag System Exerciser.
This section is divided into two parts. The first half provides a brief overview of the SunDiag diagnostic program and explains how to start and run tests. The second part provides specific information on running each test for Dinnerbox. For a detailed description of the program and the individual tests, see the latest version of the SunDiag User's Guide, shipped with SunOS documentation.
The exerciser is shipped with SunOS and is preinstalled on SPARCstations equipped with at least one internal hard disk drive. If the SunDiag System Exerciser is not found on the system, you can load it from tape or compact disc. It can be run at any time.
The primary way to run SunDiag test is from the windowing system (see Figure 2-2). This is the easiest way to run SunDiag tests, and the only one described in detail in this section.
SunDiag also has a TTY interface (non-window system) to run tests from a terminal, and individual tests can be run from the command line of a SunOS shell. See the latest version of the SunDiag User's Guide for details.
When you start SunDiag, in SunView, the SunDiag window appears on your screen (see Figure 2-2). The window is divided into four sections:
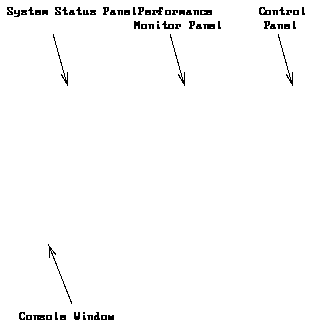
Figure 2-2 The SunDiag OPEN LOOK Window
Follow these steps to run the SunDiag SunView user interface.

This command starts the basic SunDiag program. There are a wide variety of options to this command; see the SunDiag User's Guide shipped with SunOS documentation, for details.
SunDiag automatically probes for available devices. A test is enabled if the frame around looks "pushed in" (or bold for black and white monitors). You can toggle the tests from enable to disable and back by clicking the left mouse button. Move the pointer to the test and click left once.
If a device is missing from the control panel, make sure that the device is properly installed.

Figure 2-3 Typical SunDiag Control Panel
Note - SunDiag enables all available tests when it is invoked. Starting all available tests slows down your system considerably. You can avoid most problems by disabling the virtual memory (vmem) test.

Figure 2-4 Typical Test Option Menu
Note - You only need to change the options settings once. SunDiag continues to use your selections each time you run SunDiag.
Note - Sundiag enables all available tests when it is invoked. Starting all available tests slows down your system considerably. You can avoid most problems by disabling the virtual memory (vmem) test. Use the mouse to toggle the checkmark to "unselected".
The following SunDiag tests are used to test the Dinnerbox system configuration.
These tests are described in detail below.
This test writes a pattern to a specified number of blocks (or, for a SCSI tape, writes to the end of the tape). It then rewinds the tape and reads/compares the information just written. The drive can also do a multi-file test called filetest.
Note - If you have a tape drive in your system, load a blank writable tape before you start SunDiag. If you fail to do so, SunDiag will show drive type:unknown on the option menu for the tape test.
SunDiag supports 8 mm, quarter-inch cartridge, and front-load tape drive testing. Examples of the option menus for those devices are shown below.
When you click on the tape test Option button, this menu appears:

Figure 2-5 tapetest Option Menu (Exabyte 8 mm)
Note - This test may take a while to stop after being disabled
The example above depicts the option menu for an 8 mm tape drive. This menu differs from other tape drive option menus in that it has no format or reconnect option choices.
QIC-11 and QIC-24 are tape formats that this test uses when it writes to the scratch tape you have inserted. QIC-11 uses a 1-byte block ID while QIC-24 uses 4 bytes, meaning that each block on a QIC-24 tape is uniquely identifiable.
Use a standard scratch tape for this test.
QIC-11 format is the default testing format. If you cycle through the options, you may choose QIC-24 only, or both of QIC-11 and QIC-24 formats. If you choose both, the test will first write one pass to the tape in QIC-11 format, and then write a second pass over it in QIC-24 format.
The following settings are available for 8 mm Tape Drives:
For half-inch tape drives the available settings are 800, 1600, and 6250 BPIs and ALL. For 60 mb quarter-inch tape drives the available settings are QIC-11 and QIC-24. For 150 mb quarter-inch tape drives the available settings are QIC-150.
If you toggle to Write/Read, the test first writes to the tape and then reads it back to compare.
If you toggle to Readonly, the test assumes the tape has been properly written and merely reads and compares, which is useful to check head alignment.
The amount of the tape to be tested. The choices are:
If you selected specified under the Length option, you must enter the number of blocks you wish to test.
The tape file test writes three files, rewinds and then reads part of the first file and forward spaces to the start of the second file, reads the second file, forward spaces to the start of the third file, and tries to read to the end of that file. For SCSI tapes only, the test then tries to back space to the start of the second file and read it. This tests the ability of the drive to handle multiple files (dump sessions) on one tape.
When streaming is disnabled, the test runs very slowly to insure the tape drive does not stream. When streaming is enabled the drive may stream except for large multiple tape drive systems or heavily loaded systems.
When you enable Reconnect: from the option menu, SunDiag attempts to check whether or not disconnect/reconnect is working, on a Sun-3/50 or on a system with a SCSI3 board and both SCSI disk and tape devices. The test forks a child process to test the SCSI disk, which sets up a signal handler to catch a signal from the parent process. It then sleeps for three seconds, reads in two blocks from the disk, sleeps again, and expects to have received a signal from the parent process in the interim. The parent process retensions the tape and then notifies the child. All tape drive operations use Reconnect on the current Sun platforms.
If you have enabled the head cleaning option, you must enter the number of test passes SunDiag should execute before suspending testing to provide time to clean the tape drive head.
If the -q (quick test) standard_arguments option is used when tapetest is started from a command line, an abbreviated version of this test is run. The abbreviated version tests three large blocks (512x126 bytes) and two small blocks (512 bytes) of memory, and will not sleep for 60 seconds. Otherwise the test procedure is unchanged.
This test performs read-only and read-write tests on local disks, using generic SunOS routines.
This test supports all types of Sun disk drives, such as SCSI disks, native or SCSI floppy, Xylogics 7053 disk drive, and so on. The type of drive under test is named at the top of the option menu. For example, when an Intelligent Peripheral Interface is installed on the system under test, the Disk Option Menu header will name the IPI drive (for example id0).
Caution -

If you click on a control panel disk Option button, this menu appears:

Figure 2-6 rawtest and filetest Option Menu
This test is unique in that the two Sub-tests, Rawtest and Filetest are run independently from command lines as described below.
See the Options section below.
This test exercises the disk controller and drive. It writes two .5 MB files with an incrementing data pattern in /tmp, then reads and compares them. If the system has no /tmp directory, SunDiag creates a /tmp-disktop-sd directory to fill with data, and removes it when you exit. SunDiag selects the drive by issuing the SunOS command df and uses each local drive listed. All disks to be tested should be mounted prior to starting SunDiag.
Note - If there is a power loss or system crash while running fstest, that test will leave temporary files in the system /tmp directory.
The following options can run on either sub-test.
You may choose read-only testing, read-write testing, or both. If you choose read-only testing, rawtest is executed in read-only mode. If you choose read-write testing, rawtest test is executed in read-write mode.
Specify the device partition to test.
This option is for stress testing the device. Reducing the test size automatically creates additional processes to exercise the device. Specify the size in Megabytes.
The Sundiagnostic Executive is an independent operating system. It runs exhaustive subsystem tests independent of SunOS. The Sundiagnostic Executive, which provides you with thorough diagnostics, is described in the Sundiagnostic Executive User's Guide for SPARCstations.
