Chapter 7 SNMP Configuration
This chapter explains how to perform SNMP configuration for the proxy cache service and array software that are part of the Netra Proxy Cache product. The chapter assumes you have completed configuration of your Netra Proxy Cache Array, as described in the Netra Proxy Cache Array Configuration Guide.
The SNMP Configuration page enables you to change defaults associated with the SNMP agents shipped with the Netra Proxy Cache product. The Netra Proxy Cache software's support for SNMP enables you to use a SNMP-conformant management platform to monitor your Netra Proxy Cache Array or Server.
See Chapter 16, Netra Proxy Cache Array MIBs and Traps," for a description of the MIBs shipped with the Netra Proxy Cache product.
Viewing and Modifying SNMP Properties
You view or modify SNMP configuration properties in the SNMP Configuration page. You reach this page through the Proxy Cache Administration page. See Chapter 3, Loading the Proxy Cache Administration Page," for instructions on loading this page.
To Configure SNMP Properties
-
In the Proxy Cache Administration page, click the SNMP Configuration link.
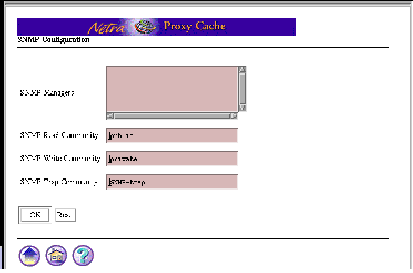
The SNMP Configuration page is displayed, as shown in Figure 7-1.
Figure 7-1 SNMP Configuration Page

-
In the SNMP Configuration Page, add the hostname(s) of machines that are to receive SNMP traps.
In the current release host names can not contain a . (period) and, therefore, cannot contain a domain name.
-
Enter values or accept defaults for the following fields:
-
SNMP Read Community
-
SNMP Write Community
-
SNMP Trap Community
-
-
Click OK.
A page is displayed indicating the success or failure of your change. If a change fails, the page is redisplayed with the error indicated. Correct the error and click OK again. With some errors a new page, containing an error message, is displayed. If this occurs, click the Back button on your browser to return to the SNMP Configuration page.
- © 2010, Oracle Corporation and/or its affiliates
