| Previous Contents Index Next |
| iPlanet Partner Agent for ECXpert Windows Client User's Guide |
Chapter 2 Installing iPlanet Partner Agent for ECXpert Windows Client Software
This chapter describes how to install and uninstall Partner Agent Windows Client.
The following topics are discussed in this section:
- Installing Partner Agent Windows Client
- Setup for Authentication Using VeriSign Class 1 Certificates
- Uninstalling Partner Agent Windows Client
Installing Partner Agent Windows Client
Follow the steps below to install the Partner Agent for ECXpert Win32 Client on any Windows NT/98/95 machine.
- Log on as administrator to a Windows NT/98/95 machine.
- Download the Partner Agent Client installation file.
- Display the iPlanet Downloads web page.
- The URL is
http://iplanet.com/downloads/testdrive/index.html
- An index of the iPlanet software available for download is displayed.
- Locate the Partner Agent for ECXpert Windows Client link and click it.
- A page is displayed that asks you to select the version and platform.
- Locate the version and platform available for download—for either Domestic or Export customers, as appropriate—and click the download link.
- If you are not previously registered for iPlanet downloads, fill out the registration form.
- Accept the license agreement.
- The file will be downloaded to your machine.
- Open the directory in which the Partner Agent Windows Client was downloaded and double-click on the Install icon.
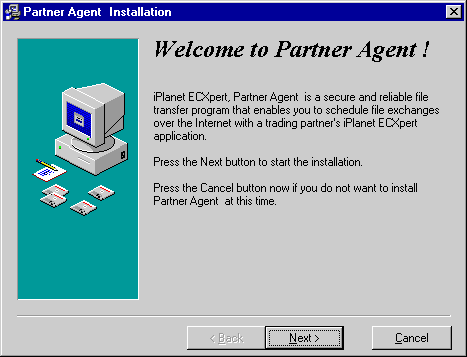
- Click Next to begin the installation.
Figure 2-1 Partner Agent Installer Step One

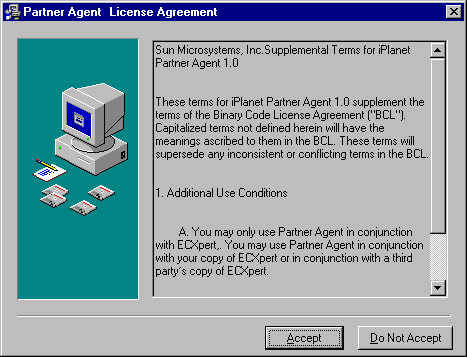
- Click Accept to accept the end user license agreement.
Figure 2-2 Partner Agent Installer Step Two

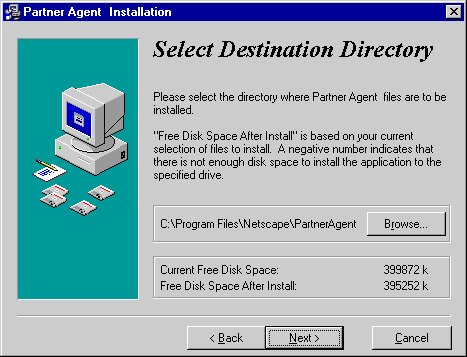
- Select the destination directory.
- The Partner Agent for ECXpert client is installed immediately below the directory specified here.
- Click Browse if you want to select a different destination directory. Make sure that the directory you want appears in the destination directory box before you continue.
- Click Next to continue.
Figure 2-3 Partner Agent Installer Step Three

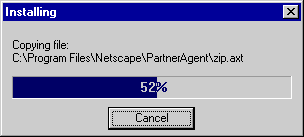
- As you begin copying files to the new installation directories, a window similar to that in Figure 2-4 will appear.
Figure 2-4 Partner Agent Installer Step Four

- Restart your machine after installation is complete.
Setup for Authentication Using VeriSign Class 1 Certificates
To allow the Partner Agent Client to authenticate itself to the Partner Agent Server using a VeriSign Class 1 certificate, follow these steps:
- Log on as administrator to the Windows Client machine.
- Open a Command Prompt window.
- Convert your private key from pkcs12 format to pem format.
- Enter the following command to use the pkcs12 utility packaged with Partner Agent:
<client_directory>\pkcs12 -in<certfilename>-nocerts -out<certfilename>-key.pem
- where
<client_directory>is the directory in which the Partner Agent Client application is installed.
- Convert your certificate from pkcs12 format to pem format.
- Enter the following command to use the pkcs12 utility packaged with Partner Agent:
<client_directory>\pkcs12 -in<certfilename>-clcerts -nokeys -out<certfilename>-crt.pem
- where
<client_directory>is the directory in which the Partner Agent Client application is installed.
- Specify the certificate and public key in the Client preferences.
- Open the Manager interface, Edit, Preferences/Security tab.
- Specify the Certificate File by entering a path or using the Browse button to select a file.
- Specify the Key File by entering a path or using the Browse button to select a file.
- Click OK.
Uninstalling Partner Agent Windows Client
Once Partner Agent Client has been installed, you can uninstall it. If you installed Partner Agent Client in the default directory:
Copyright © 2000 Sun Microsystems, Inc.
Some preexisting portions Copyright © 2000 Netscape Communications Corp. All rights reserved.