Using netcontool(1M)
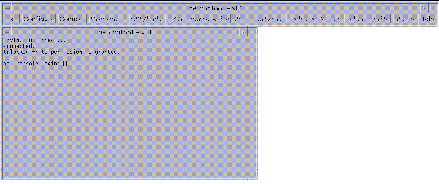
The netcontool(1M) GUI program provides the buttons shown in Figure 4-1.
Figure 4-1 netcontool GUI Program

Table 4-1 explains the netcontool(1M) buttons.
Table 4-1 netcontool buttons|
Button |
Description |
|---|---|
|
Configure |
Displays the Console Configuration window. See "To Configure the netcontool(1M) Window". |
|
Connect |
Displays the netcon(1M) window and initiates the connection process. |
|
Disconnect |
Disconnects the console window from the domain and removes the console window. The netcontool(1M) window is still available so that you can reconfigure for another connect session. |
|
OBP/kadb |
Breaks to the OpenBoot(TM) PROM (OBP) or kadb(1M) programs. |
|
JTAG |
Toggles the SSP-to-platform connection between a network connection and a JTAG connection. |
|
Locked Write, Unlocked Write, and Exclusive Write |
Requests the corresponding mode for the console window. For an explanation of the meaning of these modes, see "To Configure the netcontool(1M) Window". |
|
Release Write |
Releases write access and places the console in read only mode. |
|
Status |
Displays information about all open consoles that are connected to the same domain as the current session, as well as the connection type currently used. |
|
Help |
Displays information about the netcontool(1M) window. |
|
Exit |
Exits the program and closes the netcon(1M) window if it is still open. |
To Display a netcontool(1M) Window From the Command Line
To Display a netcontool(1M) Window From the CDE Front Panel
-
From the CDE front panel, select the SSP subpanel and then select the netcontool option.
-
Specify the domain name when prompted to do so.
To Display a netcontool(1M) Window From the CDE Workspace Menu
-
From the CDE Workspace menu (right click), select the SSP submenu and then select the netcontool option.
-
Specify the domain name when prompted to do so.
To Display the netcontool(1M) Window From Hostview
-
Select a board from the domain for which you want to display a netcontool(1M) window by clicking on that board with the left mouse button.
-
Select Terminal netcontool.
-
In the netcontool(1M) window, click the Connect button.
The netcontool(1M) window (Figure 4-2) is displayed beneath the netcontool(1M) buttons.
Figure 4-2 netcontool Window in Hostview

To Configure the netcontool(1M) Window
-
Click the Configure button if you want to configure the netcontool(1M) window before you display a netcon(1M) window.
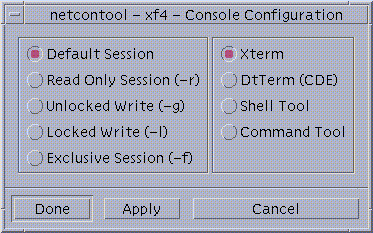
The Console Configuration window is displayed (Figure 4-3).
Figure 4-3 netcontool Console Configuration Window

-
Select the session type in the left panel, and the terminal emulation type in the right panel.
-
When you are satisfied with the contents of the window, click Done to accept the settings and dismiss the window, or click Apply to accept the settings without dismissing the window.
The following table contains the options in the Console Configuration window.
Table 4-2 Console Configuration Options
- © 2010, Oracle Corporation and/or its affiliates
