Getting Started with the SunVTS TTY UI
This section describes how to use the fundamental features of the SunVTS TTY UI to perform diagnostic testing on a system. For information about using more advanced features, see "Using Additional Features with the SunVTS TTY UI".
The SunVTS TTY UI Main Window and Keyboard Commands
The SunVTS TTY UI is an ASCII based, screen-oriented interface that does not require a graphical window environment. Most of the control and monitoring options that are available in the SunVTS graphical interfaces are also available in the TTY interface.
You can use the TTY interface to run SunVTS from a serial terminal, or through a graphical window tool such as a shell tool, command tool, or CDE terminal window.
The procedures in this chapter explain how to use the TTY main window:
Figure 5-1 SunVTS TTY Main Window
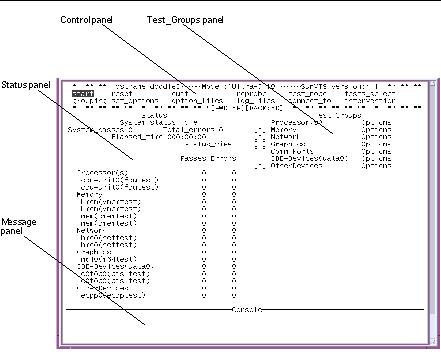 Table 5-1 SunVTS TTY Main Window
Use keyboard commands instead of mouse and pointer action to control SunVTS in the TTY UI. The following table lists the keyboard commands and explains how to use them.
Table 5-2 TTY Keyboard Commands
To Configure SunVTS for a Test Session
-
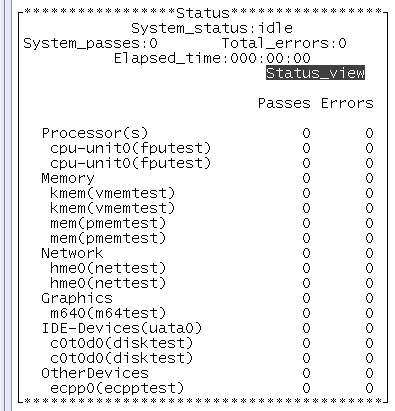
Identify the current state of SunVTS in the Status panel.
Figure 5-2 Status panel (TTY)
-
System_status--provides the following status of SunVTS:
-
Idle--no testing is taking place
-
Testing--a test session is running
-
Suspend--a test session is suspended
-
Replay--a previously recorded test session is displayed
-
Stopping--is momentarily displayed when a test session stops
-
-
System_passes--displays the total number of successful system passes (a system pass is when all tests have run once).
-
Total_errors--the total number of errors from all tests.
-
Elapsed_time--indicates the total number of hours, minutes, and seconds that elapsed during testing.
-
List of devices to test with pass and error counts.
-
-
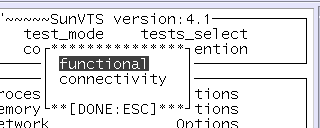
Select a test mode (Functional or Connection).
-
Connection test mode--provides a low-stress, quick testing of the availability and connectivity of selected devices. These tests are non-intrusive, meaning they will release the devices after a quick test and they will not place a heavy load on system activity.
-
Functional test mode--provides more robust testing of your system and devices. It will use your system resources for thorough testing and it assumes that no other applications are running.
How to do it:
-
Use the tab key to move to the Control panel ((if needed).
-
Use the arrow keys to highlight test_mode and press return.
The test_mode menu is displayed.
Figure 5-3 test_mode Menu (TTY)
-
Use the arrow keys to highlight functional or connectivity and press return.
-
Use the arrow key to highlight OK in the confirmation dialog box and press return.
Note -You can exit any menu, at any time with the <Esc> key.
-
-
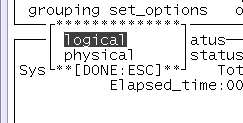
Specify the display mode (logical or physical).
About display modes:
-
Logical Mapping--organizes the devices, according to their function, into groups. For example, SCSI disk, SCSI tape, and SCSI CD-ROM drives are placed in the SCSI-Devices group. You can focus your testing on a specific device, device group, or on all of the groups on the system.
-
Physical Mapping--shows the exact location of each device on the system in relation to how the devices are connected to each other. If you are testing a single-board type system, each device is shown under the system board. Multi-board type systems show each device under the board (for example, board0, board1, and so on) to which the device is attached. For example, if you have multiple disk drives connected to different disk interfaces, each disk would be displayed under the respective interface. From Physical Mapping, you can determine the actual location of each device. When possible, the board number and controller type for the device are also displayed.
How to do it:
-
-
Enable Intervention mode (if needed).
Any device that requires your intervention before the test can run (such as loading media for tape, CD-ROM, and diskette tests) also requires that you notify SunVTS that you have performed this action by enabling Intervention mode. You can not select any intervention mode devices until you enable this mode.
How to do it:
-
Prepare the device for testing (see "Preparing Devices for Testing").
-
Use the tab key to move to the Control panel.
-
Use the arrow keys to highlight intervention and press return.
-
Use the arrow keys to highlight Enable and press return.
-
-
Select the device groups that you want to test.
About device groups:
An asterisk next to a device group in the Test_Groups panel indicates that the devices in that group are selected. Depending on the devices on your system, and the test mode that you select, SunVTS selects certain devices by default. You can change the selected devices.
How to do it:
-
Use the tab key to move to the Control panel.
-
Use the arrow keys to highlight test_select and press return.
-
Use the arrow keys to highlight one of the following:
-
Default--selects the SunVTS default selected devices
-
None--deselects all devices
-
All--selects all devices
-
Custom--indicates that you intend to select your own set of devices to test.
-
-
-
Select specific devices to test.
About specific devices:
In the previous step, you selected sets of devices for testing by choosing device groups. You can further refine your device selection by selecting or deselecting specific devices.
How to do it:
-
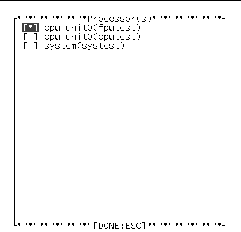
Use the arrow keys to highlight the device group for which you plan to select or deselect individual devices, and press return.
The individual devices within that group are displayed in a list.
Figure 5-5 Devices within a Group (TTY)
-
Use the arrow keys to highlight the [ ] (brackets) next to the device that you want to select or deselect.
-
Press the space-bar to toggle the asterisk.
-
Press return to close the group.
Notice that the Status panel displays (or removes) the devices as you select (or deselect) them.
-
Modify the system-level test options (if desired).
SunVTS is ready to test each device once you select it. You can, however, modify test options that alter the way tests run to suit your testing needs. There are three levels where you control test options:
-
System-level options--control the testing attributes of all devices. This is the highest level, applying all your options globally. When you modify option values at this level, the option settings are propagated down to the group level and device level options.
-
Group-level options--control the testing attributes of all the devices in the group. Settings made at this level propagate down, setting all the options in the group.
-
Device-level options--control the testing of a single, specific device.
The order that you apply the system-level, group-level, and device-level options is important. Start by assigning the system-level options, then assign the group-level options, and finish with the device-level options. Otherwise, if you make lower-level options, then higher-level options, the higher-level options will propagate down and undo your lower-level options. An alternative to this approach is to use locks and overrides to protect lower-level options. See "Preserving Test Options with Locks and Overrides".
How to do it:
-
Tab to the Control panel.
-
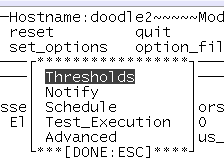
Use the arrow keys to highlight set_options and press return.
The set_options menu is displayed.
Figure 5-6 set_options Menu (TTY)
-
Use the arrow keys to select one of the following menus, and press return:
-
Thresholds
-
Notify
-
Schedule
-
Test_execution
-
Advanced
Note -For descriptions of these menus see "SunVTS Dialog Boxes".
-
-
Use the arrow keys and numeric keys to set the options values.
-
Use the arrow keys to highlight Apply and press return.
-
-
Modify group-level and device-level options (if desired).
About group-level and device-level options:
Group-level and device-level options are similar to the system-level testing attributes, but instead pertain to a specific device (or device group) only. You modify these options by changing values in the following dialog boxes:
-
Test_Parameters
-
Test_Execution
-
Advanced
-
Schedule (group-level only)
How to do it:
-
Use the arrow keys to highlight the device group and press return.
At this point you can choose to access the group-level option menu instead by highlighting Option (instead of the device-level) and press return. Then go to Step d. Otherwise, the following steps will direct you to modify device-level options.
-
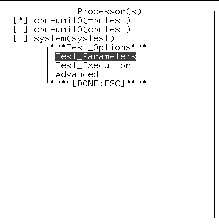
Use the arrow keys to select a device from the device list and press return.
The Test_Options menu is displayed.
Figure 5-7 Test_Options Menu
-
Select one of the option dialog boxes (Test_Parameters, Test_Execution, or Advanced) and press return.
Note -For descriptions of these menus, see "SunVTS Dialog Boxes".
-
Use the arrow and numeric keys to modify the options in the dialog box.
-
Use the arrow keys to highlight apply and press return.
If you selected the Test_Parameters dialog box, you will be prompted to apply your changes to one of the following:
-
Within_Instance--applies the option settings to this test instance (test instance 1 for example) for this device with Apply, or to all the same instances within the same device-group with Apply_to_group, or to all the same instances for all like devices with Apply_to_All.
-
Across_All_Instances--applies the option settings to all test instances (for example, instance 1 and 2) to this device with Apply, or to all the instances for all the devices in the group with Apply_to_group, or to all the instances for all like devices with Apply_to_all.
Figure 5-8 Apply Menu Choices

-
-
The test session configuration is complete. Continue to the next procedure to run the test session.
To Run, Monitor, and Stop a Test Session
-
-
Use the tab key to move to the Control panel.
-
Use the arrow keys to highlight start and press return.
The start menu is displayed.
-
With start highlighted (the default) press return.
The test session begins.
Depending on how you configured the options in the Test_Execution menus, testing will continue until:
-
a test error is detected (this is the default behavior). If you enter a value for Run_On_Error, SunVTS continues to run until the specified number of errors is reached.
-
testing has reached the Max_Passes value. The default is to run indefinite test passes.
-
testing has reached the Max_Time value. The default is to run indefinitely.
-
you select Stop in the Control panel.
-
-
Monitor the overall test session status by watching the Status panel.
The Status panel indicates that a test session is running by displaying testing for the System_status. The System_passes, Total_errors, and elapsed_time will increment.
-
Monitor specific tests by watching the Status panel.
-
An asterisk--displayed next to each device indicating which device is currently under test. Depending on how you configured SunVTS (with the System Concurrency option), single or multiple devices are tested concurrently.
-
Pass and Error columns--Indicates the state of each device test.
-
-
Check for test messages by watching the Message console panel.
The Message console panel displays test messages under the following circumstances:
-
When a test error occurs
-
If you enable trace mode
-
If you enable verbose mode
Use the up and down arrow keys to scroll through messages in this panel.
-
-
Stop the test session (if desired).
How to do it:
To Review and Reset Test Session Results
-
About logs:
SunVTS provides access to four log files:
-
SunVTS test error log--contains time-stamped SunVTS test error messages. The log file pathname is /var/opt/SUNWvts/logs/sunvts.err. This file is not created until a SunVTS test failure occurs.
-
SunVTS kernel error log--contains time-stamped SunVTS kernel and SunVTS probe errors. SunVTS kernel errors are errors that relate to running SunVTS, and not to testing of devices. The log file pathname is /var/opt/SUNWvts/logs/vtsk.err. This file is not created until SunVTS reports a SunVTS kernel error.
-
SunVTS information log--contains informative messages that are generated when you start and stop SunVTS test sessions. The log file pathname is /var/opt/SUNWvts/logs/sunvts.info. This file is not created until a SunVTS test session runs.
-
Solaris system message log--is a log of all the general Solaris events logged by syslogd. The pathname of this log file is /var/adm/messages.
How to do it:
-
Use the tab keys to move to the Control panel.
-
Use the arrow keys to highlight log_files.
-
Use the arrow keys to select one of the three log files and press return.
-
Use the arrow keys to select one of the following:
-
Display--the content of the log file is displayed.
Note -SunVTS uses your default editor to display the log file. In many cases, the default editor is vi and you can use the standard vi commands to view the content. However, the file is opened in read-only mode, so you cannot do anything to alter the content. Use the vi command :q to quit and return to the main TTY window.
-
Remove--the content of the log file is deleted.
-
Print--the print menu is displayed. Specify the name of the printer in this menu, highlight Apply, and press return. The content of the log file is sent to the printer.
Note -Take the length of the log file into consideration before you print it.
-
-
Press <Esc> to close the log_file menu.
-
-
Interpret SunVTS messages
There are many messages for each of the many tests that run under SunVTS. For this reason, it is difficult to document the implication of each message that you might see. Most messages contain all the explanatory text that is possible for each event that is encountered. Some messages are information messages (INFO, VERBOSE, WARNING) which do not represent an error, while some messages are error messages (ERROR and FATAL), indicating that the test detected a failure. This section explains generic test message information.
SunVTS information message example:
04/24/00 17:19:47 systemA SunVTS5.0: VTSID 34 disktest.VERBOSE c0t0d0: "number of blocks 3629760"
SunVTS error message example:
05/02/00 10:49:43 systemA SunVTS5.0: VTSID 8040 disktest. FATAL diskette: "Failed get_volmgr_name()" Probable_Cause(s): (1)No floppy disk in drive Recommended_Action(s): (1)Check the floppy drive
Whenever possible, the error message supplies a message type (Table 5-3), followed by the message text, one or more probable causes, and one or more recommended corrective actions.
The following table describes the types of messages you might encounter. All messages are displayed in the Message panel, and most are logged in one of the SunVTS logs (Info or Error).
Table 5-3 Message TypesMessage Type
Log file
Description
INFO
Info log
Displayed when a non-error test event occurs.
ERROR
Error and Info logs
Displayed when a test detects an error, often an indication of a problem with a specific function or feature of the device under test.
FATAL
Error and Info logs
Displayed when a test detects a severe error that might cause the test to exit, such as a failure to open a device. These errors are indicative of hardware failures.
VERBOSE
Not logged
Test progression messages that are displayed when the verbose feature is enabled.
WARNING
Info log
Displayed when something affects the test that is not an error, such as a device that is busy.
You can write scripts that watch for certain SunVTS events as they are logged in the log files, and which trigger an action when a particular message string occurs. If you plan to do this, read the information about the message format. See Table 4-2.
Note -The message syntax changed as of SunVTS 4.0. For the old message syntax information, see Appendix B, Frequently Asked Questions. In a future version of SunVTS, the old message format will no longer be supported. Update any scripts that rely on the old message format.
-
Reset the test session results (if desired).
How to do it:
- © 2010, Oracle Corporation and/or its affiliates

