| Previous Contents Index DocHome Next |
| iPlanet Application Server Administrator's Guide |
Chapter 6 Enabling High Availability of Server Resources
This chapter describes how to enable high availability of iPlanet Application Server resources, to ensure effective system performance.Increasing iPlanet Application Server resources such as the number of threads, processes, and restart attempts can increase the performance of the applications running on the server, and reduce the likelihood of application downtime.
You need to consider the resources of the iPlanet Application Server instance before you plan on increasing server resources. For instance, if the iPlanet Application Server instance is working at full capacity, adding to the load can negatively affect the performance of an application. Likewise, assigning additional threads to a process removes available threads from the system-wide thread pool, limiting the system's ability to process other thread-utilizing requests, such as database access.
Directory Server stores the bulk of information on which iPlanet Application Server's usage depends. It is important, therefore, that this information is not lost, if Directory Server fails due to some reason. To ensure high availability of a huge volume of information and configuration data, it is necessary to configure a backup Directory Server to take over when the primary Directory Server fails.
This chapter deals mainly with how you can effectively configure iPlanet Application Server's resources and ensure availability of data.
This chapter includes the following topics:
About Adding and Tuning Server Processes
Adjusting the Number of Threads for Processing Requests
Specifying the Number of Requests for the Executive Process
Setting Options of the Administration Server
About Adding and Tuning Server Processes
You can add a Java Server (KJS) or C++ Server (KCS) process to increase high availability. When you add one or two additional processes, an application is more likely to respond to requests. For instance, if one process fails, the second or third process can take its place, decreasing the period for which an application is unavailable. This is particularly useful for applications that have known problems which can cause a process to fail.In addition, you can add a Bridge process to enable direct communication to application components hosted by a KJS process on iPlanet Application Server, using RMI/IIOP. When a request originates from a Corba-based client it is sent to iPlanet Application Server through a Bridge process. This allows Corba-based clients to communicate directly to application components on iPlanet Application Server. For more information on adding a bridge process, see Chapter 14, "Enabling Support For Corba-Based Clients".
To Add and Tune Java and C++ Processes
You can add additional KJS processes for Java applications and KCS processes for C++ applications. It may not be necessary to add more than two processes for either type of application. If an application cannot run on one or two processes, you could check for errors in the code, which can be addressed by the application developer.To add a Java or C++ process, perform the following tasks:
On the iASAT toolbar, click General to open the General window.
In the left pane of the General window, select the iPlanet Application Server instance where you want to add the KJS process.
From the File menu, click New>Process.
From the Process Type drop-down list, choose KJS or KCS.
In the Port Number text box, specify an unused port number where the additional process will run.
Click OK to add the new process.
If this process is to be used in a single-threaded environment, perform the following tasks:
Click Apply Changes to save your changes.
Adjusting the Number of Threads for Processing Requests
Request threads handle user requests for application components. When iPlanet Application Server receives a request, it assigns the request to a free thread. The thread manages the system needs of the request. For example, if the request needs to use a system resource that is currently busy, the thread waits until that resource is free before allowing the request to use that resource.You can specify the minimum and maximum number of threads that are reserved for requests from applications. The thread pool is dynamically adjusted between these two values. The minimum thread value you specify holds at least that many threads in reserve for application requests. That number is increased up to the maximum thread value you that you specify.
Increasing the number of threads available to a process allows the process to respond to more application requests simultaneously. You can add and adjust threads for each process, or you can define the number of threads for all processes under a server, at the server level.
By default, each process uses the threads assigned to iPlanet Application Server. For example, if iPlanet Application Server uses a minimum of 8 threads and a maximum of 64 threads, each individual process uses a minimum of 8 threads and a maximum of 64 threads.
This section describes the following topics:
To Adjust Threads at Server Level
To Adjust Threads at Server Level
To adjust the number of request threads for all (KJS/KCS/KXS and IIOP) processes for a server, perform the following tasks:
On the iASAT toolbar, click General to open the General window.
From the left pane of the General window, select the server for which you want to adjust the number of threads.
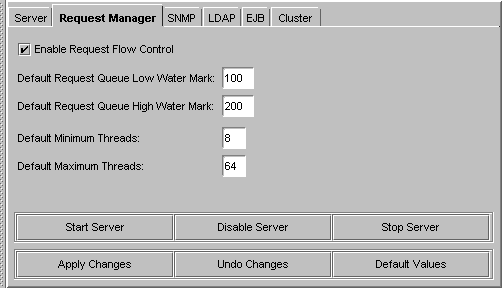
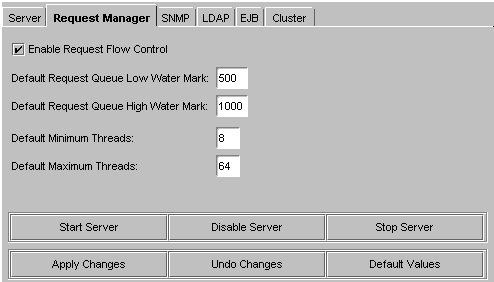
Click the Request Manager tab in the right pane of the General window.
In the Default Minimum Threads text box, specify the minimum number of threads available for each process of the selected iPlanet Application Server.
In the Default Maximum Threads text box, enter the maximum number of threads available for each process on the selected iPlanet Application Server.
To Adjust Threads at Process Level
You can also specify different thread settings for each process under a server. Note that the numbers you specify for a process will be accepted as default for that process. The process level setting overrides the server level setting.To adjust the number of threads available for a process under a server, perform the following tasks:
On the iASAT toolbar, click General to open the General window.
In the left pane of the General window, select the server whose process you want to edit. Expand the server to view its processes. Note that you can expand a server's hierarchical tree only when it is running.
Select the process whose number of threads you want to adjust.
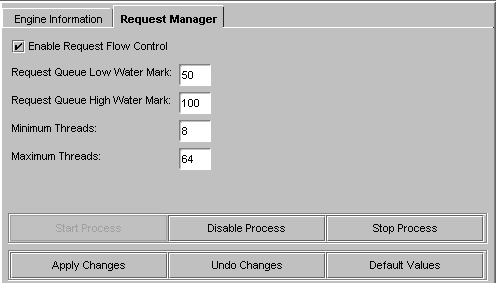
Click the Request Manager tab, from the right pane of the General window.
Specify the minimum number of threads available for the selected process, in the Minimum Threads text box.
Specify the maximum number of threads available for that process, in the Maximum Threads text box.
Click Apply Changes to save your changes.
Note Settings that are specified at process level override those set at the server level.
Specifying the Number of Requests for the Executive Process
The Web Connector Plug-in routes users requests aimed at iPlanet Application Server applications, to the Executive process (KXS). These requests are logged to the request queue in the Executive process.You can perform the following tasks:
Control the maximum number of threads the Web Connector Plug-in will use to process requests. This prevents the request queue from receiving more requests than it can process.
This section includes the following topics:Set the maximum number of requests that are logged to the request queue to control the flow of requests. The maximum number is called the "high watermark".
Set the number of requests in the queue in which logging will resume. This number is called the "low watermark".
To Control Request Flow at Server Level
To Control Request Flow at Server Level
To control the flow of requests at the server level, perform the following tasks:
On the iASAT toolbar, click General to open the General window.
In the left pane of the General window, select the server in which you want to control request flow.
Click the Request Manager tab from the right pane of the General window.
Mark the Enable Request Flow Control checkbox to enable flow control.
In the Request Queue Low Water Mark text box specify the number of requests that should be available in the queue, which will trigger request logging.
In the Request Queue High Water Mark text box specify the maximum number of requests for the queue.
- This number is only applicable after the maximum number of requests in the queue has been reached. See the next step.
Click Apply Changes to save your changes.
- When this number is reached no more user's requests will be accepted until the request queue reduces to the number specified as the low watermark.
To Control Request Flow at Process Level
You can also customize the request flow for a process. Note that the numbers you specify for a process will be accepted as default for that process. The process level setting overrides the server level settingTo adjust the request flow for a process, perform the following tasks:
On the iASAT toolbar, click General to open the General window.
In the left pane of the General window, select the server for which you want to control request flow. Expand the server to view its processes.
Note You can expand a server in the hierarchical tree only when it is running.
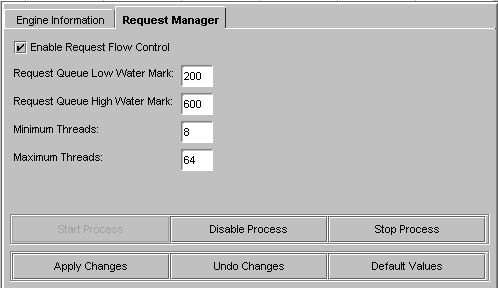
Click the Request Manager tab in the right pane of the General window.
Click the Enable Request Flow Control checkbox to enable flow control.
In the Request Queue Low Water Mark text box enter the number of requests in the queue in which logging will resume.
In the Request Queue High Water Mark text box enter the maximum number of requests for the queue.
Click Apply Changes to save your changes.
- These setting override the default settings at the server level.
Note Settings that are specified at process level override those set at the server level.
Setting Options of the Administration Server
The Administration Server (KAS) manages all the administrative processes and tasks within iPlanet Application Server. You can set several options for the administrative server that will enable high availability of server resources. Setting these options can increase the performance of applications running on a server and attempt to reduce the likelihood of application downtime. You can set the following options:
To Specify EJB Container Parameters for Run Time
To Specify Maximum Number of Engine Restarts
To Enable Internationalization Support
To Specify EJB Container Parameters for Run Time
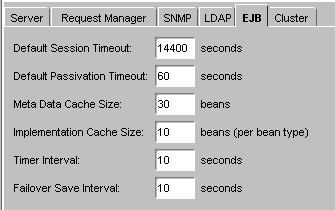
iPlanet Application Server provides an EJB container that enables you to build distributed applications using your own EJB components, and components from other suppliers. When you configure iPlanet Application Server for your enterprise, you must set the EJB container's declarative parameters. These parameters determine, for example, session timeout when an EJB is removed after being inactive for a specified number of seconds. Set these parameters using the editor in iASAT.To access the editor, perform the following tasks:
On the iASAT toolbar, click General to open the General window.
In the right pane of the General window, click the EJB tab to open the EJB container declarative parameters editor.
Default Session Timeout
Click Apply Changes to save your changes.
Default Passivation Timeout
- If an EJB is not accessed for the specified number of seconds, it is removed. This applies to stateful session EJBs.
Metadata Cache Size
- Time (in seconds) that elapses before the state of the EJB is written to disk. This value must be less than the session timeout value.
Implementation Cache Size
- The metadata cache for EJBs, whose value is in number of EJBs.
Timer Interval
- Maximum cache size is in number of EJBs.
Failover Save Interval
- How frequently (in seconds) the EJB pool checks to see if it should passivate or remove an EJB.
- How frequently (in seconds) the EJB state is saved. If the server fails, the last saved state of the EJB can be restored. Data saved is available to all engines in a cluster. This value is set on a per server basis and applies to EJBs that were deployed with Failover option enabled (on the General tab of the Deployment Tool EJB descriptor editor).
Restart iPlanet Application Server for the changes to take effect.
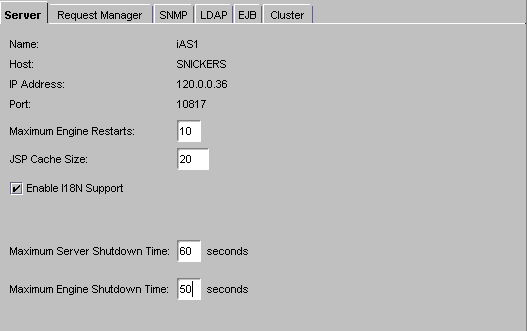
To Specify Maximum Number of Engine Restarts
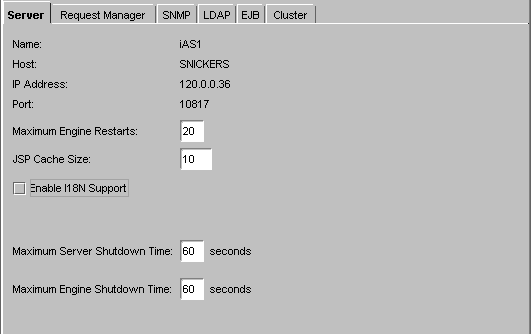
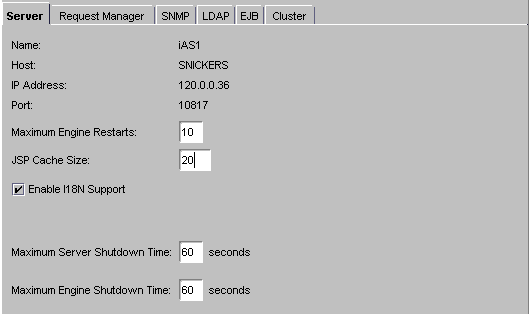
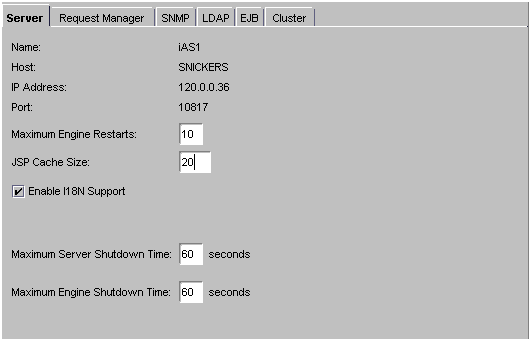
When a process, such as Executive Server (KXS), Java Server (KJS), C++ Server (KCS) or Corba Executive Server (CXS) fails, the Administrative Server restarts it. You can set the restart option to either increase or decrease the number of times that a process is restarted. Fault tolerance and application availability are increased when all processes are running smoothly.To adjust the restart option of the Administrative Server, perform the following tasks:
On the iASAT toolbar, click General to open the General window.
In the left pane of the General window, select the iPlanet Application Server instance whose Administrative Server restart option you want to adjust.
Open the Server tab from the right pane of the General window.
Specify the new restart value in the Maximum Engine Restarts text field.
To Enable Internationalization Support
You can enable iPlanet Application Server to support applications in languages belonging to different geographic locations.To enable internationalization, perform the following tasks:
On the iASAT toolbar, click General to open the General window.
In the left pane of the General window, select the iPlanet Application Server instance for which you want to enable internationalization.
Click the Server tab in the right pane of the General window.
Mark the Enable I18N Support check box.
Click Apply Changes to save your changes.
Note You must stop and restart the server for your changes to take affect. See Performing Administrative Tasks Using iPlanet Registry Editor for information.
To Cache JavaServer Pages (JSP)
You can specify the number of JSP pages that are cached by each KJS engine for each iPlanet Application Server instance. Caching JSPs optimizes application response time.To set the JSP caching value of the Administrative Server, perform the following tasks:
On the iASAT toolbar, click General to open the General window.
In the left pane of the General window, select the iPlanet Application Server instance for which you want to set the JSP caching value.
Click the Server tab from the right pane of the General window.
Specify the JSP Cache Size in the text field. The cache size is set on a per-page basis.
To Specify Maximum Server and Engine Shutdown Time
You can set shutdown values of the Administrative Server for both iPlanet Application Server and engine processes. For example, if you set a 60 seconds engine shutdown time, application tasks being processed are allowed 60 seconds for completion. No new requests are accepted after this period has elapsed. Specifying a shutdown value avoids a "hard" shutdown that will return errors to the client.To set the server and engine shutdown time of the Administrative Server, perform the following tasks:
On the iASAT toolbar, click General to open the General window.
In the left pane of the General window, select the iPlanet Application Server instance whose shutdown time you want to specify.
Click the Server tab from the right pane of the General window.
Enter a Maximum Engine Shutdown Time.
- Specify a Maximum Server Shutdown Time.
- The Maximum Server Shutdown Time is the maximum time taken to shut down iPlanet Application Server. After this time, any engines that are still running are killed. The server typically shuts down quickly unless it is heavily loaded.
Click Apply Changes to save your changes.
Implementing a Multi-Process, Single-Threaded Environment
You can add a Java Server (KJS) or C++ Server (KCS) process to implement a multi-process, single-threaded environment. Running multiple KJS processes, all in single-threaded request mode, effectively creates a "multi-threaded" environment, which allows simultaneous processing of users requests.Implementing this environment allows each process to accept only one request at a time. This is useful when you integrate third-party utilities. Running third-party utilities in the iPlanet Application Server multi-threaded request environment can cause errors that the application server may not be able to handle, including thread safety issues. You can implement a multi-process, single-threaded environment and avoid this type of problem, while enabling iPlanet Application Server to scale.
For example, if a third-party utility which is not thread safe runs within the KJS process, you can adjust the request threads of the KJS to 1 and eliminate the issues of utility safety. However, this creates a request backlog as requests wait for the KJS to process a single request at a time. You can avoid this by running multiple KJS processes in single-threaded request mode, and effectively create a "multi-threaded" environment allowing simultaneous processing of users' requests.
You do need to maintain multiple request threads for the Executive Server (KXS) process, as it distributes all requests that come into iPlanet Application Server.
To implement a multi-process, single-threaded environment, perform the following tasks:
Add a KJS or a KCS processes.
Adjust the request threads allocated for those processes to 1.
- See To Add and Tune Java and C++ Processes.
- See Adjusting the Number of Threads for Processing Requests.
Configuring Directory Server Failover
The Directory Server connected to your iPlanet Application Server instance contains global information shared by all application servers in a Directory Server cluster. A Directory Server cluster is simply one or more iPlanet Application Server instances that share a single Directory Server. See What Is LDAP? for more information on LDAP servers.To protect this globally shared information, you need to configure a second Directory Server to act as a backup if the primary server fails. You need to install the backup Directory Server on a machine other than the one on which your primary Directory Server is configured.
Perform the following tasks to effectively configure a backup Directory Server for failover:
Install Netscape Directory Server 4.13, on a separate machine. See the documentation that is provided along with the server, for installation details.
These topics are described in detail, in the following sections:Set up Supplier-Initiated Replication (SIR), for the backup Directory Server.
Modify the primary Directory Server configuration to include the backup Directory Server's hostname and port number. You can do this using iASAT.
If you have a webless installation of iPlanet Application Server, modify iPlanet Registry entries for the web-connector.
Setting Up Supplier-Initiated Replication
To Start Replication Agreement in Backup Directory Server
To Set Up Replication of Directory Trees
Setting Up Supplier-Initiated Replication
Supplier-Initiated Replication is a replication configuration where servers containing master copies of directory trees and sub-trees replicate directory data to replicated servers. To set up SIR, you need to first configure the backup Directory Server to accept replication configuration updates. You then need to set up replication agreements for specific directory trees in the primary Directory Server (see To Set Up Replication of Directory Trees)Note that once the backup Directory Server is set up to accept replication configuration, any modifications made to the primary Directory Server will be replicated to the backup Directory Server.
To Start Replication Agreement in Backup Directory Server
To configure the backup Directory Server to accept replication configuration updates, perform the following tasks:
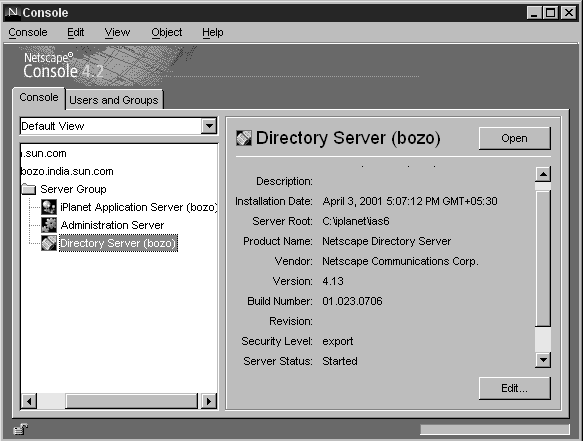
Start Netscape Console (on the machine in which the backup Directory Server is installed).
Double-click Directory Server, as shown in the following figure:
- On Windows systems, you can do this by opening the Start menu, and choosing Programs>iPlanet Server Products>Netscape Console 6.0.
- On both Windows and Solaris systems, navigate to the <iASInstallDir> path, and type startconsole at the command line prompt.
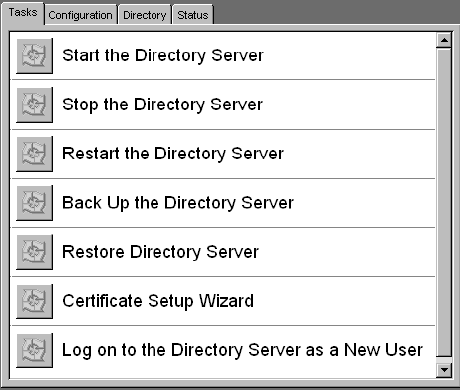
Click the Configuration tab. The following window appears:
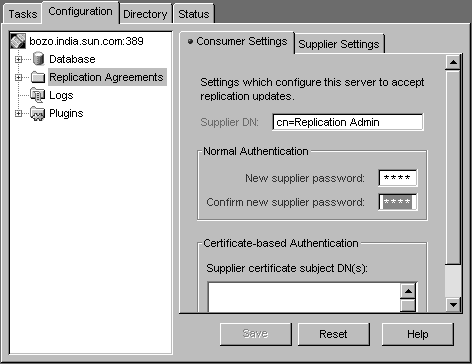
Select the Replication Agreement folder as shown in the figure.
In the Consumer Settings tab, provide a valid Distinguished Name in the Supplier DN text field, for example, cn=Replication Admin.
In the New supplier password text field, enter a password of your choice. You will be prompted for this password during supplier authentication. Confirm your new password in the Confirm new supplier password text field. Note that your password must be at least 8 characters long.
Click Save. The backup Directory Server is now ready for replication.
- If you want certificate based authentication, enter the Distinguished Name of the supplier certificate that you want to use for authentication, in the Supplier certificate subject DN(s) text box.
To Set Up Replication of Directory Trees
To configure the backup Directory Server for authentication, you need set up replication agreements for the following directory trees:The value of X is YourDomainName (for example, india.sun.com). This value can be specified by you during iPlanet Application Server installation. The value for Y is iASCluster (the clusters that are supported by the primary Directory Server). This value can't be changed.
To set up directory tree replication, perform the following tasks:
Perform steps 1 to 3 as given in To Start Replication Agreement in Backup Directory Server.
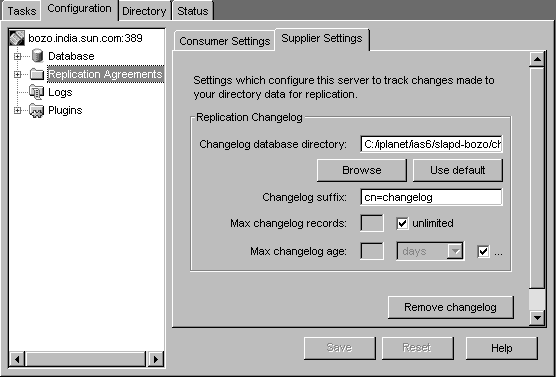
You now need to replicate the remaining trees, cn=iASCluster and o=NetscapeRoot. Perform steps 1 to 18 and replicate these trees. When you complete the replication of all the required directory trees, the Replication Agreements folder should look like this:Before you begin the replication, you need to set the primary Directory Server's changelog database directory. This is the directory where all the changes made to the directory server's settings are logged. You must set this directory to ensure that replication takes place.
- To set the changelog directory, perform the following tasks:
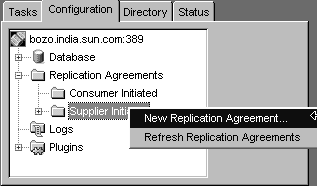
In the Directory Server main window, open the Replication Agreements folder, as shown in the following figure:
Expand the Replication Agreements folder to its hierarchal tree. Right-click on Supplier Initiated Agreements, and select New Replication Agreement, as shown in the following figure:
In the right pane of the window, click the Supplier Settings tab.
Specify the changelog directory in the Changelog database directory text field. Click Browse to locate a directory, or click Use default to set the default changelog directory.
Click Save to save your changes. You can now continue with the replication.
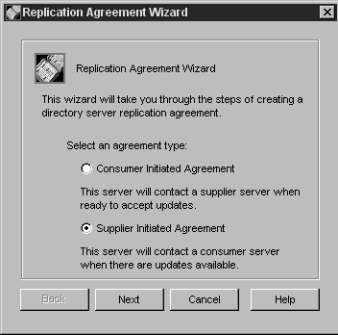
The Replication Agreement Wizard opens. Select Supplier Initiated Replication, as shown in the following figure:
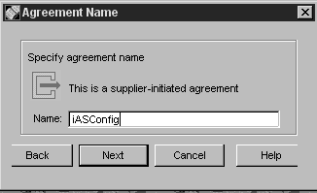
Click Next. In the Agreement Name window, specify a name (any string value) for the supplier-initiated agreement, as shown in the following figure:
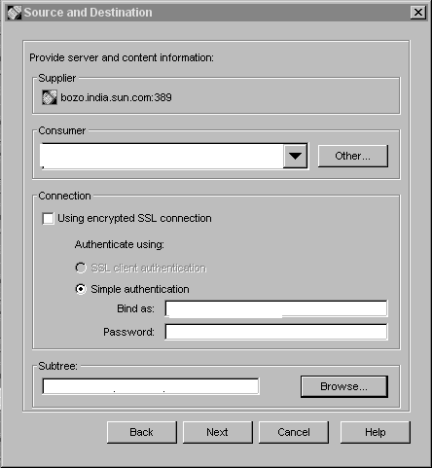
Click Next. The Source and Destination window opens, as shown in the following figure:
In the Consumer text field, enter the hostname of the machine on which the backup Directory Server is installed.
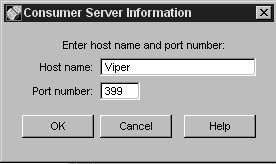
Click Other. The Consumer Server Information popup window opens, as shown in the following figure:
In the Host name text field, provide the host name of the machine on which the backup Directory Server is installed.
In the Port text field, provide the Port Number, if it is different from the primary Directory Server machine's port number.
Click OK to confirm. You can now see the consumer name in the Source and Destination window.
Select Simple authentication, for simple and direct authentication.
Provide a valid Distinguished Name in the Bind as text field, using which the Primary Server will bind to the backup Directory Server.
In the Password text field, provide the password that you used during iPlanet Application Server installation.
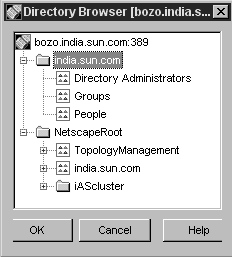
In the Subtree field, provide the name of the directory tree that you want to replicate. Click Browse to view a list of the existing trees and subtrees in the primary Directory Server. The following window appears:
Select the first directory tree to be replicated. You can select either X=YourDomainName or Y=iASCluster. In the example, X=YourDomainName (india.sun.com) has been chosen.
Click OK to confirm replication of the directory tree in the backup Directory Server.
- To choose Y=iASCluster, expand the NetscapeRoot folder and select iASCluster.
Note When you replicate X=YourDomainName, make sure that you replicate all the domain names that are stored in your primary Directory Server, to enable proper authentication during failover.
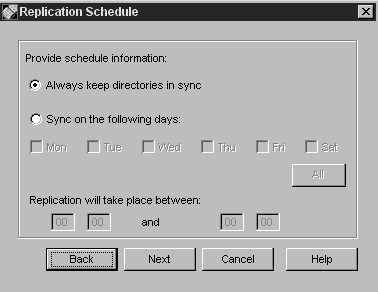
Click Next. The Replication Schedule window appears, as shown in the following figure:
- The subtree that you selected appears in the Subtree text field of the Source and Destination window.
Select Always keep directories in sync, to keep the data current in both Directory Servers.
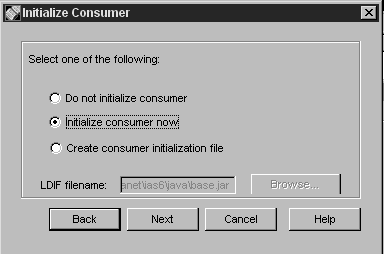
Click Next. The Initialize Consumer window appears, as shown in the following figure:
- Select Sync on the following days if you want to schedule the data synchronization between the primary and backup Directory Servers. Data replication will occur during the period you specify on the selected days of the week.
- Click All if you want to schedule data synchronization on all days of the week.
Select the Initialize consumer now radio button. This option initializes the backup Directory Server immediately. The backup Directory Server is ready for replication.
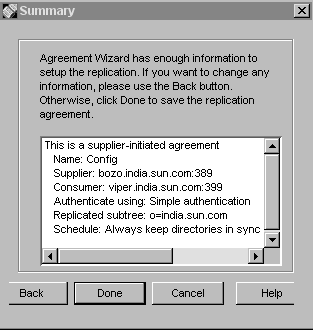
The Replication Summary window appears, as shown in the following figure:
- Select Do not initialize consumer to stop replication at this point. If you choose this option, data is not replicated in the backup Directory Server.
- Select Create consumer initialization file if you want to write the data to a file. Select a .ldif file for storing the data, which can be copied to the backup Directory Server later. See Using LDIF to Add Entries to Directory Server, for more information.
- After viewing the summary, click Done. The replication agreement is created. The backup Directory Server is initialized and is populated with the primary Directory Server data.

Replication is ready to take place at this point.
To Configure the Backup Directory Server in iASAT
Once the backup Directory Server is installed and replicated, you need to modify the primary Directory Server configuration to include the name and port number of the backup Directory Server, in iASAT. You can do this by performing the following tasks:
On the iASAT toolbar, click General to open the General window.
Directory Server(s) associated with your iPlanet Application Server instance appears in this window.Select the iPlanet Application Server instance for which you want to configure a backup Directory Server.
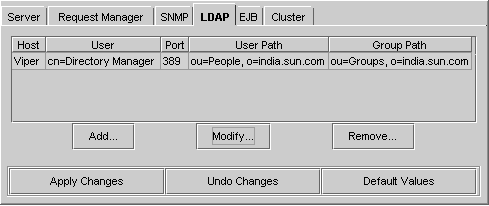
Open the LDAP tab from the right pane of the General window. The following window appears:
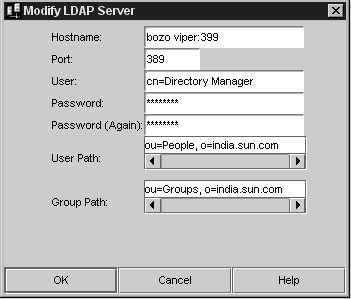
Select the primary Directory Server and click Modify. The following dialog box appears:
The backup Directory Server is now configured. Note that you must always have at least one Directory Server configured to work with iPlanet Application Server.
In the Hostname field, insert a space after the existing hostname and enter the name of the machine on which the backup Directory Server is installed (as shown in the figure given above). If the port number of the backup Directory Server machine is different, insert a colon (:) next to the hostname and specify the port number, for example, bozo viper:399
Click OK to close the window.
- You need to specify the port number only if it is different from the port number of the host.
Click Apply Changes to register the changes in iASAT.
You need to stop and start iPlanet Application Server for the change to take effect.
Note To remove a Directory Server, select the required Directory Server in the right pane of the General window in iASAT, and click Remove.
To Configure Registry Entries for Web Connector Plug-in
When you configure a backup Directory Server, iPlanet Application Server creates the necessary back-end entries in iPlanet Registry. However, in the case of a webless installation of iPlanet Application Server, where iPlanet Application Server and the web-connector are installed on different machines, you have 2 instances of iPlanet Registry. You need to update iPlanet Registry entries on the web-connector, with the host name and port number of the machine on which the backup Directory Server is installed.To update iPlanet Registry with the backup Directory Server details, perform the following tasks:
Start iPlanet Registry (on the machine where the web-connector is installed).
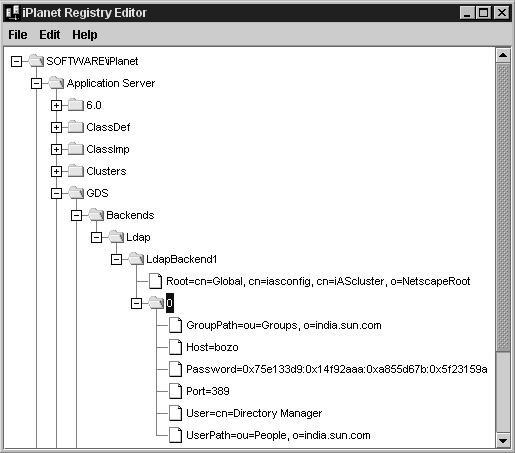
Open the following key:
- (See About iPlanet Registry Editor).
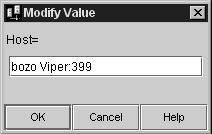
Select the Host=<hostname> value. Double-click the value to open it, or choose Modify Value from the Edit menu. The Modify Value dialog box appears, as shown in the following figure:
Insert a space after the existing hostname and enter the name of the machine on which the backup Directory Server is installed (as shown in the figure). If the port number of the backup Directory Server machine is different, insert a colon (:) next to the hostname and specify the port number.
- For example, bozo viper:399
- Stop and start iPlanet Registry for the changes to take effect.
Previous Contents Index DocHome Next
Copyright © 2001 Sun Microsystems, Inc. Some preexisting portions Copyright © 2001 Netscape Communications Corp. All rights reserved.
Last Updated November 09, 2001

