 |
To create a local or remote server instance:
| NOTE: If the iPlanet Application Server node is not displayed, then the integration module is not installed or it is not enabled. |

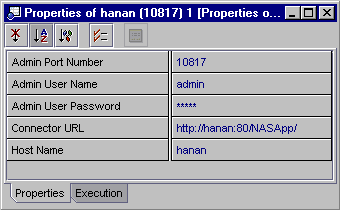
The iPlanet Application Server Properties window appears.

Admin Port Number Enter the port number of the local or remote Administrative Server. During installation of the iPlanet Application Server this is set by default to port number 10817.
If you are unsure of the port number, perform the following steps:
Admin User Name Enter the username for the local or remote iPlanet Administration Server. The "admin" username is set by default.
Admin User Password Enter the password for the local or remote iPlanet Administrative Server. If your local server has registered with the Administration Tool, then the password should be set by default.
Connector URL Accept the default URL setting. The URL displayed should be http://<LocalOrRemoteHostname>:<LocalOrRemotePortNumber>/NASApp.
Host Name Accept the default URL setting for local host, modify the default host name to your remote host name.
A node representing your local or remote server appears under the Server Instances node in the Explorer.
When you set the server instance as default, the J2EE Applications and Web Module subnodes under the Default Servers node display changes to identify the default server instance.
There are three sub-nodes under the local server instance listing Registered DataSources, Deployed Modules, and Deployed Applications. .
The next step in the iPlanet Application Server Integration Module Tutorial is creating a web module.
| Creating a Web Module | |
| © 2002 Sun Microsystems, Inc. | terms of use privacy policy feedback |