nasadmin Command
|
Function
|
Input parameter
|
Output parameter
|
|---|
abort transaction
|
Abort a server transaction.
|
DWORD tid
|
|
add trace
|
Add a trace mask.
|
STRING traceSpec
|
|
add mirror
|
Add a mirror to a logical volume.
|
STRING lVol, STRING pVol, STRING diskName
|
|
dump component
|
Dumps the internal state of a component
|
STRING componentName
|
|
dump ringbuffer
|
Dumps the current contents of the ringbuffer
|
STRING destination
|
|
expand lvol
|
Expand a logical volume.
|
STRING lVol, DWORD newSize
|
|
expand pvol
|
Expand a physical volume.
|
STRING pVol, STRING diskName
|
|
force transaction
|
Force the outcome of a transaction.
|
DWORD tid, WORD commitDesired, WORD finish
|
|
help
|
Display help message for given command
|
{STRING commands}
|
|
list trace
|
Lists the current trace masks for Encina components
|
|
|
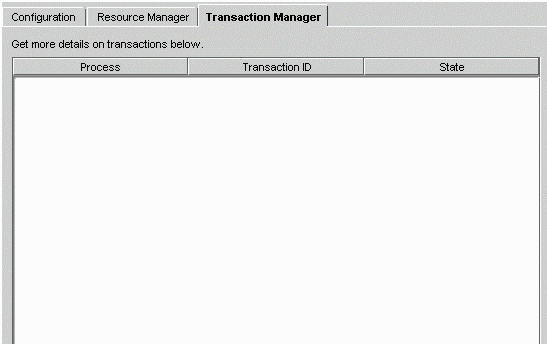
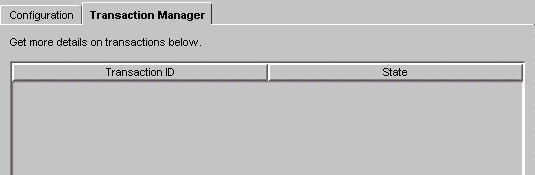
list transactions
|
List unresolved transactions in the server.
|
DWORD originator, DWORD participant, DWORD globalID
|
DWORD tid, WORD state (for example, active or inactive)
|
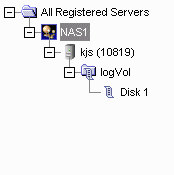
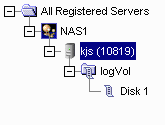
list lvols
|
List all known logical volumes.
|
WORD enabled
|
{STRING lVol}
|
list pvols
|
List all known physical volumes.
|
|
{STRING pVol}
|
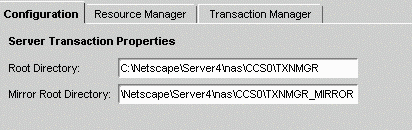
query transaction
|
Query transaction attributes.
|
DWORD tid, WORD state, WORD originator, WORD participants, WORD global
|
STRING globalID, WORD state, STRING originator, {STRING participant}
|
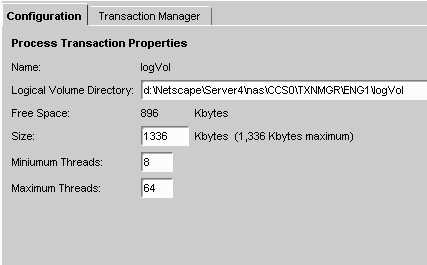
query logvol
|
Query a log volume.
|
STRING logVol
|
STRING archiveDevice, DWORD freePages, DWORD numLogFile, {STRING logFile}
|
query lvol
|
Obtain information about a logical volume.
|
STRING lVol
|
DWORD pageSize, DWORD size, {STRING pVol, WORD state (e.g. clean or dirty), WORD isMounted}
|
query pvol
|
Obtain information about a physical volume.
|
STRING pVol
|
STRING lVol, DWORD chunkSize, DWORD numRegions, {STRING disk, DWORD offset, DWORD size}, DWORD totalSize
|
redirect trace
|
Redirects trace to the specified destination
|
STRING destination {ringbuffer, stderr, stdout, filename}
|
|
remove mirror
|
Remove a mirror from a logical volume
|
STRING lVol, STRING pVol
|
|
sync mirrors
|
Synchronize mirrors of a logical volume
|
STRING lVol
|
|