| Sun ONE Integration Server B2B 3.6.2 Update 1, ECXpert Support for AS2 Messaging |
Chapter 2
Example: End-to-End Test for AS2 MessagingThis chapter provides a detailed example that shows how to set up ECXpert inbound and outbound hosts for AS2 messaging and steps through a procedure to send and receive an AS2 message. If you need more information to configure the trading relationship using ECXpert, refer to the ECXpert documentation set at docs.sun.com.
If you plan to follow the procedure in this chapter to test your AS2 setup, AS2 must be installed on two ECXpert machines—one to act as the outbound host or sender, the other to act as the inbound host or receiver. Chapter 1, "Getting Started with AS2 Messaging: Installation and Configuration" gives the instructions for setting up the AS2 plug-in.
Example OverviewThis example uses two members called partyA and partyB, which reside on the outbound host and the inbound host respectively. The purpose of the test is to ensure that you can send a plain messages end to end.
Setting up the Outbound HostThis section shows how to set up a partnership so that the outbound host can send AS2 messages. It contains procedures for the following tasks:
Perform these procedures using the ECXpert installation on the machine you are using for the sender.
To create memberships
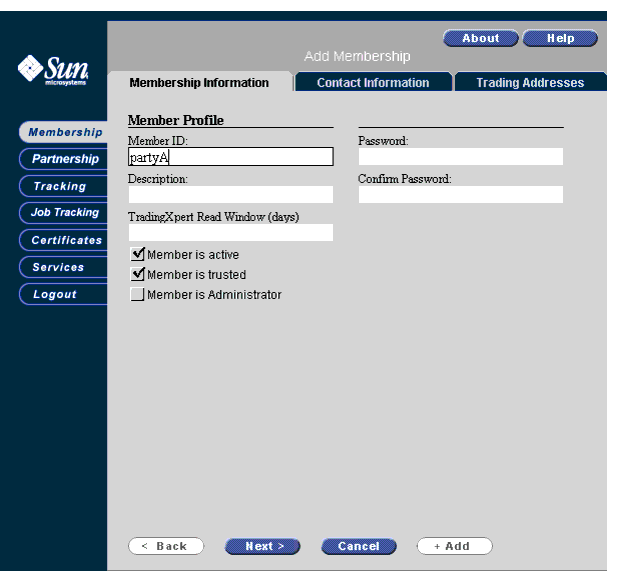
- Open the Support interface to ECXpert, and select Membership.
- Select Add and specify the fields in Table 2-1, as shown in Figure 2-1:
Figure 2-1 Add a Member Screen
- Select Next twice, bypassing the Contact Information page. These fields are not important for this test.
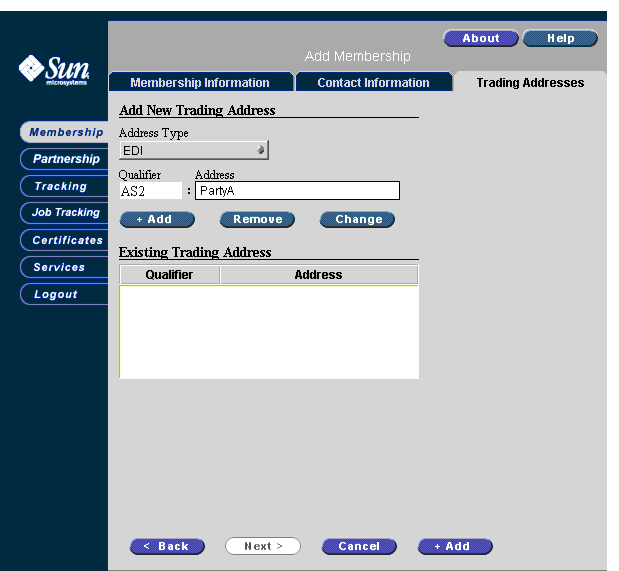
- Specify information for the Trading Address as shown in the following table and Figure 2-2.
Figure 2-2 Trading Address Screen
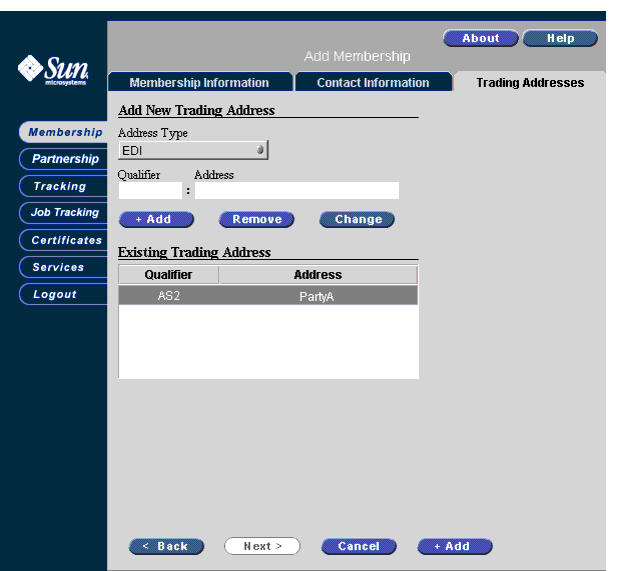
- Click Change to modify the member with the new trading address. This results in the address being added to the Existing Trading Address list, as shown in Figure 2-3.
Figure 2-3 Trading Address Added Screen
To create a service list
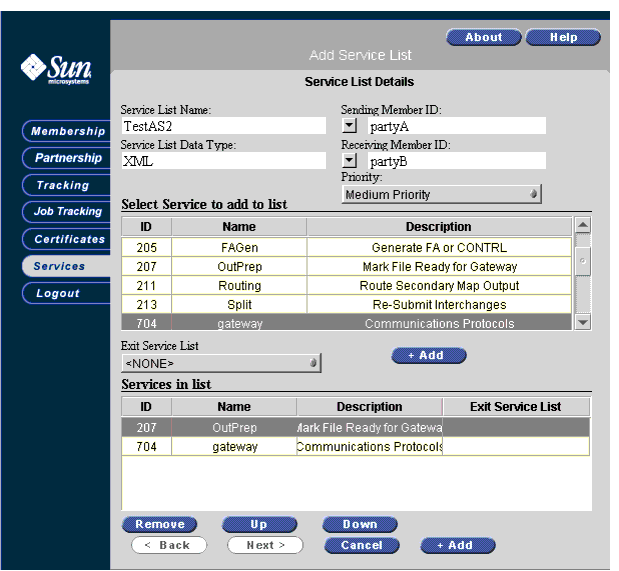
- From the Support interface, select Services.
- Select Add and specify the following field values, as shown in Figure 2-4:
Figure 2-4 Service List Screen
- Click Add to add the Service List.
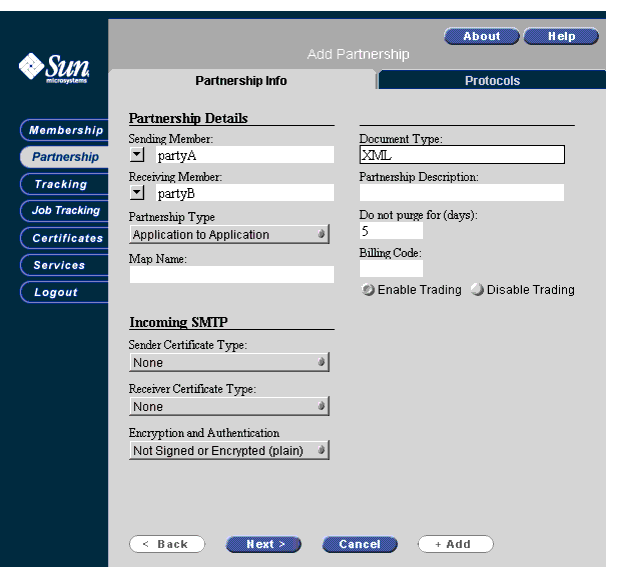
To create a partnership
- From the Support interface, select Partnership.
- Select Add and specify the following field values:
Figure 2-5 Add Partnership Screen
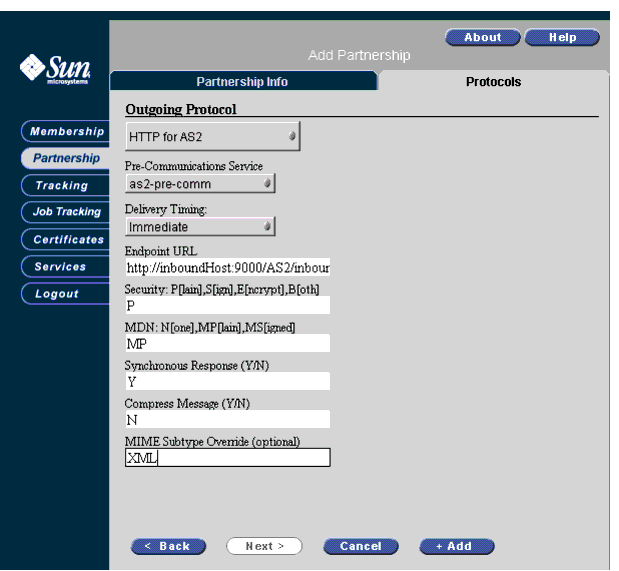
- Select Next and specify field values for Protocols. In Table 2-6, the first line in each Value cell gives a specific field value for the example. A general definition of the field is also given.
Figure 2-6 shows the outgoing protocol specifications for this example.
If you need to use security or reliability, you must create certificates as described in Chapter 3, "Creating Certificates for AS2 Messaging".
Figure 2-6 Outgoing Protocol Screen
Setting up the Inbound HostThis section shows how to set up a partnership so that the inbound host can receive AS2 messages. Much of it is identical to the last section for setting up the Outbound host. Differences are noted.
Perform these procedures using the ECXpert installation on the machine you are using for the receiver.
To create memberships
- Follow the same procedure and use exactly the same field information as shown in "To create memberships".
To create a service list
- From the Support interface, select Services.
- Select Add and specify the field values given in Table 2-7.
- Click Add to add the Service List.
To create a partnership follow the same procedure and use exactly the same field information as shown in "To create a partnership" for Step 1 and Step 2.
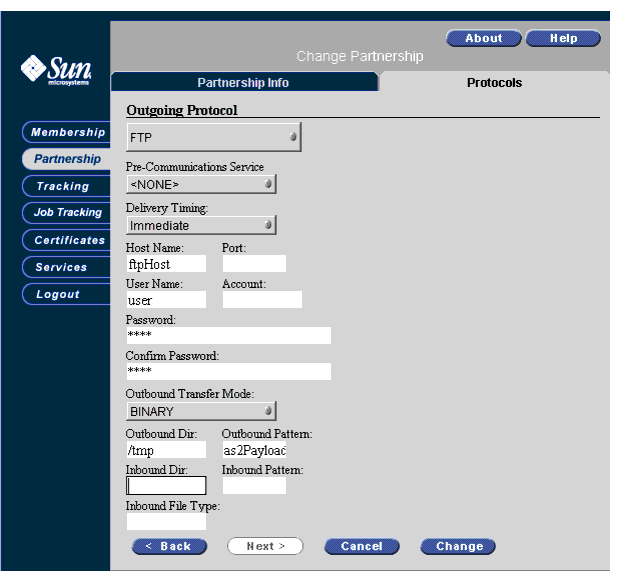
To create a partnership
- Select Next and specify the following for Protocols for the example, as shown in Figure 2-7:
Figure 2-7 Receiver’s Protocol Screen
- Click Change.
Modifying the ecx.ini Configuration FileYou must modify the ecx.ini file to identify the sender and receiver to ECXpert.
To modify the ecx.ini file
- Open the ecx.ini using a text editor.
- Locate the AS2 Server section and modify the following fields:
submit_sender = partyA
submit_receiver = partyB
submit_file_type = XML
Leave submit_password blank.
- Save and exit the ecx.ini file.
- Shut down and restart the AS2 Server. See "Starting and Stopping the Servers" for instructions.
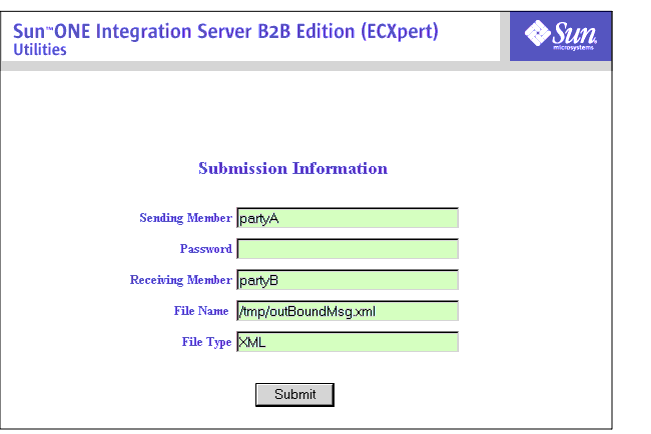
Sending a Document and Checking ResultsUse the submission utility to submit a document from the outbound host, partyA.
To submit a document
- Open the ECXpert submission utility and specify the field values in Table 2-9:
Figure 2-8 Submitting a Document Screen
To check the results