 To Create and Register the Subnet
-
Open a Web browser and go to URL http://external OTP installation server:9090 where external OTP installation server is either the IP address or the fully qualified name of the external OTP installation server.
The OTP provisioning service log in screen appears. Log in to the service provisioning system.
-
Click OS Provisioning.
The OS Provisioning screen appears.
-
Scroll down and locate OSP Subnets.
Figure 3–4 OS Provisioning Screen: Selecting OSP Subnets Create

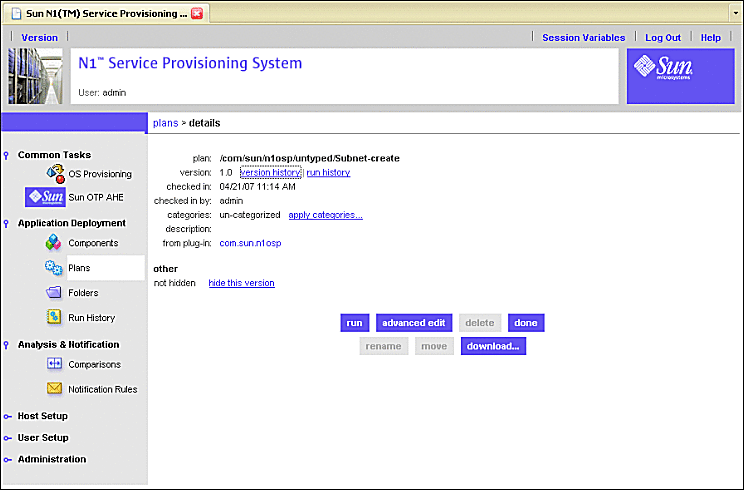
Click Create. The Subnet-create screen appears.
Figure 3–5 Create Subnet Plan Screen
-
Click run.
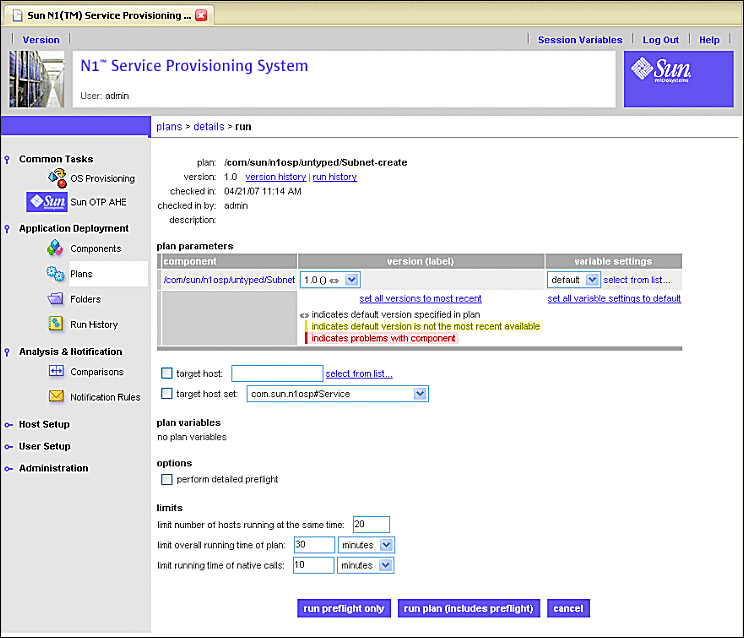
The Create Subnet Plan Run screen appears.
Figure 3–6 Create Subnet Plan Run Screen
-
Click select from list... beneath variable settings.
The select variable setting from list... screen appears.
Figure 3–7 Create Subnet Plan: Select Variable Setting From List Screen

-
Click create set in the Variable Setting From List screen as shown by the following figure.
Figure 3–8 Create Subnet Plan: Create Set Screen

When you click create set, the subnet variables screen appears:
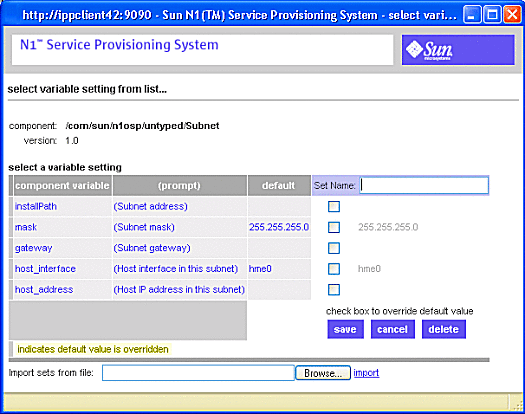
Figure 3–9 Create Subnet Plan: Create Set Variables Screen
-
Enter the values on the Create Set Variables Screen as follows:
-
Type a name for the subnet set in the Set Name field.
For example, subnet53
-
Click the installPath check box.
A text field appears to the right of the check box. Type the base IP address of the subnet.
-
Click the mask check box.
A text field appears to the right of the check box populated with the default subnet mask 255.255.255.0. If needed, type in a different subnet mask in the text field. .
-
Click the gateway check box.
Type the gateway IP address in the text field that appeared.
-
Click the host_interface check box.
Type the name of the external OTP installation server's provisioning interface, for example, bge0. Do not specify the logical interface.
-
Click the host_address check box.
Type the IP address of the provisioning interface..
The Create Set Variables screen should be similar to the following:
Figure 3–10 Create Subnet Plan: Example of Completed Create Set Variables Screen

-
Click save.
The Create Set Variables Screen refreshes and displays your entries:
Figure 3–11 Create Subnet Plan: Example of Saved Create Set Variables Screen

-
Click the right-most select button.
The Create Set Variables screen closes. and the Subnet Plan Run Screen is updated.
If the variable settings field does not display the plan set you created, click select from list... and click the name of the set you created.
-
-
Click on the target host field select from list... link on the Subnet Plan Run screen as shown by the following figure.
Figure 3–12 Create Subnet Plan: Selecting Target Host Select From List
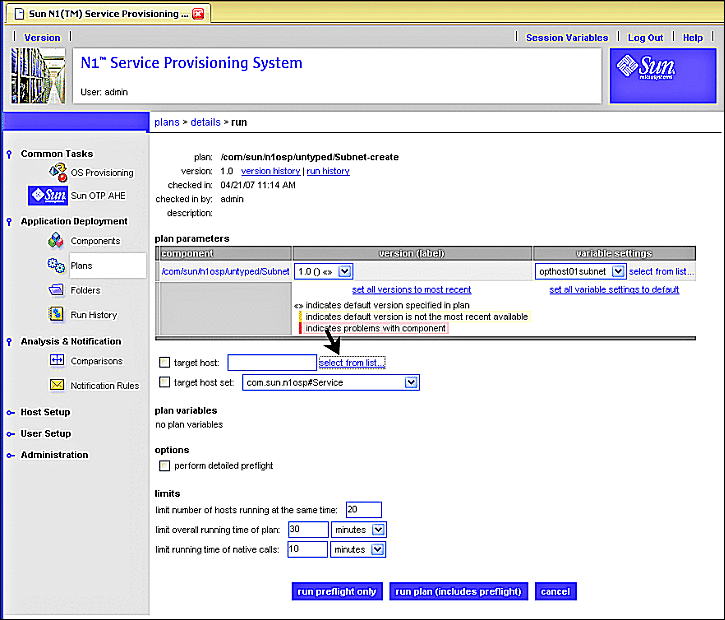
When you click the target host select from list... link, the target host select from list screen appears:
Figure 3–13 Create Subnet Plan: Target Host Select From List Screen

-
Click masterserver-osp, then click add hosts to main window.
The Target Host Select From List screen closes, and the target host field on the Subnet Plan Run screen is populated with masterserver-osp.
-
Click run plan (includes preflight).
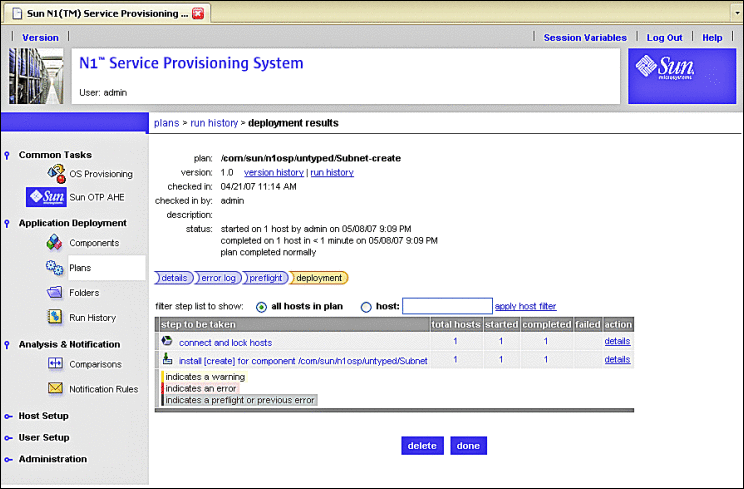
Several screens are displayed as the plan runs. When the plan completes, the deployment results screen appears. Your screen should be similar to the following example.
Figure 3–14 Create Subnet Plan: Example Deployment Results
-
Click done.
Next Steps
Create the Solaris 10 Update 2 image as described in the next procedure.
- © 2010, Oracle Corporation and/or its affiliates
