 To Create the Solaris 10 Update 2 Image
-
Open a Web browser and go to URL http://external OTP installation server:9090 where external OTP installation server is either the IP address or the fully qualified name of the external OTP installation server.
The OTP provisioning service log in screen appears. Log in to the service provisioning system.
-
Click OS Provisioning.
The OS Provisioning screen appears:
Figure 3–15 OS Provisioning Screen: Selecting Solaris Images Import

-
Click the Solaris Images Import link.
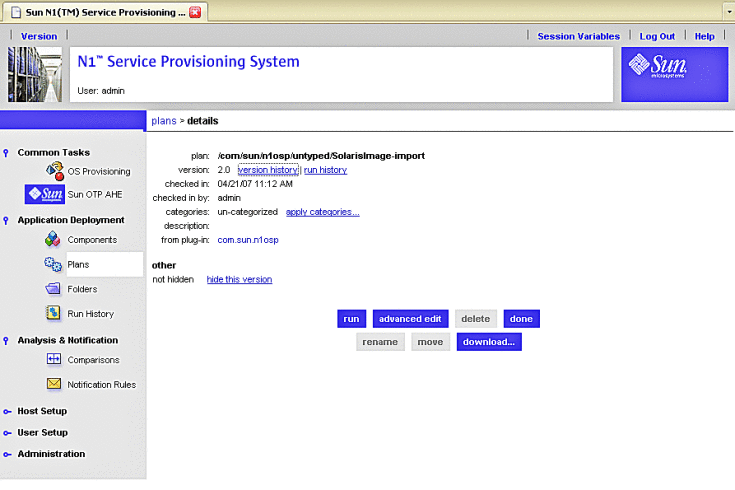
The Solaris Image Import plans screen appears.
Figure 3–16 Solaris Images Import Plan Screen
-
Click run.
The Solaris Image Plan Variables screen appears.
Figure 3–17 Solaris Images Import Plan Variables Screen

-
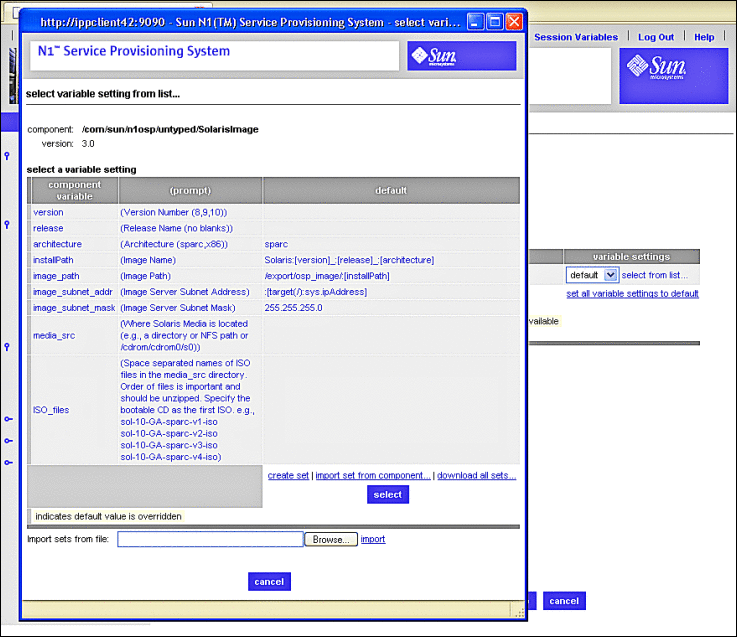
Click select from list... beneath variable settings.
The select variable setting from list... screen appears.
Figure 3–18 Solaris Images Select Variable Setting From List Screen
-
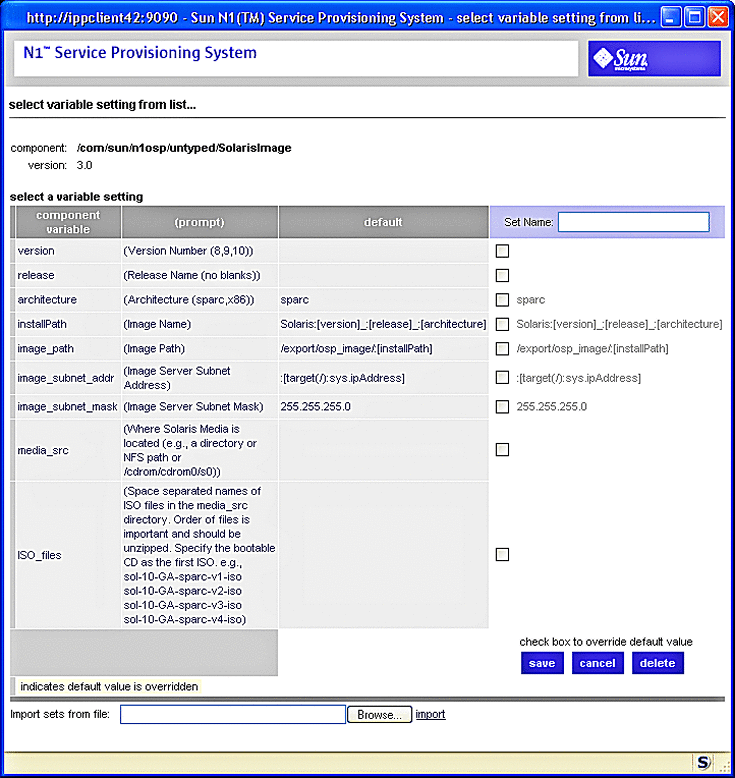
Click create set in the Select Variable Setting From List screen.
The Solaris Images Create Set variables screen appears:
Figure 3–19 Solaris Images Create Set Variables Screen
-
Enter the values on the Solaris Images Create Set Variables Screen as follows:
-
Type a name for the Solaris OS image in the Set Name field.
For example, sol10u2. The name must start with an alphabetic character.
-
Click the version check box.
A text field appears to the right of the check box. Type the Solaris OS version number, for example, 10.
-
Click the release check box.
A text field appears to the right of the check box. Type the Solaris release version, for example u2.
-
Click the architecture check box.
The text field is populated with the default value sparc.
-
Click the installPath check box.
Type the name of the Solaris OS image, for example sol-10–u2–ga-sparc
-
Click the image_path check box.
Type the full path to which to the Solaris OS ISO image will be copied. This can be a shared file system on the external OTP installation server or an shared file system on a clustered OTP host.
-
Click the image_subnet_addr check box.
Type the IP address of the server on which the OS image is to be copied.
-
Click the image_subnet_mask check box.
A text field appears to the right of the check box populated with the default subnet mask 255.255.255.0. If needed, type in a different subnet mask in the text field. .
-
Click the media_src check box.
Type the full path to the source Solaris OS image. This can be an NFS-mounted ISO image as described in To Download and Uncompress the OTP and Solaris OS Installation Zip Files.
-
Click the ISO_files check box.
Type the names of the Solaris OS ISO files as directed.
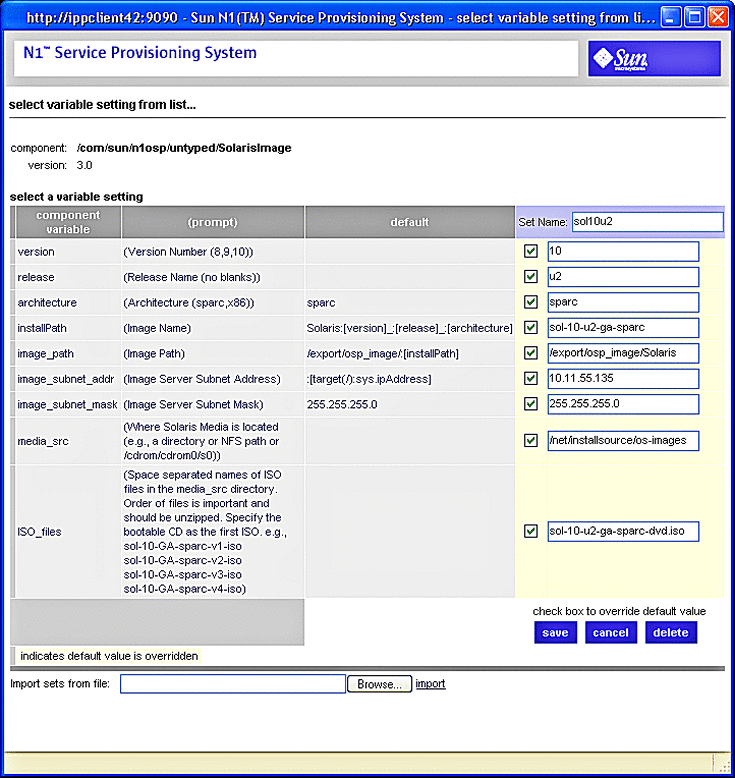
The Solaris Images Create Set Variables Screen should be similar to the following example:
Figure 3–20 Solaris Images: Example Create Set Variables Screen
-
Click save.
The Create Set Variables Screen refreshes and displays your entries
-
Click the right-most select button.
The Create Set Variables screen closes. and the Solaris Images Plan Run Screen is updated.
If the variable settings field does not display the plan set you created, click select from list... and click the name of the set you created.
-
-
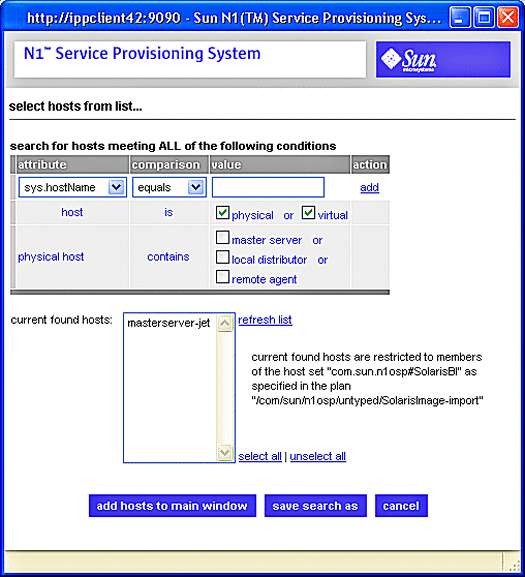
Click on the target host field select from list... link on the Solaris Images Plan Run screen.
The target host select from list screen appears:
Figure 3–21 Solaris Images Target Host Select From List Screen
-
Click masterserver-jet, then click add hosts to main window.
The Target Host Select From List screen closes, and the target host field on the Solaris Images Plan Run screen is populated with masterserver-jet.
-
Change limit overall running time of plan to two hours.
-
Change limit running time of native calls to two hours.
-
Click run plan (includes preflight).
The Solaris Images plan will take about an hour to complete. When the plan completes, the deployment results screen appears.
-
Click done.
Next Steps
Create the Solaris OS provisioning profile as described in the next procedure.
- © 2010, Oracle Corporation and/or its affiliates
