 To Create the Solaris OS Provisioning Profile
-
Log in as root (su - root) to the external OTP installation server.
-
Type the following command to populate the custom packages with the appropriate JET path:
/opt/SUNWjet/bin/copy_custom_packages /OTP_media_path/Products/packages sparc SUNWotpra SUNWotpcli SUNWotputil
where /OTP_media_path is the fully-qualifed path to the OTP installation directory you created in To Create the OTP Installation Directory on the External OTP Installation Server. For example:
# /opt/SUNWjet/bin/copy_custom_packages \
/otp1.1/Products/packages sparc SUNWotpra SUNWotpcli SUNWotputil
The media is copied to the directory /export/install/pkgs/custom/sparc by default. To change the default directory, modify the setting in /opt/SUNWjet/etc/jumpstart.conf.
For further information, see Chapter 5, Provisioning the Solaris Operating System, in Sun N1 Service Provisioning System User’s Guide for OS Provisioning Plug-In 3.1.
-
Open a Web browser and go to URL http://external OTP installation server:9090 where external OTP installation server is either the IP address or the fully qualified name of the external OTP installation server.
The OTP provisioning service log in screen appears. Log in to the service provisioning system.
-
Click OS Provisioning.
The OS Provisioning screen appears.
-
Click the Solaris Images Create Profile link.
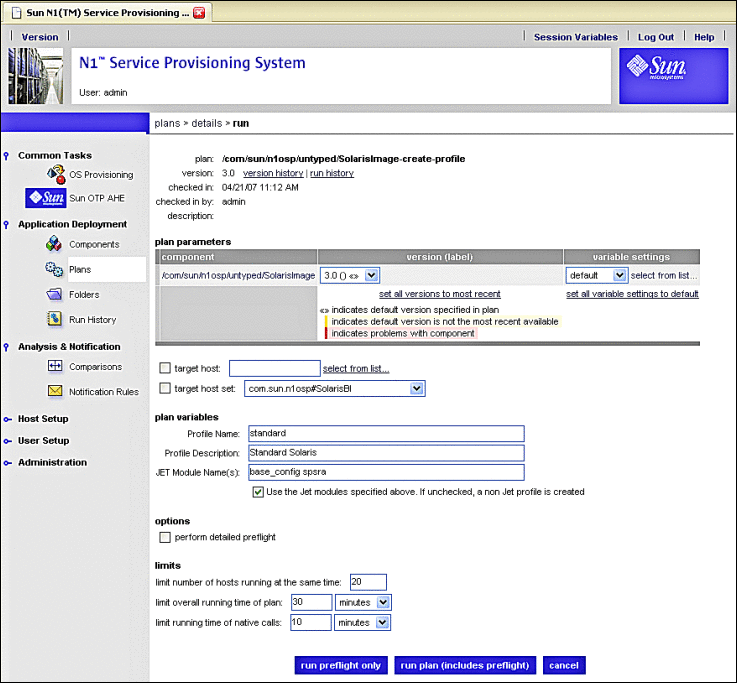
The Create Profile run screen appears.
-
Click run.
The Create Profile variable settings run screen appears.
Figure 3–22 Create OS Profile Plan Variable Settings Run Screen

-
Click the drop-down list beneath variable settings, and choose the OS image you created in the previous procedure.
For example, sol10u2.
-
Click on the target host field select from list... link on the Solaris Images Plan Run screen.
The target host select from list screen appears.
-
Click masterserver-jet, then click add hosts to main window.
The Target Host Select From List screen closes, and the target host field on the Solaris Images Plan Run screen is populated with masterserver-jet.
-
Add custom to the text in the JET Module Name(s) field.
Ensure that the check box beneath the JET Module Name(s) field is checked.
The custom module ensures that the service provisioning remote agent is installed to the new OTP host after OS installation has completed.
The Create OS Profile Plan run screen should be similar to the following example:
Figure 3–23 Create OS Profile Plan Variable Settings Run Screen Example

-
Click run plan (includes preflight).
The Create OS Profile plan will take a few minutes to complete. When the plan completes, the deployment results screen appears.
-
Click done.
Next Steps
Create the ALOM target host as described in the next procedure.
- © 2010, Oracle Corporation and/or its affiliates
