Chapter 1 Administration Overview
This chapter is helpful to gain a basic understanding of Project WebSynergy.
WebSynergy Terminology
The following are some common terms that are useful to know.
- Portlet
-
Portlets are pluggable user interface software components that are managed and displayed in a web portal. Typically, a portal page is displays as a collection of non-overlapping portlet windows, where each portlet window displays a portlet. WebSynergy portlets confirm to JSR286 standards.
- Instanceable Portlet
-
If you can add many instances of a portlet to your page, the portlet is called an instanceable portlet.
- Non-instanceable Portlet
-
If you can add just one instance of a portlet to your page, the portlet is called a it is a non-instanceable portlet.
- Public Page and Private Page
-
Every individual user account in a WebSynergy site contains public pages and private pages. Pages that can be accessed by a guest user are public pages. Pages that can only be accessed by logging in to a user account are private pages.
- Widget
-
Widgets are similar to portlets, except that unlike portlets, widgets are created using a programming language other than Java, such as PHP or Ruby.
- Friendly URL
-
The modifiable part of the URL for the private page of an user account.
- Theme
-
The "look and feel" settings that are applied to a portal page. Themes can be applied sitewide by a WebSynergy site administrator or on a page-by-page basis by registered users.
- Layout Template
-
A scheme that defines the general layout of portlets and widgets on a portal page. As with themes, layout templates can be applied by site administrators and registered users.
- Guest
-
A user who does not have an account on a given WebSynergy site. Typically, guest users have limited ability to view or modify content on a WebSynergy site.
- User
-
A person who is registered on a WebSynergy site.
- User Group
-
A grouping of users; members of a user group typically share common sets of access permissions.
- Community
-
A collection of users sharing common interests or goals; community members typically share a common set of portlets and pages. For example, a community might have a wiki that is not available to users outside the community. Multiple user groups can coexist within a given community.
- Organization
-
A hierarchical collection of users, user groups, and communities. Multiple communities can coexist within a given organization.
- User Role
-
Permissions and access rights defined for a given user; typically maps to rights within groups, communities, and organizations.
Creating an User Account on WebSynergy
Any user who can accesses the HTTP instance of WebSynergy can create a user account on it. You can sign in by selecting Sign In from the welcome menu. If you are an existing user, you can sign in by using your user name and password. To create a new account click on the Create Account link and follow the instructions to create an account. When you add an user account, the user is added to the list of Users in the Enterprise Admin Portlet. The admin user can monitor all the user accounts.
Also, you can login to WebSynergy by using an OpenID. To be able to login using an OpenID, you need to get an OpenID from any of the popular OpenID providers. For more information, see http://openid.net/. You can get an OpenID from any of the popular OpenID providers such as, are claimID, myOpenID, VeriSign's Personal Identity Provider, myID.net, and myVidoop.
When you create an OpenID with a OpenID provider such as myOpenID, you get an email to the mail ID provided by you. Your OpenID will be authenticated when you check your mail, and you can use the OpenID to login to any of the websites which support OpenIDs. The OpenID is in the form of an URL, and you can sign-in and sign-out of the OpenID. When you have signed into an OpenID, you can login to any of the websites which support OpenIDs by using your OpenID.
The below procedure discusses the example of signing into WebSynergy by using an OpenID created by using myOpenID.
 To login to WebSynergy Using an OpenID
-
Access the HTTP instance for WebSynergy using http://<machine-name>:8080.
-
Choose Sign In from the welcome menu.
-
Click on the OpenID link.
-
Specify your OpenID and click Sign In.
In this example, specify the OpenID from myOpenID. You need to be logged on to your OpenID for the OpenID authentication to work.
-
Disable the Skip this step next time I sign in to http://<machine-name>:8080 option, and click Continue.
-
Provide the required information and click Save.
Note –For the OpenIDs provided by yahoo and many other OpenID providers, you need to register the OpenID by selecting My Account –> Identification –> OpenID.
Defining Password Policies for Users
The admin user can use the Enterprise Admin portlet to define password policies for Users and Organizations. You can change the default password policy or can create a new password policy, and can apply different password policies to different sets of users and organizations.
 To Define a Password Policy
-
Login to WebSynergy as Admin User.
-
Click on the Password Policies tab in the Enterprise Admin portlet.
You need to expand the portlet to access the Password Policies tab.
-
Click on the Add button to add a new password policy.
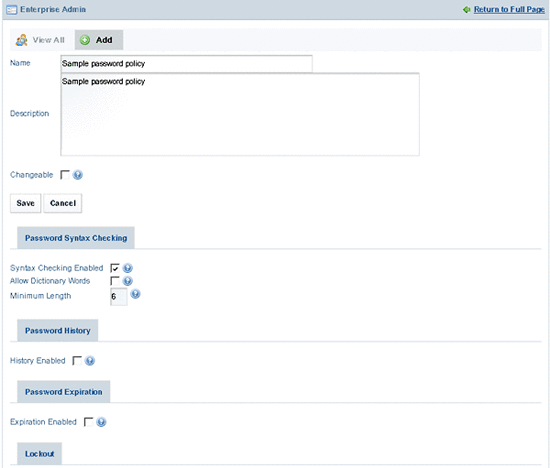
Specify a name and description. You can enable some of the options as per your requirement. To know what an option is, place the cursor on the help button next to the option.
Figure 1–1 Defining a password policy
-
Click Save and return to the full screen.
-
To assign users or organizations to the password policy, click on the Actions button against the password policy and select Assign Members from the menu.
Using the Welcome Menu for Administration Tasks
To be done.
 To use the Welcome Menu
-
Login to WebSynergy as Admin User.
-
Navigate to the Welcome menu, and click on the menu item that you need to access.
Home, Control Panel, My Account, Sign Out, Add Application, Layout Template, Manage Pages, Toggle Edit Controls, and My Places are the items which can be accessed from the welcome menu for the admin user.
- Control Panel
-
To apply control settings
- My Account
-
To apply account settings
- Add Application
-
To add portlets and widgets to your page
- Layout Template
-
To change the layout template
- Manage Pages
-
To specify a friendly URL to your public and private pages
- Toggle Edit Controls
-
To toggle edit controls of the portlets on your page
- My Places
-
To navigate to public and private pages associated with your account
Control Panel
You can use the Control Panel to change the settings applied to My Account, Content, Portal, and Server settings. Select Control Panel from the main menu. The following page appears:
Figure 1–2 Control Panel
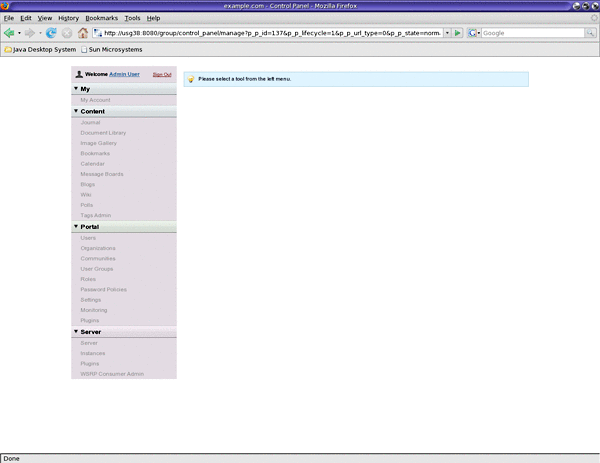
You can select a tool from the left menu to apply settings to it. For example, click on Server under the Server menu.
Figure 1–3 Control Panel
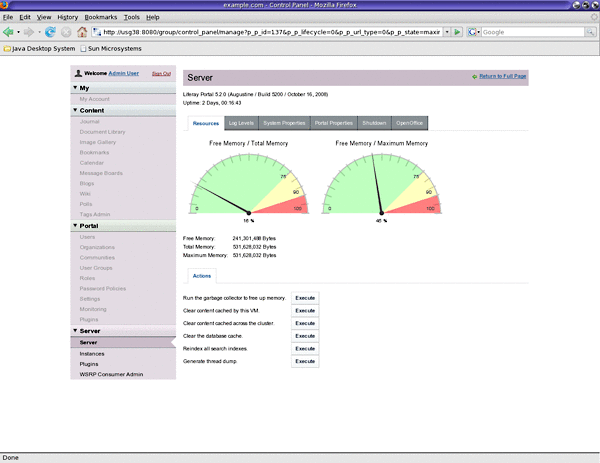
You can perform a number of server maintenance activities from this page.
Similarly, you can apply different kind of settings by using the Control Panel. You can click on the Welcome User and Sign Out links in the top left corner of the page, respectively to return to the main page and to sign-out of WebSynergy.
My Account
To access the My Account page, you can click on 'My Account' for the Control Panel window or you can choose it from the welcome menu.
Figure 1–4 My Account
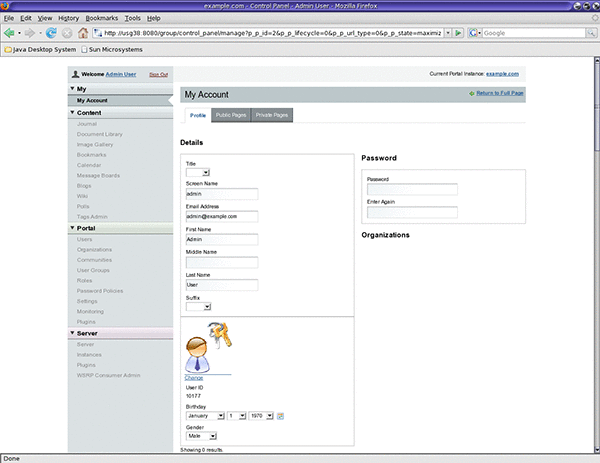
From this page, you can view and make changes to Public Pages and Private Pages associated with your account. Also, you can view and make changes to your profile.
Add Application
You can add a portlet or a widget to your page by clicking Add Application from the welcome menu.
Layout Template
Click on Layout Template from the Welcome Menu.
Figure 1–5 Layout Template
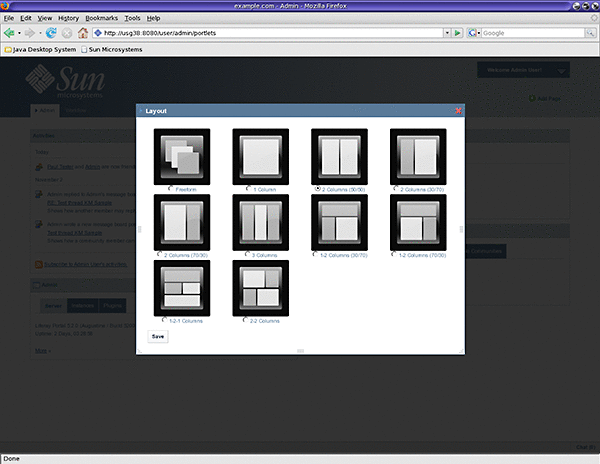
The Layout window appears. The 2 Column (50/50) is the default layout. You can select the radio button for the Layout of your choice and click Save to apply the layout for your account.
Manage Pages
You can use Manage Pages from the Welcome Menu to specify a Friendly URL and apply other settings to a Public Page or a Private Page associated with your account.
You can refer the section on Friendly URLs.
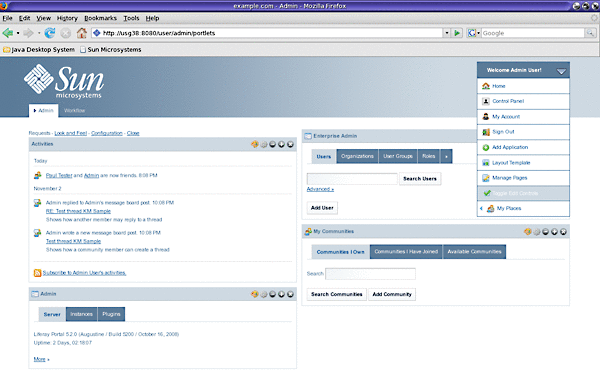
Toggle Edit Controls
You can toggle edit controls off and on by clicking on Toggle Edit Controls from the Welcome Menu.
You can notice that edit controls are on when Toggle Edit Controls is on.
Figure 1–6 Toggle Edit Controls
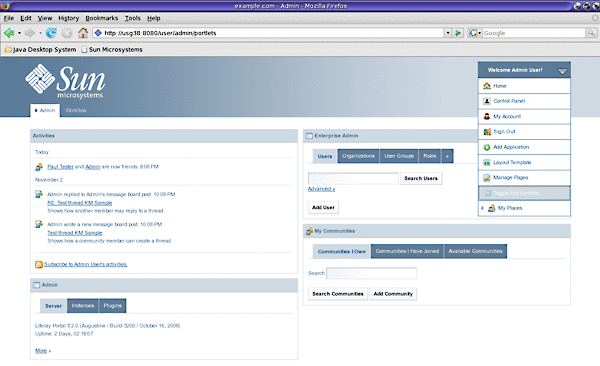
The edit controls for the portlets on your page are off when 'Toggle Edit Controls' is off.
Figure 1–7 Toggle Edit Controls
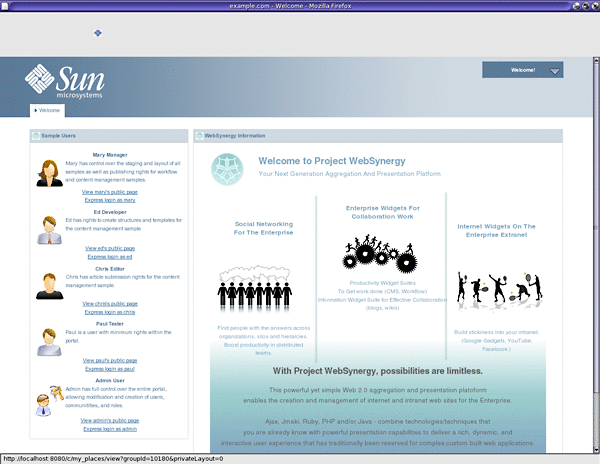
My Places
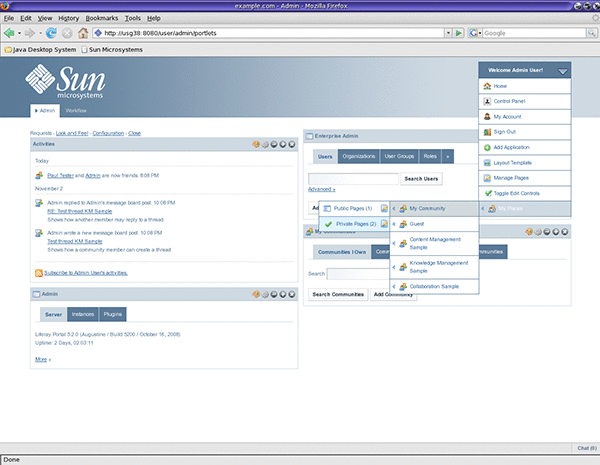
You can select My Places from the welcome menu to navigate to all the public and private pages of the communities associated with your account. When you click on My Places, the page you are on is highlighted in the menu appearing.
Figure 1–8 My Places menu
Note –
A public pageis a page which can be viewed by the Guest user i.e., the public page can be viewed without the need to login. Private pages can be viewed only after you login. For example, to view the public page of the admin user, click on the View admin's public page link. To view admin's private pages, you need to login as the admin user.
Figure 1–9 My Places menu
Setting a Development Environment for WebSynergy
If you are beginning a WebSynergy-based project, chances are you will need to get your developers up and running before your production systems are ready. In order for a developer to do his or her work, an instance of WebSynergy needs to be running on his or her machine. Additionally, to prevent file-locking issues, a developer's version of WebSynergy should not use the embedded database, so a separate database will need to be installed.
WebSynergy makes use of many open source tools for development. This has two benefits: 1) It removes any barriers to entry, as there are no expensive tools to purchase in order to make use of WebSynergy, and 2) It allows WebSynergy to remain as tool-agnostic as possible. If developers wish to use an IDE to work on WebSynergy, great. If developers want to use a text editor and the command line, that's great too. Developers can choose the tools they are most comfortable with to write code on WebSynergy platform.
There are, however, some tools that are required in order to develop with WebSynergy. These are at a minimum:
-
Apache Ant 1.7.0 or above
-
A Java Development Kit
-
A Liferay-supported database (MySQL recommended for a developer machine)
-
The IDE or development environment of your choice
If you will be customizing WebSynergy via the Extension Environment (please see the WebSynergy Developer's Guide for further details), you may need:
-
A Subversion client (optional: you can also download the Liferay source from the web site)
Developing With Apache Ant 1.7.0 or Above
Apache Ant is a build tool that is used extensively by both the Liferay source and the extension environment. You can download the latest version of Ant from http://ant.apache.org. After downloading, uncompress the archive into a folder. You then need to set the ANT_HOME environment variable to add binaries to your PATH.
 To Set the ANT_HOME Variable on
Windows
-
Go to Start -> Control Panel, and double-click the System icon.
-
Go to Advanced, and then click the Environment Variables button.
-
Under System Variables, select New to create the ANT_HOME environment variable.
-
Set the variable name to ANT_HOME and the variable value to apache-install-dir\apache-ant-1.7.0 and click OK.
For example, the installation directory might be C:\Java\apache-ant-1.7.0.
-
Select New again to create the ANT_OPTS environment variable.
-
Set the variable name to ANT_OPTS and the variable value to -Xms256M -Xmx512M and click OK.
-
Select the PATH environment variable and select Edit.
-
Add %ANT_HOME%\bin to the end or beginning of the PATH.
-
Click OK and then click OK again.
-
To test the setting, type ant at a command prompt and press Return.
 To Set the ANT_HOME Variable on
a Linux or Macintosh System
-
In your home folder, open the .bash_profile file in the root directory.
-
Add the following lines to the file, substituting the directory where you installed Ant:
ANT_HOME=/apache-install-dir/apache-ant-1.7.0
ANT_OPTS="-Xms256M -Xmx512M"
PATH=$PATH:$HOME/bin:$ANT_HOME/bin
export ANT_HOME ANT_OPTS PATH
-
To test the setting, type ant at a command prompt and press Return.
- © 2010, Oracle Corporation and/or its affiliates
