 To Create an Article
-
Login to WebSynergy.
-
Click Add Applications from the welcome menu.
-
Expand the Content Management folder.
-
Add the Web Content portlet to the page.
-
Click the Articles tab.
All articles are listed.
-
To create a new article, click the Add Article button.
You can create a basic or an advanced article.
-
To create a basic article:
A basic article do not make use of a template, workflow, and other sophisticated articles.
-
To create an advanced article:
An advanced article too can be created the same way as you create a basic article, but you can apply Form and Presentation, Workflow, Categorization, and Schedule options for the article.
-
Click “<< Advanced” in the top-right corner of the portlet window.
Skip this step if you are already on this page.
-
To select a Structure and a Template for the article, click the Select button besides the Template field.
The option to select a structure and a template is found under Farm and Presentation.
A dialog box appears with the message “Selecting a new template will change the structure, available input fields, and available templates? Do you want to proceed?” appears. Click OK. The “Templates” pop-up appears. You can select a template by clicking on the name of the template. In our example, click “NEWS-LETTER-TEMPLATE” to select it as the template for the article.
The structure used by the template is added to the article. You can note that the structure of the article has changed.
Note –If you want to remove the template or the structure applied to an article, click Remove corresponding to the structure.
-
Specify a name for the article.
-
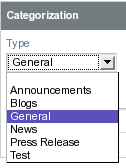
Choose the Type for Categorization that the article will reside in.
Figure 6–4 To create an Article

This makes it easier for users in searching for an article and to organize articles.
-
Set the Schedule details.
Set values for Display Date, Expiration Date, and Review Date fields. The default setting does not set an expiration date and review date.
-
Create the article, and click Save.
-
-
- © 2010, Oracle Corporation and/or its affiliates
