| Skip Navigation Links | |
| Exit Print View | |

|
Sun Blade X6275 M2 Server Module Installation Guide for Windows Operating Systems |
| Skip Navigation Links | |
| Exit Print View | |

|
Sun Blade X6275 M2 Server Module Installation Guide for Windows Operating Systems |
About This Documentation (PDF and HTML)
Introduction to Windows Installation
Getting Started With Windows Server 2008 Installation
Supported Windows Operating Systems
Windows Installation Considerations
Windows Media Delivery Methods
How to Download Server Software
Installing the Windows Server 2008 R2 Operating System
Updating Critical Drivers and Installing Supplemental Software
Installing Server-Specific Device Drivers
Installing Supplemental Software
Incorporating Device Drivers into a WIM Image for WDS
How to Add Drivers to the WIM Image
Before You Begin
For your chosen Windows media delivery method, refer to the following requirements table.
|
For example:
For distribution media: Insert the Windows Server 2008 R2 distribution media (CD labeled #1 or the single DVD) into the local or remote USB DVD-ROM drive.
For ISO image: Copy the ISO image to a system on which you will access the ILOM remote console feature. After launching the remote console, be sure to mount the ISO image from the ILOM Remote Console Devices menu.
For example:
From the ILOM web interface, select “Control Alt Delete” from the keyboard menu of the JavaRConsole.
From the local server, press the Power button on the front panel of the server to power off the server, then press the Power button again to power on the server.
From the ILOM CLI on the server SP, type: reset /SYS
From the ILOM CLI on a CMM, type: reset /CH/BLn/SYS
where n is the number of the server module in the chassis.
The BIOS screen appears.
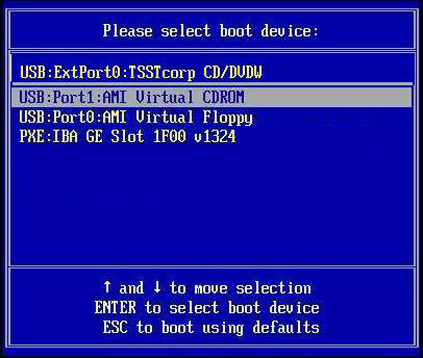
The Boot Device dialog box appears.
Note - The dialog box that appears in your installation might be different depending the type of storage and storage controller installed in your server.

For example:
If you elected to use the Windows Local delivery method, select CD/DVDW.
If you elected to use the ILOM Remote Console delivery method, select Virtual CDROM.
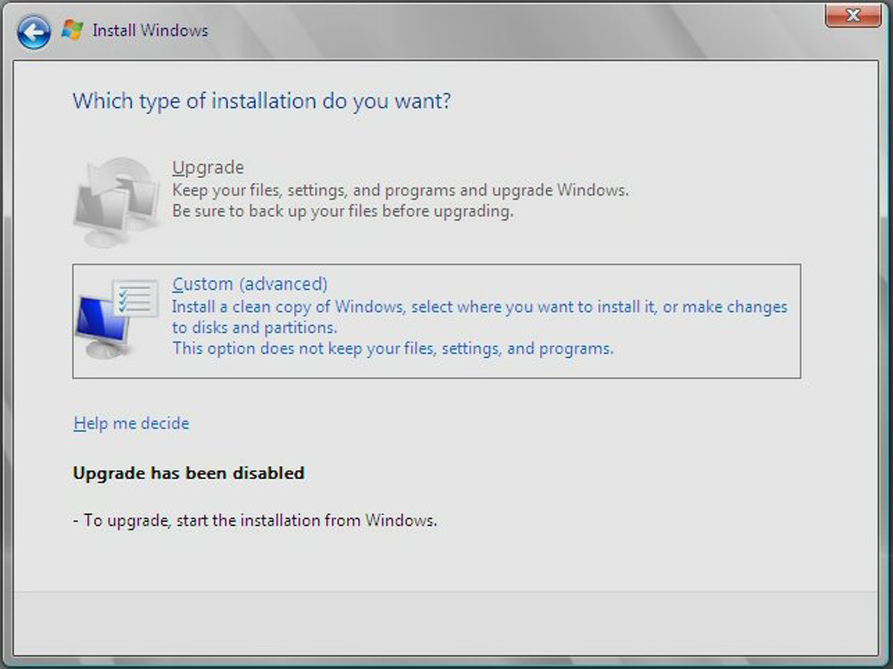
The Windows installation wizard starts.
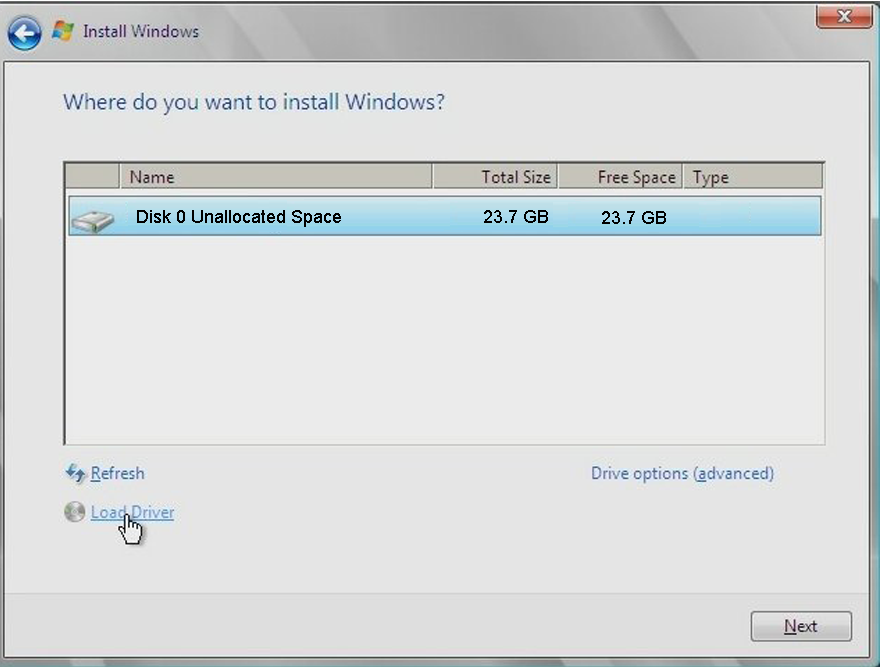
Continue the Windows installation wizard until the following dialog box appears.

The dialog box asks where you want to install Windows:

If you do not want to override the Windows default partition information, click Next, and then skip to Step 9.
If you do want to override the Windows default partition information, click the Driver Options (advanced) option and proceed to Step 8.
 | Caution - Formatting or re-partitioning a pre-existing partition will destroy all data on the partition. |
The Where do you want to Install Windows dialog box appears:
A confirmation window appears.
The partition is created.
The Windows installation begins.
The server reboots multiple times during the installation process. This process can take several minutes.
Note - Windows Server 2008 R2 enforces strong password schemes for user accounts. Password standards include restrictions on length, complexity, and history. For more details, click the Accessibility link at the account creation page.
After the initial user account is created, the Windows Server 2008 R2 desktop appears.
Next Steps
Proceed to Updating Critical Drivers and Installing Supplemental Software.