JavaScript is required to for searching.
Skip Navigation Links
Exit Print View
Sun Blade X6275 M2 Server Module Installation Guide for Oracle VM Operating Systems
search filter icon
search icon

Document Information

Using This Documentation

Product Information Web Site

Related Books

About This Documentation (PDF and HTML)

Documentation Comments

Contributors

Change History

Introduction to Oracle VM Installation

Installing Oracle VM

System Requirements

How to Obtain Oracle VM Software

How to Install Oracle VM Server

How to Install Drivers

How to Install Oracle VM Manager

Creating and Managing VM Resources

Creating a PXE Installation Image for Oracle VM

How to Create a PXE Installation Image for Oracle VM

How to Install Oracle VM Server

Before You Begin

See System Requirements.

  1. Connect to your server console using one of the methods described in Accessing the Host Console Through ILOM in Sun Blade X6275 M2 Server Module Installation Guide.
  2. If not done already, insert your Oracle VM Server distribution CD/DVD or access the ISO image distribution media for the method you chose in step 1.
  3. Power on or reset the server.

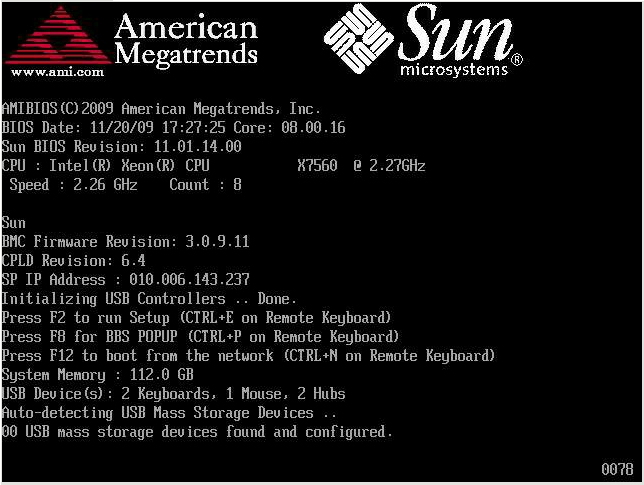
    BIOS messages appear on the console.


    image:Graphic showing BIOS boot screen messages.
  4. When you see a message offering a series of selections, press F8.

    After a delay, a menu offers a selection of boot devices (see the following example).
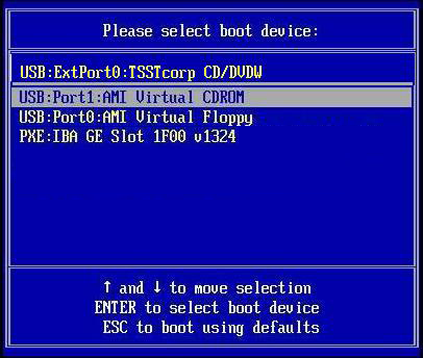

    image:Graphic showing boot device selection menu.
  5. Select a boot device from the list.

    To boot from a physical CD/DVD or from an ISO image, select CD/DVD.

    Control passes to the OS installation program on the media.

  6. Enter the following command at the boot prompt: Enter
  7. Follow the prompts to install the software.

    Oracle VM Server and Oracle VM Agent software are installed.

    For additional information refer to the Oracle VM Server installation documentation at:

    http://download.oracle.com/docs/cd/E15458_01/index.htm

Next Steps