| Oracle® Enterprise Data Quality for Product Data Knowledge Studio Reference Guide Release 5.6.2 Part Number E23610-03 |
|
|
View PDF |
| Oracle® Enterprise Data Quality for Product Data Knowledge Studio Reference Guide Release 5.6.2 Part Number E23610-03 |
|
|
View PDF |
The purpose of data standardization is to make your data consistent and clear. Consistent is ensuring that the output is reliable so that related data can be identified using common terminology and format. Clear is to ensure that the data can be easily understood by those who are not involved with the data maintenance process.
You can standardize data globally (throughout the data lens) or you can perform standardization at very detailed level. This chapter contains information about how to globally standardize data. For information about standardizing by Item Definition, see Chapter 4, "Standardizing Item Definitions."
Standardization controls how your output appears. It allows you to choose how you will output the terms, phrases, or specific attributes within your data set. For example, the data may contain several versions of the word 'highlighter'. Highlighter may appear in the data as 'hi-lighter' and 'hi-liters'. By standardizing the output of the highlighter rule, you can choose the standardization of this word to be 'highlighters', regardless of whether it appeared as 'hi-lighter' or 'hi-liters' in the input data.
The Standardize tab and the associated sub-tabs provide you with all of the functionality needed to globally standardize your data.
The Standardize Terms sub-tab is the default when selecting the Standardize tab for the first time. It allows you to:
assign a replacement method for all of the term variants that have been assigned to terminology rules,
set case,
and easily copy and paste replacement values.
The Terminology Rules pane contains the entire set of term rules that occur in your lens. This includes the rules you created and any rules imported using the Smart Glossaries.
Double-clicking on a terminology rule or the adjacent plus (+) sign expands the rule and its term variants are displayed. These variants are also displayed in the Rewrite Rule pane.
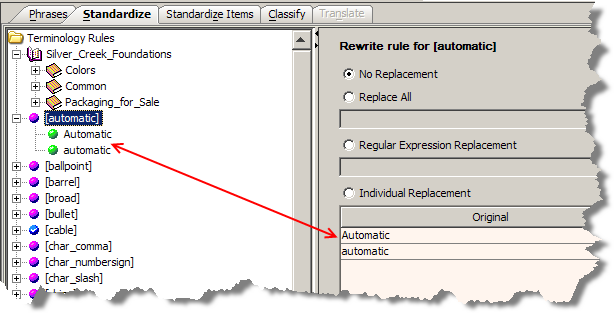
Single-clicking does not expand the rule though the term variants are displayed Rewrite Rule pane.
The main area of this pane allows you to select one of four methods that your data lens will use to standardize terms by replacing the text expression as follows:
The variant is not changed when parsed; no standardization occurs to the term variants for the term rule.
All variants are replaced with the text entered into the field. Any terms subsequently added to a terminology rule using the Define Phrases sub-tab are automatically standardized.
All variants are replaced with the regular expression entered into the field.
Clicking in the Rewrite As column in the Replacement Table activates a field in which you can enter replacement text. Each variant can be changed individually to specify different text.
You can add more term variants by clicking the Add button. The new term variant can be added by clicking in the Original field of the new line, entering the given text, and then enter the replacement text in the Rewrite As field.
You can clear any Rewrite As field by selecting the Delete check box.
The context-sensitive menu for this pane can only be activated in the Replacement Table and the menu options are dependent on the replacement selection. The possible menu options are as follows:
| Make this the Replace All value
Use this option to populate the value for the Replace All method. Copy table to Clipboard |
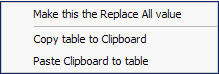 |
| Use this option to copy the contents of the replacement table into your clipboard so that you can paste it into another application. For example, an Excel spreadsheet.
Paste Clipboard to table Use this option if you have created text rewrite rules in another application and want to paste them directly into the replacement table rather then entering them individually. |
|
You can quickly create rewrite rules based on the full forms defined for your term rules in your data lens using the Copy Full Form button. This button is active when the overall Terminology Rules folder, in the pane of the same name, is selected.
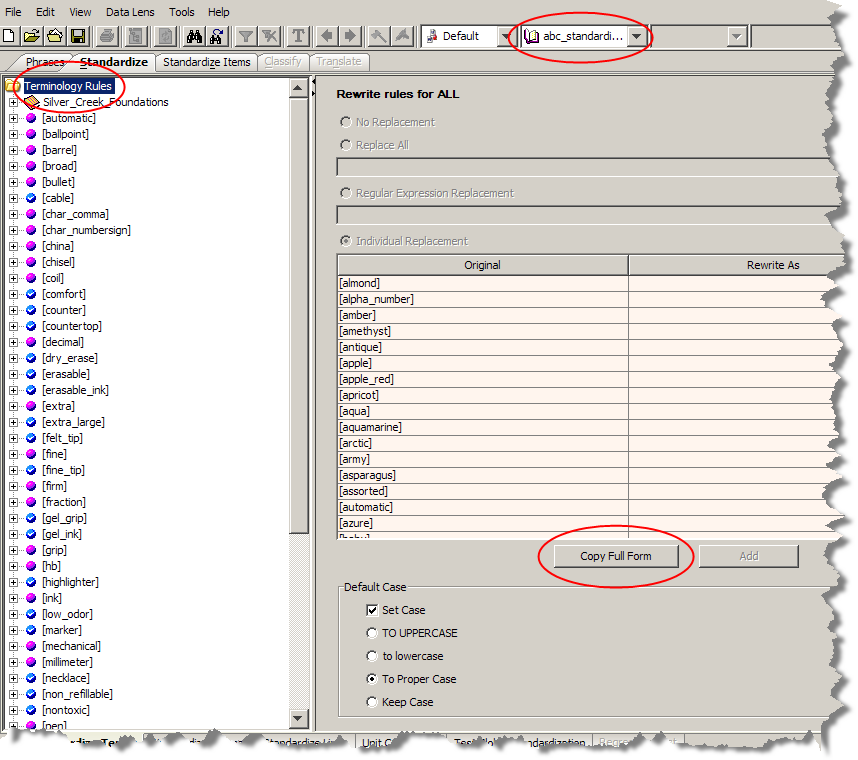
The default case for the Standardization Type currently in use is set in the Default Case section, and applied to the rewrite rules by clicking Copy Full Form.
For example, using the To Proper Case setting means that the full form of each terminology rule (non-abbreviated words) is the default output. The full form 'medium' is the output standardized form even when the abbreviation 'med' is in the original data.
When your data is case-sensitive, you should standardize term variants by clicking the Set Case check box and then selecting how to change the case using the appropriate check box:
TO UPPPERCASE
to lowercase
To Proper Case
Keep Case
Each case type option is shown as the term variants will be standardized. The default is Keep Case, which leaves the case unchanged.
The Standardize Phrases sub-tab allows you to:
Specify the order of the individual term and phrase elements within a phrase and how those elements are combined.
Modify a phrase by adding a new terminology rule.
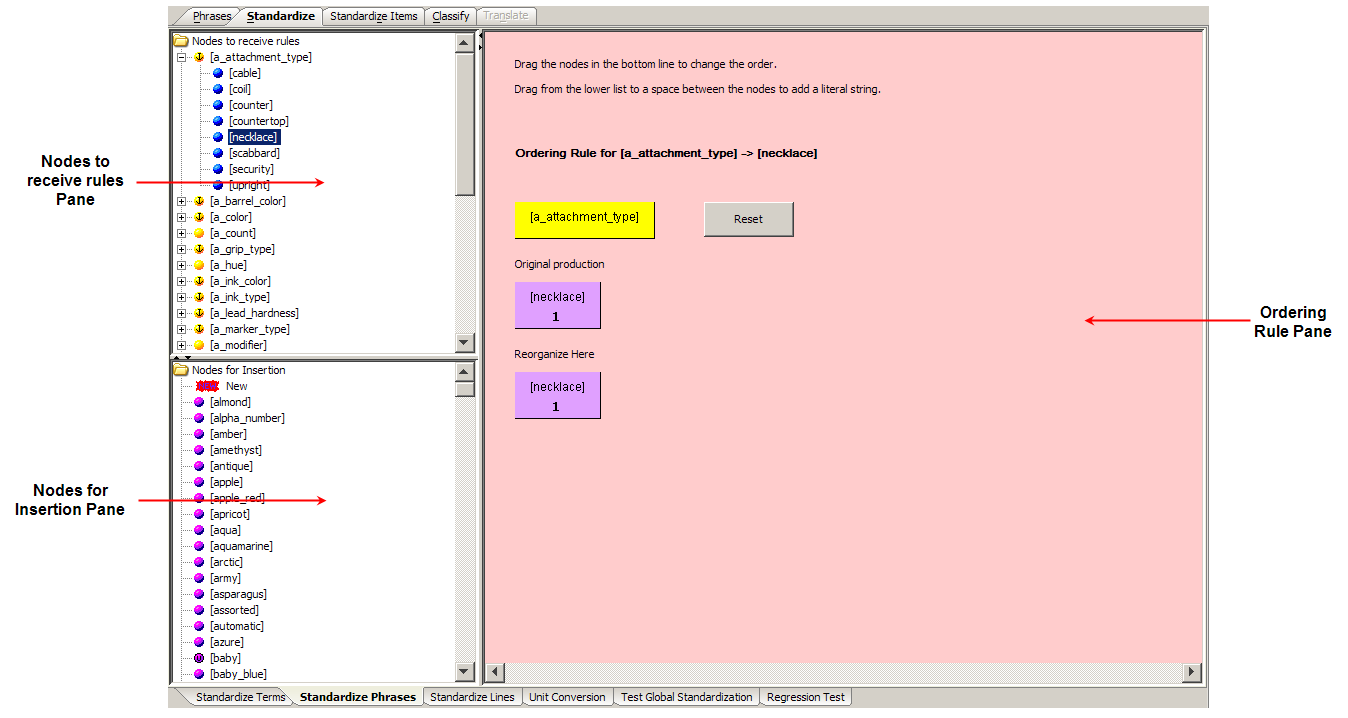
The Nodes to receive rules pane contains a list all of the phrases in the data lens. It allows you to select nodes that you want to reorder so upon selection the node appears in the Ordering Rule pane.
When you make changes in the Ordering Rules pane, the changes to the phrase are reflected in this pane by a change in the phrase icon color or shape.
The Nodes for Insertion pane contains a list of all of the terms in the data lens. If you want to standardize a production by adding an existing terminology rule, drag the nodes from the Nodes for Insertion pane to the Ordering Rule pane.
The Ordering Rule pane allows you to manipulate phrases to create an exact ordering for each node in your data lens. It has two distinct functionality representations to provide you with the ability to change the rule order, join the production terms, or delete a production in this pane.
When you expand a phrase or phrase production in the Nodes to receive rules pane, the proper ordering functionality is displayed in the Ordering Rule pane.
Within the Ordering Rule pane, there are three operations you can perform on a production:
add terms
delete terms
change the order of terms
The ability to join one term with another term gives you the capability to quickly standardize your data and ensure that it is concise. There may be certain phrases that it is helpful to join with a character other than a space. For example, you may want to remove the spaces surrounding the slash in '2 / Package' so that it appears as '2/Package'.
You can join terms, or concatenate, to affect a new rule for the productions of one node by selecting it to change the functionality in the Ordering Rule pane.
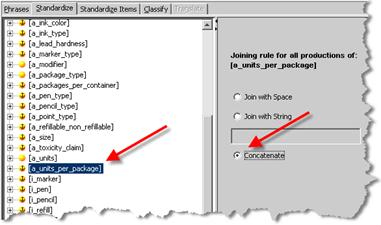
The three concatenation options as follows:
Each term in each production of this phrase is separated with a space in the standardized output.
The terms in all multi-term productions associated with this phrase will be joined together by the string (character) that you specify.
The terms within each multi-term production of this phrase will be concatenated without a space.
When the active functionality is deleting or reordering terms, the original production order is displayed and productions that can be moved or deleted appear below it.
A term can be deleted in this pane by right-clicking on it and clicking Delete.
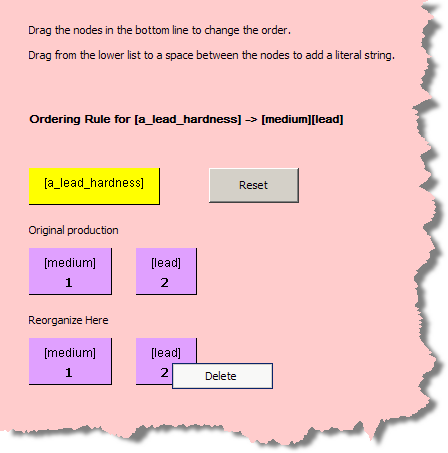
Phrase productions are dragged in the Reorganize Here section to create a new phrase standardization rule (reorder).
The Reset button returns the phrase to its original production and all changes are negated including deletions.
Note:
The Test Global Standardization sub-tab is used to the view all the global standardization changes made in the Ordering Rule pane.The Standardize Lines sub-tab is no longer actively used and will be deprecated in a future release. For further information, contact Oracle Consulting Services.
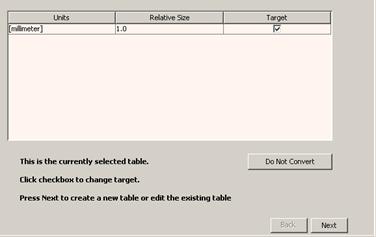
The Unit Conversion sub-tab task allows you to standardize units of measure that are used in your data.
A unit conversion type must be selected to activate this sub-tab. From the Data Lens menu, click Unit Conversion Types, and then select the appropriate conversion type.
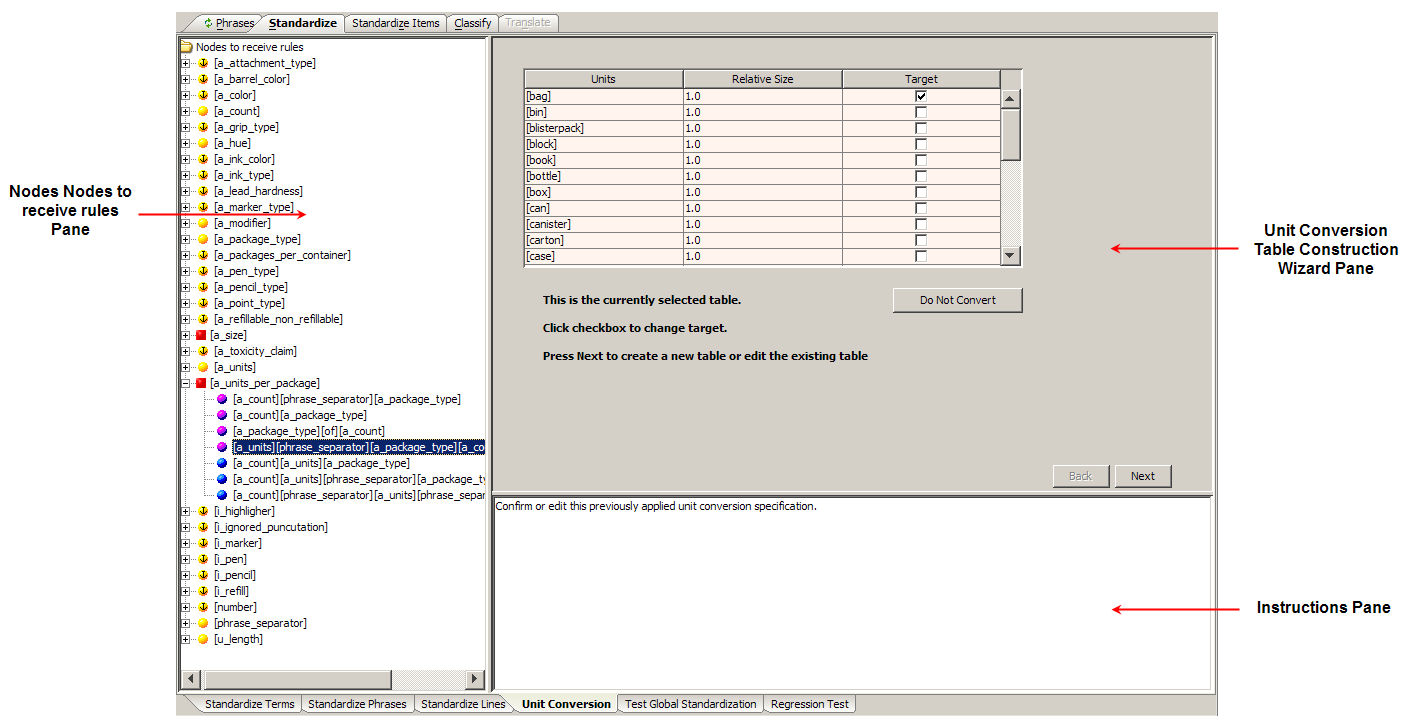
The Nodes to receive rules pane operates in the same manner as on the Standardize Phrases sub-tab (see "Standardize Phrases Sub-Tab"). Additionally, this pane on the Unit Conversion sub-tab indicates the phrase productions that are contained in the Unit Conversion Table.
The Test Global Standardization sub-tab allows you to review the global standardization rules applied to your sample data.
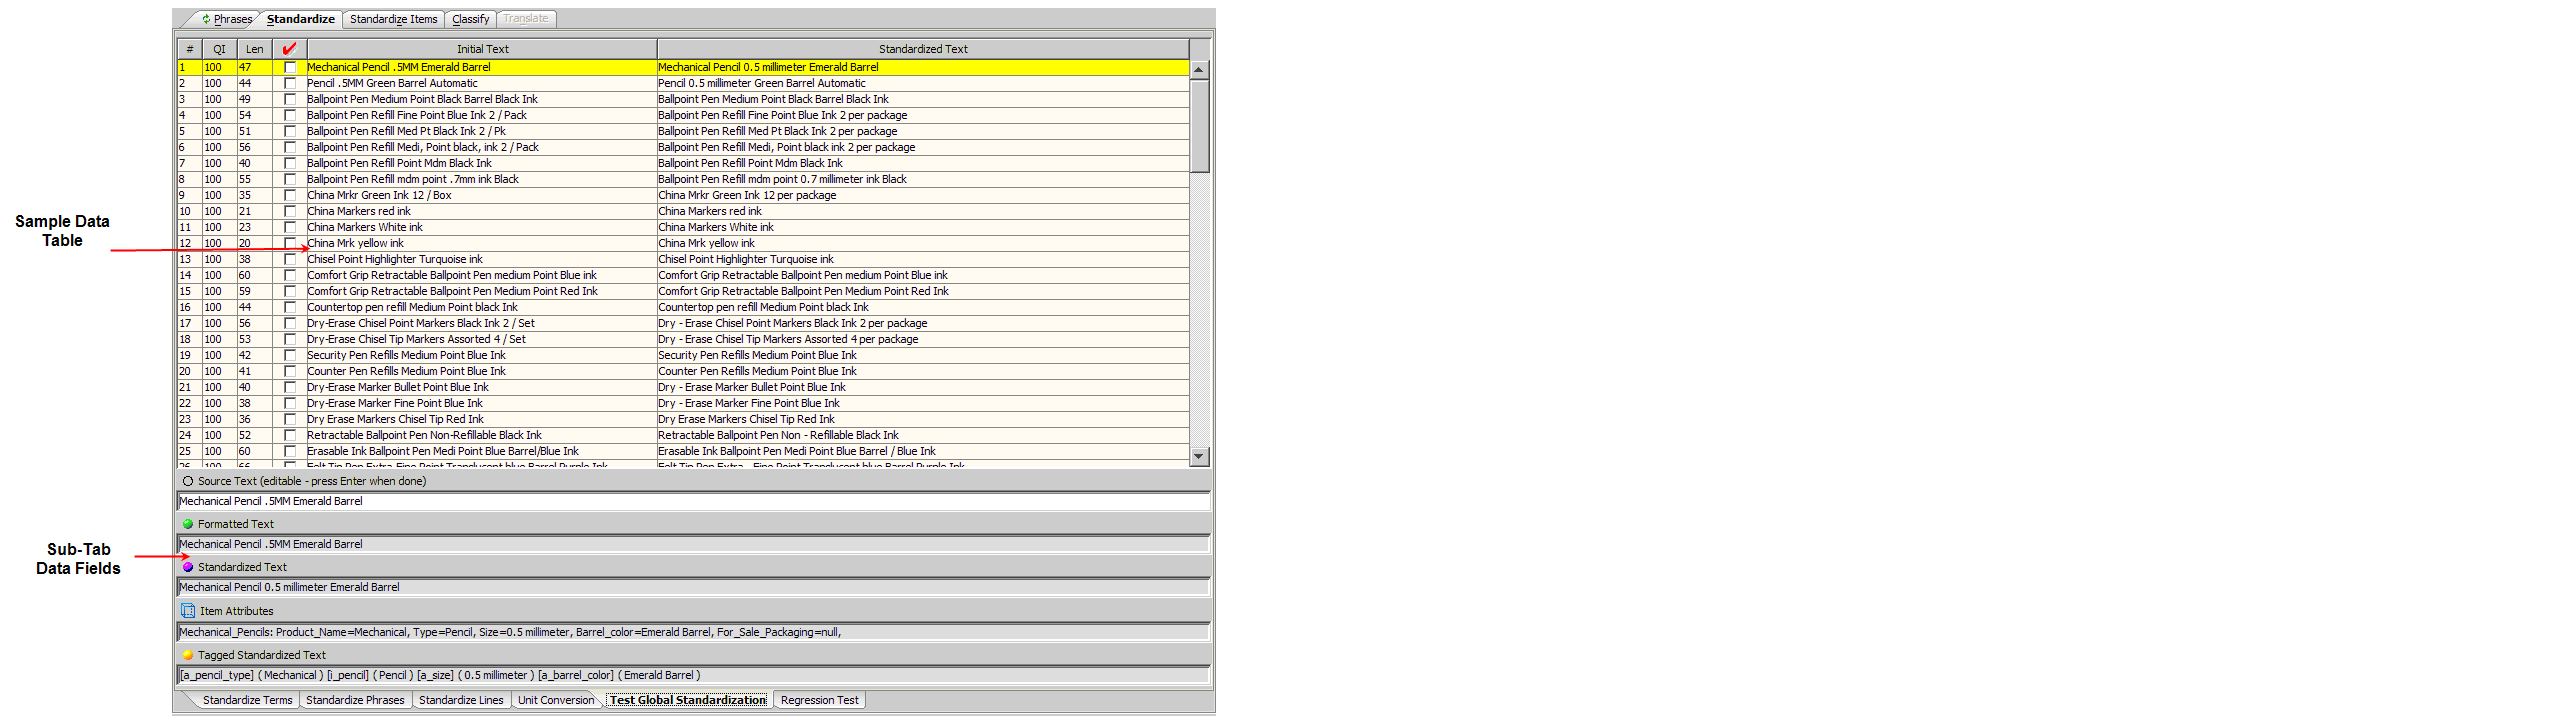
This table displays the original data and the same data after it has been standardized. The five columns, left to right, indicate the following:
The unique number assigned to that line of data.
A number between 0 and 100 that represents the degree to which the line has been standardized.
The number of characters that are in that line of data.
Data you have reviewed and marked as such by selecting the check box in that line of data.
The original, unstandardized line of data that was parsed by the data lens.
The standardized form of the original line of data.
Each of the columns that contain data can be used to sort the table, both ascending and descending, by clicking on the column heading. Clicking a column heading once sorts the table, by the items in the selected column, in ascending alphabetically order. Clicking the same column heading a second time sorts the table again in descending alphabetical order.
Selecting one of the lines in the Sample Data Table displays the following information in the data fields below the table:
The standardized version of the original data.
The fully tagged and standardized version of the initial data.
The result of applying source formatting rules.
The original data. This field can be edited and when you press Enter, you can review the immediate effects of the data lens.
Regression testing is an important part of data standardization so that you can be sure that your data output is as you expect.
If the tab is not active, set the Regression Testing Active Data Lens option. For more information, see "Setting Data Lens Options".

There are two regression testing panes, the 'before' and 'after' states of your sample data.
This pane contains the data that has been standardized based on the rules defined in the data lens before regression testing. The text that appears on the selected line of data in the pane is also displayed in the Current Text field.
This pane contains the text that has been standardized based on the rules defined in the data lens. The text that appears on the selected line of data in the pane is also displayed in the Regression Text field.
If there is no data displayed in the Before and After panes, the sample data has not been initialized; a regression base does not exist. For information about initializing the regression base, see "Creating and Updating the Regression Base".
In either the Before or After pane, the colorized text indicates the following:
The data that has been removed.
That the data has been added. All text should be reviewed for any issues and a visual comparison made between the left hand and right hand panes.
That the standardization has been applied to this term and both the regression and current data will be colorized.
The red check mark or Review column indicates new or changed lines of data and the text on these lines should be reviewed. If the information in the Current Text column is correct and you want to accept the changes as valid progressions, select this check box so that the data is included in the regression testing.
The best practice in creating a regression base is to combine your sample data into a one file. For more information, see "Combining Sample Files".
Combining files does not remove any data; it simply combines the selected sample files into a new, larger file.
Next, make single changes to your regression base sample data file, check your regression sets, and update them as appropriate. Making multiple changes can make the regressions hard to read, which increases the chance that an error is overlooked or is much harder to fix.
To create the regression base, select the Create New Regression Base option on the File menu, and then select the sample data file that you want to use for regression testing. This initializes the regression base and displays the results in the After pane.
You can update the regression base with the reviewed and accepted lines of text (as previously described in Review Column) using the Update Regression Base option on the File menu.
Note:
You should only initialize or update the regression base if you have reviewed or accepted the sample data.Enterprise DQ for Product supplies a default standardization type. This allows you to add standardization rules immediately without having to add a standardization type.
You can create your own standardization schemas to be used throughout your data lens. Standardization types are used with all standardization tabs and sub-tabs.
From the Data Lens menu, select Standardization Types….
Click the Add New button.
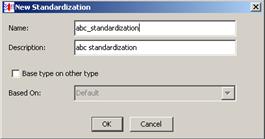
Enter the requested information to create your new standardization type that will be added as a selection option to the Standardization Types list.
If you already have a standardization type created and you want to reuse that knowledge in a new version of the same standardization, select the Base classification on other type check box, and then select the appropriate classification type from the Based On: list.
Note:
This check box is not active if there are no other standardization types.Click OK.
You can select the new standardization type for editing using the standardization type list on the toolbar. When you select a standardization type from the toolbar list, the standardization rules associated with the selected type appear on the Standardize tab. As you maintain your phrases and terms on the Define Phrases sub-tab of the Phrases tab, all standardization types are updated. When you save your data lens, all changes to standardization types are saved.
You can delete standardization types if necessary.
Ensure that you have checked in your latest data lens version.
From the Data Lens menu, select Standardization Types….
Select the standardization type that you want to delete, and then right-click on it.
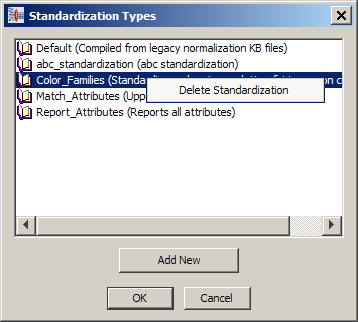
Click Delete Standardization.
A deletion verification dialog is displayed.
If you want to delete the selected standardization type, click OK otherwise click Cancel.
Click OK.
For more information about the use of Standardization Types, see "Unit of Measure Standardization Types".
|
Copyright © 2001, 2011, Oracle and/or its affiliates. All rights reserved. Legal Notices |
|