| Oracle® Enterprise Data Quality for Product Data Fusion PIM Integration Implementation and User's Guide Release 5.6.2 Part Number E27167-01 |
|
|
View PDF |
| Oracle® Enterprise Data Quality for Product Data Fusion PIM Integration Implementation and User's Guide Release 5.6.2 Part Number E27167-01 |
|
|
View PDF |
This chapter provides information you need to get started implementing EDQP to work with Fusion PIMDH, including prerequisites, preparing to implement, and the components in the product package.
To use all of the EDQP for Fusion PIMDH functions, you must ensure that you have completed the following actions before implementing, configuring, or using it:
Install the Fusion PIMDH server (including the latest patch sets)
Install and configure an EDQP 5.6.2 Oracle DataLens Server. For instructions, see Oracle Enterprise Data Quality for Product Data Oracle DataLens Server Installation Guide.
Install the EDQP 5.6.2 client software. For installation instructions, see "Installing the Client Software".
Install and configure the EDQP Services for Excel 5.6.2. For instructions, see Oracle Enterprise Data Quality for Product Data Services for Excel Reference Guide.
You must obtain the current EDQP for Fusion PIMDH product, which is delivered as a patch, from the Oracle Support Web site.
Locate and download the EDQP for Fusion PIMDH version 5.6.2 patch:
Browse to the My Oracle Support Web site:
Log in or register.
Click the Patches & Updates tab.
Click Product or Family (Advanced Search).
Search for Oracle Enterprise Data Quality for Product Data by beginning to enter the name in the Product field and then select it when it is displayed in the list.
Select the Release list, click the arrow adjacent to the Oracle Enterprise Data Quality for Product Data folder.
Select the EDQP 5.6 release and then click Close.
Click Search.
Select the EDQP for Fusion PIMDH version 5.6.2 patch from the list of patches, and then click Download.
Click the patch file name, and then save it to a temporary directory.
Change directories to the temporary directory.
Unzip the patch zip file into the temporary directory.
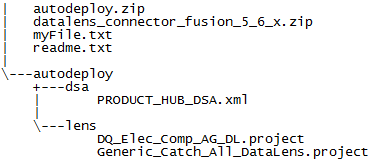
Unzip the autodeploy.zip file into the temporary directory.
Implement the EDQP for Fusion PIMDH application DSA and data lens files:
On your Oracle DataLens Administration Server system, log in using the administrator user you established when installing the server in preparation to copy files.
Note:
This step does not refer to the Oracle DataLens Administration Server Web page.Copy the autodeploy directory that you extracted, from the patch set to a temporary directory, to the local directory of your Oracle DataLens Administration Server. By default, these directories are:
On Linux and UNIX: /opt/Oracle/Middleware/opdq/local
On Windows: C:\Oracle\Middleware\opdq\local
Note:
The preceding directories are the defaults when installing your Oracle DataLens Server; your installation directory may vary.This automatically deploys (autodeploys) the DSA and data lens files to your Oracle DataLens Server. The Oracle DataLens Administration Server polls the local directory every 10 minutes and attempts to autodeploy the DSA and data lens files that are placed in the respective folders under the autodeploy parent folder.
Log out of the Oracle DataLens Administration Server system.
Wait 10 minutes to ensure that the DSA and data lens files have been autodeployed.
Log into the Oracle DataLens Server Administration Web page.
For more information about these Web pages, see Oracle Enterprise Data Quality for Product Data Oracle DataLens Server Administration Guide.
Verify that the DSAs and data lens have been autodeployed.
After implementing Fusion PIMDH, use the Oracle Enterprise Manager to establish or modify the connection with the Oracle DataLens Server. For more information, see Oracle Fusion Applications Post-Installation Guide at:
http://docs.oracle.com/cd/E15586_01/fusionapps.1111/e22380/toc.htm
After you have installed the necessary EDQP components, you must return to PIM and perform the following additional configuration actions that are described in detail in the Item Data Quality Management white paper (see "Related Documents"):
Configure PIM to enable Data Quality (DQ) processing and interface with EDQP.
Configure the DQ ICC verification profile options.
Optional - Define the DQ Alternate Catalog to be used for data processing.
Define the Item Class Catalogs (ICC) that you want to use including valid values for attribute groups and attributes.
For each ICC, set up the DQ processing parameters by defining the attributes that will participate.
|
Copyright © 2012, Oracle and/or its affiliates. All rights reserved. Legal Notices |
|