5 CPS Portlet Functionality
This chapter provides information on the CPS portlets, including a short tutorial on using the CPS portlets, and instructions on how to customize the Library and Guest Library portlets. It covers the following topics:
5.1 Using the CPS Portlets
This section provides a brief tutorial for the following CPS portlets:
The portlet images in this section are examples only. The actual look (icons, colors, and so on) may be different on your portal server instance.
Note:
If the portlets are on WebSphere and users are using Internet Explorer 8, it is recommended that they view the portlet pages in compatibility mode. If they do not, the portlet icon menu options do not render correctly and are not available.5.1.1 Guest Library Portlet
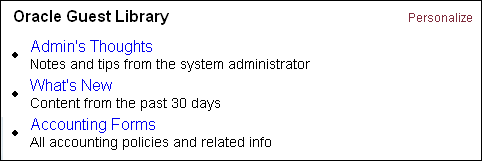
The Guest Library portlet enables portal users to view content that matches criteria predefined by the portlet administrator. The results of the predefined search are delivered to the user in a list format. By selecting a hyperlink item in the list, the user can view the content. The user can also view the content item information page. The content displayed to the user is defined by the portal administrator.
Using the Guest Library Portlet
-
Click Personalize.
Personalization enables users to modify the displayed results from a search.
-
Results Per Page: Enter the number of results to display per page. Default is 20.
-
Sort By: Select the field to sort by. Options are Date or Title.
-
Sort Order: Select the sort order. Options are Ascending or Descending.
-
-
Modify the settings as desired and click Save when edits are complete.
-
Select a search query (for example, What's New).
The results are displayed in a list format.
-
Click Back.
5.1.2 Guest Search Portlet
The Guest Search portlet enables portal users to search the content server for business content. Users can search by subject and/or keyword. The results of the search are delivered to the user in a list format. By selecting a hyperlink item in the list, the user can view the content.
Using the Guest Search Portlet
-
Click Personalize.
Personalization enables users to modify the displayed results from a search.
-
Results Per Page: Enter the number of results to display per page. Default is 20.
-
Sort By: Select the field to sort by. Options are Date or Title.
-
Sort Order: Select the sort order. Options are Ascending or Descending.
-
-
Modify the settings as desired and click Save when edits are complete.
-
Enter a subject or keyword and click Search.
There must be content checked into your content server that contains the specified subject or keyword for items to be retrieved.
-
In the search results screen, click Save.
The save search query screen is displayed. This functionality saves a search to the saved searches list of the Saved Search portlet.
-
The keyword used to perform the search is displayed in the Keywords field. To save a search, enter a title for the query, the content item title, and click Add New Query.
-
Click Back to return to the search results page.
5.1.3 Saved Search Portlet
The Saved Search portlet enables portal users to view previously saved searches. Saved searches are delivered to the user in a list format. By selecting a hyperlink item in the list, the user can view the content of the saved search. Saved searches can be saved to the list by performing a search using the Search portlet and saving that search or by directly defining search parameters on the Saved Search portlet.
Using the Saved Search Portlet
Searches can be saved to the Saved Searches list by performing a search using the Search portlet and saving that search, or by directly defining search parameters on the Saved Search portlet.
-
Click Personalize.
The search criteria page is displayed. On this page you can edit your standard search parameters, view or delete items from your saved search list, and create a new query.
-
Enter the information for the new query:
-
Query Title (for example, Sales Images).
-
Query Description (for example, Sales Department Images).
-
Query Text (for example, dDocTitle <substring> `salesimage`).
Rather than entering a query string, you can perform a standard search using the Search portlet, click Save, and then click Add New Query.
-
-
Click Add New Query.
Figure 5-4 Saved Search Portlet - Saved Query

Description of "Figure 5-4 Saved Search Portlet - Saved Query"
-
Click the saved search title.
The saved search results are displayed in a list format.
-
Click Back.
5.1.4 Contribution Portlet
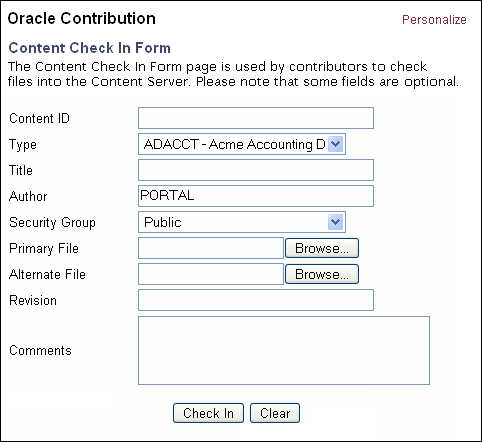
The Contribution portlet enables portal users to submit native business content for management and publishing. Content submission can trigger automatic indexing, workflow routing, subscription services, and security. Additionally, content server add-on modules can enable publishing in a variety of formats.
Using the Contribution Portlet
-
In the Contribution portlet, enter required metadata and any desired optional metadata.
The Contribution portlet enables users to submit business content created in native applications for publishing and revision control. Metadata fields are defined by the content server administrator.
-
In the Primary File field, enter the complete path to the content or click Browse to select the content for check in.
-
Click Check In to submit the content.
Note:
The contribution portlet has some known issues when the component for Oracle URM has been enabled on Oracle Content Server, including:-
Rendering the CPS contribution portlet takes a long time. Please ensure that your WSRP request timeout on the consumer is set to a sufficiently high value.
-
The CPS contribution portlet displays two additional fields: 'Folder ID' and 'Category ID'. These fields are not visible on the Oracle Content Server check-in page.
-
The 'Category or Folders' field is a required field for checking items in to Oracle Content Server. However, the contribution portlet does not highlight this field as a required field. If users attempt to check in a document from the contribution portlet without providing a value for this field, check-in will fail.
5.1.5 Workflow Queue Portlet
The Workflow Queue portlet enables portal users to quickly access content that is waiting for their review. This portlet provides users direct access to their workflow in-boxes for the review and approval of business content. A workflow must be defined for this portlet to provide functionality. The portlet lists the content item title, workflow step information, the last action performed, and the actions allowed, and provides a link to content item information.
A workflow must be defined for this portlet to provide functionality. Refer to the workflow chapter in the Oracle Fusion Middleware Application Administrator's Guide for Content Server for instructions on defining a workflow.
This example assumes a criteria workflow with these properties:
-
Name: WorkflowTest
-
Security Group: Public
-
Has Criteria Definition: ENABLED
-
Field: Type
-
Operator: Matches
-
Value: ADSALES
Also, it assumes a workflow step with these properties:
-
Name: StepOne
-
Type: Reviewer
-
User: User1
Using the Workflow Queue Portlet
-
Locate the Workflow Queue portlet.
-
After creating a workflow, log in as a workflow reviewer (for example, user1) and check in a content item matching the specified criteria.
-
Review the workflow item.
The Workflow Queue portlet provides this functionality:
-
Title: Lists the content item. Click to download file.
-
Workflow Info: Lists the active step. Click to view workflow step information.
-
Last Action: Lists the last action the user performed on the workflow.
-
Action: Users defined as reviewers can approve or reject content. Users defined as reviewer/contributor can approve, reject, or contribute content.
-
Info: Provides content item information.
Figure 5-7 Workflow Queue Portlet - Workflow Defined

Description of "Figure 5-7 Workflow Queue Portlet - Workflow Defined"
-
-
Click Workflow Info step name to view the workflow step information.
-
Click Back.
-
Click Approve or Reject.
Depending on how your approval criteria is defined, clicking Approve may send the content item to the next workflow step. However, each workflow can include multiple review and notification steps, and multiple reviewers can be assigned to approve or reject the content at each step. Thus, a workflow step may require approval from a number of reviewers to go to the next step in the workflow.
Clicking Reject sends the content item back to the most recent Review/Edit Revision or Review/New Revision step. If there is no such step, the content goes back to the original author.
Refer to the workflow chapter in the Oracle Fusion Middleware Application Administrator's Guide for Content Server for more information.
5.1.6 Library Portlet
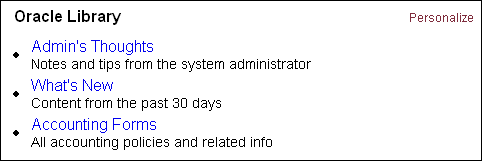
The Library portlet enables portal users to perform a selected metadata and keyword search on the content server, and provides read/write access to the returned content. This portlet also enables users to save queries for display in the Saved Search portlet.
-
Click Personalize.
Personalization enables users to modify the displayed results from a search.
-
Results Per Page: Enter the number of results to display per page. Default is 20.
-
Sort By: Select the field to sort by. Options are Date or Title.
-
Sort Order: Select the sort order. Options are Ascending or Descending.
-
-
Modify the settings as desired and click Save when edits are complete.
-
Select a search query (for example, What's New).
The search results are displayed.
-
Click the Info icon.
-
In the Content Info page, these options can be selected from the list:
-
Content Information
-
Check Out
-
Check in Similar
-
Send Link by Email
-
-
Click Back.
5.1.7 Search Portlet
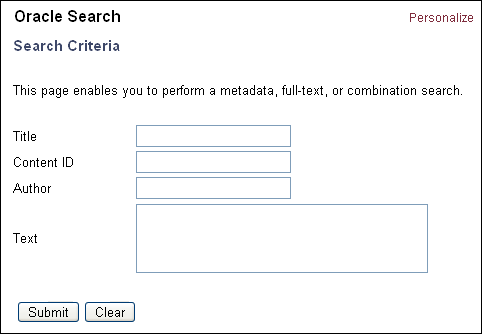
The Search portlet enables portal users to view content that matches user-defined query criteria, and provides read/write access to the returned content. This portlet also enables users to save queries for display in the Saved Search portlet.
-
Enter a search query (for example, Sample) and click Submit.
The results from the search query are displayed.
-
Click the Info icon.
-
In the Content Info page, these options can be selected from the list:
-
Content Information
-
Check Out
-
Check in Similar
-
Send Link by Email
-
-
Click Back.
5.1.8 Metadata Admin Portlet
The Metadata Admin portlet enables administrators to modify the properties of custom metadata.
Using the Metadata Admin Portlet
-
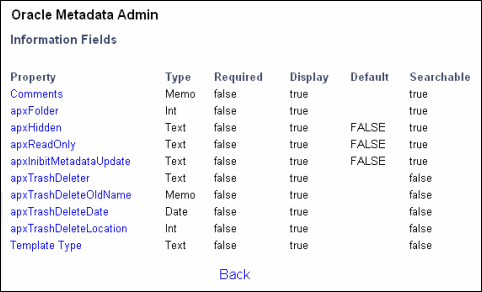
Click Information Fields.
The Information Fields list is displayed. Information fields are defined by the content server administrator.
Figure 5-11 Metadata Admin Portlet - Information Fields
Description of "Figure 5-11 Metadata Admin Portlet - Information Fields"
-
Click an information field (for example, Comments).
The Edit Field page is displayed.
-
Make changes as desired and click Apply or Cancel.
5.2 Customizing the Portlets
This section provides information on customizing the portlets including customizing the Library and Guest Library portlets that display queries predefined by the administrator.
These procedures are performed by an administrator and are not user configurable.
Administrators can define the business content displayed to users in portlets by editing the portlet.xml file. A query string defines the parameters to search on, and any metadata field can be used to define the search query.
-
Uncompress the CPS distribution file or locate the deployed portlet EAR file on your Portal Server instance.
-
Uncompress the WAR file (for example, cps-oracle-war-<version>.war).
-
In the WEB-INF directory, open the portlet.xml file in a text-only editor.
-
Locate the <portlet> entries for the Library and Guest Library portlets.
<portlet>
  <description>Oracle Library Portlet</description>
  <portlet-name>stellentLibrary</portlet-name>

<portlet>
  <description>Oracle Guest Library Portlet</description>
  <portlet-name>stellentGuestLibrary</portlet-name>
-
For either the Library or the Guest Library portlet, locate the <preference> entries that provide the query definitions. To customize the portlet, you must edit the <value> entries.
<preference> <name>query1.title</name> <value>What's New</value> </preference> <preference> <name>query1.description</name> <value>Content from the past 30 days</value> </preference> <preference> <name>query1.query</name> <value>dInDate > `<$dateCurrent(-30)$>`</value> </preference>
-
Edit the title and description entries. The title is the search title displayed to the user and the description is the short search description displayed to the user.
For example: Important Notices and Important messages from the company president.
<name>query3.title</name>
<value>Important Notices</value>

<name>query3.description</name>
<value>Important messages from the company president.</value>
-
Edit the query entry defined by a query string using standard XML notation. To code a query string, use a predefined metadata parameter, a query string modifier, and an appropriate metadata value.
For example, define a query string that returns content items checked in by author president (dDocAuthor matches president):
<name>query3.query</name> <value>dDocAuthor <matches> 'president'</value>
Any predefined metadata parameter can be used to create commands, for example:
-
dInDate: The content item release date (that is, the date the content item was released to the web).
-
dDocAuthor: The content item author (for example, user1 or sysadmin).
-
dDocType: The content item type (for example, ADACCT or FILES).
You must use the metadata parameter, not the field title (for example, dDocAuthor not Author).
These query string modifiers can be used:
-
contains
-
starts
-
ends
-
matches
-
substring
-
-
When your edits are complete, save the portlets.xml file.
-
Recompress the WAR file.
-
Deploy the updated version of the edited portlet.
