22 Managing Groups
This section contains the typical group management tasks you can perform with Oracle CEP Visualizer.
For more information, see Section 20.1, "User, Group, and Role Management".
22.1 Creating and Editing a Group
This section describes:
-
Section 22.1.2, "How to Change the Roles to Which a Group Maps"
-
Section 22.1.3, "How to Change the Groups to Which a User is Assigned"
22.1.1 How to Create a Group
Oracle CEP is configured by default with a set of groups that are in turn mapped to roles. See Section 20.1, "User, Group, and Role Management" for details.
This section describes how to create a new group.
-
Log on to Oracle CEP Visualizer as a user with the
Adminrole. -
In the left pane, click the Domain > Security node, where Domain refers to the name of your Oracle CEP domain.
-
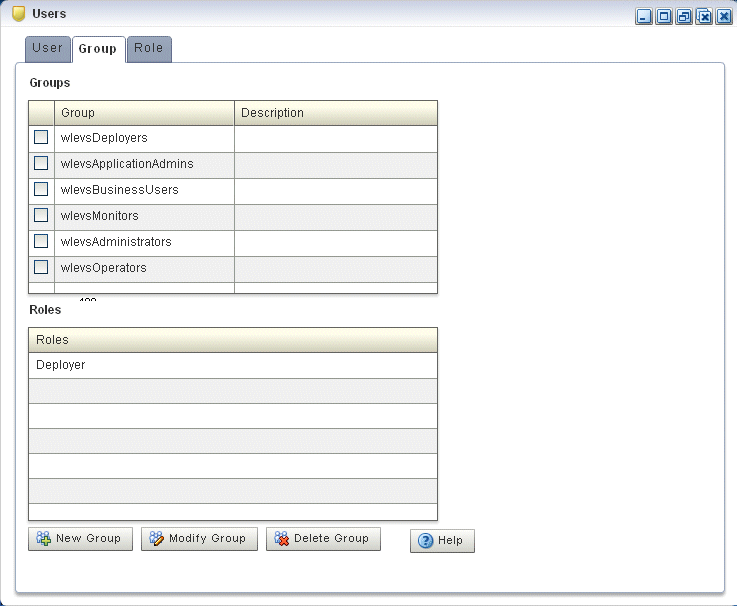
In the right pane, click the Group tab.
The Group tab appears as Figure 22-1 shows.
-
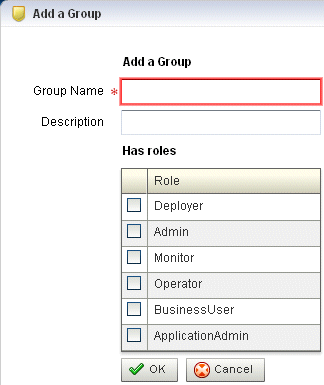
Click the New Group button at the bottom of the right pane.
The Add a Group panel appears as Figure 22-2 shows.
-
Configure the Add a Group panel as Table 22-1 describes.
Table 22-1 Add a Group Panel Attributes
Attribute Description Group NameEnter the name of the group.
DescriptionAn optional description for this user.
Has rolesCheck one or more roles to which the group maps. Each role grants access to an application.
You must select at least one role. For more information, see Chapter 23, "Managing Roles".
-
Click OK.
When the group has been successfully created, a confirmation message appears momentarily.
22.1.2 How to Change the Roles to Which a Group Maps
You can change existing groups, including the default groups, to change the roles they map to.
To change the roles to which a group maps:
-
Log on to Oracle CEP Visualizer as a user with the
Adminrole. -
In the left pane, click the Domain > Security node, where Domain refers to the name of your Oracle CEP domain.
-
In the right pane, click the Group tab.
-
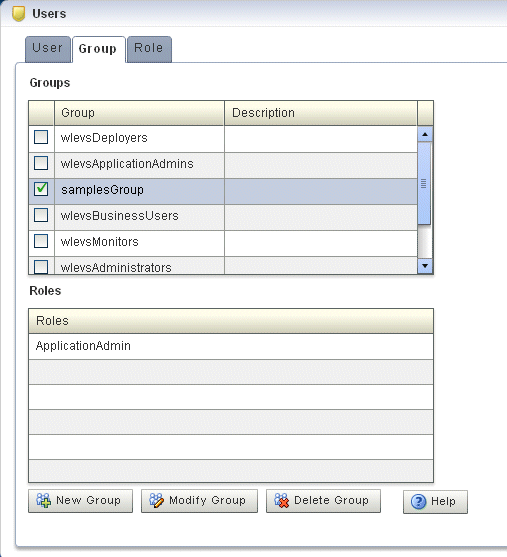
In the Group table, check the boxes to the left of the name of the groups that you want to modify as Figure 22-3 shows.
-
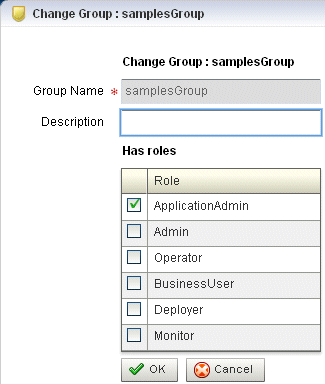
Click the Modify Group button at the bottom of the right pane.
The Change Group panel appears as Figure 22-2 shows.
-
Configure the Change Group panel as Table 22-1 describes.
Table 22-2 Change Group Panel Attributes
Attribute Description Group NameThe name of the group. This is a read-only field..
DescriptionAn optional description for this user.
Has rolesCheck one or more roles to which the group maps. Each role grants access to an application.
You must select at least one role. For more information, see Chapter 23, "Managing Roles".
-
Click OK.
When the group has been successfully modified, a confirmation message appears momentarily.
-
Optionally modify the description of the group.
-
Click OK.
22.1.3 How to Change the Groups to Which a User is Assigned
To change the groups to which a user is assigned, see Section 21.1.2, "How to Edit a User".
22.2 Deleting a Group
You can delete an existing group using the Oracle CEP Visualizer.
22.2.1 How to Delete a Group
Oracle CEP is configured by default with a set of groups that are in turn mapped to roles: you cannot delete the default groups. See Section 20.1, "User, Group, and Role Management" for details.
This section describes how to delete a group that you created.
-
Log on to Oracle CEP Visualizer as a user with the
Adminrole. -
In the left pane, click the Domain > Security node, where Domain refers to the name of your Oracle CEP domain.
-
In the right pane, click the Group tab.
-
In the Group table, check the boxes to the left of the name of the groups that you want to delete as Figure 22-5 shows.
-
Click the Delete Group button at the bottom of the right pane.
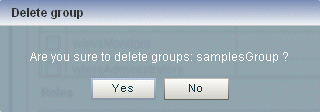
A confirmation dialog appears as Figure 22-6 shows.
-
Click Yes.
When the group has been successfully deleted, a confirmation message appears momentarily.
