| Oracle® Argus Insight Installation Guide Release 7.0 E22883-01 |
|
 Previous |
 Next |
The chapter describes steps to configure and work on the Cognos 8 environment.
Before attempting to configure the environment, verify that you have installed all required hardware and software. For more information, see the Hardware and Software Requirements section.
|
Note: You must configure the Cognos 8 environment in the order shown in this document. |
Refer to the attached embedded document to configure IIS 7.0 on the Cognos 8 Server, using Microsoft Windows 2008.
Double-click on the attached icon to open the document (available in the PDF version only). Alternatively, you can also right-click the icon and click Save Embedded File to Disk... to save the document locally.
Use the following procedure to configure the JDBC in the Cognos 8 environment.
Copy the ojdbc5.jar file from the Oracle installation path C:\app\Administrator\product\<Oracle Version>\client_1\sqldeveloper\jdbc\lib” to the following location on the Cognos 8 environment:
<Cognos Installation Path>\c8\webapps\p2pd\web-inf\lib
|
Note: In the above example, C:\app is only a reference about an Oracle installation path. |
Copy the PR.asp file from the following location on the Argus Insight Web Server:
\\<Argus Insight Installation Path>ArgusInsight\ASP\Reports to the following path on the Cognos 8 Server:
\\<Cognos 8 Installation>Cognos\c8\cgi-bin
Use the following procedure to configure custom Java authentication.
Copy the CAM_AAA_JDBC_PowerReports.jar file from the following location
\\<Cognos 8 Server>\<Argus Insight Installation Path>\Java Authentication\JDBC_PowerReports
to this location on the Cognos8 Server:
\\<Cognos 8 InstallationPath>\ c8\webapps\p2pd\WEB-INF\lib
Copy the JDBC_Config_PowerReports.properties file from this location:
\\<Cognos 8 Server>\<Argus Insight Installation Path>\Java Authentication\JDBC_PowerReports
to this location on the Cognos8 Server:
\\<Cognos 8 Installation Path>\c8\Configuration
Open the JDBC_Config_PowerReports.properties file in Notepad.
Go to the Cognos Server and modify the existing values of the parameters in the JDBC_Config_PowerReports.properties file, as shown in the following table.
| Parameter | Value to Enter |
|---|---|
| Server | Enter the IP address or the name of the Database Server. |
| SID | Enter the instance/service name of the Argus Insight datamart. |
| Port | Enter the database port number. |
Save and close the file.
Copy the file ContentStore.zip from this location:
\\<Cognos 8 Server Name>\<Argus Insight Installation Path>\Cognos 8\Contentstore
to this location on the Cognos 8 Server:
<Cognos 8 Installation Path>\C8\Deployment
Use the following procedure to configure the Cognos 8 environment.
Select Start > Programs > IBM Cognos 8 > IBM Cognos Configuration to open the IBM Cognos Configuration window.
|
Note: The windows that are displayed during the Cognos 8 configuration are labeled as either IBM Cognos 8 or Cognos 8. Both labels refer to the same Cognos configuration. |
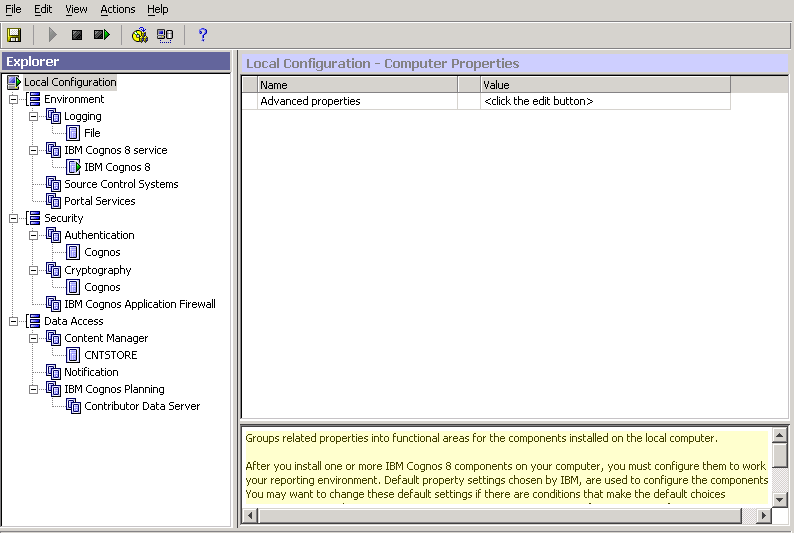
Select the Environment group in the control tree.
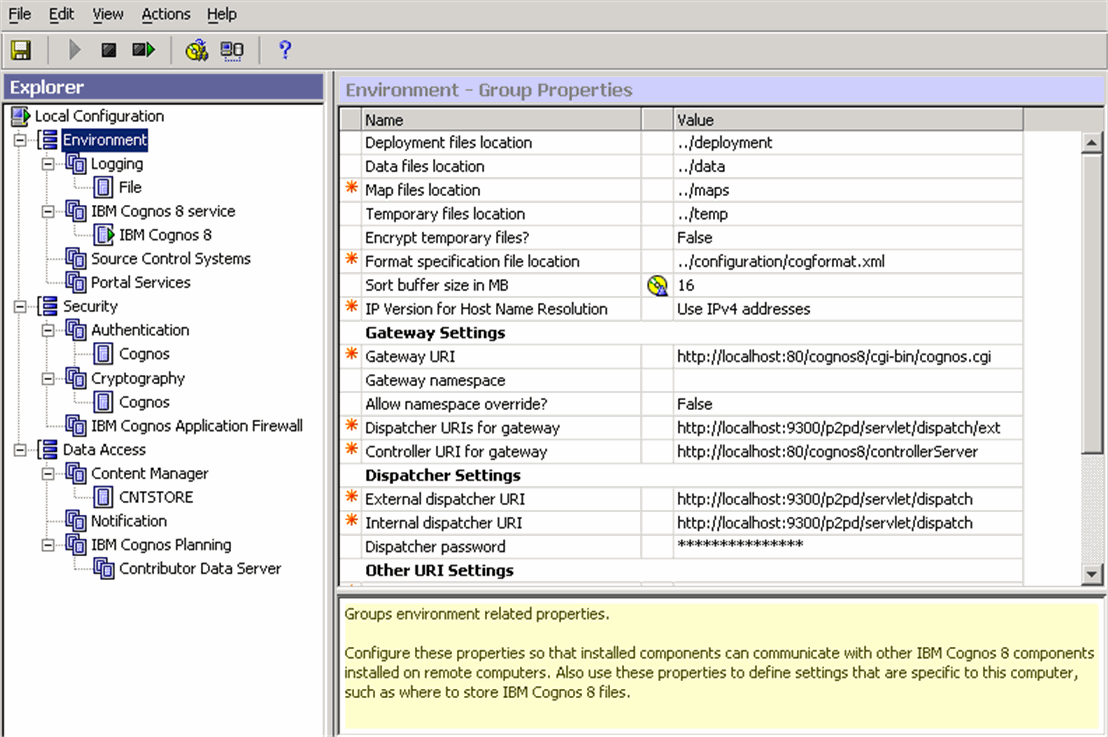
Verify that the values of the environment attributes in the right pane are set as shown in the following table:
| Item | Value |
|---|---|
| Sort Buffer Size in MB | 16 |
| Gateway URI | http://localhost:80/cognos8/cgi-bin/cognos.cgi |
| Dispatcher URI for Gateway | http://localhost:9300/p2pd/servlet/dispatch/ext |
| Controller URI for gateway | http://localhost:80/cognos8/controllerServer |
| External dispatcher URI | http://localhost:9300/p2pd/servlet/dispatch |
| Internal dispatcher URI | http://localhost:9300/p2pd/servlet/dispatch |
| Content Manager URIs | http://localhost:9300/p2pd/servlet |
| Dispatcher URI for external applications | http://localhost:9300/p2pd/servlet/dispatch |
In the control tree, select the Logging sub-group under the Environment group.
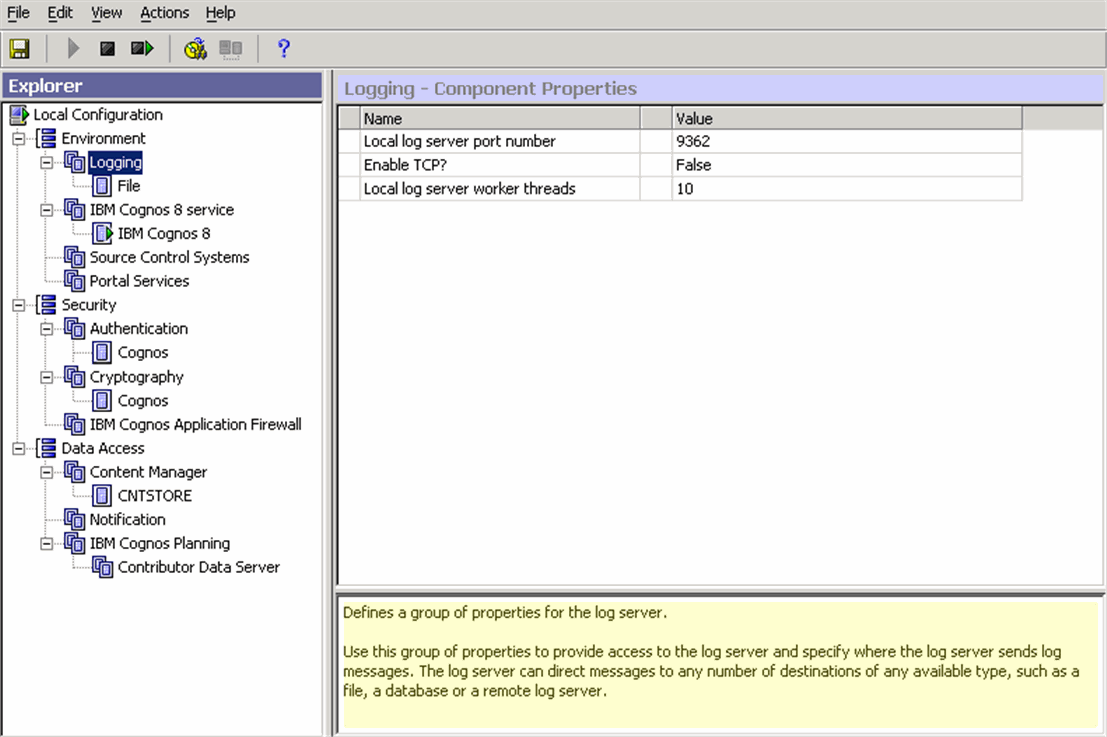
Verify that the items in the right pane display the following values. Modify the values if they are not as specified below:
| Item | Value |
|---|---|
| Local Log Server Port Number | 9362 |
| Enable TCP | False |
| Local Log Server worker Thread | 10 |
In the control tree, select Security > Authentication > Cognos.
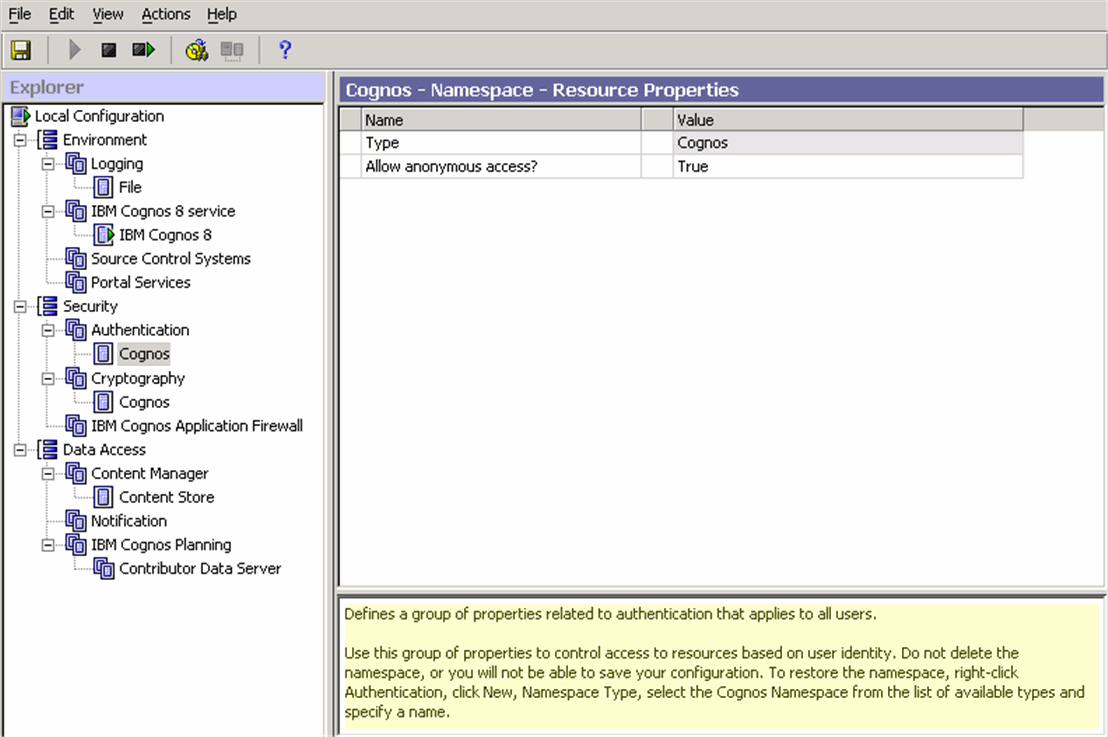
Verify that the item in the right pane displays the following value. Modify the value if it is not set, as shown below:
Item: Allow anonymous access?
Value: True
In the left pane, click IBM Cognos Application Firewall to change the value of Enable CAF validation? to False.
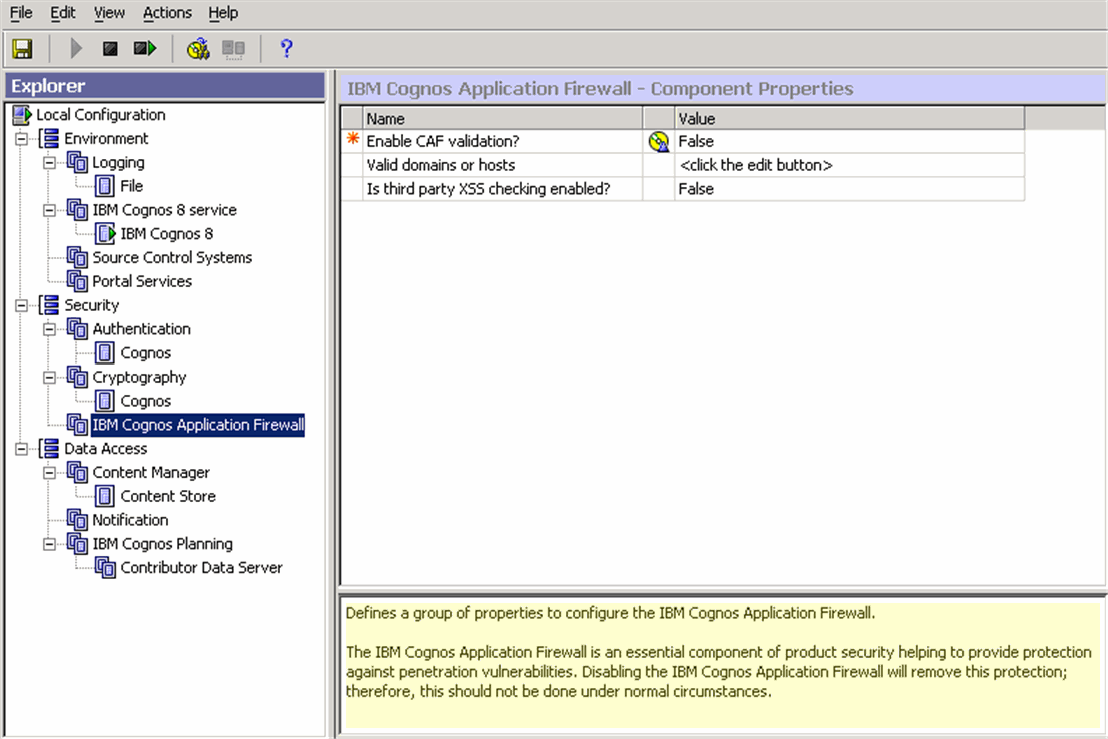
In the control tree, select Data Access > Content Manager.
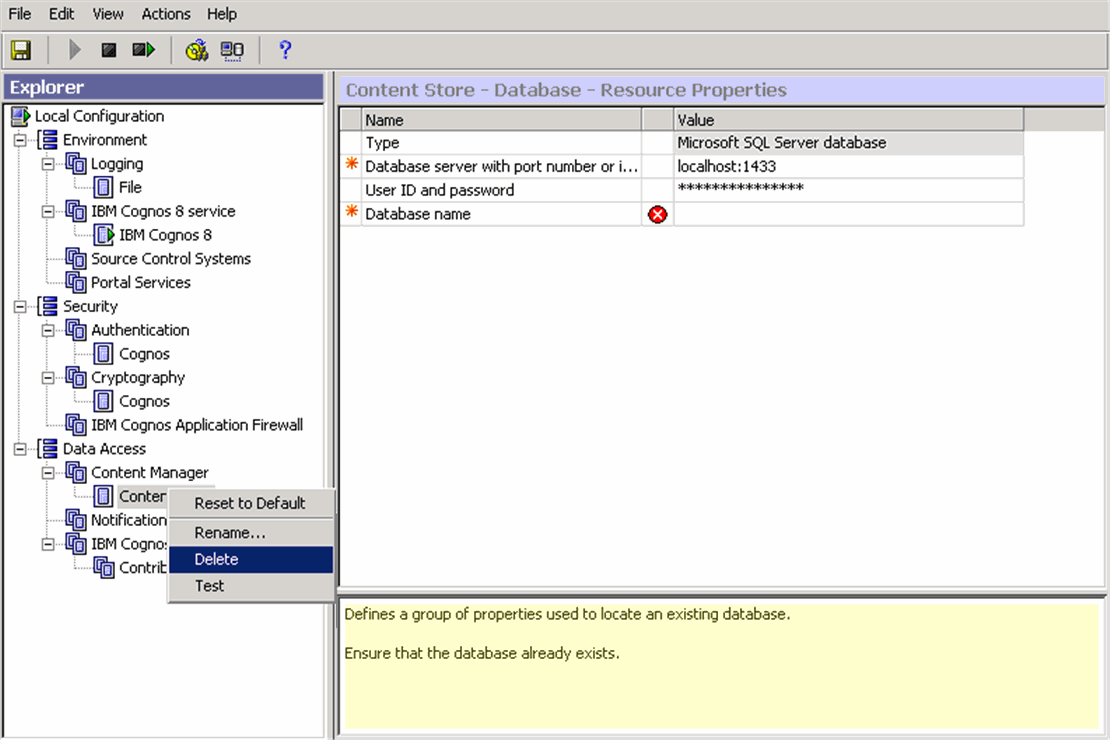
Right-click the Content Store item in the left pane. Select Delete from the popup menu.
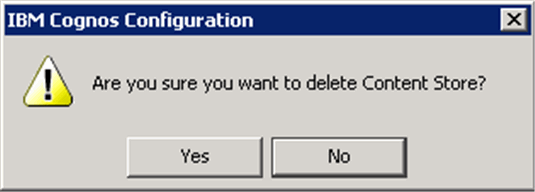
When the system opens the following dialog box, click Yes.
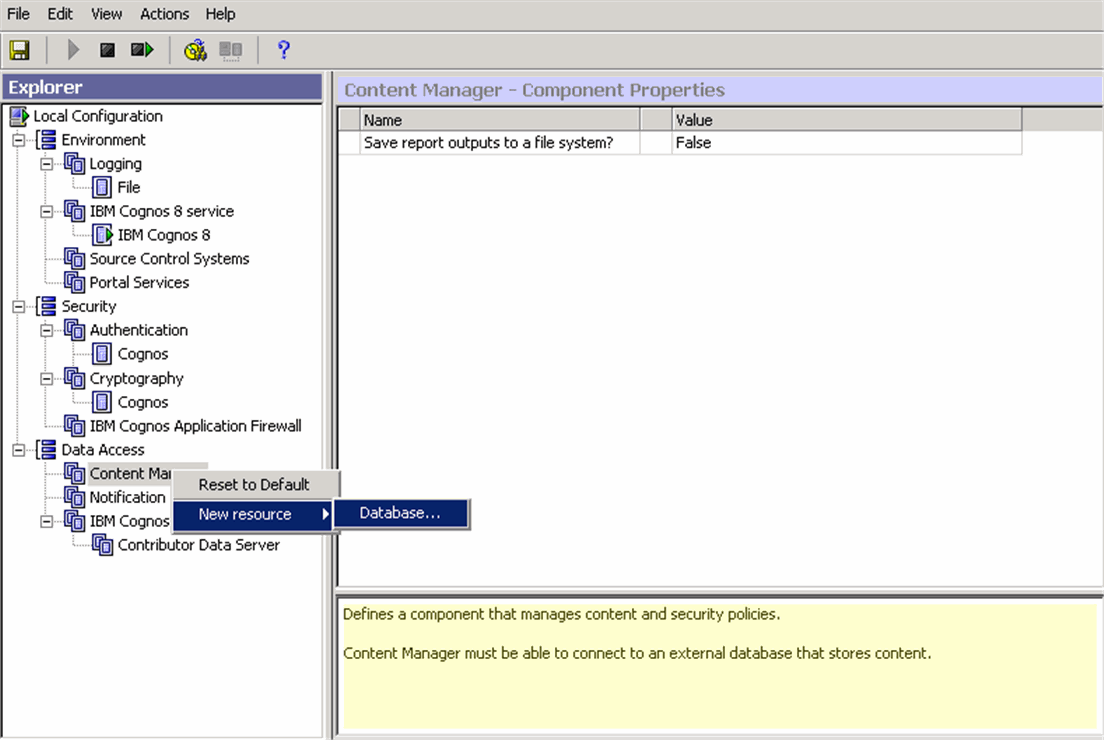
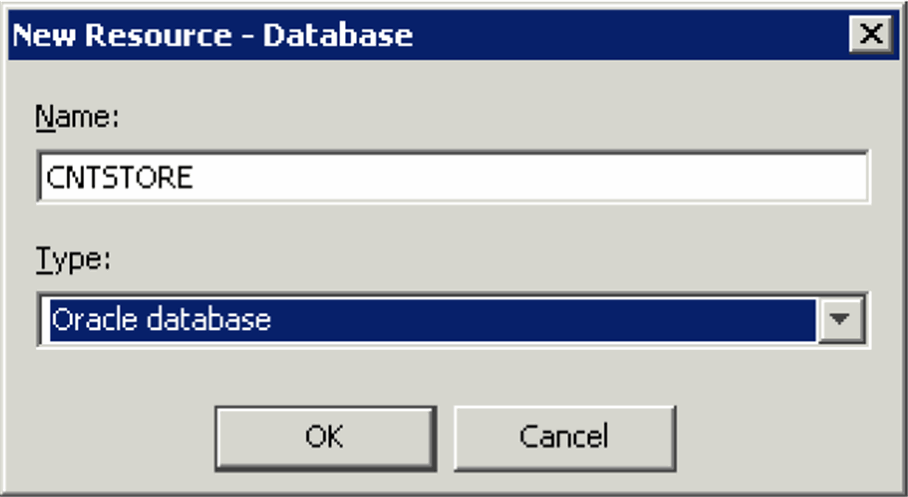
Go to Data Access>Content Manager and right-click Content Store and select New Resource > Database.
When the system opens the New Resource Database dialog box:
Type CNTSTORE in the Name field. This is the name of the database resource.
Select Oracle database from the Type drop-down list.
Click OK.
When the system opens the IBM Cognos Configuration window:
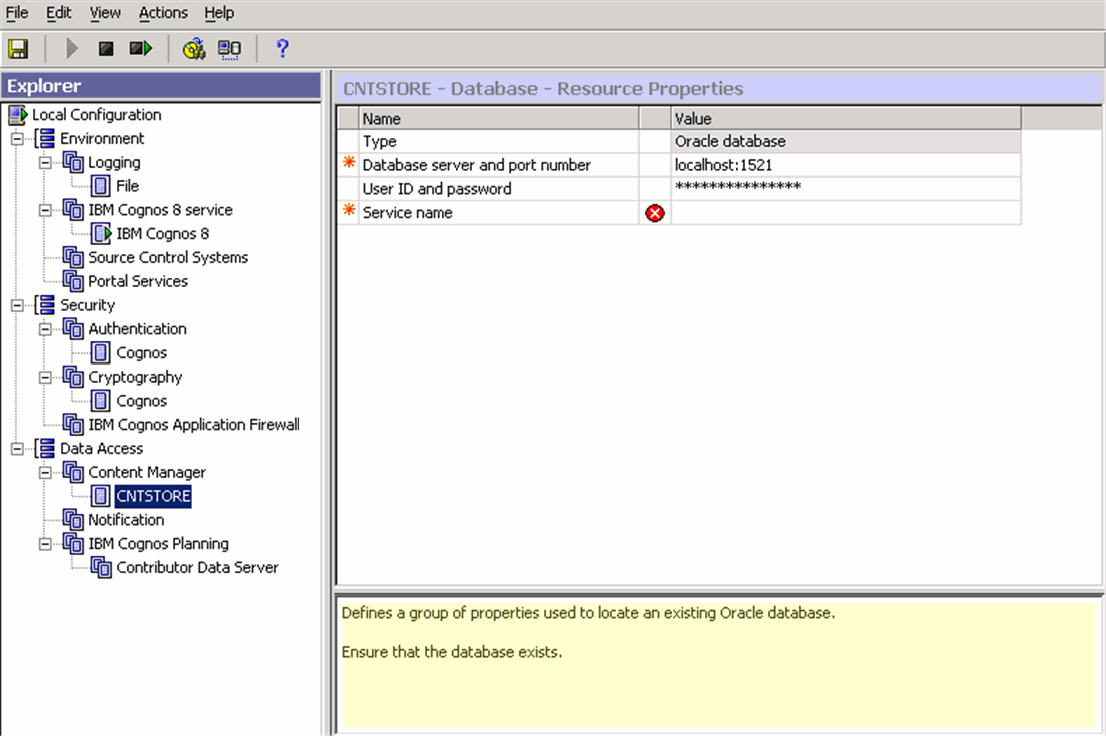
In the right pane, enter the value for the Database Server and port Number as:
<Database Server Name>:1521
where:
Database Server Name is the name of the server where your content store database is stored.
Select User ID and password item, and click the icon that appears next to it.
When the system opens the following dialog box:
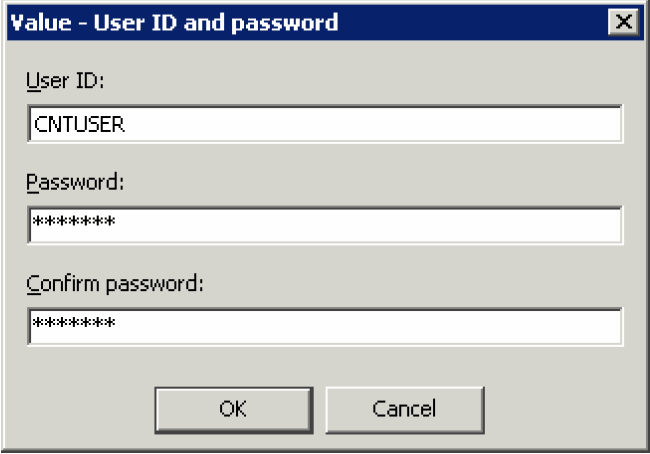
Type the User ID for the content store database user in the User ID field.
Type the password for the content store database user in the Password field.
For verification, re-enter the password in the Confirm password field.
Click OK.
|
Note: The contents store database user is created in the Cognos content store database. This user is given grants of Connect, Resource, and Create View, along with Unlimited Tablespace Grant.The character set of the Cognos content store database should only be UTF. Make sure that the content store database entry is added in the TNSNames.ora file on the Cognos 8 server. |
When the system opens the IBM Cognos Configuration window, enter the database instance name for the Cognos 8 repository in the Service Name field.
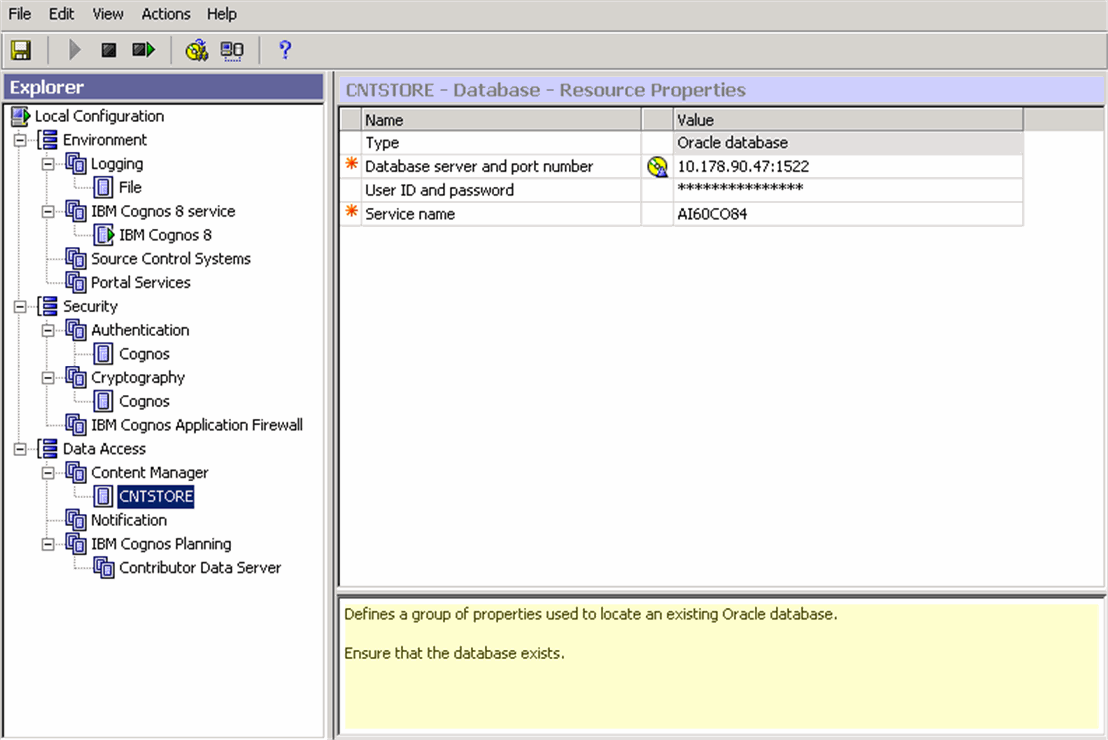
Use the following procedure to create the Namespace for Argus Insight authentication.
In the IBM Cognos Configuration window, right-click on Authentication under Security, and select New Resource>Namespace.
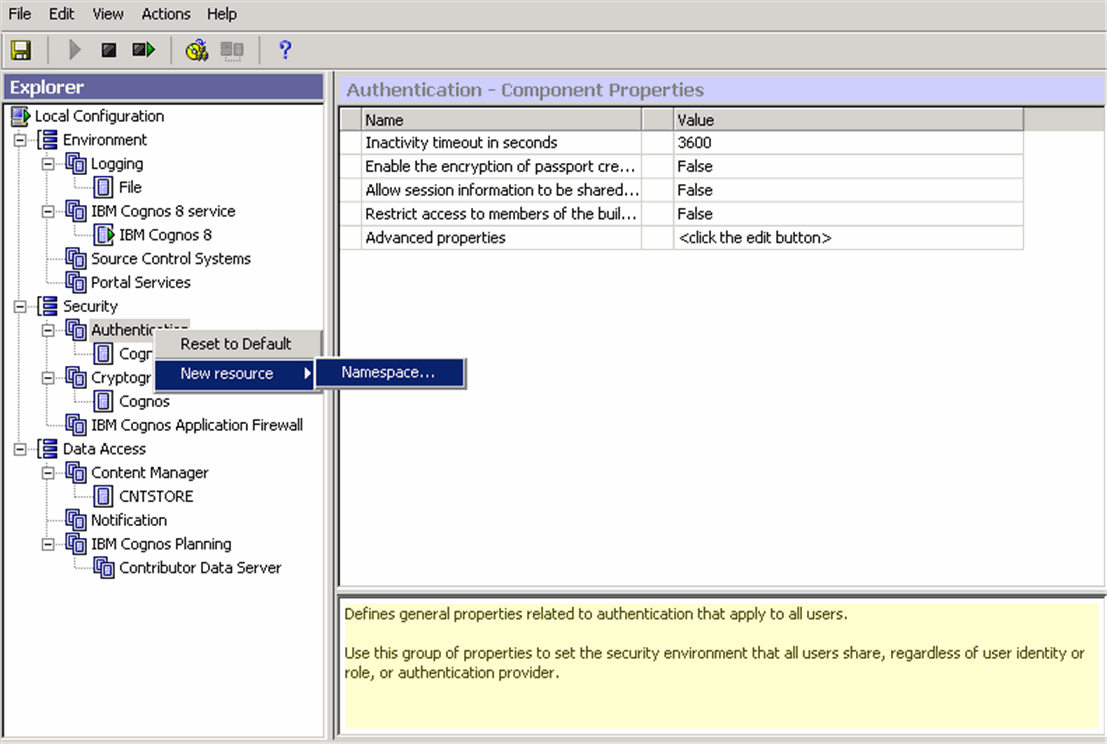
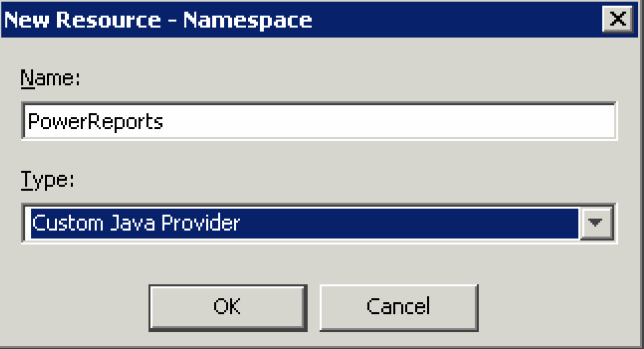
When the system opens the New Resource – Namespace dialog box:
Type PowerReports in the Name field.
Type Custom Java Provider in the Type field.
Click OK.
When the system opens the PowerReports - Namespace - Resource Properties screen:
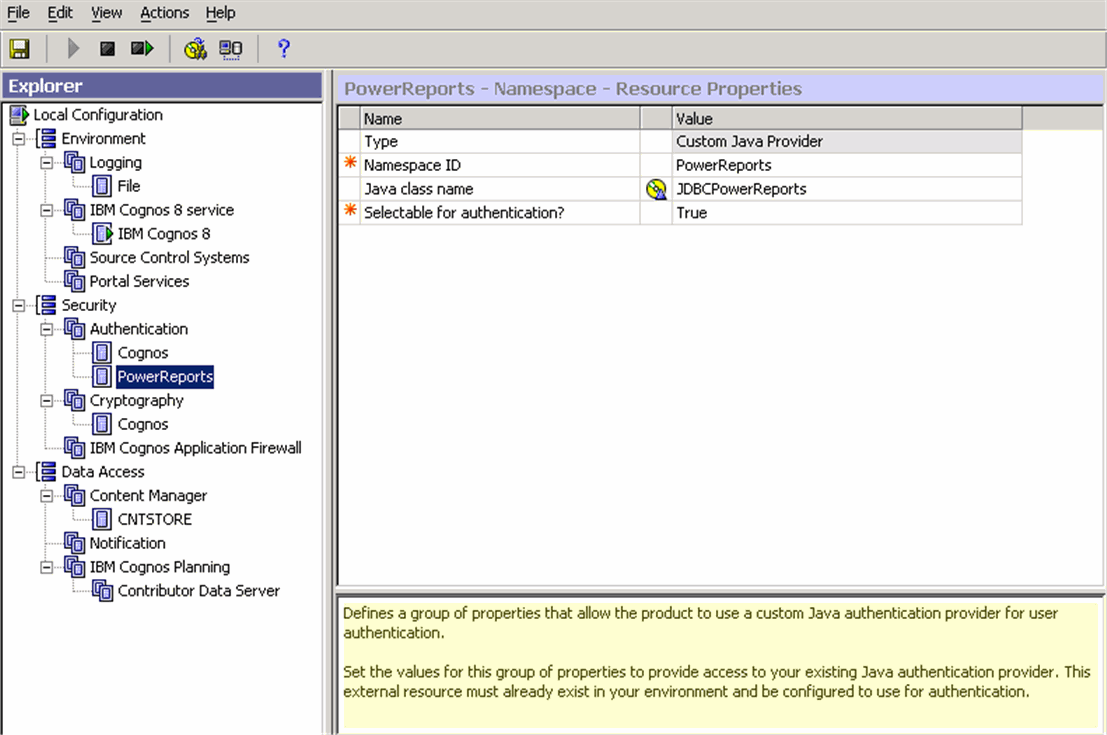
Enter the values (case sensitive) for the items as shown in the following table:
| Item | Value |
|---|---|
| Namespace ID | PowerReports |
| Java class name | JDBCPowerReports |
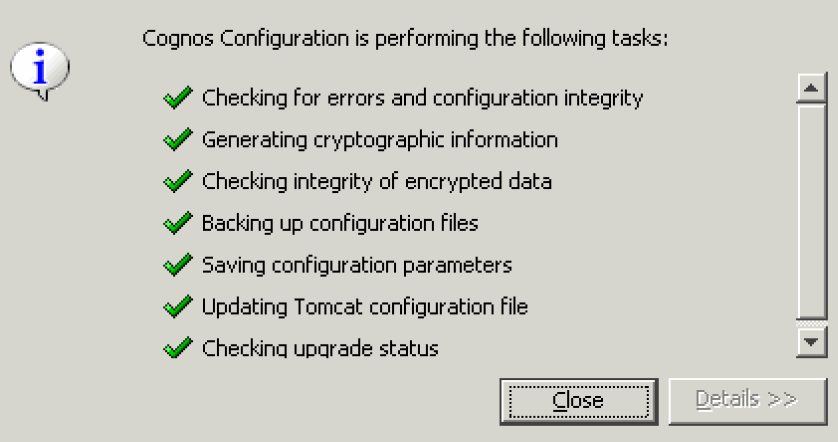
Click the Save icon in the IBM Cognos Configuration window toolbar to save the configuration settings.
When the system opens the following dialog box, click Close.
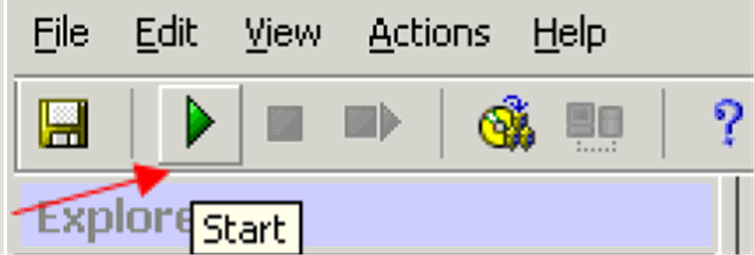
Click the Start icon in the IBM Cognos Configuration screen to run the Cognos 8 service.
If the system displays the following message, click OK to continue.

Ignore the warning if it appears due to mail server connection failure, as shown in the following dialog box.
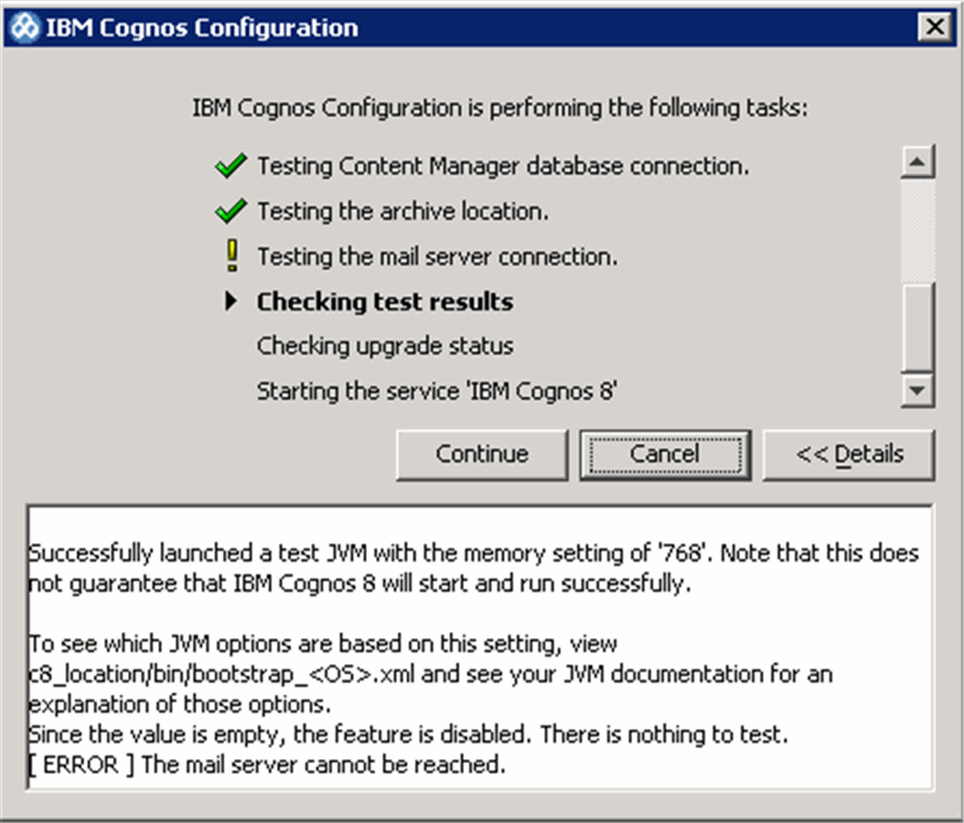
Click Continue to ignore the Mail Server Connection Warning displayed above. If the warning(s) appear due to reasons other than mail server connection failure, please check your configuration again.
Click Close to exit.
Click File>Exit to exit from the IBM Cognos 8 configuration.
Use the following procedure to import the content repository to the database.
Log on to the IBM Cognos 8 Server as an Admin user.
Start Internet Explorer.
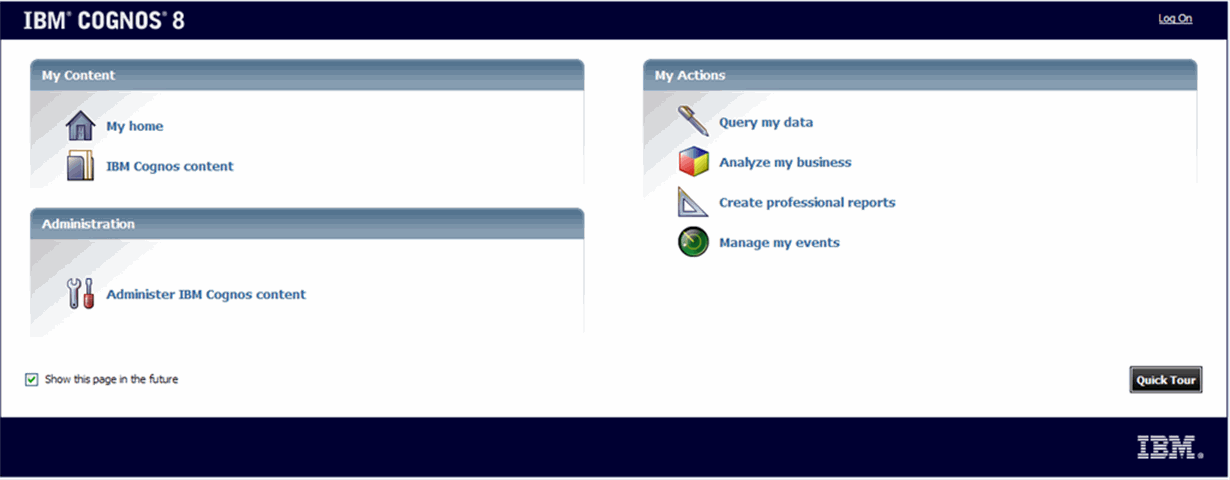
Enter the URL in the following format and press Enter: http://< Cognos 8 Server>/cognos8
When the system opens the following window, click Administer IBM Cognos Content.
|
Note: If your security settings on the server do not permit you to view the Cognos connection, add the site URL (http://<Cognos 8 Server>/cognos8) to the list of local intranet sites. |
When the system opens the IBM Cognos Administration screen, click the Configuration tab.
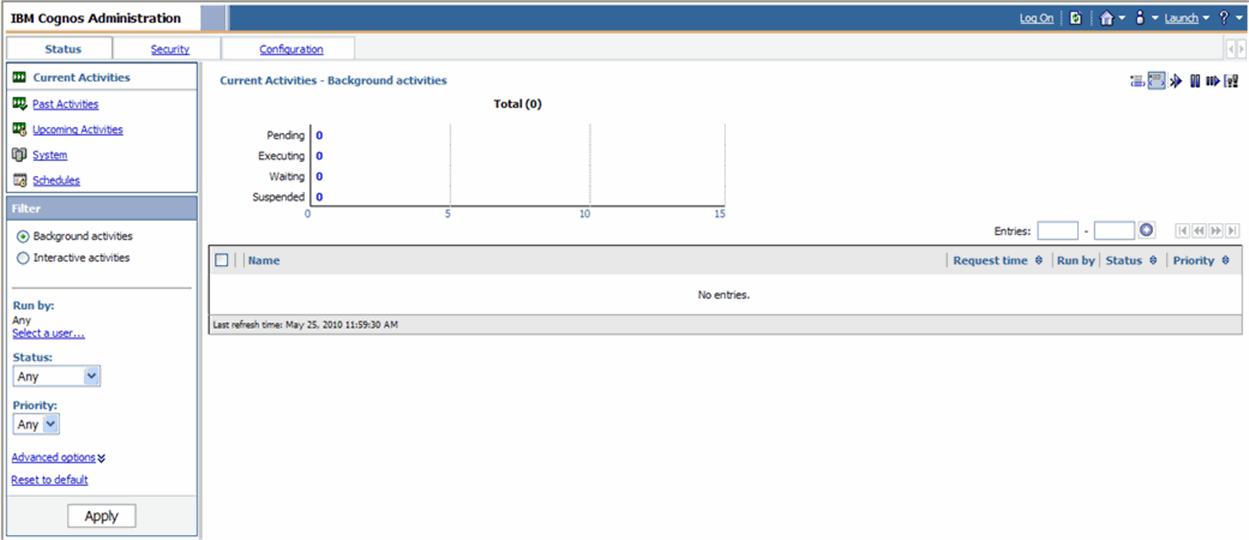
When the system opens the Data Source Connection window, click Content Administration.

When the system opens the Content Administration window, click the New Import icon.

When the system opens the following window, click Next.

When the system opens the following window, type password in the Password field and click OK.

When the system opens the following window, click Next>.
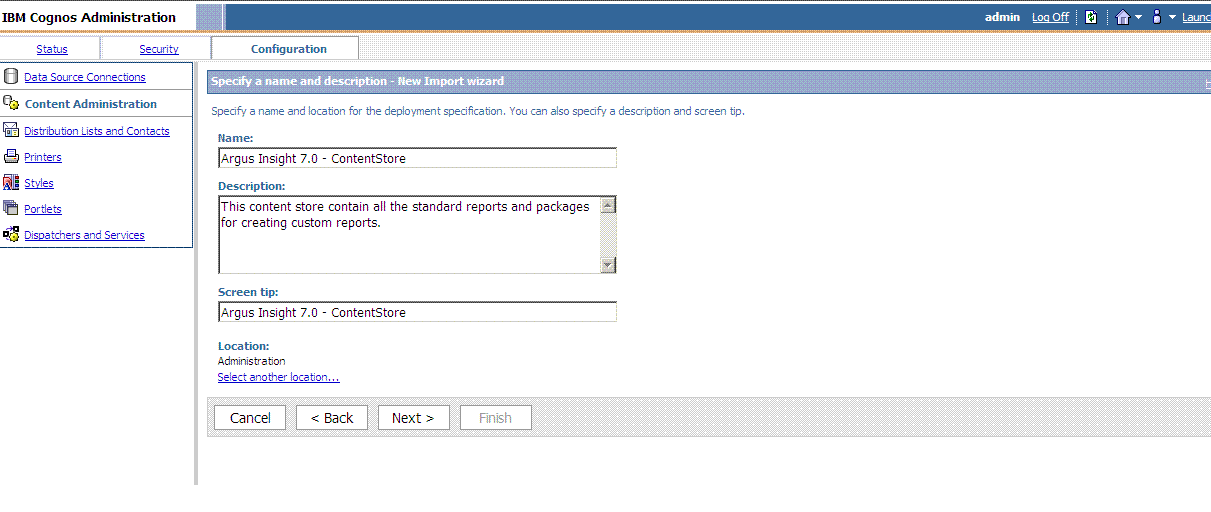
When the system opens the following window, click the Name checkbox to select all the checkboxes in this category.
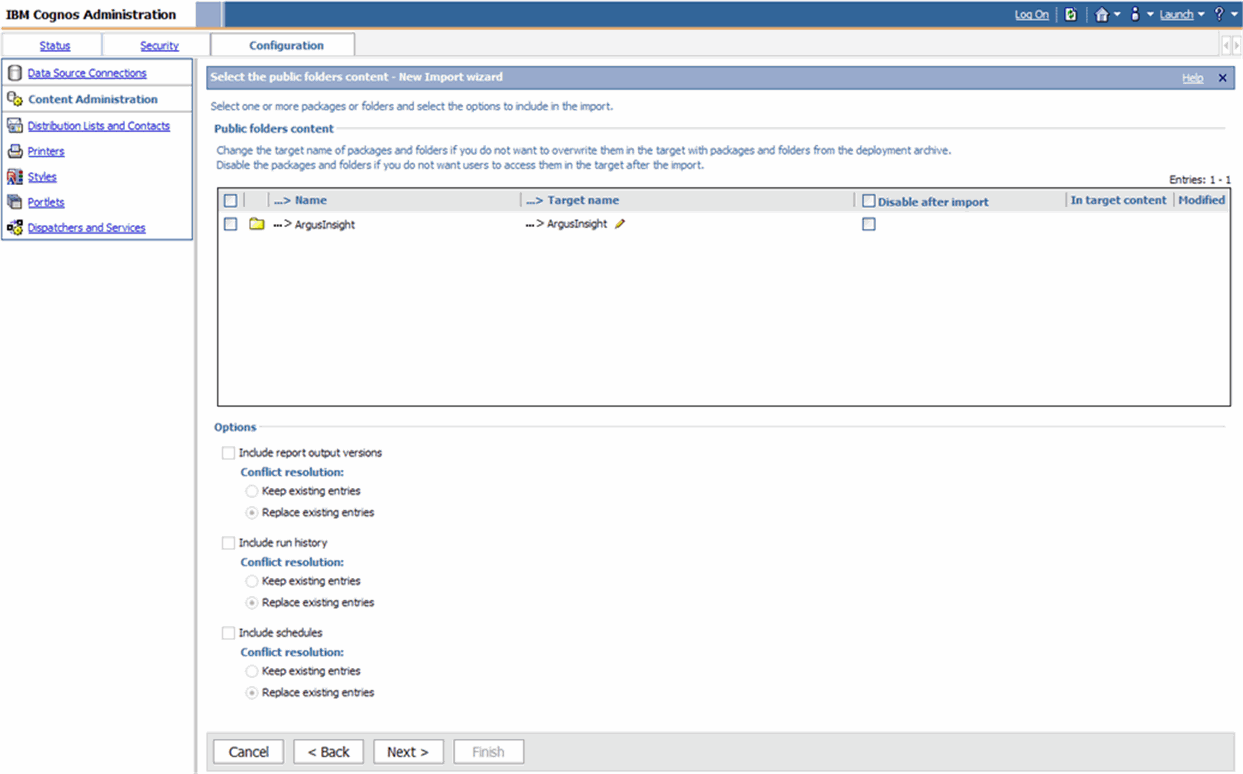
When the system opens the following window, click Next>.
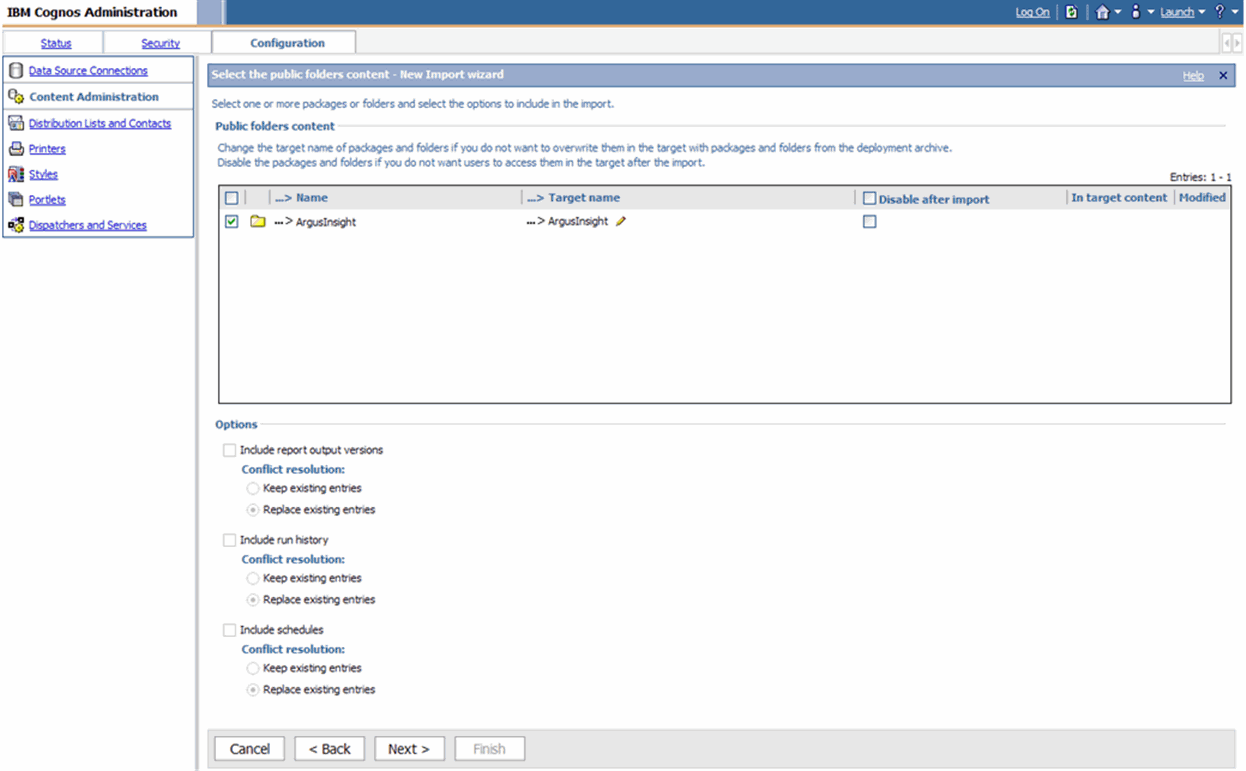
When the system opens the following window, verify that your settings are the same as the setting shown in the following illustration. Click Next>.
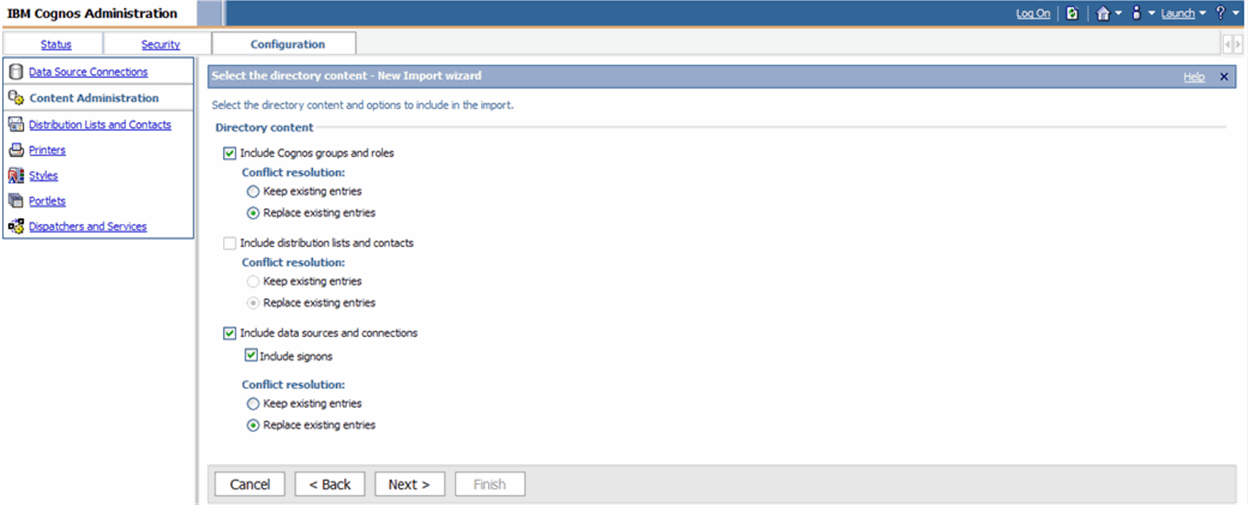
When the system opens the next window, verify that your settings are the same as those shown in the following illustration. Click Next>.
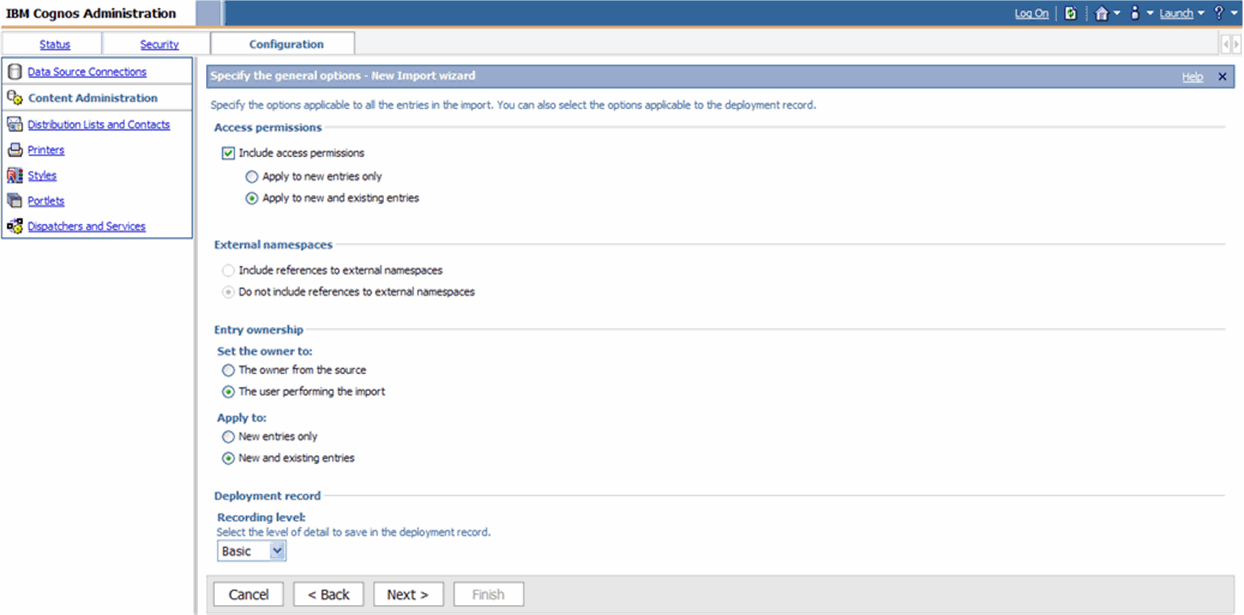
When the system opens the following window, click Next>.
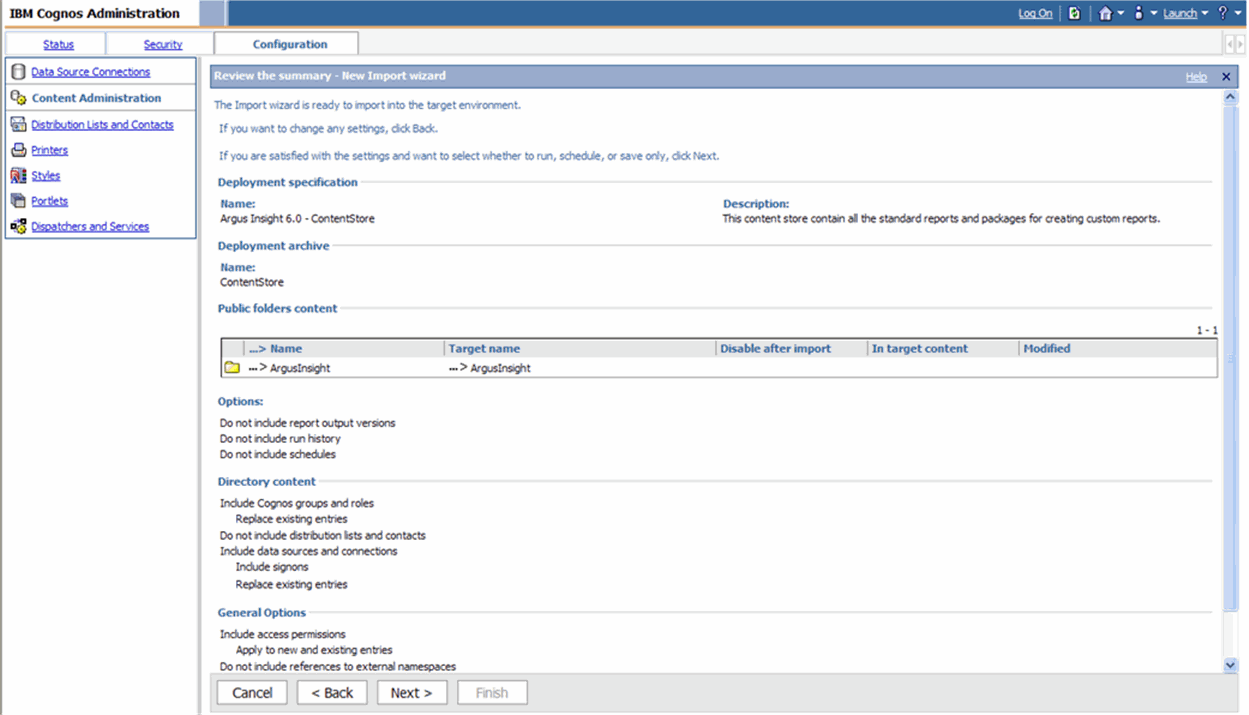
When the system opens the following window, click Finish.

When the system opens the following window, click the Upgrade all report specifications to the latest version radio button and click Run.
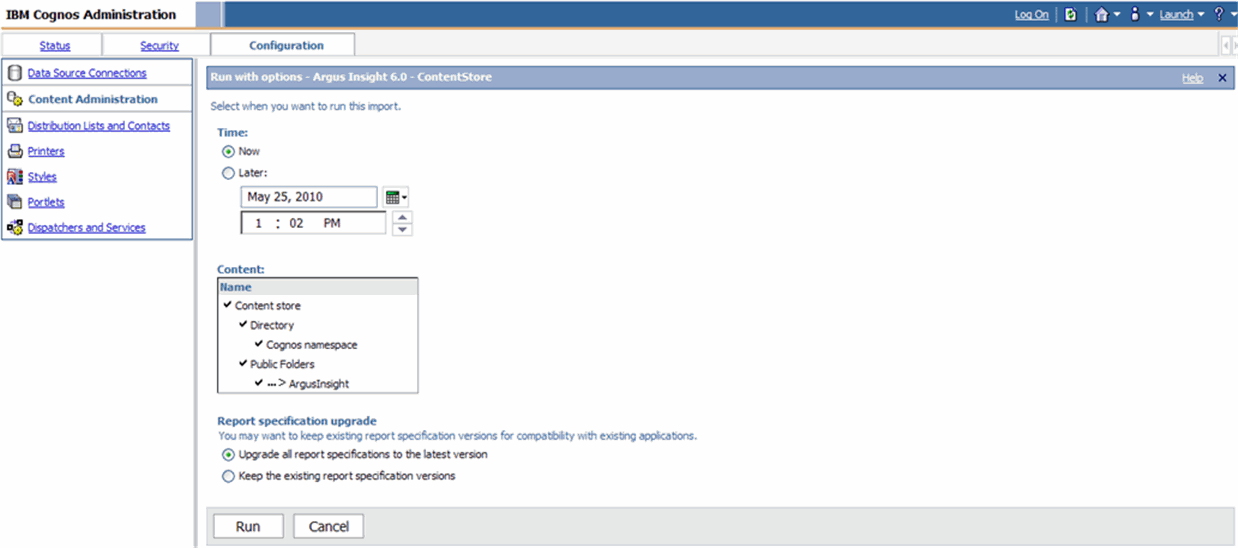
When the system opens the following window, click OK.

Verify the import as follows:
Click More corresponding to the newly imported ContentStore.
Click View run history to view the deployment history.
Verify that the Status column displays the status as Succeeded.
Click Close to exit.
The repository import is complete.