| Oracle® Argus Insight Installation Guide Release 7.0 E22883-01 |
|
 Previous |
 Next |
The Argus Insight Schema Creation Tool lets you create the Argus Insight Datamart structure. It creates a link between your source Argus database and your new Argus Insight Datamart. The ETL process uses this link to transfer data from your Argus database to the Argus Insight Datamart for reporting purposes. During this process, you are required to create four database users: one for logging in to the Argus Insight application, two other users who are schema owners, and one for supporting Private DB Links.
|
Note: The Argus Insight database must be created with same Character Set as the Argus Safety Database. Make sure you have installed that requisite software as explained in the Hardware and Software Requirements topic. |
Before you run the schema creation tool, contact your Database Administrator (DBA) to verify these database parameter values in the Database configuration file for the Argus Insight database:
global_name = false
job_queue_processes=10
Add "SET ARRAYSIZE 5000" in file glogin.sql ($ORACLE_HOME/sqlplus/admin/glogin.sql)
The following table lists the minimum values required on different Database Parameters for Argus Insight. The Database Administrator should monitor these values to increase/decrease the parameters.
| S. No. | Argus Insight Database Instance Parameters | Small (Less than 30,000 Cases) | Medium (30,000 - 200,000 Cases) | Large (200,000 - 1 Million Cases) | Very Large (More than 1 Million Cases) | Remarks |
|---|---|---|---|---|---|---|
| Value | Value | Value | Value | |||
| 1 | Shared_Pool_Size | Default | Default | Default | Default | |
| 2 | DB_Block_Buffers (Size in MB) / DB_Cache_Size | Default | Default | Default | Default | |
| 3 | DB_Block_Size (bytes) | Default | Default | Default | Default | |
| 4 | SGA_Target | 1 GB | 2.5 GB | 3.5 GB | 4.5 GB | The 32-bit architecture allows for 4 GB of physical memory to be addressed, DBAs are requested to verify the maximum addressable RAM for their respective architectures. |
| 5 | SGA_Max_Size | >= value for SGA_TARGET | >= value for SGA_TARGET | >= value for SGA_TARGET | >= value for SGA_TARGET | |
| 6 | PGA_AGGREGATE_TARGET | 0.5 GB | 2 GB | 3 GB | 4 GB | |
| 7 | CURSOR_SHARING | EXACT | EXACT | EXACT | EXACT | |
| 8 | OPTIMIZER_SECURE_VIEW_MERGING | TRUE | TRUE | TRUE | TRUE | |
| 9 | WORKAREA_SIZE_POLICY | AUTO | AUTO | AUTO | AUTO | |
| 10 | QUERY_REWRITE_ENABLED (If Computing Statistics regularly) | TRUE | TRUE | TRUE | TRUE | |
| QUERY_REWRITE_ENABLED (If Not Computing Statistics regularly) | FALSE | FALSE | FALSE | FALSE | ||
| 11 | QUERY_REWRITE_INTEGRITY | Default | Default | Default | Default | |
| 12 | GLOBAL_NAME | False | False | False | False | |
| 13 | PARALLEL_MAX_SERVERS | 16 | 32 | Default | Default | |
| 14 | OPTIMIZER_MODE | ALL_ROWS | ALL_ROWS | ALL_ROWS | ALL_ROWS | |
| 16 | COMPATIBLE (For Oracle 11gR2) | 11.2.0.0.0 or Higher | 11.2.0.0.0 or Higher | 11.2.0.0.0 or Higher | 11.2.0.0.0 or Higher | |
| 17 | UNDO_MANAGEMENT | AUTO | AUTO | AUTO | AUTO | |
| 18 | NLS_LENGTH_SEMANTICS | CHAR | CHAR | CHAR | CHAR |
| S. No. | Argus Insight Database I/O Configuration | Small | Medium | Large | Very Large | Remarks |
|---|---|---|---|---|---|---|
| Value | Value | Value | Value | |||
| 1 | Number and Size of Redo Log Files | Default | 3 X 500 MB | 5 X 500 MB | 5 X 500 MB | Depends on the characteristics of the I/O subsystem like the I/O bandwidth, Storage Disks type, RAID Level, etc. (Oracle recommends RAID 1+0 or similar) |
| 2 | TEMP Tablespace size | 32 GB | 32 GB | 64 GB | 128 GB | |
| 3 | Undo Tablespace size | 16 GB | 32 GB | 64 GB | 128 GB | The recommended UNDO Tablespace size is based on the projections with the following two Parameter values:
RETENTION=NOGUARANTEE UNDO_RETENTION=900 (seconds) |
| S. No. | Argus Insight Database Server Configuration | Small | Medium | Large | Very Large | Remarks |
|---|---|---|---|---|---|---|
| Value | Value | Value | Value | |||
| 1 | RAM | 4-8 GB | 8-16 GB | 16-32 GB | 16-32 GB | |
| 2 | CPU | Equivalent to 2-4 Dual Core, 3 GHz | Equivalent to 4-8 Dual Core, 3 GHz | Equivalent to 8-12 Dual Core, 3 GHz | Equivalent to 8-12 Dual Core, 3 GHz |
|
Note: The Argus Insight Database and Argus Database TNS names entry must be available in both Argus Insight Database Server and Argus Safety Database Server. Argus Safety Database TNS should also be present in the Argus Insight Web server. |
The following are the Tablespaces for Argus Insight MART.
| S.No. | Tablespace | S.No. | Tablespace |
|---|---|---|---|
| 1 | APR_CFG_DATA_01 | 19 | APR_MRPT_DATA_02 |
| 2 | APR_MCAS_DATA_01 | 20 | APR_MRPT_DATA_03 |
| 3 | APR_MCAS_DATA_02 | 21 | APR_MRPT_INDEX_01 |
| 4 | APR_MCAS_INDEX_01 | 22 | APR_MRPT_INDEX_02 |
| 5 | APR_MCAS_INDEX_02 | 23 | APR_MRPT_INDEX_03 |
| 6 | APR_MCAS_LOB_01 | 24 | APR_MWHOC_DATA_01 |
| 7 | APR_MCFG_DATA_01 | 25 | APR_MWHOC_INDEX_01 |
| 8 | APR_MCFG_INDEX_01 | 26 | APR_SESM_DATA_01 |
| 9 | APR_MCFG_LOB_01 | 27 | APR_SESM_INDEX_01 |
| 10 | APR_MCFG_LOG_01 | 28 | APR_SESM_LOB_01 |
| 11 | APR_MEDM_DATA_01 | 29 | APR_STAGE_DATA_01 |
| 12 | APR_MEDM_INDEX_01 | 30 | APR_STAGE_DATA_02 |
| 13 | APR_MEDM_LOB_01 | 31 | APR_STAGE_DATA_03 |
| 14 | APR_MFACT_DATA_01 | 32 | APR_STAGE_INDEX_01 |
| 15 | APR_MFACT_DATA_02 | 33 | APR_STAGE_INDEX_02 |
| 16 | APR_MFACT_INDEX_01 | 34 | APR_STAGE_INDEX_03 |
| 17 | APR_MFACT_INDEX_02 | 35 | APR_STAGE_LOB_01 |
| 18 | APR_MRPT_DATA_01 | 36 | APR_SWHOC_DATA_01 |
| S.No. | Tablespace |
|---|---|
| 37 | APR_MCAS_HIST_DATA_01 |
| 38 | APR_MCAS_HIST_DATA_02 |
| 39 | APR_MCAS_HIST_INDEX_01 |
| 40 | APR_MCAS_HIST_LOB_01 |
| 41 | APR_MCFG_HIST_INDEX_01 |
| 42 | APR_MCFG_HIST_LOB_01 |
| 43 | APR_MFACT_HIST_DATA_01 |
| 44 | APR_MFACT_HIST_DATA_02 |
| 45 | APR_MFACT_HIST_INDEX_01 |
| 46 | APR_MFACT_HIST_INDEX_02 |
| 47 | APR_MRPT_HIST_DATA_01 |
| 48 | APR_MRPT_HIST_DATA_02 |
| 49 | APR_MRPT_HIST_DATA_03 |
| 50 | APR_MRPT_HIST_INDEX_01 |
| 51 | APR_MRPT_HIST_INDEX_02 |
| 52 | APR_MRPT_HIST_INDEX_03 |
Use the following procedure to create the database schema and run the Initial ETL.
Log in (RDC) to Insight Web Server after installing Argus Insight 7.0 application using build.
INSTALLDIR: - Default is "C:\Program Files\Oracle"
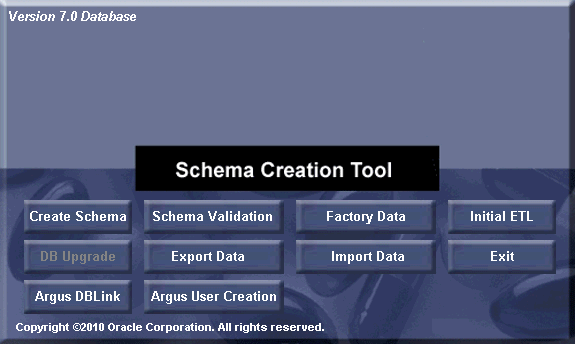
Run the schema creation tool.
Click Argus User Creation.
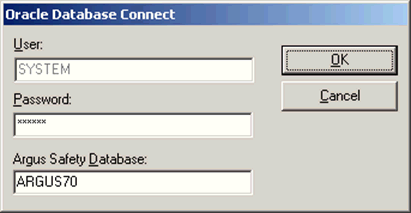
When the system opens the following dialog box, enter the Argus Safety database instance name and password for "SYSTEM". Click OK.
When the system opens the following dialog box, click New User.
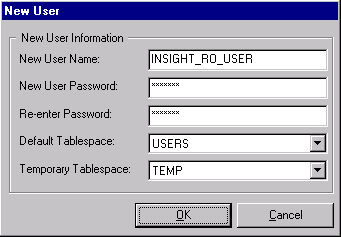
When the system opens the following dialog box, enter the name of the Argus Safety user you wish to create in the New User Name field. Click OK.
|
Note: You must create the INSIGHT_RO_USER and INSIGHT_RO_ROLE even if they already exist in the Argus Safety schema. Make the appropriate selection in step 8 below for New User Name and New Role drop downs and proceed. |
When the system redisplays the following dialog box, click New Role.
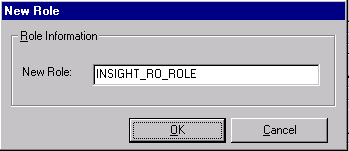
When the system opens the following dialog box, enter the name of the role to create in the New Role field. Click OK.
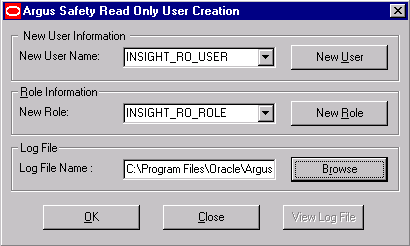
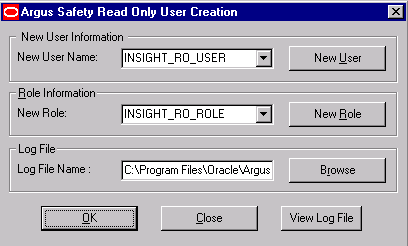
When the system opens the following dialog box, select New User Name and New Role from the dropdown menu as 'INSIGHT_RO_USER' and 'INSIGHT_RO_ROLE'.
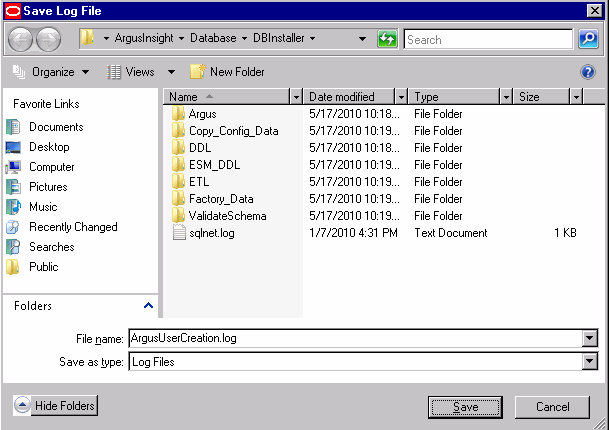
When the system opens the following dialog box, click Browse to select the location for the log files.
When the system opens the following dialog box, enter the name of the log file where you want to store the user creation information in the File name field.
When the system returns to the following dialog box, click OK.
When the system opens the following screen, verify that the information on the screen is correct and press Enter.
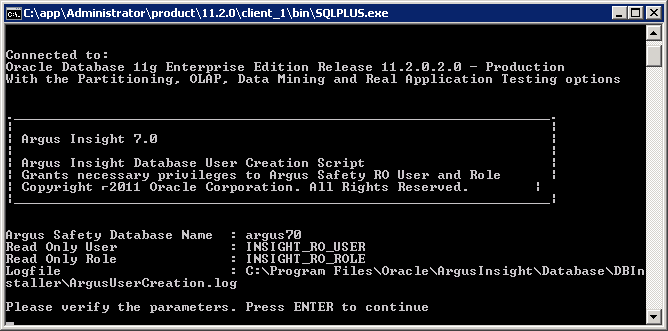
When the system displays the following screen, verify that the information is correct and press Enter to complete the installation.
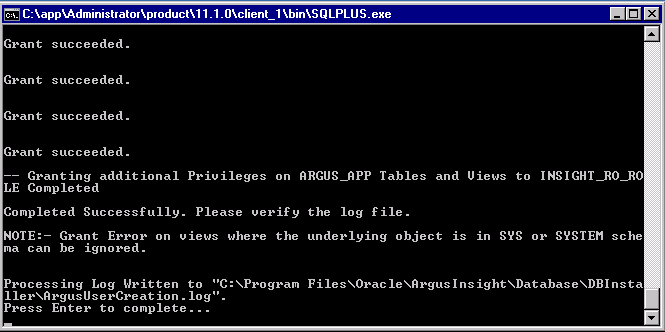
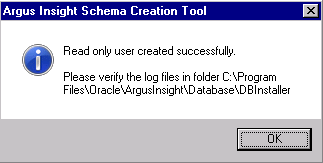
When the system displays the following message, click OK.
When the system redisplays the following dialog box, click View Log File.
When the system displays the log file, verify the log file for any errors during read only user creation.
Close the log file.
Click Close to close the 'Argus Safety Read Only User Creation' dialog.
Use the following procedures to create or upgrade the database schema, as applicable.
If you are using the same DB Installer used to create an earlier schema, you must clear its cache. Use the following procedure to clear the cache.
Press and hold the CTRL key and right-click the mouse.
When the system presents the following dialog box, click Yes.
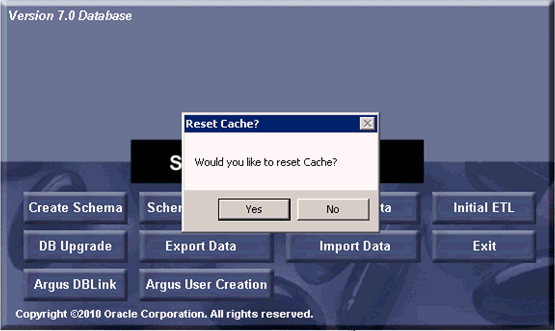
The system logs the action in the createlog.rtf file.
Use the following procedure to create a new schema for Argus Insight:
Go to Start>Programs>Oracle>Argus Insight>Schema Creation Tool.
When the system opens the following dialog box, click Create Schema.

|
Note: You mustconvert the Oracle parameter NLS_LENGTH_SEMENTICS to CHAR in the Argus Insight data mart and restart the database instance. You will not be able to proceed further without changing the NLS_LENGTH_SEMENTICS to CHAR. |
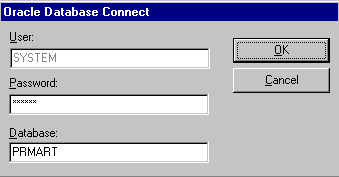
When the system opens the following dialog box:
Enter the SYSTEM user password in the Password field.
Type the TNS Entry for the Insight Database in the Database field.
Click OK.
The system displays the following message if the NLS_LENGTH_SEMANTICS parameter is not set to CHAR. You must set this parameter before you can proceed.

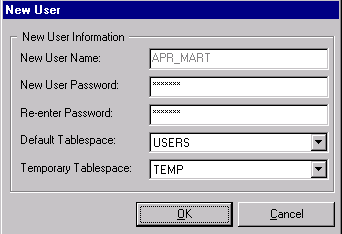
When the system opens the following dialog box, set the APR_MART password. Click OK.
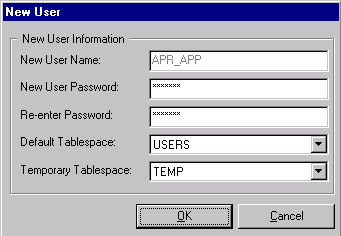
When the system opens the following dialog box, set the APR_APP password. Click OK.
|
Note: This user will be used for all the application access and reporting. The password for this user is stored in encrypted form in CMN_PROFILE_GLOBAL table. We cannot change password of this user as it will break down the Insight application access. If you wish to change the password for this user, please contact Oracle support for getting encrypted value of new password. |
When the system opens the Argus Insight Schema Creation Options screen, click New User to create the following users:
APR_STAGE
APR_LOGIN
APR_HIST
APR_LINK_USER
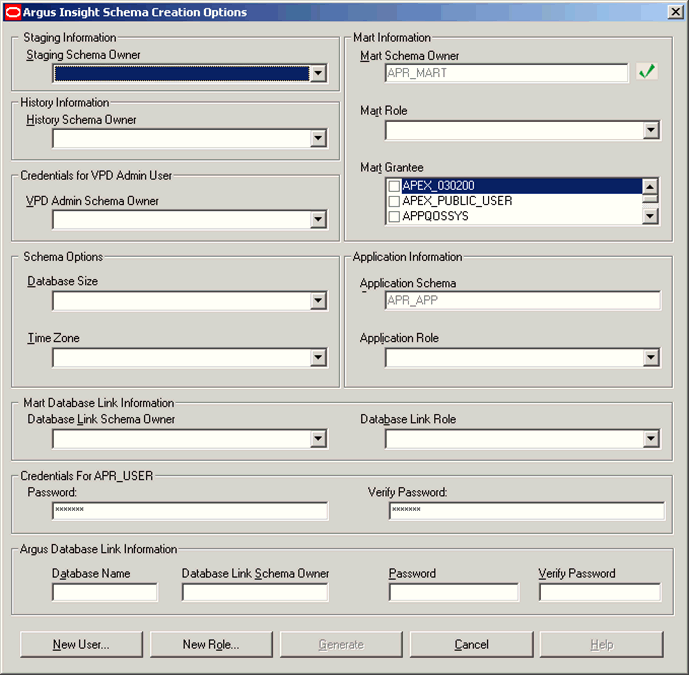
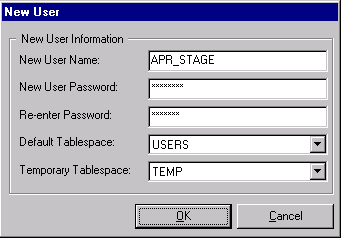
When the system opens the New User dialog box, do the following:
Enter one of the following names in the New User Name field:
APR_STAGE
APR_LOGIN
APR_LINK_USER
APR_HIST
RLS_USER
Enter the user password in the New User Password field.
For verification, enter the user password in the Re-enter Password field.
Click OK.
The system redisplays the Argus Insight Schema Creation Options screen.
Repeat Step 7 and Steps 8a through 8d until you have created all five (5) users.
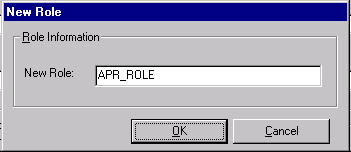
When the system redisplays the Argus Insight Schema Creation Options screen, click New Role to create the following user roles:
APR_ROLE
APR_LINK_ROLE
APR_APP_ROLE

When the system opens the New Role dialog box, do the following:
Enter one of the following names in the New Role field:
APR_ROLE
APR_LINK_ROLE
APR_APP_ROLE
Click OK.
The system redisplays the Argus Insight Schema Creation Options screen.
Repeat Step 9 and Steps 10a through 10c until you have created all three (3) roles.
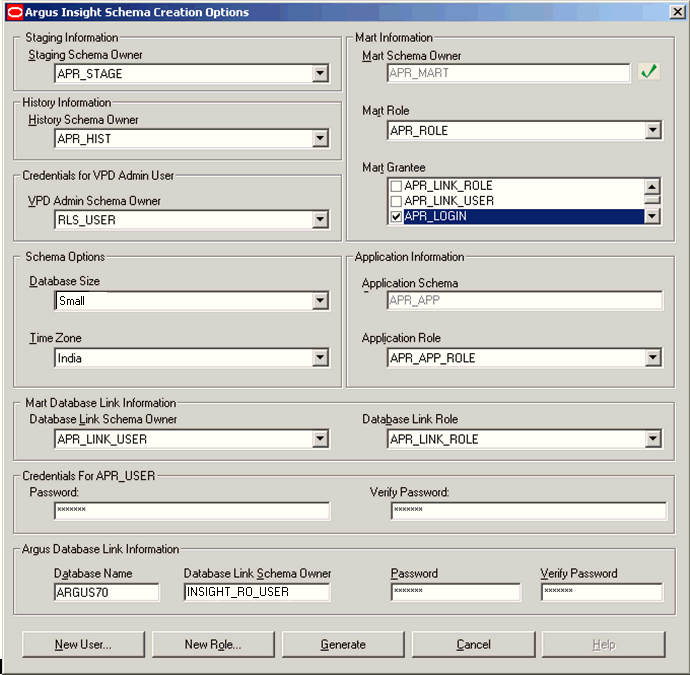
When the system redisplays the Argus Insight Schema Creation Options screen:
Select RLS_USER in the VPD Admin Schema Owner field of Credentials for VPD Admin Users section.
Select APR_LINK_USER in the Database Link Schema Owner field of MART Database Link Information section.
Select APR_LINK_ROLE in the Database Link Role field of MART Database Link Information section.
Enter INSIGHT_RO_USER in the Database Link Schema Owner field of Argus Database Link Information section.
Click Generate.
|
Note: Enter the Insight read-only user name in 'Database Link Schema Owner' text box of Argus Safety link information, created using the 'Argus User Creation' button. |
|
Note: If you want to change the password for APR_USER, edit the entries for APR_USER password textbox. |
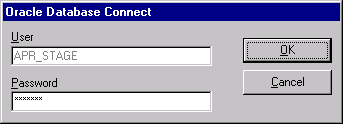
When the system prompts for staging user's password (APR_STAGE user's password), enter the password and click OK.
|
Note: The system displays the following message if the MART Character set is not same as the Argus character set. Please make sure the character sets for Argus Insight and Argus Safety database are the same. |

Click Yes to proceed with schema creation (not recommended) else press No.
|
Note:
|
If your Argus Safety version is 7.0, the following screen is displayed for default enterprise information:
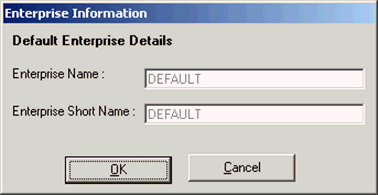
When the system displays the following message, follow these steps:
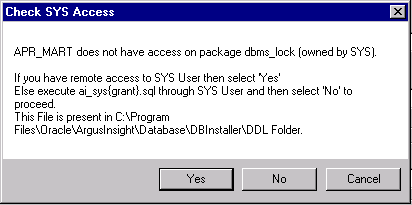
If you do not have remote access to SYS User, follow the instructions given in the message box "Check SYS Access" provided above. After executing the ai_sys{grant}.sql through SYS user, Click No and go to Step 16 of this procedure.
If you do have remote access to SYS user, click Yes and go to Step 15 of this procedure.
When the system opens the following dialog box, provide the SYS user password and click OK.
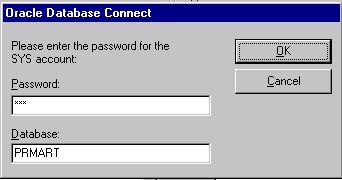
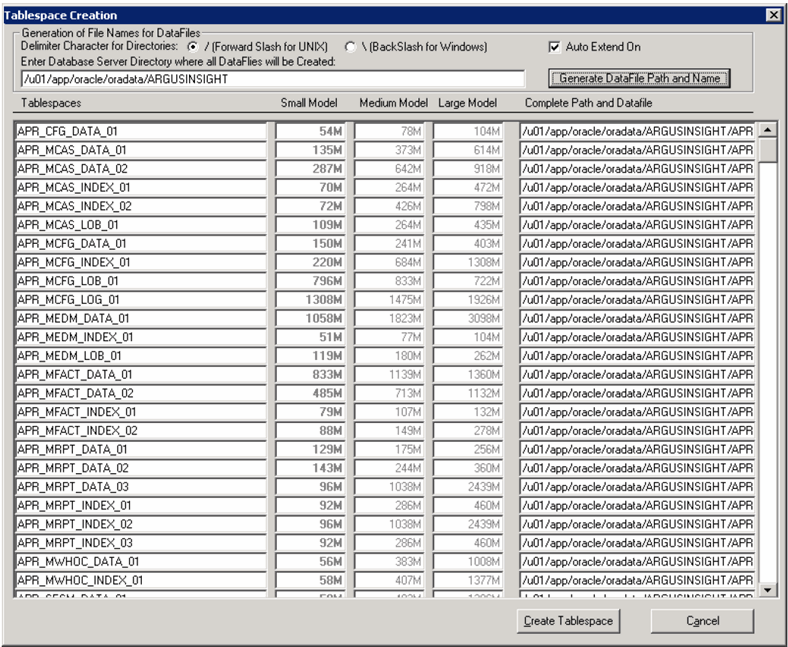
The system opens the Tablespace Creation screen as follows:
Schema Creation Tool will automatically select the Delimiter Character for the Directories radio button, based on the Database Server Operating System.
Provide the datafile path in "Enter Database Server Directory….." Textbox (For e.g. /u01/app/oracle/SMTEST, PLEASE MAKE SURE THIS DIRECTORY EXISTS) and click on button "Generate Datafile path and name".
It will fill "Complete Path and Datafile" textboxes for all table spaces.
Click Create Tablespace to create all table spaces.
Wait while the system creates the table spaces.
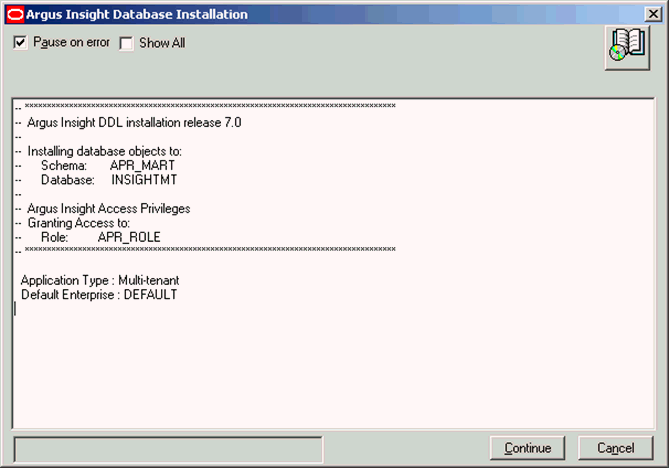
When the system opens the following window, click Continue to start Schema Creation.
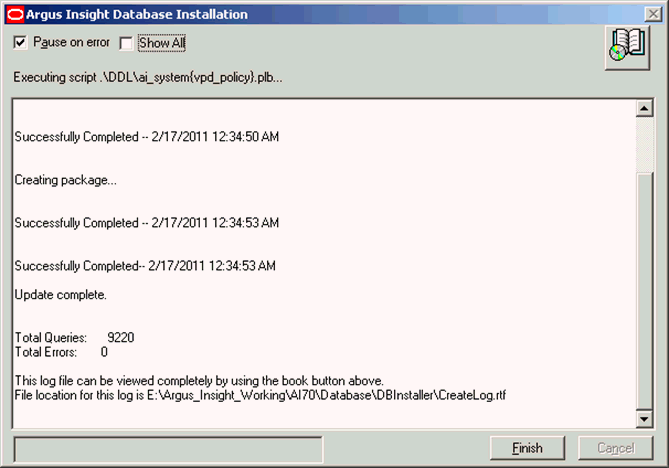
When the system displays the following window, schema creation is complete. Click Finish.
You must ensure that the following points are implemented before beginning the migration process:
All customers must create a new Argus Insight database instance and create a fresh schema for Argus Insight 7.0. This also applies to customers who are upgrading from version 5.1 to 7.0.
Before migrating a schema, ensure that you have validated the schema with the CTL file of the existing Argus Insight version. For example, before migrating from Argus Insight 5.1 to Argus Insight 7.0, validate the schema for Argus Insight 5.1.
Before migrating to Argus Insight 7.0, ensure that Cognos service is stopped on the Cognos server and Argus Insight service is stopped on the Argus Insight web server. You can start these services once the database migration is complete.
Before migrating from Argus Insight 5.1 to Argus Insight 7.0, ensure that Argus Insight 5.1 instance has been upgraded to Oracle 11.2.0.1. Doing so ensures that the export process will not fail.
This section provides instructions for the migration from the following:
Argus Insight v5.1 to Argus Insight v7.0
Go to the following path: <Argus Insight Installation Directory>\ArgusInsight\Database\Upgrades\51_TO_70. Double-click the MigrationUtility.exe. The following screen is displayed.
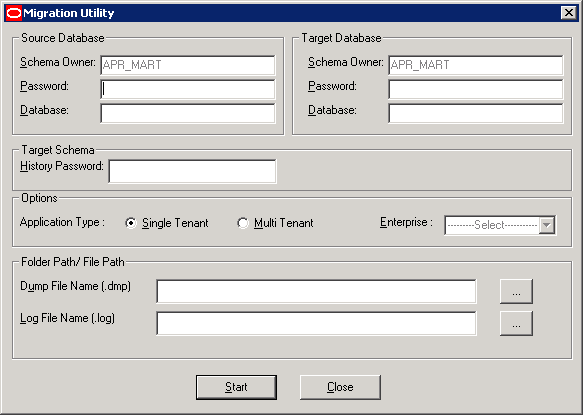
In the Source Database section, do the following:
Enter the password for APR_MART schema for the Argus Insight 5.1 database.
Enter the TNS Entry for the Argus Insight 5.1 database in the Database field.
In the Target Database section, do the following:
Enter the password for APR_MART schema for the Argus Insight 7.0 database.
Enter the TNS Entry for the Argus Insight 7.0 database in the Database field.
In the Target Schema section, do the following:
Enter the password for history schema (APR_HIST) for the Argus Insight 7.0 database.
In the Options section, do the following:
Select the application type as Single Tenant or Multi Tenant. If you select Multi Tenant, the Enterprise drop-down list is enabled.
Select the enterprise required for multi-tenant installation from the Enterprise drop-down list.
In the Folder Path/File Path section, do the following:
Click the ... button to select the path for the export dump of the source Argus Insight database.
|
Note: This is the path and dump file name which will contain the import dump from the Source Database. It is exported automatically to the Target Database. On clicking Start, the dump file is created by using the Source Database at the specified location. This file is then used to export the data in the Target Database. |
Click the ... button to select the path for the log file of the source Argus Insight database.
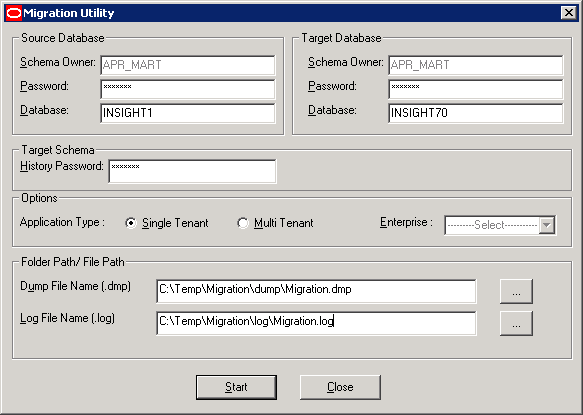
Click Start. The following screen is displayed.
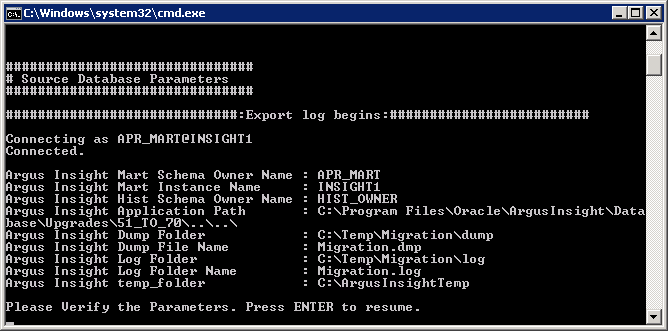
Press Enter to resume. The following screen is displayed.
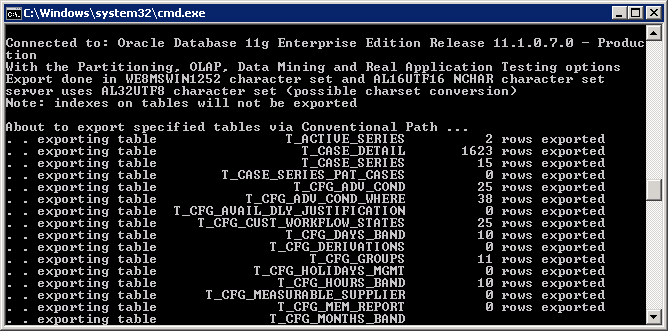
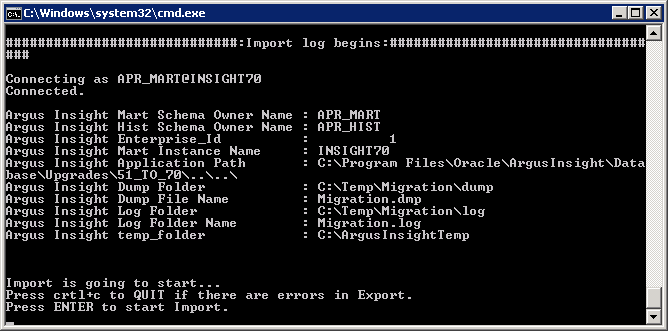
The above process may take some time. The following screen is displayed once the export process is complete.
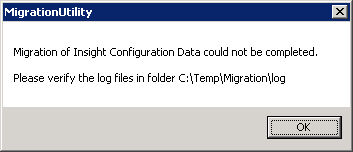
If you encounter errors during the export process, press the Ctrl + C key to quit. The following screen is displayed when you quit.
Once the export is complete, press the Enter key to start the import process. When the export process is complete, the following screen is displayed.
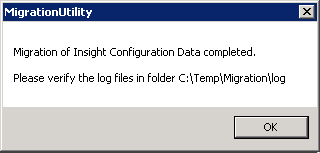
|
Note: Repeat these steps for migrating Argus Insight 5.1 data in multi-tenant applications by selecting different enterprises from the Enterprise drop-down list, listed in step 5 above. |
|
Note: If you have upgraded Argus Insight using an Argus Safety version earlier than the 6.0 version, and have then upgraded Argus Safety to its 7.0 version, you must execute the User Password Update Utility. To use this utility, click the AIPwdUpdate.exe present in the \Oracle\Database\DBInstaller folder. |
Execute the following steps if you wish to use the Upgrade utility:
Go to the <Insight_Install_Path>\Database\DBInstaller folder and double-click AIPwdUpdate.exe. The following screen is displayed.
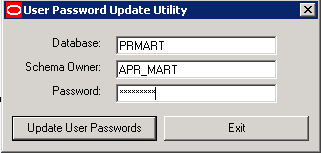
Enter the database name and click Update User Passwords. On successful update, the following dialog is displayed.
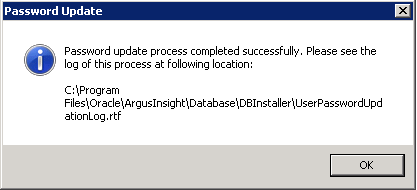
Click OK. The password process has been updated successfully.
This section is meant to avoid the execution errors that could be encountered if any Power Query contains a nested advanced condition that could get deleted during migration from Argus Insight v5.1 to v7.0. To avoid such errors, execute the following steps:
After migrating from Argus Insight version 5.1 to version 7.0, go to <Insight Installation Directory>/Oracle/ArgusInsight/Database/Utils. Open Power_Queries_Req_Change.sql.
For a single-tenant installation, connect to APR_MART to execute each of the SELECT queries.
For a multi-tenant installation, connect as a SYS user to execute each of the SELECT queries.
A list of Power Queries (Advanced Conditions, QBEs, or Filters) is generated. Remove all the references of the last SELECT query results from this list.
Use the following procedure to validate the database schema:
Click Schema Validation to validate the schema.

When the system opens the following dialog box, enter the SYSTEM password and MART instance name and click OK.
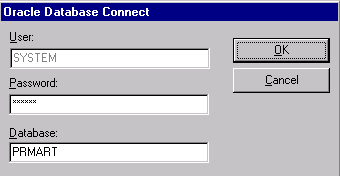
When the system opens the following dialog box, click Browse to the right of the Validation CTL Folder and File field.
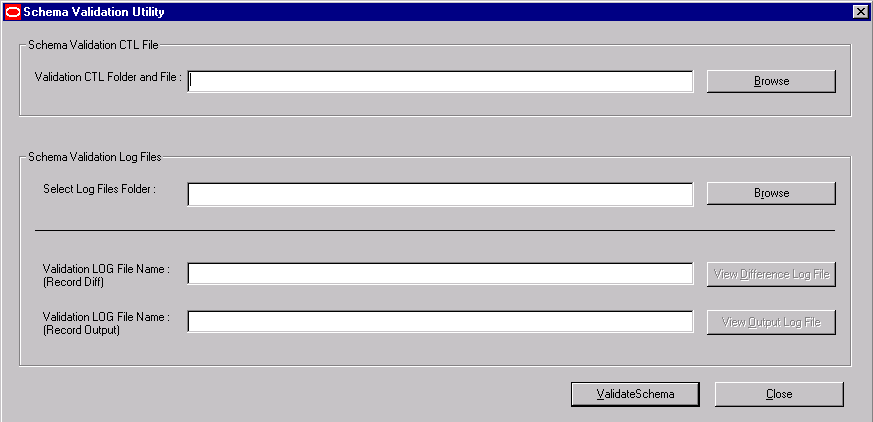
When the system opens the following window, select the validation CTL file. Click Open.
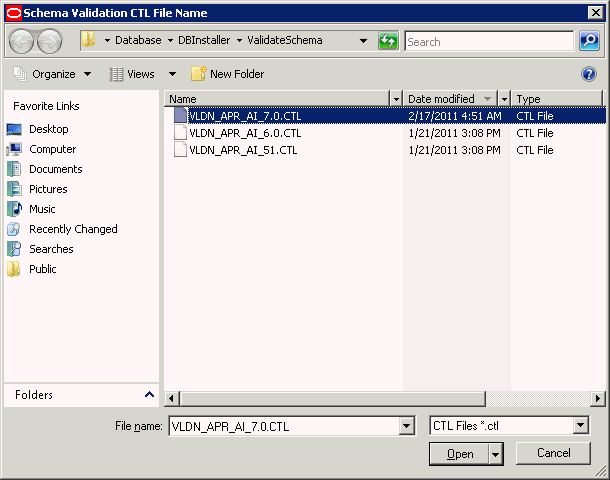
When the system redisplays the following dialog box, click Browse to the right of the Select Log Files Folder field.
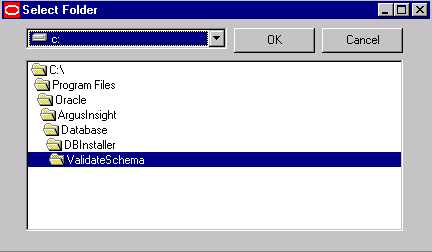
When the system opens the following dialog box, select the Log files folder. Click OK.
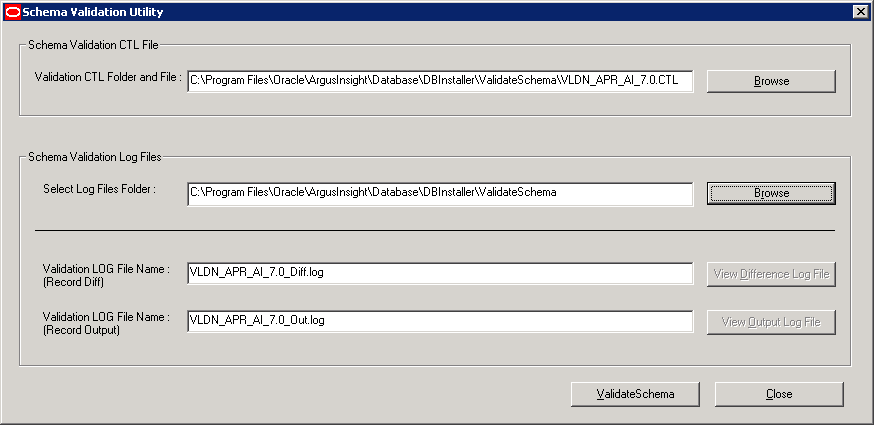
Click Validate Schema.
The system displays a series of command screens as follows. Press Enter when prompted to do so.
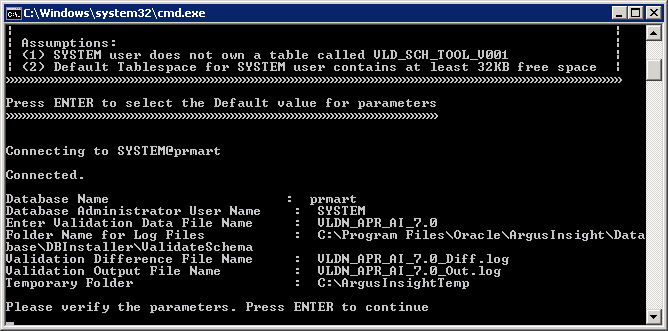
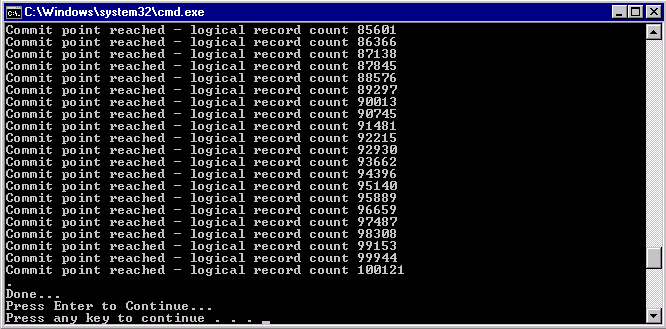
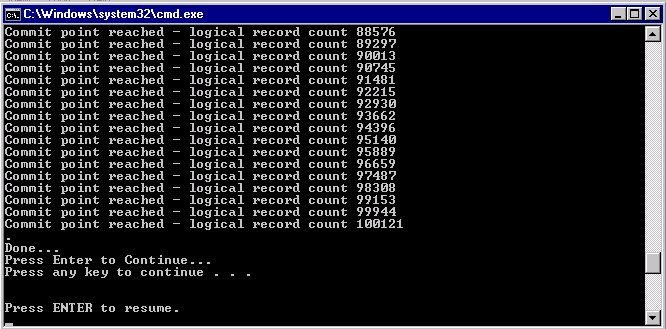
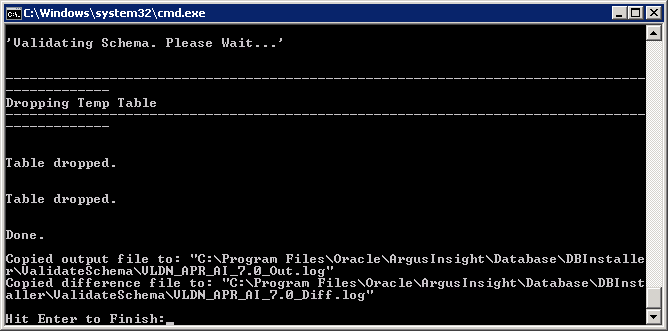
When the system opens the following dialog box, click OK.

When the system displays the log file, verify the log file for any schema discrepancies.
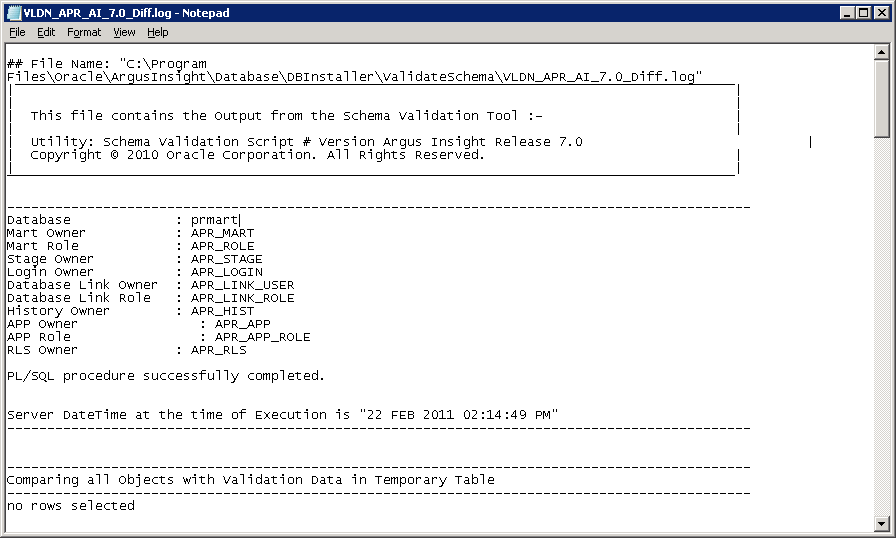
Use the following procedure to create the database link from the Argus Safety database to the Argus Insight database.
Go to Start>Programs>Oracle>Argus Insight>Schema Creation Tool.

Click Argus DBLink.
When the system opens the following dialog box, enter the information for the Argus Safety database. Click OK.
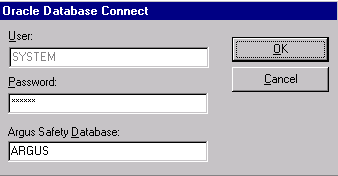
When the system opens the following dialog box, enter the following:
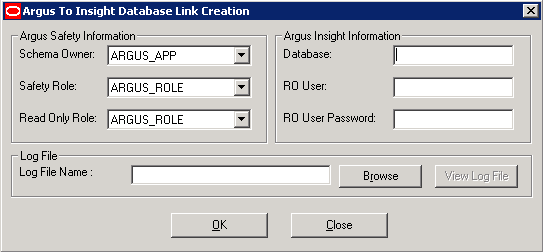
Under Argus Safety Information:
Select the Argus Safety Schema Owner in the Schema Owner field.
Select the Argus Safety role in the Safety Role field.
Select the Insight_RO_Role in the Read Only Role field.
Under Argus Insight Information:
Enter the name of the Argus Insight database in the Database field.
Enter the name of the RO user in the RO user field.
Enter the password for the RO user in the RO User Password field.
Click Browse.
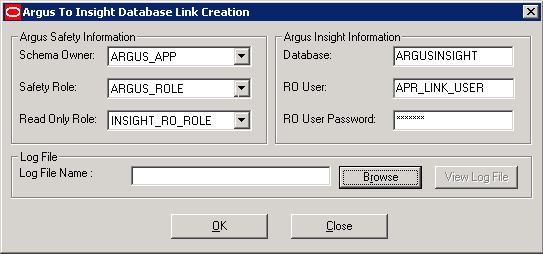
When the system opens the following window, select the Log File for storing the DBLink creation information. Click Save.
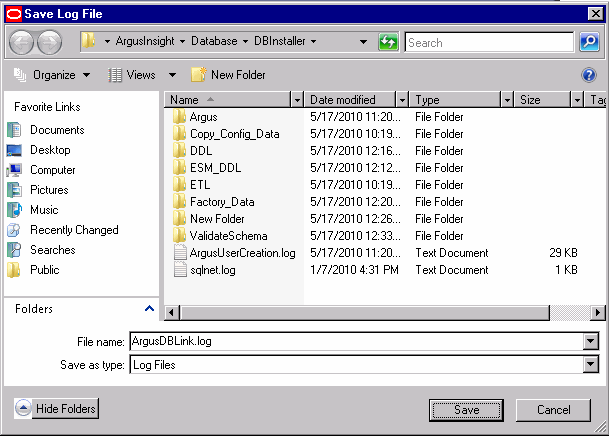
When the system returns to the following dialog box, click OK.
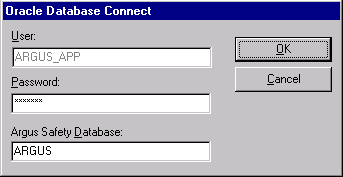
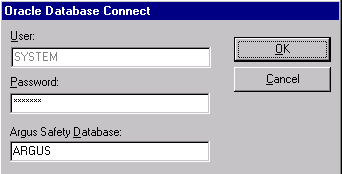
When the system opens the following dialog boxes:
Enter the ARGUS_APP database information. Click OK.
Enter the SYSTEM database information. Click OK.
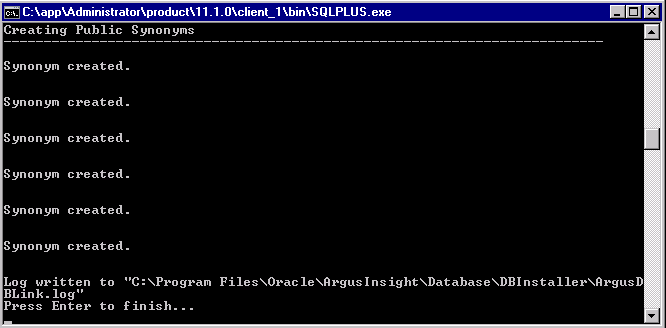
When the system opens the following command screen, press Enter to finish.
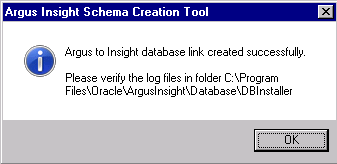
When the system opens the following dialog verify the log files. Click OK.
