| Oracle® Student Learning Installation and Deployment Guide Release 3.1.3 Part Number E20664-04 |
|
|
PDF · Mobi · ePub |
| Oracle® Student Learning Installation and Deployment Guide Release 3.1.3 Part Number E20664-04 |
|
|
PDF · Mobi · ePub |
This chapter describes the required and optional steps for installing Oracle Student Learning (OSL).
Note:
Before you begin installation, it is recommended that you close all other applications.To install OSL, perform the following steps:
Open the Disk1/install directory.
Run the runInstaller executable file.
On the Oracle Universal Installer: Welcome screen, click Next.
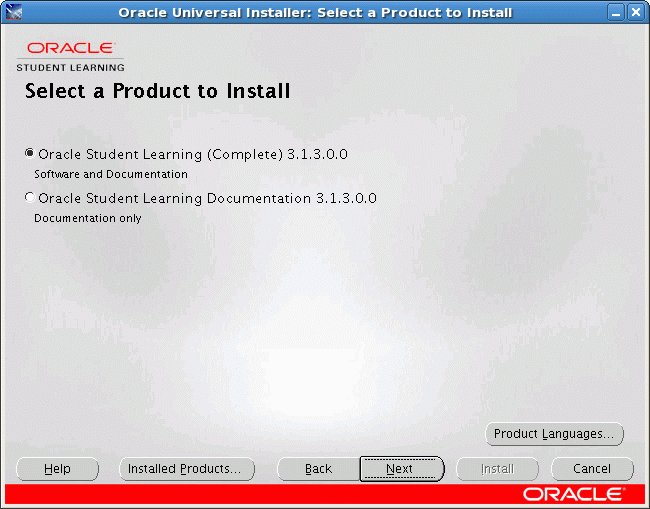
Select a product to install:
Oracle Student Learning (Complete)
Installs all components and documentation.
Oracle Student Learning Documentation
Installs only documentation.
Note:
For all input fields, a basic validation is performed to ensure that you have entered a valid value. If you have entered an invalid value, an error message displays.Depending on your selection, some subsequent steps are not applicable.
Figure 2-2 Selecting a Product to Install
Click Next.
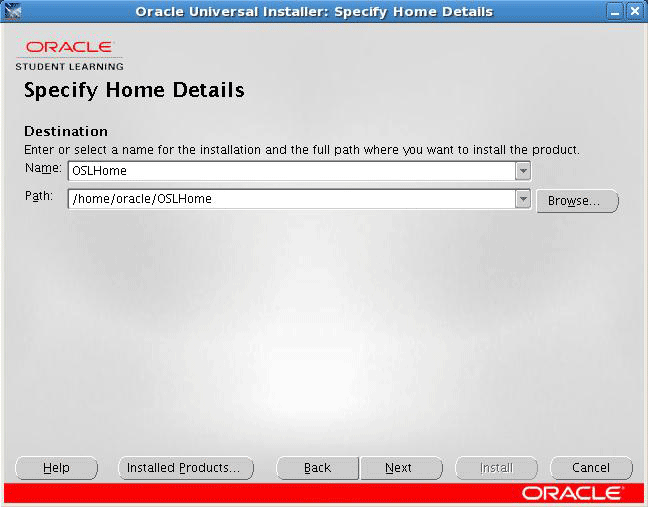
In the Specify Home Details screen, specify the following information:
Name
A unique name to identify Oracle home.
Path
The destination directory for the installation files.
Figure 2-3 Specify installation directory details
Note:
If you are upgrading OSL, ensure that you choose a different directory than the previous version, to avoid overwriting files.Click Next.
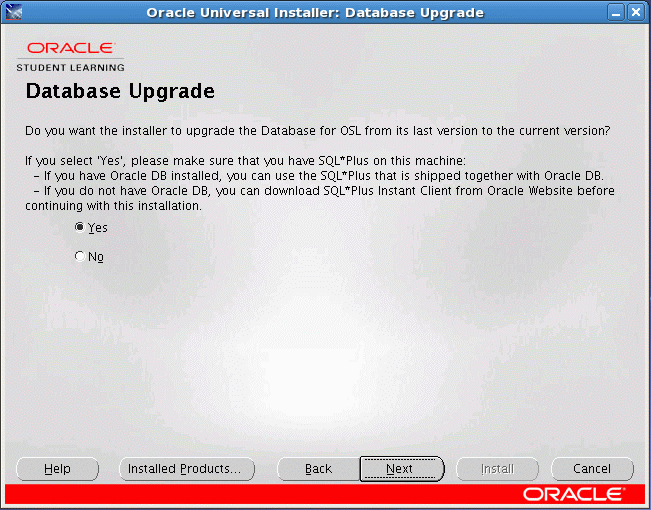
On the Database Upgrade screen, select Yes to upgrade the Learning Tool Database.
If you select Yes, ensure that SQL*Plus is available on this computer.
If you select No, you can manually upgrade the database after OSL installation.
To upgrade the database, use the OSL database account to run the DB_Upgrade.sql script available under LearningTool/Scripts.
Figure 2-4 Choose whether to upgrade the database
Click Next.
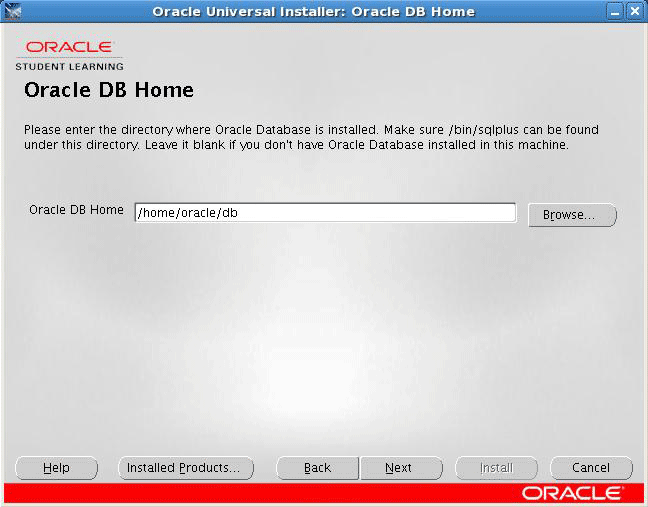
If you selected Yes in Step 8, the Oracle DB Home screen displays. Click Next.
If the Oracle DB is installed on this computer, the database path in the Oracle DB Home field. The installer uses the SQL*Plus that is distributed with the Oracle DB.
If the Oracle DB is not installed on this computer, leave the Oracle DB Home field blank.
Note:
You must provide the path to the SQL*Plus Instant Client in Step 7.Figure 2-5 Specify the Oracle DB Home path
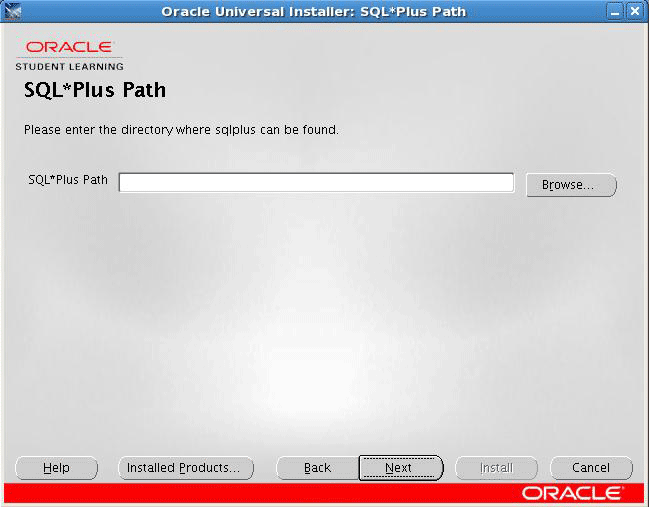
If you leave the input field blank in the Oracle DB Home screen, the SQL*Plus Path screen displays.
Enter the path to the SQL*Plus Instant Client, where sqlplus is located.
Click Next.
Figure 2-6 Specify the SQL*Plus Directory Path
On the Database Information screen, enter the following information:
Host Name
The host name or IP address of the database server.
Port
The listening port number of the database server.
SID
The unique Oracle System ID that identifies the database that OSL is using.
OSL DB Username
The user name of the OSL DB account.
Password
The password of the OSL DB account.
Proceed to Step 25.
Click Next.
If you selected No in Step 8, the Database Initialization screen displays.
Figure 2-8 Choose Whether to Initialize the Database
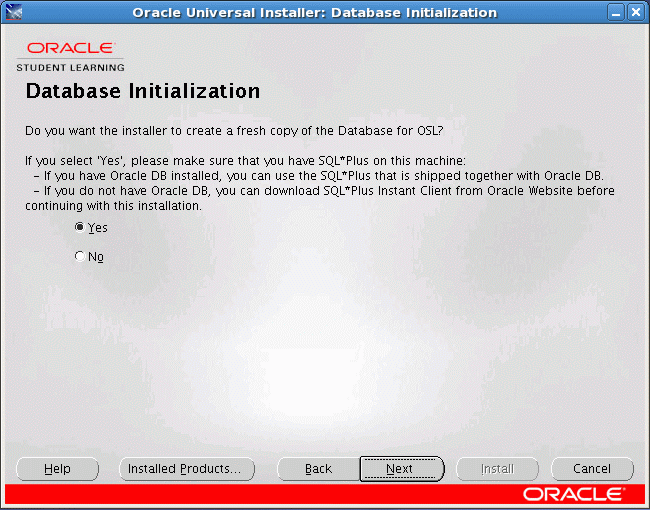
Select Yes to initialize the Learning Tool Database for OSL components.
If you select Yes, ensure that SQL*Plus is available on this computer.
Select No to choose not to initialize the Learning Tool Database for OSL components.
If you select No, you must perform the following steps after installation.
Use the database SYSTEM account to run the Tablespace_Creation.sql script in the [OSL Home]/LearningTool/Scripts directory.
Create a database account to be used for the Learning Tool.
i). Create the user <db_username> identified by <db_password> default tablespace OSL_DATA.
ii). Grant the following privileges to this account:
grant connect, resource, create table, create view, create sequence to <db_username>
Use the database account created in Step (b) to run the following SQL scripts available in the [OSL Home]/LearningTool/Scripts directory.
- DB_Creation.sql
-Production_Seed_Data.sql
Click Next.
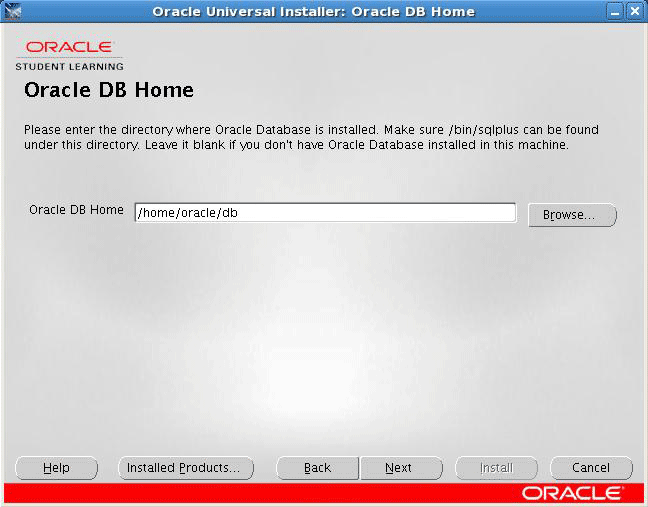
If you selected Yes in Step 15, the Oracle DB Home screen displays.
If you selected No, then proceed to Step 25.
If the Oracle DB is installed on this computer, enter its path in the Oracle DB Home field. The installer uses the SQL*Plus distributed with the Oracle DB.
If the Oracle DB is not installed on this computer, leave the Oracle DB Home field blank. Provide the path to the SQL*Plus Instant Client in Step 19.
Figure 2-9 Specify the Oracle DB Home path
Click Next.
If you left the Oracle DB Home field blank in Step 17, the SQL*Plus Path screen displays.
In the SQL*Plus Path field, enter the path to sqlplus.
Click Next.
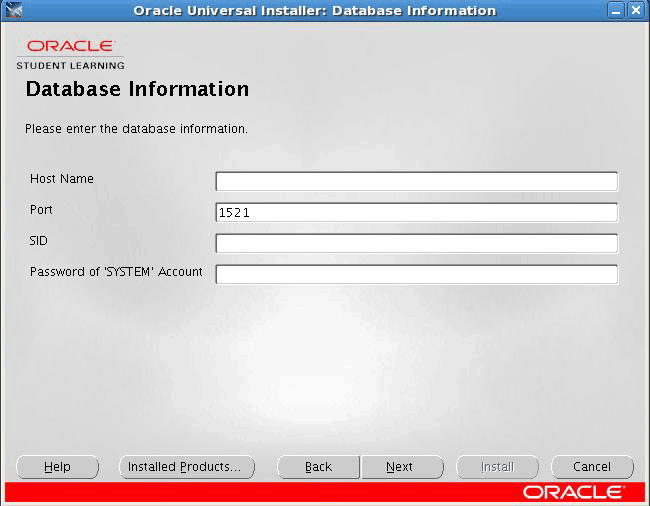
On the Database Information screen, enter the following information:
Host Name
The host name or IP address of the database server.
Port
The listening port number of the database server.
SID
The Oracle System ID that uniquely identifies a particular database on a system.
Password of 'SYSTEM' account
The password of the SYSTEM user.
Figure 2-11 Specify the Database Information
Click Next.
On the DB Account for OSL screen, enter the following information to create an OSL database account:
OSL DB Username
The user name of the OSL DB account.
Password
The password of the OSL DB account.
Confirm Password
Enter the OSL DB account password again.
WARNING:
If the specified OSL DB user name exists, it is dropped and created again. Therefore, all existing data is lost.
Click Next.
Ensure the Summary screen displays correct information and click Install.
To make any modifications in the previous screens, click Back.
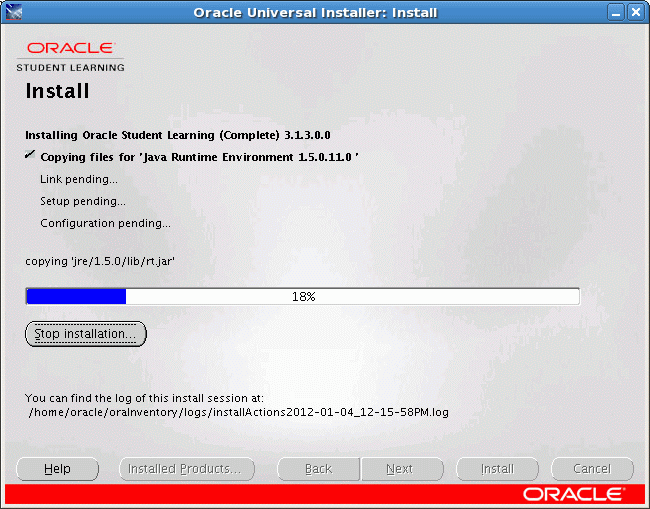
On the Install screen, wait for the installation to complete.
Click Next after the progress bar indicates completed installation.
Figure 2-14 Wait for Installation to Complete
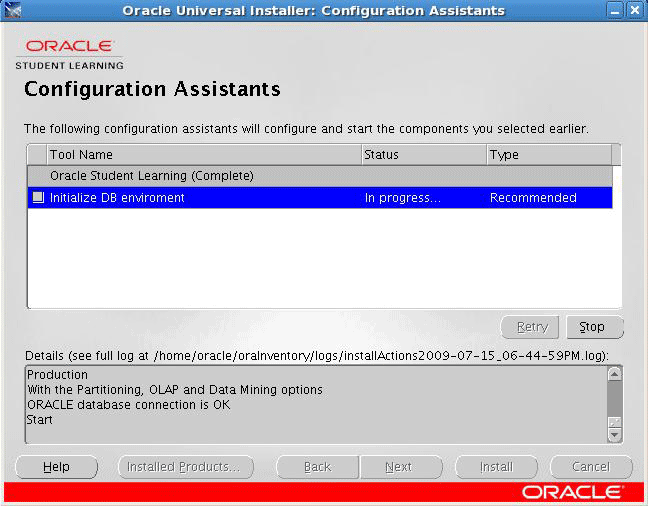
If you selected to upgrade or initialize the Learning Tool Database in Step 15, the Configuration Assistant screen displays.
The installation of OSL component is complete. Proceed to the configuration steps.
Figure 2-15 Viewing the Configuration Assistants
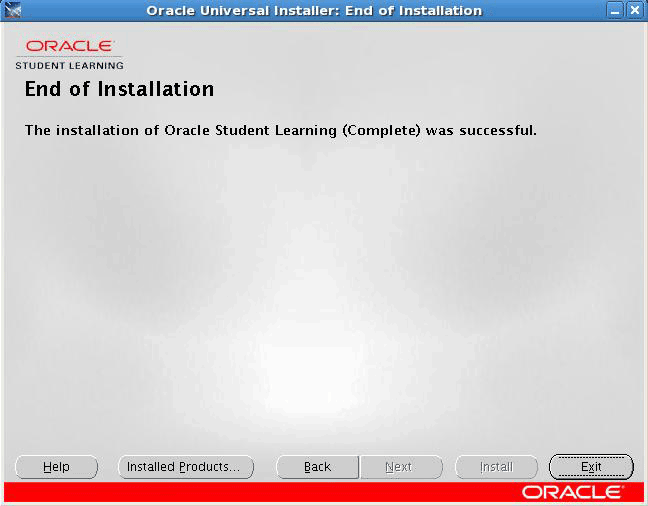
On the End of Installation screen, click Exit.
Figure 2-16 Exiting the Installation Wizard
After the installation process, the following directory structure is available.
Depending on your installation selection, some folders might not be applicable as shown in the example below.
Table 2-1, "OSL Installation Footprint" is an example of a complete OSL installation.
Table 2-1 OSL Installation Footprint
| Folders and Files | Descriptions |
|---|---|
|
−LearningTool |
Contains related files and documents for the following components:
|
|
−−OSLLearningToolApp.ear |
The Learning Tool EAR file. |
|
−−Configuration |
Contains all the customizable files for OSL Learning Tool Admin and OSL Learning Tool. |
|
−−−Admin |
|
|
−−−−DeploymentDescriptors |
Contains all the customizable deployment descriptors for OSL Learning Tool Admin. |
|
−−−−−faces-config.xml |
|
|
−−−−−web.xml |
|
|
−−−−−weblogic.xml |
|
|
−−−−Images |
Contains all the customizable icons and images for OSL Learning Tool Admin. |
|
−−−−Labels |
Contains all the customizable labels and text for OSL Learning Tool Admin. |
|
−−−Common |
|
|
−−−−background |
Contains all background images |
|
−−−−resources |
|
|
−−−−−BackgroundImagesRes.properties |
Contains the location of the background images |
|
−−−−−BackgroundTitle.properties |
Contains the title of the background images. The titles appear in the UI. |
|
−−−LearningTool |
|
|
−−−−−ckeditor |
|
|
−−−−DeploymentDescriptors |
Contains all the customizable deployment descriptors for OSL Learning Tool. |
|
−−−−−adf-config.xml |
|
|
−−−−−faces-config.xml |
|
|
−−−−−jazn-data.xml |
|
|
−−−−−persistence.xml |
|
|
−−−−−osl_configuration.properties |
|
|
−−−−−osl_learning_item_types.xml |
|
|
−−−−−web.xml |
|
|
−−−−−weblogic.xml |
|
|
−−−−−weblogic-ejb-jar.xml |
|
|
−−−−Images |
Contains all the customizable icons and images for OSL Learning Tool. |
|
−−−−Labels |
Contains all the customizable labels and text for OSL Learning Tool. |
|
−−ContentIntegration |
Contains files related to Default Content Integration. |
|
−−−components |
|
|
−−−−OSL_Add_Cancel.zip |
|
|
−−−−OSL_LocaleString.zip |
|
|
−−−−OSL_CheckinLayout.zip |
|
|
−−−−OSL_AdvSearchComponent.zip |
|
|
−−−−OSL_SearchTemplate.zip |
|
|
−−−−OSL_School.zip |
|
|
−−−−OSL_Javascript.zip |
|
|
−−−−OSL_DefaultEnv.zip |
|
|
−−−−OSL_SelectivelyRefineAndIndex.zip |
|
|
−−−−OSL_RemoveStandardProfileLinks.zip |
|
|
−−−−OSL_RemoveSwitchProfile.zip |
|
|
−−−−OSL_CustomAction.zip |
|
|
−−−−OSL_Home_Page_Content.zip |
|
|
−−−−OSL_InterfaceChanges.zip |
|
|
−−−−OSL_ClassicSearchTemplate.zip |
|
|
−−−−AdditionalSortFields.zip |
|
|
−−−−OSL_SearchResults.zip |
|
|
−−−DCI_Config_Assistant.zip |
Contains DCI Configuration Assistant for configure UCM server with the required rules, profiles, and search template. |
|
−−−wsdl |
Contains the .wsdl and .xsd files for Content Integration Web Services. These Web services abstract all the interactions of OSL back-end with an integrated external Content Management System. These interactions include:
|
|
−−−−OSLContentIntegrationService.wsdl |
|
|
−−−−OSLContentIntegrationService.xsd |
|
|
−−−−GeneralContentIntegrationService.wsdl |
|
|
−−−−GeneralContentIntegrationService.xsd |
|
|
−−−−PublishLearningItemService.wsdl |
|
|
−−−−PublishLearningItemService.xsd |
|
|
−−−scripts/oid |
Contains files for OID setup |
|
−−−scripts/ucm |
Contains scripts for UCM setup |
|
−−−−DB_insert.sql |
|
|
−−StudentReporting |
Contains files related to Student Reporting. |
|
−−−OSLCatalog.zip |
|
|
−−−OSL.rpd |
|
|
−−−OSL_error_messages.xml |
|
|
−−Scripts |
Contains the Learning Tool configuration files. |
|
−−−Tablespace_Creation.sql |
|
|
−−−DB_Creation.sql |
|
|
−−−Production_Seed_Data.sql |
|
|
−−−Updated_Seed_Data_For_JP.sql |
The script to update Japanese seed data on top of English data.When you run this script, ensure that the database version is the latest for this release. For software supported and required by this release, see Oracle Student Learning Release Notes. |
|
−−−DB_Upgrade.sql |
|
|
−−−InitializeDB.sh |
The script to initialize Learning Tool Database. |
|
−−−UpgradeDB.sh |
The script to upgrade Learning Tool Database. |
|
−−−build.xml |
The Ant build script that allows users to deploy the Learning Tool and Learning Tool Admin EAR file. |
|
−−−build.properties |
The properties file to be used with Ant build scripts. |
|
−−RDL |
Contains the Repeatable DataLoading related files. |
|
−Doc |
Contains Oracle Student Learning related documents. |
|
−−−InstallationDeploymentGuide.pdf |
|
|
−−−LearningToolUsersGuide.pdf |
|
|
−−−OSLProgrammersGuide.pdf |
|
|
−−−LearningToolCustomizationGuide.pdf |
|
|
−−−LearningToolAdminUsersGuide.pdf |
|
|
−−−ImplementationGuide.pdf |
|
|
−ReleaseNotes.pdf |
The release notes of Oracle Student Learning. |
|
−OPatch |
Contains the OPatch tool to apply patches. |
|
−oui |
Contains the OUI executable file. |
After you install OSL, deploy it using the deployment steps.