Managing Team Actions
The Team Actions list displays on the right side of the Team Development Home page.
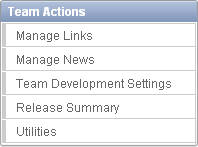
Description of the illustration team_actions.gif
Managing Links
Use the Links page to share links within Team Development.
Accessing the Links Page
To access the links page:
-
On the Workspace home page, click the Team Development icon.
-
On the Team Actions list, click Manage Links.
The Links page appears.
-
Use the Search bar to filter the display.
Available controls on the Search bar include:
-
Search icon - Resembles a magnifying glass. Click this icon to narrow your search to only specific columns. To search all columns, select All Columns.
-
Text area - Enter case insensitive search criteria (wildcard characters are implied) and then click Go.
-
Go button - Executes a search or applies a filter.
-
Actions menu - Displays the Actions menu. Use this menu to customize an interactive report. See "About the Actions Menu".
-
Adding a Link
To add a link:
-
On the Workspace home page, click the Team Development icon.
-
On the Team Actions list, click Manage Links.
The Links page appears.
-
Click Create Link.
The Links page appears.
-
Fill in the appropriate fields. Mandatory fields are marked with a red asterisk (*).
-
To learn more about a specific field, see item Help.
When help is available, the item label changes to red when you pass your cursor over it and the cursor changes to an arrow and question mark. See "About Field-Level Help".
-
Click Create.
Editing or Deleting a Link
To edit or delete a link:
-
On the Workspace home page, click the Team Development icon.
-
On the Team Actions list, click Manage Links.
The Links page appears.
-
To edit a link:
-
Click the Edit icon.
The Links page appears.
-
Edit the appropriate fields.
-
Click Apply Changes.
-
-
To delete a new link:
-
Click the Edit icon.
The Links page appears.
-
Click Delete.
-
Managing News Entries
Use the News region to communicate with other developers. You can add or view news entries posted by other workspace users. News displays on the Application Express home page, the Team Development home page, and News page.
Accessing the News Page
To access the News page:
-
On the Workspace home page, click the Team Development icon.
-
On the Team Actions list, click Manage News.
The News page appears.
-
Use the Search bar to filter the display. Available controls include:
-
Search icon - Resembles a magnifying glass. Click this icon to narrow your search to only specific columns. To search all columns, select All Columns.
-
Text area - Enter case insensitive search criteria (wildcard characters are implied) and then click Go.
-
Go button - Executes a search or applies a filter.
-
View. Toggles between Report and Details views. To change the view, click the following icons:
-
View Report displays each entry as a line in a report.
-
View Detail displays detailed information about each news entry.
-
-
Actions menu - Displays the Actions menu. Use this menu to customize an interactive report. See "About the Actions Menu".
-
Adding a News Entry
To add a news entry:
-
On the Workspace home page, click the Team Development icon.
-
On the Team Actions list, click Manage News.
The News page appears.
-
To add news:
-
Click Add News.
The News page appears.
-
Enter text in the News Entry field.
-
Click Add News.
-
Editing or Deleting News
To edit or delete news:
-
On the Workspace home page, click the Team Development icon.
-
On the Team Actions list, click Manage News.
The News page appears.
-
To edit a news item:
-
Click the Edit icon.
-
Edit the news item.
-
Click Apply Changes.
-
-
To delete a news item:
-
Click the Edit icon.
-
Click Delete.
-
Managing Team Development Settings
Team Development Settings enable you specify how to dos and bugs display, default values for release, owner, and priority, and what tracking attributes are enabled for the current workspace.
To edit Team Development preferences.
-
On the Workspace home page, click the Team Development icon.
-
On the Team Actions list, click Team Development Settings.
The Settings page appears.
-
Edit the appropriate attributes.
-
To learn more about a specific field, see item Help.
When help is available, the item label changes to red when you pass your cursor over it and the cursor changes to an arrow and question mark. See "About Field-Level Help".
-
Click Apply Changes.
Tip:
Click Reset to Default to return the settings to the default values.Viewing a Release Summary
The Release Summary report enables you to organize features, to dos, and bugs.
To access the Release Summary report:
-
On the Workspace home page, click the Team Development icon.
-
On the Team Actions list, click Release Summary.
The Release Summary page appears.
-
Use the Search bar to restrict the view. To filter the view, select a developer or release and click Set.
-
To email the report:
-
Click Email.
The Email Report page appears.
-
Fill in the appropriate fields. Mandatory fields are marked with a red asterisk (*).
-
To learn more about a specific field, see item Help.
When help is available, the item label changes to red when you pass your cursor over it and the cursor changes to an arrow and question mark. See "About Field-Level Help".
-
-
Click Email.
Tip:
Click Reset to return the report to the default view.About Utilities
Use Team Development Utilities to manage team development data.
To access Team Development Utilities:
-
On the Workspace home page, click the Team Development icon.
-
On the Team Actions list, click Utilities.
-
Options include:
-
Push past due Bugs - Enables you to extend the estimated fix date of bugs that are not yet complete. You can filter and then select just the bugs you want to push and then extend for any number of days.
-
Update Assignees - Enables you to reassign selected components from one user to another user, for all releases or just a selected release. Only incomplete components are reassigned (that is, those components having a status less than 100% or milestone date in the future).
-
Purge Data - Deletes all entries for the selected components. This is useful when beginning a new development cycle or after using a workspace for testing.
-
Manage Team Development Settings - See "Managing Team Development Settings".
-
Feature Utilities - See "About Feature Utilities"
-
About Feature Utilities
Use the Feature Utilities page to manage milestones for multiple features at once. Use this feature to:
-
Assign milestones to features
-
Set the feature due date to a milestone date
-
Change milestone for overdue features
-
Push due date of open features
To access the Feature Utilities page:
-
On the Workspace home page, click the Team Development icon.
-
On the Team Actions list, click Utilities.
-
On the Utilities page, click the Feature Utilities link.
-
On the Feature Utilities page:
-
Select one of the following:
-
Assign milestones to features (only those with no milestone currently assigned).
-
Set feature due date to milestone date (only affects features).
-
Change milestone for overdue features.
-
Push due date of open features.
-
-
Click Next.
-
-
Follow the on-screen instructions.
-
To learn more about a specific field, see item Help.
When help is available, the item label changes to red when you pass your cursor over it and the cursor changes to an arrow and question mark. See "About Field-Level Help".