Managing Application Express Users
Workspace administrators can create new user accounts, manage existing user accounts, and change user passwords. User accounts are particularly useful if you are using Application Express Authentication. Application Express Authentication checks the user name and password against the Oracle Application Express account repository. The Oracle Application Express account repository contains account information for developers and administrators when they log in to Oracle Application Express applications.
If the workspace administrator enables the Account Locking/Expiration feature for end user accounts, new account management attributes are exposed. Accounts may be locked, unlocked, or expired. Passwords for those accounts can also have restrictions, such as a fixed lifetime, a maximum number of consecutive incorrect passwords when attempting to log in, and a requirement to be changed on first use.
See Also:
"Managing Users in an Oracle Application Express Instance" and "Exporting Workspace Users" in Oracle Application Express Application Builder User's GuideCreating New User Accounts
Workspace administrators can create three different types of user accounts:
-
Developers can create and edit applications and view developer activity, session state, workspace activity, application, and schema reports. In Icons view, developers are yellow.
-
Workspace administrators perform administrator tasks specific to a workspace, such as managing user accounts, managing groups, altering passwords of users within the same workspace, and managing development services. In Icons view, Workspace administrators are red.
-
End users have no development privileges and can access only applications that do not use an external authentication scheme. In Icons view, End users are green.
To create a new user account:
-
Log in to Oracle Application Express. See "Logging In To Oracle Application Express" in Oracle Application Express Application Builder User's Guide.
The Workspace home page appears.
-
Click the Administration icon.
The Administration page appears.
-
Click Manage Users and Groups.
-
Click Create User.
The Create User page appears.
-
Under User Identification, enter:
-
Username - Enter the username used to log in to the system. Restrictions include:
-
Maximum length of 100 characters
-
No spaces
-
Only these special characters are permitted: ampersand (@) and period (.)
-
-
Email Address - Enter the valid email address for this user.
-
First Name - Enter the first or given name to further identify the user (optional).
-
Last Name - Enter the last or family name to further identify the user (optional).
-
Description - Enter comments about this user (optional).
-
-
Under Account Privileges:
-
Default Schemas - Specify the default schema used for data browsing, application creation, and SQL script execution.
When using workspaces that have more than one schema available, this schema is the default. This setting does not control security, only the user's preference.
-
Accessible Schemas (null for all) - Leave this blank to enable the end user to access all schemas associated with the workspace.
-
User is a workspace administrator - Specify if this user should have workspace administrator privileges.
Administrators are given access to all components. Additionally, they can manage user accounts, groups, and development services. Components may not be available if they are switched off by Instance Administrators.
-
User is a developer - Specify if this user should have developer privileges.
Developers must have access to either Application Builder, SQL Workshop, or both. Components may not be available if they are switched off by Instance Administrators.
-
Application Builder Access - Determines whether a developer has access to the Application Builder.
-
SQL Workshop Access - Determines whether a developer has access to the SQL Workshop.
-
Team Development Access - Determines whether a developer has access to the Team Development.
-
Set Account Availability - Select Locked to prevent the account from being used. Select Unlocked to allow the account to be used.
If the user has exceeded the maximum login failures allowed, specified in Workspace Preferences, then there account will be locked automatically.
Tip:
An Instance administrator can configure these settings for an entire Oracle Application Express instance and define password complexity policies. See "Enabling Login Controls for All Workspaces". "About Strong Password Policies", and "Configuring Password Policies" -
-
Under Password:
-
Password - Enter a case sensitive password.
-
Confirm Password - Enter the password again.
-
Require Change of Password On First Use - Select No to allow the user to use the same password until it expires. Select Yes to require the user to change the password immediately when logging in the first time.
Tip:
An Instance administrator can configure these settings for an entire Oracle Application Express instance and define password complexity policies. See "Enabling Login Controls for All Workspaces". "About Strong Password Policies", and "Configuring Password Policies" -
-
Under User Groups, optionally select one or more user groups by holding down the CTRL key and selecting the groups.
-
Click Create User or Create and Create Another.
Creating Multiple Users at Once
Workspace administrators can create multiple user accounts in a single operation.
To create multiple user accounts at once:
-
Log in to Oracle Application Express. See "Logging In To Oracle Application Express" in Oracle Application Express Application Builder User's Guide.
The Workspace home page appears.
-
Click the Administration icon.
The Administration page appears.
-
Click Manage Users and Groups.
-
On the Tasks list, click Create Multiple Users.
The Create Multiple Users page appears.
-
In List of Email Addresses, enter or copy and paste email addresses separated by commas, semicolons, or new lines.
-
Under Users:
-
List of Email Addresses - Enter or copy and paste email addresses separated by commas, semicolons, or new lines.
-
Usernames - Specify whether to include or exclude the domain name. Select one of the following:
-
Set username to full email address
-
Exclude @ domain as part of the username
Removes all text after the @ symbol (for example,
user1@xyz.combecomesuser1).
-
-
-
Under Account Privileges:
-
Default Schemas - Specify the default schema used for data browsing, application creation, and SQL script execution. When using workspaces that have more than one schema available, this schema is the default for creating applications, performing SQL queries, and so on.
-
Accessible Schemas (null for all) - Enter a colon-delimited list of schemas for which this developer has permissions when using the SQL Workshop. The list of schemas you enter here restricts the user to a subset of the full set of schemas provisioned for the workspace and determines what schema names the user sees in SQL Workshop.
-
Users are workspace administrators - Specify if these users should have workspace administrator privileges.
Administrators are given access to all components. Additionally, they can manage user accounts, groups, and development services. Components may not be available if they are switched off by Instance Administrators Additionally, they can also manage user accounts, groups, and development services.
-
Users are Developers - Specify if these users should have developer privileges. Developers must have access to either Application Builder, SQL Workshop, or both. Components may not be available if they are switched off by Instance Administrators.
-
Application Builder Access - Determines whether a developer has access to the Application Builder.
-
SQL Workshop Access - Determines whether a developer has access to the SQL Workshop.
-
Team Development Access - Determines whether a developer has access to the Team Development.
-
-
Under Password:
-
Password - Specify a password. Passwords are case sensitive. Developers can change their own passwords. Developers with Administrator privilege can change the passwords of users within the same workspace.
-
Confirm Password - Enter the password again.
-
-
Click Apply Changes.
Editing Existing User Accounts
Workspace administrators can edit existing user accounts.
To edit an existing user account:
-
Log in to Oracle Application Express. See "Logging In To Oracle Application Express" in Oracle Application Express Application Builder User's Guide.
The Workspace home page appears.
-
Click the Administration icon.
The Administration page appears.
-
Click Manage Users and Groups.
The Users page appears.
-
You can customize the appearance the page using the Search bar at the top of the page. See "Customizing Interactive Reports" in Oracle Application Express Application Builder User's Guide.
-
Select a user.
The Edit User page appears.
-
Under Edit User, update the username, email address, first name, last name, and description.
-
Under Account Privileges:
-
Default Schema - Identifies the default schema used for data browsing, application creation, and SQL script execution.
-
Accessible Schemas (null for all) - Enter a colon-delimited list of schemas for which this developer has permissions when using the SQL Workshop. This list of schemas restricts the user to a subset of the full set of schemas provisioned for the workspace and determines what schema names the user sees in SQL Workshop.
-
User is a workspace administrator - Specify if this user should have workspace administrator privileges.
Administrators are given access to all components. Additionally, they can manage user accounts, groups, and development services. Components may not be available if they are switched off by Instance Administrators.
-
User is a developer - Developers create and modify applications and database objects and view developer activity, session state, workspace activity, application, and schema reports.
-
Application Builder Access - Determines whether a developer has access to the Application Builder.
-
SQL Workshop Access - Determines whether a developer has access to the SQL Workshop.
-
Team Development Access - Determines whether a developer has access to the Team Development.
-
Account Availability - Select Locked to prevent the account from being used. Select Unlocked to enable the account to be used.
If the user has exceeded the maximum login failures allowed, specified in Workspace Preferences, then there account will be locked automatically.
Tip:
An Instance administrator can configure these settings for an entire Oracle Application Express instance. See "Configuring Security Settings". -
-
Under Password:
-
Password - Enter a case sensitive password.
-
Confirm Password - Enter the password again.
-
Require Change of Password On First Use - Select No to allow the user to use the same password until it expires. Select Yes to require the user to change the password immediately when logging in the first time.
-
-
Under User Groups, optionally select one or more user groups by holding down the CTRL key and selecting the groups.
-
Click Apply Changes.
Deleting or Locking User Accounts
Workspace administrators can delete or lock user accounts.
To delete or lock a user account:
-
Navigate to the Workspace home page.
-
Click the Administration icon.
The Administration page appears.
-
Click Manage Users and Groups.
The Users page appears.
-
Select a user.
The Edit User page appears.
-
To delete a user:
-
Click the Delete User button.
-
Confirm your selection and click OK.
-
-
To lock the account:
-
Scroll down to the Account Privileges section.
-
For Account Availability, select Locked.
-
Click Apply Changes.
-
Deleting Multiple Users at Once
Workspace administrators can delete multiple user accounts at the same time
To delete multiple user accounts:
-
Log in to Oracle Application Express. See "Logging In To Oracle Application Express" in Oracle Application Express Application Builder User's Guide.
The Workspace home page appears.
-
Click the Administration icon.
The Administration page appears.
-
Click Manage Users and Groups.
-
On the Tasks list, click Delete Multiple Users.
The Delete Multiple Users page appears.
-
Select the users to be deleted.
-
Click Delete Users.
Changing an End User Password
To change an end user password:
-
Log in to Oracle Application Express. See "Logging In To Oracle Application Express" in Oracle Application Express Application Builder User's Guide.
The Workspace home page appears.
-
Click the Administration icon.
The Administration page appears.
-
Click Manage Users and Groups.
The Users page appears.
-
Select a user.
Tip:
To search for an existing user, enter a query in the Find field and click Go. -
Under Password, type a new password in the Password and Confirm Password fields.
-
Click Apply Changes.
Viewing the Users Dashboard
The Users Dashboard displays a summary of your account information, users in the current workspace, defined user groups, recently created users, and user status.
See Also:
"Viewing Workspace Dashboards"To view the Users Dashboard:
-
Log in to Oracle Application Express. See "Logging In To Oracle Application Express" in Oracle Application Express Application Builder User's Guide.
The Workspace home page appears.
-
Click the Administration icon.
The Administration page appears.
-
Click Dashboards.
The Dashboard page appears.
-
Click Users.
The Users Dashboard appears listing the following information:
-
Your Account lists information about your account including your username, workspace, account credentials, and email address.
-
Workspace Users lists statistics about all users in the current workspace.
-
User Groups lists all currently defined user groups.
-
Recently Created lists recently created users.
-
User Status lists valid passwords, expired passwords, locked accounts, unlocked accounts, and any accounts for which no email address is defined.
-
Using Groups to Manage Application Express Users
You can create groups to restrict access to specific features and functions. Note that groups are not portable over different authentication schemes. Groups are primarily useful when used with Application Express Authentication (Internal Cookie User authentication).
See Also:
"Managing Application Express Users"“Creating a Group
-
Log in to Oracle Application Express. See "Logging In To Oracle Application Express" in Oracle Application Express Application Builder User's Guide.
The Workspace home page appears.
-
Click the Administration icon.
The Administration page appears.
-
From the Tasks list, click Manage User Groups.
The User Groups page appears.
-
On the User Groups page, click Create User Group.
The Create/Edit User Group page appears.
-
Specify a group name and description, and click Create Group.
Editing an Existing User Group
To edit an existing group assignment:
-
Log in to Oracle Application Express. See "Logging In To Oracle Application Express" in Oracle Application Express Application Builder User's Guide.
The Workspace home page appears.
-
Click the Administration icon.
The Administration page appears.
-
From the Tasks list, click Manage User Groups.
The User Groups page appears.
-
You can customize the appearance the page using the Search bar at the top of the page. See "Customizing Interactive Reports" in Oracle Application Express Application Builder User's Guide.
-
Select the group you want to edit.
The Create/Edit User Group page appears.
-
Make the appropriate edits and click Apply Changes.
Adding and Removing Users from a Group
-
Log in to Oracle Application Express. See "Logging In To Oracle Application Express" in Oracle Application Express Application Builder User's Guide.
The Workspace home page appears.
-
Click the Administration icon.
The Administration page appears.
-
Click Manage Users and Groups.
The Users page appears.
-
Select a user.
The Edit User page appears.
-
Scroll down to User Groups.
Each user belongs to the groups on the right.
-
To add a user to a group, select the group and click Move.
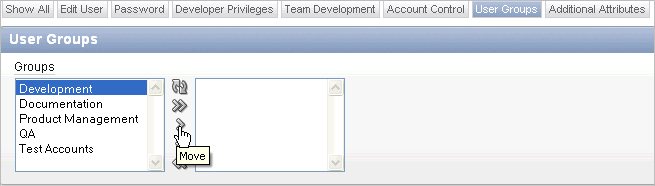
Description of the illustration add_user_group.gif
-
To remove a user from a group, select the group and click Remove.
-
Click Apply Changes.