5 Using Blackouts
Blackouts allow Enterprise Manager administrators to suspend all data collection activity on one or more monitored targets. The primary reason for blacking out targets is to allow Enterprise Manager administrators to perform scheduled maintenance on those targets.
A blackout can be defined for individual target(s), a group of multiple targets that reside on different hosts, or for all targets on a host. The blackout can be scheduled to run immediately or in the future, and to run indefinitely or stop after a specific duration. Blackouts can be created on an as-needed basis, or scheduled to run at regular intervals. If, during the maintenance period, the administrator discovers that he needs more (or less) time to complete his maintenance tasks, he can easily extend (or stop) the blackout that is currently in effect.
Blackout functionality is available from both the Enterprise Manager console as well as via the Enterprise Manager command-line interface (EMCLI). EMCLI is often useful for administrators who would like to incorporate the blacking out of a target within their maintenance scripts.
5.1 Working with Blackouts
Blackouts allow you to collect accurate monitoring data. For example, you can stop data collections during periods where a managed target is undergoing routine maintenance, such as a database backup or hardware upgrade. If you continue monitoring during these periods, the collected data will show trends and other monitoring information that are not the result of normal day-to-day operations. To get a more accurate, long-term picture of a target's performance, you can use blackouts to exclude these special-case situations from data analysis.
Enterprise Manager administrators who have at least Blackout Target privileges on all Selected Targets in a blackout will be able to create, edit, stop, or delete the blackout.
In case an administrator has at least Blackout Target privileges on all Selected Targets (targets directly added to the blackout), but does not have Blackout Target privileges on some or all of the Dependent Targets, then that administrator will be able to edit, stop, or delete the blackout. For more information on Blackout access, see About Blackouts Best Effort.
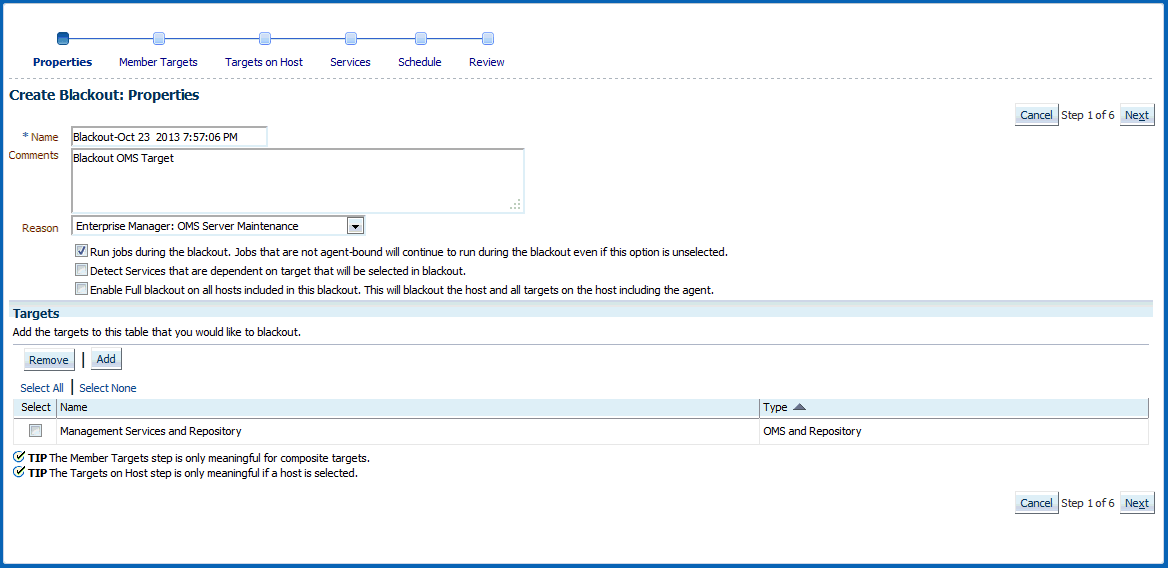
5.1.1 Creating a Blackout
To create a blackout:
-
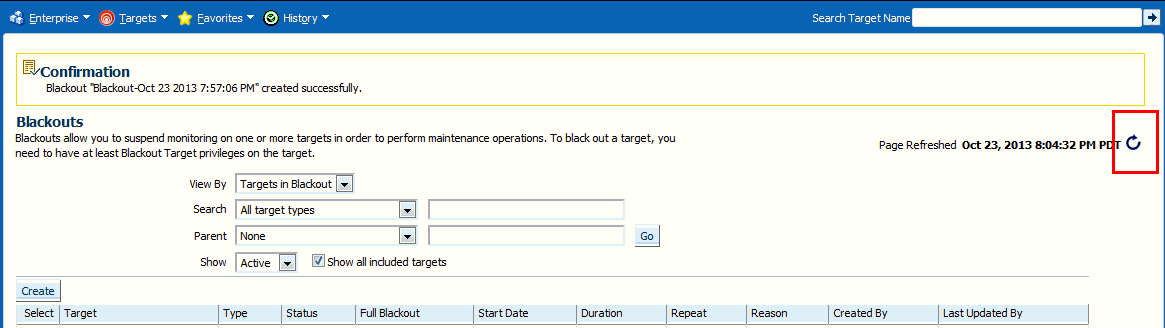
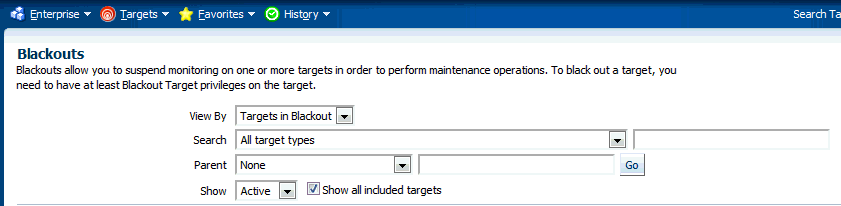
From the Enterprise menu, select Monitoring, then select Blackouts.
-
From the table, click Create. Enterprise Manager displays a wizard page to guide you through the steps required to create a blackout. Click Help from any wizard page for more information on specific steps.
-
To display the latest blackout information, click the refresh icon.
5.1.2 Editing a Blackout
To edit a blackout:
-
From the Enterprise menu, select Monitoring, then select Blackouts.
-
If necessary, use the Search and display options to show the blackouts you want to change in the blackouts table.
-
Select the desired blackout and click Edit.
Note:
Enterprise Manager also allows you to edit blackouts after they have already started.5.1.3 Viewing Blackouts
To view information and current status of a blackout:
-
From the Enterprise menu, select Monitoring, then select Blackouts.
-
If necessary, you can use the Search and display options to show the blackouts you want to view in the blackouts table.
-
Select the desired blackout and click View. Alternatively, if you are in View By - 'Targets in Blackout', then you can click on blackout status in the table to access the View Blackout page. If you are in View By - 'Blackout Name', then you can click on a blackout name in the table to access the View Blackout page.
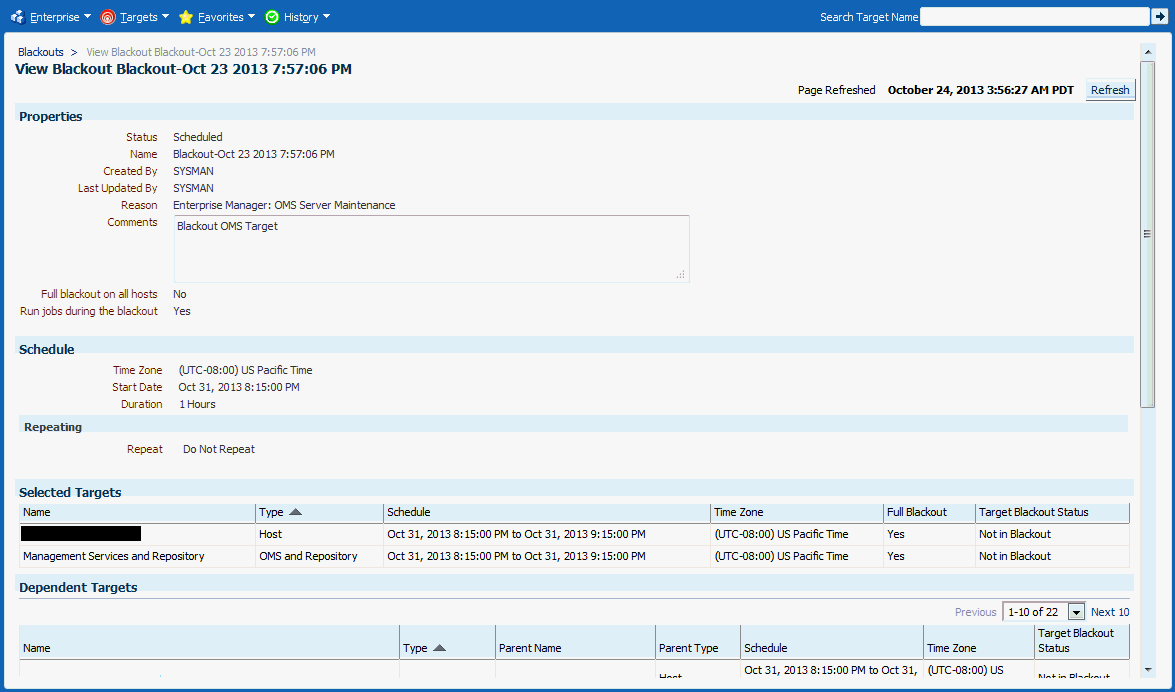
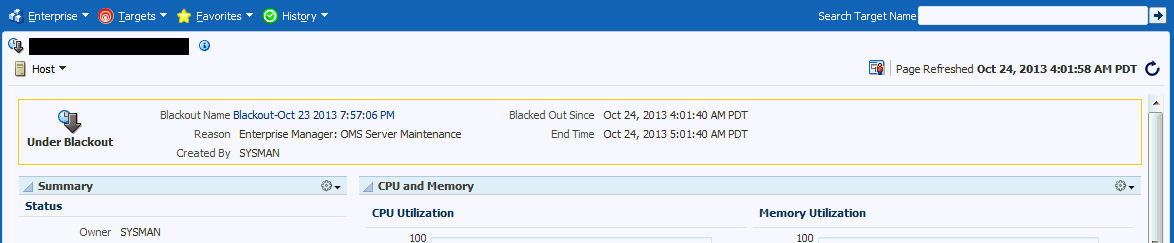
You can bookmark the View Blackout page as a quick way to monitor the status of a particular blackout. Click Refresh to display the most recent blackout information.
5.1.3.1 Viewing Blackouts on Targets Monitored by a Specific Management Agent
To view the blackouts configured for the targets monitored by the Management Agent:
-
From the Cloud Control home page, click Targets and then All Targets. In the All Targets page, locate the Management Agent in the list of targets. Click on the Management Agent's name. This brings you to the Management Agent's home page.
-
The list of targets monitored by the Management Agent are listed in the Monitored Targets section.
-
For each of target in the list:
-
Click the target name. This brings you to the target's home page.
-
From the <Target> menu, select Monitoring and then click Blackouts. This allows you to check any currently running blackouts or blackouts that are scheduled in the future for this target.
-
5.1.4 Purging Blackouts that have Ended
When managing a large number of targets, the number of completed blackouts, or those blackouts that have been ended by an administrator can become quite large. Removing these ended blackouts facilitates better search an display for current blackouts.
To purge ended blackouts from Enterprise Manager:
-
From the Enterprise menu, select Monitoring, then select Blackouts.
-
Use the search criteria to filter for the desired targets.
-
From the Show drop-down menu, select History.
-
In the table, select the ended blackouts you want to remove and click Delete. The purge confirmation page appears.
-
Click Yes to complete the purge process.
5.2 Controlling Blackouts Using the Command Line Utility
You can control blackouts from the Oracle Enterprise Manager 12c Cloud Control Console or from the Enterprise Manager command line utility (emctl). However, if you are controlling target blackouts from the command line, you should not attempt to control the same blackouts from the Cloud Control Console. Similarly, if you are controlling target blackouts from the Cloud Control Console, do not attempt to control those blackouts from the command line.
From the command line, you can perform the following blackout functions:
-
Starting Immediate Blackouts
-
Stopping Immediate Blackouts
-
Checking the Status of Immediate Blackouts
Note:
When you start a blackout from the command line, any Enterprise Manager jobs scheduled to run against the blacked out targets will still run. If you use the Cloud Control Console to control blackouts, you can optionally prevent jobs from running against blacked out targets.
To use the Enterprise Manager command-line utility to control blackouts:
-
Change directory to the
AGENT_HOME/bindirectory (UNIX) or the
AGENT_INSTANCE_HOME\bindirectory (Windows). -
Enter the appropriate command as described in Table 5-1, "Summary of Blackout Commands".
Note:
When you start a blackout, you must identify the target or targets affected by the blackout. To obtain the correct target name and target type for a target, see Chapter 22, "Administering Enterprise Manager Using EMCTL Commands."
Table 5-1 Summary of Blackout Commands
Use the following examples to learn more about controlling blackouts from the Enterprise Manager command line:
-
To start a blackout called "bk1" for databases "db1" and "db2," and for Oracle Listener "ldb2," enter the following command:
$PROMPT> emctl start blackout bk1 db1 db2 ldb2:oracle_listener -d 5 02:30
The blackout starts immediately and will last for 5 days 2 hours and 30 minutes.
-
To check the status of all the blackouts on a managed host:
$PROMPT> emctl status blackout
-
To stop blackout "bk2" immediately:
$PROMPT> emctl stop blackout bk2
-
To start an immediate blackout called "bk3" for all targets on the host:
$PROMPT> emctl start blackout bk3 -nodeLevel
-
To start an immediate blackout called "bk3" for database "db1" for 30 minutes:
$PROMPT> emctl start blackout bk3 db1 -d 30
-
To start an immediate blackout called "bk3" for database "db2" for five hours:
$PROMPT> emctl start blackout bk db2 -d 5:00
5.3 About Blackouts Best Effort
The Blackouts Best Effort feature allows you to create blackouts on aggregate targets, such as groups or systems, for which you do not have Blackout Target (or Higher) privileges on all members of the aggregate target.
Here, an Enterprise Manager administrator has Blackout Target privilege on an aggregate target but do not have OPERATOR privilege on its member/associated targets. You should ideally create a Full Blackout on this aggregate target. When defining the blackout, you are allowed to select any member target, even those member targets for which you have no Blackout Target privileges.
When the blackout actually starts, Enterprise Manager checks privileges on each member target and only blackout those on which you have Blackout Target( or Higher) privileges. This automated privilege check and target blackout selection is Enterprise Manager's "best effort" at blacking out the aggregate target.
5.3.1 When to Use Blackout Best Effort
The Blackout Best Effort functionality is targeted towards the creation of blackouts on targets of any aggregate type, such as Group, Hosts, Application Servers, Web Applications, Redundancy Groups, or Systems.
All targets the blackout creator has Blackout Target (or higher) privilege on will be displayed in the first step of Create/Edit Blackout Wizard. Once the blackout creator selects an aggregate type of target to be included in the Blackout Definition, this Blackout is "Full Blackout" by default.
The creator has the option of choosing the Blackout to run on ”All Current” or ”Selected” Targets, by selecting the appropriate values from the List box. Only when the "Full Blackout" option is chosen, will Blackout Best Effort affect targets for which the creator does not have Blackout Target (or higher) privileges.
Consider 3 targets T1,T2 and T3 (all databases). A Group G1 contains all these 3 targets.
User U1 has OPERATOR privilege on T1,T2 and G1. User U1 has VIEW privilege on T3.
User U1 creates a scheduled full blackout on target G1. Scheduled implies that the blackout will start at a later point in time.
At the time of blackout creation, the tip text Needs Blackout Target privilege, see Tip below the table would be shown beside target T3.
When this blackout starts, if by that time User U1 has been granted OPERATOR privileges on target T3, then target T3 would also be under blackout. Otherwise only targets T1, T2 and G1 will be under blackout.