11 Upgrading Oracle Management Agents 10g Release 5 (10.2.0.5) or 11g Release 1 (11.1.0.1) to 12c Release 5 (12.1.0.5)
This chapter describes how you can upgrade your Oracle Management Agents. In particular, this part covers the following:
-
Deploying and Configuring Oracle Management Agents 12c Release 5 (12.1.0.5)
-
Generating a Health Report of Deployed Oracle Management Agents 12c Release 5 (12.1.0.5)
-
Switching Over to Oracle Management Agent 12c Release 5 (12.1.0.5)
11.1 Deploying and Configuring Oracle Management Agents 12c Release 5 (12.1.0.5)
This section covers the following:
-
Before You Begin Deploying and Configuring Oracle Management Agents 12c Release 5 (12.1.0.5)
-
Deploying and Configuring Oracle Management Agents 12c Release 5 (12.1.0.5)
11.1.1 Before You Begin Deploying and Configuring Oracle Management Agents 12c Release 5 (12.1.0.5)
Before you deploy and configure Oracle Management Agent, keep these point in mind:
-
You cannot deploy and configure Oracle Management Agent 12c for problematic Management Agents. To identify the problematic Management Agents, see Section 10.6.5.
-
You must deploy and configure Oracle Management Agent 12c only on existing Management Agents that are completely upgradable. To identify whether the Management Agents are completely upgradable, see Section 10.6.3.
-
For 2-system upgrade, do NOT deploy Oracle Management Agent 12c on the remote OMS host because the Enterprise Manager installer will take care of installing it while installing Oracle Management Service 12c.
-
For 1-system upgrade, use the Preupgrade Console to deploy Oracle Management Agent 12c for the central agent. Central agent is the Management Agent installed with the old OMS.
However, for 2-system upgrade and 1-system upgrade on a different host, do NOT use the Preupgrade Console to deploy Oracle Management Agent 12c as the central agent on that remote host. Instead, use the Enterprise Manager Cloud Control Installation Wizard to install the Management Agent along with the OMS. In the Preupgrade Console, you will be able to select the central agents, but not proceed with the deployment and configuration job. When you try to submit the job, the selected central agents are validated and reported as problematic agents, which cannot be upgraded. If you want to continue monitoring the targets that were monitored by the central agent, then follow the instructions outlined in Section 13.14.
-
You need the Management Agent credentials to deploy and configure the software binaries, and the root credentials to run the
root.shscript. In this regard, the following use cases are supported:-
Use Case 1: You have the agent as well as the root credentials. In this case, you can deploy and configure successfully.
-
Use Case 2: You have the agent user name and root user name, but not their passwords. However, you have SUDO or PowerBroker utility installed in your environment that can enable you to switch over to another user.
In this case, you can still deploy and configure successfully. You can use SUDO or PowerBroker, depending on what is installed in your environment, to switch over to another user account that has the required privileges.
-
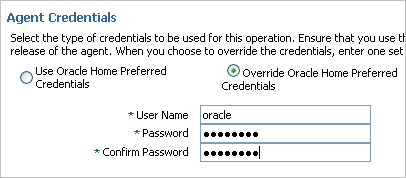
Use Case 3: You have the agent credentials, but not the root credentials, and you do not have SUDO or PowerBroker utility in your environment.
In this case, you can still deploy and configure successfully. In the Deploy and Configure Agents Wizard, in the Agent Credentials section, enter the agent credentials as described in Step (10) and as shown in Figure 11-1.
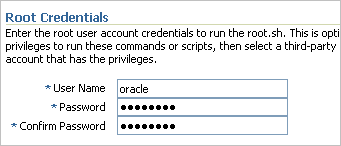
Then, on the Optional Details page of the wizard, in the Root Credentials section as described in Step (16) and as shown in Figure 11-2, enter any dummy user name and password.
Proceed with the deployment and configuration. Note that the deployment will succeed, but the
root.shscript will not run. One of the steps in the upgrade job will fail stating that the root password was incorrect and that the root script was not run. Ignore the error and proceed.After the deployment, contact the adminitrator who has the root credentials, and request him or her to manually run this
root.shscript on each of the Management Agents.Note:
Theroot.shscript can be run any time after the deployment, and not necessarily immediately after the deployment. Even if the script is not run, the upgrade process will not be affected in any way—the health check, sign-off, and switchover operations will work without any issues. However, Oracle strongly recommends that you run the script before using the Enterprise Manager Cloud Control. Otherwise, you will not be able to run jobs on the Management Agents and you will seenmoerrors.
-
-
To deploy and configure Oracle Management Agent 12c, the existing connectivity between the old Management Agent and the OMS is used; SSH is not used.
-
For 2-system upgrade, if your old Management Agent was running in secure (or unsecure) mode before backing up the Management Repository, then ensure that it continues to run in the same mode while you deploy and configure the new Management Agent for it. Do not resecure the Management Agents after backing up the Management Repository. If you do so, the ping test might fail while performing the healthcheck because of a mismatch between the configuration stored in the repository and the actual configuration of the Management Agent. You will see a
KEY_MISMATCHerror ingcagent.log. For information on this error and to know how to secure the Management Agents without facing this issue, see Appendix I. -
For 2-system upgrade, after cloning the old Management Repository (or taking a backup), do not make any configuration changes to the Management Agent. If you do, then you must redeploy and reconfigure the Management Agents. Despite redeploying and reconfiguring the Management Agents if you see an error during the switchover process, then log out and log in to the Enterprise Manager Grid Control Console (old EM Console) and retry the switchover process.
11.1.2 Deploying and Configuring Oracle Management Agents 12c Release 5 (12.1.0.5)
To deploy Oracle Management Agent 12c, follow these steps:
Note:
Perform these steps in the Enterprise Manager Grid Control console of the earlier release.-
In Grid Control, click Deployments.
-
On the Deployments page, in the Upgrade section, click Enterprise Manager 12c Upgrade Console.
-
On the Upgrade Console page, in the Select Upgrade Type section, select one of the following. For information about these upgrade approaches, see Chapter 2.
-
To upgrade your Enterprise Manager system with downtime (even if you manually install Management Agents), select 1-System.
-
To upgrade your Enterprise Manager system with "near zero" downtime (even if you manually install Management Agents), select 2-System.
-
To upgrade your Enterprise Manager system with downtime on a different host, select 1-System on a Different Host.
Enterprise Manager Grid Control refreshes the page and displays a table with a list of tasks you need to perform for the upgrade approach you selected.
-
-
In the Preupgrade Steps section, from the table, click Deploy and Configure Agents.
-
On the Deploy and Configure Agents page, for Operation Name, enter a unique name for the deployment operation you are about to perform. The custom name you enter can be any intuitive name, and need not necessarily be in the same format as the default name.
For example,
Deploy_Agents_Phase1_2015_7_23.Note:
The operation name you enter here is only a logical name and will be used for saving the details of the operation you are about to perform. After deploying the software binaries of Oracle Management Agent 12c, at a later point in time, if you want to check the health of the deployed Management Agents or switch over from old to newly deployed and configured Management Agents, then you can use the operation name to identify and track the Management Agents selected as part of this operation. -
In the Select Operation Type section, select Deploy Agent and Plug-In Software and Configure Agent and Plug-In Software.
Note:
If you had already deployed the software binaries of the Management Agent, then you can choose to only configure them now. In this case, select only Configure Agent and Plug-In Software. -
In the Search Agents section, search and add the existing, old Management Agents for which you want to deploy the software. To understand how to search and add Management Agents, see Appendix H.
Note:
-
If you had already deployed the software binaries of the Management Agent, and if you are only configuring them at this point, then search (or add) and select the Management Agents for which you had already manually deployed the software.
-
If you are adding a Shared Agent, then ensure that you add the Master Agent to which it communicates, and all the Shared Agents that communicate with this Master Agent.
-
For 2-system upgrade and 1-system upgrade on a different host, the central agents are listed for selection, but when you select and try to submit the deployment and configuration job, the selected central agents are validated and reported as problematic agents. Therefore, they cannot be deployed and configured, and as a result, cannot be switched over. If you want to continue monitoring the targets that were monitored by those central agents, then follow the instructions outlined in Section 13.14.
-
When you return to this screen to retry the deploy operation, you will see the Management Agents selected as part of the previous deploy operation. This is an expected behavior. You can choose to redeploy the software binaries for them, or remove them from the list and add a fresh set of Management Agents.
-
-
In the table that lists the Management Agents, enter an installation base directory and an instance home directory for each of the Management Agents.
Note:
-
Ensure that the installation base directory you enter here is NOT inside the Middleware home.
-
Ensure that the installation base directory has at least 1 GB of free disk space.
-
If you had already deployed the software binaries of the Management Agent, and if you are only configuring them at this point, then enter the same installation base directory and the instance home directory where you had deployed the software binaries.
-
Ensure that the installing user owns the agent base directory. Ensure that the installing user or the root user owns all the parent directories. Ensure that the root user owns the root directory. And ensure that all of these directories have read and execute permissions for group and other users.
For example, if the agent base directory is
/scratch/OracleHomes/agent,and if oracle is the installing user, then the/scratch/OracleHomes/agentdirectory must be owned by oracle, directoriesscratchandOracleHomesmust be owned by either oracle or root user, and the root directory(/)must be owned by root user. And directories/, scratch,andOracleHomeshave read and execute permissions.
Select these additional options if required:
-
If you want the paths to the installation base directory and the instance home directory to be the same across Management Agents, then select Use Same Paths for All Agents, and enter the absolute path for installation base directory and instance home directory, just once, for the first Management Agent listed in the table. Enterprise Manager Grid Control will consider the same paths for other Management Agents listed in the table.
Note:
You cannot select Use Same Paths for All Agents with the installation base directory mentioned for one Management Agent and the instance home directory mentioned for another Management Agent in the table. Only the paths specified for the first Management Agent will be considered as the same paths for other Management Agents in the table. -
If the agent base directory or the agent instance home directory specified by you already exists, and if you want to overwrite them, then select Overwrite Any Existing Directories. Typically, you will select this option when you choose to redeploy the software binaries in the same base directory.
-
If you want to ignore any deployment and configuration-related prerequisite checks, then select Ignore Deploy Prerequisites. To ensure successful deployment, you must manually perform all the agent installation prerequisite checks, as described in Oracle Enterprise Manager Cloud Control Basic Installation Guide, before attempting an agent deployment with the Ignore Deploy Prerequisites option selected.
-
If you want to clean up all the traces for failed deployments, then select Cleanup Failed Deployments. Note that this will clean up all the files, directories, and even log files for failed deployments. So select this option only if you are sure you want to lose all the data.
-
-
After you add the Management Agents, select each of them from the Select column.
-
In the Agent Credentials section, retain the default selection, that is, Use Oracle Home Preferred Credentials, so that the preferred credentials stored in the Management Repository can be used for this job.
Note:
Ensure that the preferred credentials were registered with the Enterprise Manager system using the Enterprise Manager Command Line Interface (EM CLI). For more information, see Section F.You can optionally override these preferred credentials. To do so, select Override Oracle Home Preferred Credentials and enter one set of credentials that can be used for all Oracle homes.
Note:
Ensure that you use the same credentials that you used for the existing, earlier release of the Management Agent -
In the Run Privilege section, by default, None is selected assuming that the credentials you have provided in the previous step have the privileges to run this job.
However, if those credentials do not have the privileges to run this job, and if you want to switch over as another user for this purpose, then select either SUDO or Power Broker, depending on the authentication utility you want to use, and provide the user account name and profile.
-
(Applicable Only for 2-System Upgrade) In the OMS Host and Port section, validate the name and the secure port of the host where you plan to install Oracle Management Service 12c. To change the values, click Edit.
Note:
If you had already upgraded your existing OMS to Oracle Management Service 12c, then ensure that the port you enter here matches with the Enterprise Manager Upload HTTP SSL Port you selected or specified in the installer while upgrading the OMS. -
Click Next.
-
On the Optional Details page, in the Pre-Deploy Options section, select Run Pre-Command/Script if you want to run any script before deploying the software binaries of the Management Agents.
Enter the absolute path to a location on the destination host where the script is available. The script can also be in a shared location, but you must have execute privileges on it to run the script.
Note:
By default, the credentials provided in Step (10) are used for running the script. And by default, None is selected assuming that the credentials have the privileges to run the script.However, if those credentials do not have the privileges to run the script, and if you want to switch over as another user for this purpose, then select either SUDO or Power Broker, depending on the authentication utility you want to use, and provide the user account name and profile.
-
In the Post-Config Options section, select Run Post-Command/Script if you want to run any script after configuring the deployed Management Agents.
Enter the absolute path to a location on the destination host where the script is available. The script can also be in a shared location, but you must have execute privileges on it to run the script.
Note:
By default, the credentials provided in Step (10) are used for running the script. And by default, None is selected assuming that the credentials have the privileges to run the script.However, if those credentials do not have the privileges to run the script, and if you want to switch over as another user for this purpose, then select either SUDO or Power Broker, depending on the authentication utility you want to use, and provide the user account name and profile.
-
(Only for UNIX) In the Root Credentials section, enter the credentials of a user account to run the
root.shscript.Note:
By default, None is selected assuming that the credentials have the privileges to run the script. However, if those credentials do not have the privileges to run the script, and if you want to switch over as another user for this purpose, then select either SUDO or Power Broker, depending on the authentication utility you have, and provide the user account name and profile.If you do not have root credentials, then enter the agent credentials. In this case, the
root.shscript is not run, but the deployment succeeds. Ensure that you manually run this script after deployment. Otherwise, you will not be able to run jobs on the Management Agent. -
Click Submit.
WARNING:
After deploying and configuring the Management Agents, do not make any configuration changes, for example, the metric thresholds, job definitions, templates, and so on. If you do, then those changes will not be carried over when you switch over to the new Enterprise Manager system; the only way to transfer the changes is to reconfigure the new Management Agents. To reconfigure them, see the note in Step (6).
Note:
-
After you submit the operation, if you see the following error, then first run
root.shfrom the old Management Agent home, and then, resubmit this operation.ERROR: NMO not setuid-root (Unix-only)
-
If you see the following error, then verify the credentials entered in Step (10).
Local Authentication Failed...Attempt PAM authentication...PAM failed . . .
-
If the deployment operation fails at some point, you can choose to only reconfigure the Management Agents, and not copy the software binaries all over again. To only reconfigure the Management Agents, repeat the instructions outlined in this procedure, but for Step (6) ensure that you select only Configure Agent and Plug-In Software.
-
When the operation is in progress, if a Management Agent being deployed and configured becomes unavailable for some reason, you may see the status Suspended on Event. Once the Management Agent becomes available, the status automatically changes to show the current state. This is an expected behavior.
-
If the credentials entered in Step (10) are incorrect, then the step for running the
root.shscript fails in the predeployment job, but the job as such shows that it is successful. In this case, manually run theroot.shscript using the correct root credentials. Otherwise, the Management Agent will result in NMO errors. -
In case you have issues, review the log files mentioned in Appendix M.
11.2 Generating a Health Report of Deployed Oracle Management Agents 12c Release 5 (12.1.0.5)
Before you switch over from your old, existing Management Agent to the newly deployed and configured Oracle Management Agent 12c, generate a report to check the health and the readiness of the deployed Management Agents so that any issues with the deployment can be identified beforehand.
For all the Management Agents to switch over successfully and function properly in the upgraded Enterprise Manager system, you must ensure that the Management Agents are in a position to contact the upgraded Oracle Management Service, monitor all the targets they monitored before, and collect all the metrics details they collected before. The health report helps in identifying any issues related to these requirements so that you can resolve them beforehand.
Note:
Perform these steps in the Enterprise Manager Grid Control console of the earlier release.Note:
You can generate health reports only for Management Agents that have been successfully deployed and configured.To generate a health report of the deployed Management Agents and check their readiness, follow these steps:
-
In Grid Control, click Deployments.
-
On the Deployments page, in the Upgrade section, click Enterprise Manager 12c Upgrade Console.
-
On the Upgrade Console page, in the Agent Upgrade Steps section, from the table, click Generate Health Report of Deployed Agents.
-
On the Generate Health Report for Deployed Agents page, in the Provide Inputs section, do the following:
-
Enter a unique name for the deployment operation you are about to perform. The custom name you enter can be any intuitive name, and need not necessarily be in the same format as the default name.
For example,
CheckHealth_Agents_Phase1_2015_7_23.Note:
The operation name you enter here is only a logical name and will be used for saving the details of the operation you are about to perform. After checking the health of the deployed Management Agents, at a later point in time, if you want to switch over from old to newly deployed and configured Management Agents, then you can use the operation name to identify and track the Management Agents selected as part of this operation. -
If you want to perform the readiness check for the Management Agents you had previously deployed, then click the torch icon against Load Agents from Previous Operations, and select the operation you had submitted for deploying those Management Agents, click Go.
Enterprise Manager Grid Control populates the table in the Search Agents section with a list of Management Agents that are associated with the operation you selected.
-
-
In the Search Agents section, search and add the Management Agents for which you want to perform the readiness check:
-
If you specified a readiness operation name as described in Step 4 (a), then search (or add) and select the existing, old Management Agents for which you have already deployed the software and for which you want to check the health now. To understand how to search and add Management Agents, see Appendix H.
-
If you selected a deployment operation as described in Step 4 (b), then review the Management Agents that are displayed based on the operation you selected.
-
-
After you add the Management Agents, select each of them from the Select column.
-
In the Agent Credentials section, retain the default selection, that is, Use Oracle Home Preferred Credentials, so that the preferred credentials stored in the Management Repository can be used for this job.
Note:
Ensure that the preferred credentials were registered with the Enterprise Manager system using the Enterprise Manager Command Line Interface (EM CLI). For more information, see Appendix F.You can optionally override these preferred credentials. To do so, select Override Oracle Home Preferred Credentials and enter one set of credentials that can be used for all Oracle homes.
Note:
Ensure that you use the same credentials that you used for the existing, earlier release of the Management Agent -
Click Submit.
Note:
-
After you submit the operation, if you see the following error, then first run
root.shfrom the old Management Agent home, and then, resubmit this operation.ERROR: NMO not setuid-root (Unix-only)
-
If you see the following error, then verify the credentials entered in Step (10).
Local Authentication Failed...Attempt PAM authentication...PAM failed . . .
-
When the operation is in progress, if a Management Agent for which you are performing a readiness check becomes unavailable for some reason, you may see the status Suspended on Event. Once the Management Agent becomes available, the status automatically changes to show the current state. This is an expected behavior.
-
If you were monitoring a SOA target in your earlier release of Enterprise Manager, then in the health report, you might see metric collection errors for the following metrics:
-
Top SOA SQL Queries
-
Dehydration Store Tables
At this stage, you can ignore these errors and proceed further. However, ensure that you provide the database credentials for this target as described in Section 13.6.
-
-
In case you have issues, review the log files mentioned in Appendix M.
11.3 Verifying and Signing Off the Health Report of Deployed Oracle Management Agents 12c Release 5 (12.1.0.5)
Before you switch over from your old, existing Management Agent to the newly deployed and configured Oracle Management Agent 12c, verify and sign off the health report of deployed Management Agents.
For all the Management Agents to switch over successfully and function properly in Enterprise Manager Cloud Control, you must ensure that the Management Agents are in a position to contact the upgraded Oracle Management Service (OMS), monitor all the targets they monitored before, and collect all the metrics details they collected before. The health report helps in identifying any issues related to these requirements so that you can resolve them beforehand.
Note:
Perform these steps in the Enterprise Manager Grid Control console of the earlier release.To verify and sign off the health report, follow these steps:
-
In Grid Control, click Deployments.
-
On the Deployments page, in the Upgrade section, click Enterprise Manager 12c Upgrade Console.
-
On the Upgrade Console page, in the Agent Upgrade Steps section, from the table, click Sign Off Health Report for Deployed Agents.
-
On the Sign Off Health Report for Deployed Agents page, view the health and the readiness details for each of the Management Agents.
-
Verify the Ping Test column, which indicates whether or not the deployed Oracle Management Agent 12c will be able to contact the upgraded OMS.
Note:
For 1-System upgrade approach and 1-System upgrade approach on a different host, in the Ping Test column, you will see the value N/A.
For 2-System upgrade, you will see either Passed or Failed. The status Passed indicates that the ping test was successful, and the status Failed indicates that the test was unsuccessful. If you see the status Failed for any Management Agent, then do the following:
-
Verify the OMS host name and OMS port entered in the Identify Host and Port for New Enterprise Manager System page.
Alternatively, verify the
REPOSITORY_URLparameter in the following file:<Agent_Instance_Home>/sysman/config/emd.propertiesFor example,
/u01/app/Oracle/agent/agent_inst/sysman/config/emd.properties
If the OMS host name and port are correct, then check for errors in the following log file:
<Agent_Instance_Home>/sysman/log/gcagent.logFor example,
/u01/app/Oracle/agent/agent_inst/sysman/log/gcagent.log
Here,
<Agent_Instance_Home>refers to the 12c agent instance directory as described in Oracle Enterprise Manager Cloud Control Advanced Installation and Configuration Guide. -
If any Management Agent is in unsecure mode, and if you have already upgraded the OMS, then run these commands on the upgraded OMS (12c OMS), generate the health check report again, and then switch over:
$<OMS_HOME>/bin/emctl secure unlock -consoleFor example,
/u01/app/Oracle/Middleware/oms/bin/emctl secure unlock -console
$<OMS_HOME>/bin/emctl secure unlock -uploadFor example
/u01/app/Oracle/Middleware/oms/bin/emctl secure unlock -upload
Caution:
If your old Management Agent was running in secure (or unsecure) mode before backing up the Management Repository in case of the 2-System upgrade approach, then ensure that it continues to run in the same mode while you deploy and configure the new Management Agent for it. Otherwise, the ping test can fail due to a mismatch between the configuration stored in the repository and the actual configuration of the Management Agent. -
-
Verify the Broken Targets column, which indicates whether or not the deployed Oracle Management Agent 12c will be in a position to monitor all the targets that were monitored earlier by the old Management Agent. The numeric value you see in the column indicates the number of targets that cannot be monitored in the upgraded system.
If you see any value other than 0, then view the detailed report (as described in the next step) to see a list of broken targets and the reasons why they are broken.
-
Verify the Failed Metrics column, which indicates whether or not the deployed and configured Oracle Management Agent 12c will be able to collect all the metrics in the upgraded Enterprise Manager system. The numeric value you see in the column indicates the number of metrics that have an issue.
If you see any value other than 0, then view the detailed report (as described in the next step) to see a list of failed metrics and the reasons for their failure.
-
Verify the Sign-Off User column and the User Verified Column, which indicate whether or not the health report was signed off for a Management Agent. If you do not see any value in these columns, then formally sign off the report as described in Step (6).
-
-
If you want to view a detailed report, select the Management Agent for which you want to view a detailed report, and click View Detailed Report.
-
After checking the report, click Verify and Sign Off Report to sign off. Ensure that the Management Agent for which you viewed a detailed report is selected.
Note:
-
After you submit the operation, if you see the following error, then first run
root.shfrom the old Management Agent home, and then, resubmit this operation.ERROR: NMO not setuid-root (Unix-only)
-
If you see the following error, then verify the credentials entered in Step (10).
Local Authentication Failed...Attempt PAM authentication...PAM failed . . .
-
If you were monitoring a SOA target in your earlier release of Enterprise Manager, then in the health report, you might see metric collection errors for the following metrics:
-
Top SOA SQL Queries
-
Dehydration Store Tables
At this stage, you can ignore these errors and proceed further.
-
11.4 Switching Over to Oracle Management Agent 12c Release 5 (12.1.0.5)
This section covers the following:
-
Switching Over to Oracle Management Agent 12c Release 5 (12.1.0.5)
-
Troubleshooting Issues Related to Switching Over to Oracle Management Agent 12c Release 5 (12.1.0.5)
11.4.1 Switching Over to Oracle Management Agent 12c Release 5 (12.1.0.5)
To switch over the existing, earlier release of Oracle Management Agents (Management Agent) to the newly deployed Management Agents, so that they can communicate with Enterprise Manager Cloud Control, follow these steps:
Note:
Perform these steps in the Enterprise Manager Grid Control console of the earlier release.Note:
-
If you are upgrading using the 2-system upgrade approach or the 1-system upgrade approach on a different host, then do NOT select the old central agent, that is, the Management Agent installed with the old OMS, for switchover.
If you want to continue monitoring the targets that were monitored by the central agent, then follow the instructions outlined in Section 13.14.
-
If the agent configuration has changed after backup, then you must redeploy and reconfigure the Management Agents. If this is already done after the configuration changes, but you still see an error during the switchover process, then log out and log in to the Enterprise Manager Grid Control Console (old EM Console) and retry the switchover process.
-
Do not stop or cancel a switchover job and resubmit it immediately for the same set of Management Agents. If you are forced to do so, then first restart the database to make sure all lingering process are cleaned before a resubmission of the switchover operation.
-
In Grid Control, click Deployments.
-
On the Deployments page, in the Upgrade section, click Enterprise Manager 12c Upgrade Console.
-
On the Upgrade Console page, in the Agent Upgrade Steps section, from the table, click Switch Agents.
-
On the Switch Agents page, in the Provide Inputs section, do the following:
-
Enter a unique name for the switchover operation you are about to perform. The custom name you enter can be any intuitive name, and need not necessarily be in the same format as the default name.
For example,
Switch_Agents_Phase1_2015_7_23Note:
The operation name you enter here is only a logical name and will be used for saving the details of the operation you are about to perform. After submitting this operation, if you want to track its status, then you can use the operation name. -
If you want to switch over the Management Agents for which you had previously performed a readiness check, then click the torch icon against Load Agents from Previous Operations, and select the operation you had submitted for performing the readiness check for those Management Agents, click Go.
Enterprise Manager Grid Control populates the table in the Search Agents section with a list of Management Agents that are associated with the operation you selected.
-
-
In the Search Agents section, search and add the Management Agents you want to switch over:
-
If you specified a switchover operation name as described in Step 4 (a), then search (or add) and select the deployed Management Agents that you want to switch over now. To understand how to search and add Management Agents, see Appendix H.
Note:
If you are upgrading using the 2-system upgrade approach or the 1-system upgrade approach on a different host, then do NOT select the old central agent, that is, the Management Agent installed with the old OMS, for switchover. If you want to continue monitoring the targets that were monitored by the central agent, then follow the instructions outlined in Section 13.14. -
If you selected an operation name as described in Step 4 (b), then review the Management Agents that are displayed based on the operation you selected.
-
-
After you add the Management Agents, select each of them from the Select column.
-
In the Agent Credentials section, retain the default selection, that is, Use Oracle Home Preferred Credentials, so that the preferred credentials stored in the Management Repository can be used for this job.
Note:
Ensure that the preferred credentials were registered with the Enterprise Manager system using the Enterprise Manager Command Line Interface (EM CLI). For more information, see Appendix F.You can optionally override these preferred credentials. To do so, select Override Oracle Home Preferred Credentials and enter one set of credentials that can be used for all Oracle homes.
Note:
Ensure that you use the same credentials that you used for the existing, earlier release of the Management Agent -
Click Submit.
Note:
If you have any issues with the switchover operation, then troubleshoot them as described in Section 11.4.2. In case of other issues, review the log files mentioned in Appendix M. -
(Applicable Only for 2-System Upgrade Approach and 1-System Upgrade Approach on a Different Host) After the switchover, delete the central agents as described in Section 13.13.
After deleting the central agents, if you want to continue monitoring the targets that were monitored by them, then follow the instructions outlined in Section 13.14.
11.4.2 Troubleshooting Issues Related to Switching Over to Oracle Management Agent 12c Release 5 (12.1.0.5)
The following are some common issues and workarounds related to the switchover operation:
-
After you submit the operation, if you see the following error, then first run
root.shfrom the old Management Agent home, and then, resubmit this operation.ERROR: NMO not setuid-root (Unix-only)
-
If you see the following error, then verify the credentials entered in Step (10) of Section 11.1.
Local Authentication Failed...Attempt PAM authentication...PAM failed . . .
-
If the Run Presync step of the switchover operation fails, then you will see the following error in the
emoms.trctrace file. This is possible if your database domain name has any characters other than A-Z (letters), 0-9 (numerals), _ (underscore), # (hash), $ (dollar),. (period), or @ (at the rate). For example, a database domain name with a hyphen (-) can result in this issue.ORA-20000: Found exception Error Message :ORA-02083: database name has illegal character '-' Error Number ;-2083
To resolve this issue, follow the instructions outlined in Section L.2. If the database domain name has an illegal character, such as a hyphen, then correct it.
-
When the operation is in progress, if a Management Agent being deployed and configured becomes unavailable for some reason, you may see the status Suspended on Event. Once the Management Agent becomes available, the status automatically changes to show the current state, and eventually gets switched over. This is an expected behavior.
-
In the 2-System upgrade approach, all the old Management Agents you selected are switched over, and the upgraded Management Agents are started so that they can communicate with the upgraded OMS.
-
In the 1-System upgrade approach, if you missed switching over any Management Agent and upgraded the OMS inadvertently, then you must manually switch over those Management Agents by first stopping the old Management Agents and then starting the new ones:
(a) Stop the old Management Agent home:
$<AGENT_HOME>/bin/emctl stop agent(b) Start the deployed Oracle Management Agent 12c from its instance home:
$<AGENT_INSTANCE_DIR>/bin/emctl start agent -
Even after switching over a Management Agent, if the status shows that it is down, then manually start it:
$<AGENT_INSTANCE_DIR>/bin/emctl start agent -
While switching over a deployed Management Agent to the new Enterprise Manager system, the switchover job might fail at the uploadAgent step. If the step fails with that error, then do the following:
-
On the Management Agent host, run the following command:
cat /dev/null > access_log -
From the Management Agent instance home, run the following command and verify if the upload operation succeeds. Repeat this command until the upload operation succeeds.
$<AGENT_INSTANCE_HOME>/bin/emctl upload agent -
Once the upload operation succeeds, access the Preupgrade Console from your Enterprise Manager Grid Control console, and in the Agent Upgrade Steps section, click Switch Agents.
-
On the Switch Agents page, select the Management Agent that had the error, and submit the switchover job again.
-
-
In case of other issues, review the log files mentioned in Appendix M.