5 Upgrading Oracle Management Service and Oracle Management Repository 12c Release 4 (12.1.0.4), 12c Release 3 (12.1.0.3), or 12c Release 2 (12.1.0.2) to 12c Release 5 (12.1.0.5)
This chapter describes the different ways of upgrading your Oracle Management Service and Oracle Management Repository of 12c Release 4 (12.1.0.4), 12c Release 3 (12.1.0.3), or 12c Release 2 (12.1.0.2). Select the one that best suits your requirement, and follow the instructions outlined in the respective section. The upgrade instructions apply to single-OMS as well as multi-OMS environments.
This chapter describes the following:
Note:
-
If you have Oracle Management Service 12c Release 1 (12.1.0.1) [with or without Bundle Patch 1], then first upgrade it to either 12c Release 2 (12.1.0.2), 12c Release 3 (12.1.0.3), or 12c Release 4 (12.1.0.4), and then upgrade to 12c Release 5 (12.1.0.5).
For instructions to upgrade to 12c Release 2 (12.1.0.2), 12c Release 3 (12.1.0.3), or 12c Release 4 (12.1.0.4), refer to the Oracle Enterprise Manager Cloud Control Upgrade Guide for the respective release, available in the Enterprise Manager documentation library:
-
The Oracle Management Agent releases that are supported for Enterprise Manager Cloud Control 12c Release 5 (12.1.0.5) are 12c Release 5 (12.1.0.5), 12c Release 4 (12.1.0.4), 12c Release 3 (12.1.0.3), and 12c Release 2 (12.1.0.2). If you have any earlier releases of Oracle Management Agent, then before upgrading the Oracle Management Service to 12c Release 5 (12.1.0.5), make sure you upgrade your Oracle Management Agent to either 12c Release 4 (12.1.0.4), 12c Release 3 (12.1.0.3), or 12c Release 2 (12.1.0.2) using the Agent Upgrade Console present within the Enterprise Manager Cloud Control Console. For instructions, refer to Oracle Enterprise Manager Cloud Control Upgrade Guide.
-
If you are upgrading a multi-OMS environment, then Oracle recommends that you use the software-only upgrade approach as described in Section 5.3 or Section 5.4, as this approach minimizes the downtime of the OMS instances.
-
If you want to take additional preparatory steps for a successful upgrade, then see My Oracle Support note 1682332.1.
-
If you want to see a list of known issues before starting the upgrade process, then see My Oracle Support note 2022505.1.
Note:
Oracle Management Agent (Management Agent) that was installed with the Oracle Management Service (OMS) is not upgraded by default. You must upgrade it (along with other Management Agents) using the Agent Upgrade Console. This is an expected behavior. For instructions to use the Agent Upgrade Console to upgrade Management Agents, see Chapter 6.WARNING:
Do not install Enterprise Manager Cloud Control 12c on servers of SPARC series: T1000, T2000, T5xx0, and T3-*. For more information, see My Oracle Support note 1590556.1.
5.1 Upgrading the OMS and the Management Repository of 12c Release 4 (12.1.0.4), 12c Release 3 (12.1.0.3), 12c Release 2 (12.1.0.2) to 12c Release 5 (12.1.0.5) in Graphical Mode
To upgrade your Oracle Management Service and Oracle Management Repository of 12c Release 4 (12.1.0.4), 12c Release 3 (12.1.0.3), or 12c Release 2 (12.1.0.2) in graphical mode, follow these steps.
If you want to see a list of known issues before starting the upgrade process, then see My Oracle Support note 2022505.1.
WARNING:
Do not upgrade Enterprise Manager Cloud Control 12c Release 4 (12.1.0.4), 12c Release 3 (12.1.0.3), or 12c Release 2 (12.1.0.2) while it is undergoing a 2-system upgrade from its earlier release (10.2.0.5 or 11.1.0.1). Wait until the upgrade completes fully because there might be some standalone Management Agents in status pending state while the upgrade is in progress.
Note:
While upgrading, you might see an error message stating that some Management Agents are still in Activation Pending state, or that the Deferred Data Migration Process (DDMP) or Accrued Data Migration Process (ADMP) is not complete. This indicates that the Enterprise Manager system is still undergoing a 2-system upgrade from its earlier release to 12c Release 4 (12.1.0.4), 12c Release 3 (12.1.0.3), or 12c Release 2 (12.1.0.2).To resolve this issue, wait until the DDMP and ADMP jobs are complete, and all Management Agents are switched over from the earlier release to 12c Release 4 (12.1.0.4), 12c Release 3 (12.1.0.3), or 12c Release 2 (12.1.0.2). Then upgrade to 12c Release 5 (12.1.0.5).
If you are sure you do not want to switch over some Management Agents from the earlier release to 12c Release 4 (12.1.0.4), 12c Release 3 (12.1.0.3), or 12c Release 2 (12.1.0.2), then delete such unwanted Management Agents as described in Section 5.1.3, before you start the upgrade process.
Note:
After upgrading, you can choose to delete the old OMS home if you do not want it. For instructions, see Appendix K.Note:
If you see an error message stating that you have not copied the emkey, do the following:-
If your OMS is configured with a service name, then run the following command:
<OMS_HOME>/bin/emctl config emkey -copy_to_repos_from_file -repos_conndesc '"(DESCRIPTION=(ADDRESS_LIST=(ADDRESS=(PROTOCOL=TCP)(HOST=<>)(PORT=<>)))(CONNECT_DATA=(SERVICE_NAME=<>)))"' -repos_user <> [-repos_pwd <pwd> ] [-admin_pwd <pwd>] -emkey_file < emkey file> -
If your OMS is not configured with a service name, then run the following command:
<OMS_HOME>/bin/emctl config emkey -copy_to_repos_from_file -repos_host <host> -repos_port <port> -repos_sid <sid> -repos_user <username> [-repos_pwd <pwd> ] [-admin_pwd <pwd>] -emkey_file <emkey file>
Here, the Management Repository details are details of the existing or old Management Repository. You will be prompted for the administration server password and the repository password if you do not explicitly specify them in the command line.
Note:
If you are upgrading a multi-OMS environment, always start the upgrade process with the first OMS, where the Admin Server is running, and not with any of the additional OMS instances.To identify the OMS where the Admin Server is running, run the following command on the OMS home and verify if the output displays the Admin Server details.
$<OMS_HOME>/bin/emctl status oms -details
You should see a similar output:
Oracle Enterprise Manager Cloud Control 12c
Copyright (c) 1996, 2012 Oracle Corporation. All rights reserved
Enter Enterprise Manager Root (SYSMAN) Password :
Console Server Host : myhost.example.com
.
.
.
WLS Domain Information
Domain Name : GCDomain
Admin Server Host: myhost.example.com
.
.
.
-
Oracle strongly recommends that you back up the Management Repository, the OMS, the inventory, the Software Library, and other components that are critical to the functioning of Enterprise Manager. This will enable you to revert to the original contents if the upgrade fails.
Invoke the Enterprise Manager Cloud Control Installation Wizard on the host where your existing OMS is running.
<Software_Location>/runInstaller [-invPtrLoc <absolute_path_to_oraInst.loc>]In this command,
<Software_Location>refers to the location where you have extracted the software kit.Note:
-
For information about the additional, advanced options you can pass while invoking the installer, refer to Section 5.1.1.
-
To invoke the installation wizard on UNIX platforms, run
runInstaller.To invoke on Microsoft Windows platforms, runsetup.exe. -
When you invoke
runInstallerorsetup.exe,if the Enterprise Manager Cloud Control Installation Wizard does not appear, then it is possible that you do not have access to the/stagedirectory.There is a classpath variable that the installation wizard computes for OPatch as
../stage/Components/,and when the TEMP variable is set to/tmp,the installation wizard tries to look for the opatch JAR file in the/tmp/../stagedirectory, which is equivalent to/stage.However, if you do not have the permission on/stage,then the installation wizard can hang. Under such circumstances, verify if you have access to the/stagedirectory. If you do not have access to it, then set the TEMP variable to a location where the install user has access, and then relaunch the installation wizard. -
While upgrading on IBM AIX, if you see an error message stating that your JDK version in the middleware home is not of a supported version, then make sure you install the supported version mentioned in the message, and then invoke the installer passing the
-skipJDKValidationargument.For example,
./runInstaller -skipJDKValidation -
-invPtrLocis not supported on Microsoft Windows.
-
-
(Optional) On the My Oracle Support Details screen, enter your My Oracle Support credentials to enable Oracle Configuration Manager. If you do not want to enable Oracle Configuration Manager now, go to Step (3).
If the host from where you are running the installation wizard does not have a connection to the Internet, then enter only the e-mail address and leave the other fields blank. After you complete the installation, manually collect the configuration information and upload it to My Oracle Support.
Note:
Beginning with Enterprise Manager Cloud Control 12c Release 3 (12.1.0.3), My Oracle Support accesses support.oracle.com directly. This means that you must provide network access to this URL, or grant proxy access to it from any client that will access My Oracle Support. -
Click Next.
-
On the Software Updates screen, apply the latest software updates, including the latest PSU patches.
You can download the software updates in offline mode (if you do not have Internet connectivity) or online mode (if you have Internet connectivity). For instructions, see Oracle Enterprise Manager Cloud Control Advanced Installation and Configuration Guide.
-
Click Next.
-
On the Prerequisite Checks screen, check the status of the prerequisite checks run by the installation wizard, and verify whether your environment meets all the minimum requirements for a successful upgrade.
The installation wizard runs the prerequisite checks automatically when you come to this screen. It checks for the required operating system patches, operating system packages, and so on.
The status of the prerequisite check can be either Warning, Failed, or Succeeded.
If some checks result in Warning or Failed status, then investigate and correct the problems before you proceed with the upgrade. The screen provides details on why the prerequisites failed and how you can resolve them. After you correct the problems, return to this screen and click Rerun to check the prerequisites again.
-
Click Next.
Note:
If a prerequisite check fails reporting a missing package, then make sure you install the required package, and click Rerun. The installation wizard validates the package name as well as the version, so make sure you install the packages of the minimum versions mentioned in Oracle Enterprise Manager Cloud Control Basic Installation Guide. To understand the logic the installation wizard uses to verify these packages, see Oracle Enterprise Manager Cloud Control Basic Installation Guide. -
On the Installation Types screen, select Upgrade an Existing Enterprise Manager System, then select One System Upgrade. Then, select the OMS home you want to upgrade.
-
Click Next.
-
On the Installation Details screen, do the following:
-
Enter or validate the Middleware home.
Note:
-
Upgrade to 12c Release 5 (12.1.0.5) is an out-of-place upgrade, therefore you must do one of the following:
-
Enter a new middleware home where the installer can automatically install Oracle WebLogic Server 11g Release 1 (10.3.6) and Java Development Kit 1.6.0.43.0 for you.
-
Enter a new middleware home where you have preinstalled Oracle WebLogic Server 11g Release 1 (10.3.6) and Java Development Kit 1.6.0.43.0. However, make sure this is a new middleware home meant for the Enterprise Manager system you are installing now, and not the middleware home you were using earlier for the previous release of Enterprise Manager system.
-
-
If you have Oracle WebLogic Server and JDK already installed, then ensure that they are of the supported releases—Oracle WebLogic Server 11g Release 1 (10.3.6) and JDK 1.6.0.43.0. In this case, the installer detects them and displays the Middleware home where they are installed. Validate the path to this Middleware home. The installer detects and displays only those Middleware homes where Enterprise Manager is not already configured.
-
Ensure that the Middleware home you enter or validate here is used only for Enterprise Manager Cloud Control. Ensure that no other Oracle Fusion Middleware products or components are installed in the same Middleware home.
-
-
Validate the host name. By default, the host name is the name of the host where the existing, earlier release of Enterprise Manager was installed. This is a non-editable field.
-
-
Click Next.
-
On the Database Connection Details screen, do the following:
-
Enter the passwords for the SYS and SYSMAN user accounts of the database that houses the Management Repository for the selected OMS.
-
Confirm that you have backed up the Management Repository (although the installer checks only if you have backed up the Management Repository, Oracle strongly recommends that you back up the OMS, the inventory, the Software Library, and other components that are critical to the functioning of Enterprise Manager. This will enable you to revert to the original contents if the upgrade fails). As a prerequisite, you must back up the Management Repository before starting the upgrade process. If you have not already taken a backup, then do so immediately, and then return to the installer to continue with the upgrade.
-
-
Click Next.
Note:
If you encounter a Provisioning Archive Framework (PAF) prerequisite check error, then exit the installer, stop all the running and scheduled deployment procedures in your existing Enterprise Manager system, invoke the installer all over again, and retry the upgrade process.To identify all running and scheduled deployment procedures, run the following query, and note down the GUID of the deployment procedures.
SELECT i.instance_guid FROM SYSMAN.MGMT_PAF_STATES s, SYSMAN.MGMT_PAF_INSTANCES i, SYSMAN.MGMT_PAF_PROCEDURES p WHERE p.procedure_guid = i.procedure_guid AND s.instance_guid = i.instance_guid AND s.state_type = 0 AND s.status in (0,1)To stop the running or scheduled deployment procedures, run the following query, and pass the GUID you noted down from the output of the preceding command:
emcli stop_instance -instance=<instance id from sql query>Note:
For information about the various prerequisite checks that are run on the database at this point, see Oracle Enterprise Manager Cloud Control Basic Installation Guide. -
On the Plug-In Upgrade screen, review the plug-ins that will be automatically:
-
Upgraded when newer versions exist
-
Migrated when newer versions do not exist
-
Deployed when the plug-ins being upgraded have new dependencies, or when there are any new default plug-ins introduced with a release.
Here, newer versions refer to the newer versions of plug-ins available in the Enterprise Manager software (DVD, or downloaded software) that you are using to install.
IMPORTANT:
Before you proceed to the next screen, stop all the associated OMS instances.$<OMS_HOME>/bin/emctl stop oms -allNote:
-
If the newer versions do not exist in the Enterprise Manager software that you are using, but exist on Oracle Technology Network (OTN), then you can choose to manually download them from OTN and upgrade your existing plug-ins, instead of having them automatically migrated by default. To do so, follow these steps:
-
Access the following Enterprise Manager download page on Oracle Technology Network (OTN):
http://www.oracle.com/technetwork/oem/grid-control/downloads/oem-upgrade-console-502238.html -
Expand the section that lists the software binaries and plug-ins for your upgrade path.
-
From the Download Plug-ins section, manually download the plug-ins and store them in an accessible location.
-
Invoke the installer with the following option, and pass the location where the plug-ins you want to install are available:
For UNIX Platforms:
./runInstaller -pluginLocation <absolute_path_to_plugin_software_location>For Microsoft Windows Platforms:
setup.exe -pluginLocation <absolute_path_to_plugin_software_location>
Once the newer versions of the plug-ins are made available, this screen lists those plug-ins as plug-ins that will automatically be upgraded.
-
-
If you see a message stating that you have unsupported plug-ins on the OMS or on some of the Management Agents, then follow the instructions outlined in the message to upgrade the plug-ins, and then retry upgrading the OMS.
-
-
Click Next.
-
On the Select Plug-ins screen, select the optional plug-ins you want to deploy in addition to the plug-ins that will automatically be upgraded while upgrading the OMS.
Note:
If you want to install some plug-ins that are not listed on this screen, then follow these steps:-
Access the following Enterprise Manager download page on Oracle Technology Network (OTN):
http://www.oracle.com/technetwork/oem/grid-control/downloads/oem-upgrade-console-502238.html -
Expand the section that lists the software binaries and plug-ins for your upgrade path.
-
From the Download Plug-ins section, manually download the plug-ins and store them in an accessible location.
-
Invoke the installer with the following option, and pass the location where the plug-ins you want to install are available:
For UNIX Platforms:
./runInstaller -pluginLocation <absolute_path_to_plugin_software_location>For Microsoft Windows Platforms:
setup.exe -pluginLocation <absolute_path_to_plugin_software_location>
-
-
Click Next.
-
On the Extend WebLogic Server Domain screen, do the following to create a new WebLogic domain and a new OMS instance base directory for the upgraded OMS:
-
Validate the AdminServer host name and its port, and the WebLogic user name, and enter the WebLogic user account password. This is required to create a new WebLogic domain
(GCDomain)on the same port and host name as the AdminServer used by the earlier release of the OMS you are upgrading.Note:
If you are upgrading an additional OMS, then enter the host name and port of the AdminServer configured for the first OMS that you have already upgraded, and then, enter the credentials for the existing WebLogic Server user account.The host name is the name of the host where the first OMS is running. To identify the port, check the value set to the parameter
AS_HTTPS_PORTin the following file:<OMS_INSTANCE_HOME>/em/EMGC_OMS<n>/emgc.properties -
Enter the absolute path to the new OMS instance base directory
(gc_inst), which will be created for storing the configuration information related to the upgraded OMS. Thisgc_instdirectory must not be your oldgc_instdirectory of 12c Release 4 (12.1.0.4), 12c Release 3 (12.1.0.3), or 12c Release 2 (12.1.0.2), so enter a new directory location. If you enter the oldgc_instdirectory, then the installer will display a warning that the directory is not empty.Make sure the path you enter leads up to the instance base directory, and is maintained outside the middleware home.
For example, if the 12.1.0.4 middleware home was
/u01/app/Oracle/Middleware,and the 12.1.0.4 OMS instance base directory was/u01/app/Oracle/gc_inst,then while upgrading to 12.1.0.5, if you entered the middle ware home as/u01/app/Oracle/Middleware12104,then enter the OMS instance base directory as/u01/app/Oracle/gc_inst12104.As a result, the directory name is unique and so is the directory location.Note:
If you are installing on an NFS-mounted drive and creating the OMS instance base directory (gc_inst) on that NFS-mounted drive, then after you install, move the lock files from the NFS-mounted drive to a local file system location. Modify the lock file location in the httpd.conf file to map to a location on a local file system. For instructions, refer to Section 5.1.4.
Note:
If you want to change the Oracle WebLogic Server password or the Node Manager password, see My Oracle Support note 1450798.1. -
-
Click Next.
-
On the Review screen, review the details you have provided for the upgrade.
-
If you want to change the details, click Back repeatedly until you reach the screen where you want to make the changes.
-
After you verify the details, if you are satisfied, click Install to begin the upgrade.
-
-
On the Install Progress screen, view the overall progress (in percentage) of the upgrade operation and the status of each of the Configuration Assistants.
Note:
-
If a Configuration Assistant fails, the installer stops and none of the subsequent Configuration Assistants are run until the issue related to the failed Configuration Assistant is resolved. In this case, diagnose the issue, resolve it, and then, click Retry on the Install Progress screen to rerun the Configuration Assistants starting from the Configuration Assistant that failed.
However, if you accidently exit the installer before clicking Retry, then do NOT restart the installer to reach the same screen; instead, invoke the
runConfig.shscript from the OMS home to rerun the Configuration Assistant in silent mode:$<OMS_HOME>/oui/bin/runConfig.sh ORACLE_HOME=<absolute_path_to_OMS_home> MODE=perform ACTION=configure COMPONENT_XML={encap_oms.1_0_0_0_0.xml}If the
runConfig.shscript fails, raise a service request and contact Oracle Support. -
If the Management Repository upgrade fails with the following error in the schemamanager logs, then restart the database, and then try the upgrade again.
ORA-04020: deadlock detected while trying to lock object SYSMAN.MGMT_GLOBAL -
If the upgrade fails because you did not apply the required database patches as described in Step 2 (d) of Section 4.1, then see My Oracle Support note 1568107.1 to verify the error in the log file, and to resolve the issue and proceed further.
-
-
Once the software binaries are copied and configured, you are prompted to run the
allroot.shscript. Open another window, log in asroot, and manually run the scripts.If you are installing on Microsoft Windows operating system, then you will NOT be prompted to run this script.
-
On the Finish screen, you should see information pertaining to the upgrade of Enterprise Manager. Review the information and click Close to exit the wizard.
-
If you have additional OMS instances, then start upgrading each of them following Step (1) to Step (23) as outlined in Section 5.1 (this section.)
-
After upgrading all the OMS instances, upgrade the Management Agents, including the one that was installed with the first, old OMS (that is, central agent). For more information, refer to Chapter 6.
Note:
After upgrading the central agent, if you find the agent base directory of the upgraded central agent in the old Oracle Middleware home, and if you want to move it outside that old Oracle Middleware home, then follow the instructions outlined in the My Oracle Support note 1520010.1. -
After upgrading the Enterprise Manager system completely, if some central agents appear in Activation Pending state in the Enterprise Manager Cloud Control Console, then delete them by following these steps outlined in Section 13.13.2.
Note:
After upgrading, you can choose to delete the old OMS home if you do not want it. For instructions, see Appendix K.Caution:
If you have any JVM targets associated with the old OMS, then even after you refresh the WebLogic domain, on the WebLogic domain home page, you will continue to see the JVM target that was associated with the old OMS. This is an expected behavior.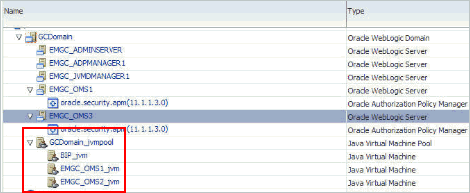
You can choose to either retain it for viewing historical data or delete it. To delete it, right-click the orphaned JVM target, and select Remove Target.
5.1.1 Advanced Installer Options Supported for Installing an Enterprise Manager System in Graphical Mode
The following are some additional, advanced options you can pass while invoking the installer in graphical mode:
-
(Applicable only for when you upgrade 10.2.0.5), When you upgrade 10g Release 5 (10.2.0.5), a new WebLogic domain named
GCDomainis created by default. If you want to override this with a custom name, then invoke the installer with theWLS_DOMAIN_NAMEoption, and enter a unique custom name.For example, if you want to use the custom name
EMDomain, then run the following command:./runInstaller WLS_DOMAIN_NAME=EMDomain -
By default, a Provisioning Advisor Framework (PAF) staging directory is created for copying the Software Library entities related to the deployment procedures. By default, this location is the scratch path location (
/tmp). The location is used only for provisioning activities—entities are copied for a deployment procedure, and then, deleted once the deployment procedure ends.If you want to override this location with a custom location, then invoke the installer with the
EM_STAGE_DIRoption, and enter a unique custom location.For example,
./runInstaller EM_STAGE_DIR=/home/john/software/oracle/pafdir -
During upgrade, if you want to install some plug-ins that are not in the software kit (DVD, downloaded software), then follow these steps:
-
Manually download the plug-ins from the following URL, and store them in an accessible location.
http://www.oracle.com/technetwork/oem/grid-control/downloads/oem-upgrade-console-502238.html -
Invoke the installer with the following option, and pass the location where the plug-ins you want to install are available:
./runInstaller -pluginLocation <absolute_path_to_plugin_software_location>This displays a list of plug-ins available in the software kit (DVD, downloaded software) as well as the plug-ins available in this custom location. You can choose the ones you want to install.
-
-
After the upgrade operation ends successfully, the OMS and the Management Agent start automatically. If you do not want them to start automatically, then invoke the installer with
START_OMSandb_startAgentoptions, and set them totrueorfalsedepending on what you want to control.For example, if you do not want the Management Agent to start automatically, then run the following command:
./runInstaller START_OMS=true b_startAgent=falseTo understand the limitations involved with this advanced option, see Section 5.1.2.
5.1.2 Limitations with the Advanced Installer Options Supported for Installing an Enterprise Manager System in Graphical Mode
When you use START_OMS and b_startAgent as advanced options to control the way the OMS and the Management Agent start up automatically, sometimes the Management Agent and the host on which it was installed do not appear as targets in the Cloud Control console.
Table 5-1 lists the different combinations of these advanced options, and describes the workaround to be followed for each combination:
Table 5-1 Advanced Options and Workarounds
| Advanced Option | Workaround |
|---|---|
|
|
|
|
|
Start the Management Agent:
|
|
|
|
5.1.3 Deleting Unwanted Standalone Management Agents Before Upgrading from 12.1.0.4, 12.1.0.3, 12.1.0.2 to 12.1.0.5
While upgrading, you might see an error message stating that some Management Agents are still in Activation Pending state, or that the Deferred Data Migration Process (DDMP) or Accrued Data Migration Process (ADMP) is not complete. This indicates that the Enterprise Manager system is still undergoing a 2-system upgrade from its earlier release (10.2.0.5 or 11.1.0.1) to 12c Release 4 (12.1.0.4), 12c Release 3 (12.1.0.3), or 12c Release 2 (12.1.0.2).
To resolve this issue, wait until the DDMP and ADMP jobs are complete, and all Management Agents are switched over from the earlier release to 12c Release 4 (12.1.0.4), 12c Release 3 (12.1.0.3), or 12c Release 2 (12.1.0.2). Then upgrade to 12c Release 5 (12.1.0.5).
If you are sure you do not want to switch over some Management Agents from the earlier release to 12c Release 4 (12.1.0.4), 12c Release 3 (12.1.0.3), or 12c Release 2 (12.1.0.2), then delete such unwanted Management Agents before you start the upgrade process.
To delete these unwanted Management Agents, follow these steps:
-
Identify the unwanted Management Agents by running the following query as SYSMAN user in the Management Repository you are about to upgrade (12.1.0.4. 12.1.0.3, or 12.1.0.2 repository):
select mt.target_name from sysman.mgmt_targets mt, sysman.em_current_availability eca, sysman.PRE_UPGC_AGT_STAT_MGMT puasm where mt.target_guid = eca.target_guid and eca.current_status = 4 and eca.current_sub_status = 1 and mt.target_type='oracle_emd'and puasm.target_guid = mt.target_guid and puasm.UPGRADE_STATUS != 'IGNORE_UPGRADE' and mt.emd_url not in (select emd_url from PRE_UPGC_TGT_SW where target_type='oracle_emrep') and mt.emd_url not in (select emd_url from mgmt_targets where target_name in(select value from mgmt_oms_parameters where name = 'HOST_NAME')) and mt.emd_url not in (select distinct emd_url from mgmt_targets where target_name like 'EnterpriseManager%home' or target_name like '%GCD omain_EMGC_OMS%') -
Delete the unwanted Management Agents:
-
On the upgraded OMS host, from the OMS home, log in to the EM CLI client. EM CLI Client is available by default with every OMS installation, so you need not install the client separately.
$<OMS_HOME>/bin/emcli login -username=SYSMAN -password=<sysman-passwd> -
Synchronize EM CLI:
$<OMS_HOME>/bin/emcli sync -
Delete the unwanted Management Agents. Here,
agentNameis the name of the Management Agent you want to delete.$<OMS_HOME>/bin/emcli delete_target -name=<agentName> -type=oracle_emd -delete_monitored_targetsFor example,
$/u01/software/oracle/middleware/oms/bin/emcli delete_target -name=example.com:4567 -type=oracle_emd -delete_monitored_targets
-
-
Proceed with the upgrade to 12c Release 5 (12.1.0.5).
Note:
If, for some reason, you are unable to delete the unwanted Management Agents, then turn off the sanity check that checks for Managements Agents with Activation Pending state. This enables you to proceed with the upgrade process without encountering any such warning. To turn off the sanity check, run the following query on your 12c Release 4 (12.1.0.4), 12c Release 1 (12.1.0.3), or 12c Release 2 (12.1.0.2) Management Repository.
MERGE INTO PRE_UPGC_MASTER_INFO DEST
   USING dual
     ON (DEST.property_name =  'ignore_upg_pending_activation_check')
   WHEN MATCHED THEN
     UPDATE SET DEST.property_value = 'TRUE'
   WHEN NOT MATCHED THEN
     INSERT (property_name, property_value) VALUES( 'ignore_upg_pending_ activation_check', 'TRUE' );
5.1.4 Moving Lock Files from an NFS-Mounted Drive to a Local File System Location
If you are installing on an NFS-mounted drive and creating the OMS instance base directory (gc_inst) on that NFS-mounted drive, then after you install, move the lock files from the NFS-mounted drive to a local file system location. To do so, modify the lock files location in the httpd.conf file to map to a location on a local file system
-
Stop the OMS:
<OMS_HOME>/bin/emctl stop oms -
Open the following file:
Note:
Oracle recommends you to take a backup of this file before editing it<WEBTIER_INSTANCE_HOME>/config/OHS/ohs<#>/httpd.confFor example,
/u01/Oracle/Middleware/gc_inst/WebTierIH1/config/OHS/ohs1/httpd.conf -
Search for sections related to the modules
mpm_prefork_moduleandmpm_worker_module.In both these sections, for theLockFileparameter, specify the absolute path to a location on the local file system where Oracle HTTP Server can automatically create thehttp_lockfile. If the location you specify does not already exist, then create it first, and then specify the path here.<IfModule mpm_prefork_module> StartServers 5 MinSpareServers 5 MaxSpareServers 10 MaxClients 150 MaxRequestsPerChild 0 AcceptMutex fcntl LockFile uo1/em/ohs_locks </IfModule> .... <IfModule mpm_worker_module> StartServers 2 MaxClients 150 MinSpareThreads 25 MaxSpareThreads 75 ThreadsPerChild 25 MaxRequestsPerChild 0 AcceptMutex fcntl LockFile uo1/em/ohs_locks </IfModule>
For example, if you want to specify the location path
uo1/em/ohs_lockswhere where/u01/emis a location on your local file system, then make sure the directoryohs_locksalready exists. If it does not exit, create it in the following way, and then specify this path in thehttpd.conffile.mkdir –p /u01/em/ohs_locksOracle HTTP Server will automatically create the following lock file:
uo1/em/ohs_locks/http_lock -
Save the changes.
-
Restart the OMS:
<OMS_HOME>/bin/emctl start oms
5.2 Upgrading the OMS and the Management Repository of 12c Release 4 (12.1.0.4), 12c Release 3 (12.1.0.3), or 12c Release 2 (12.1.0.2) to 12c Release 5 (12.1.0.5) in Silent Mode
To upgrade your Oracle Management Service and Oracle Management Repository of 12c Release 4 (12.1.0.4), 12c Release 3 (12.1.0.3), or 12c Release 2 (12.1.0.2) in silent mode, follow these steps.
If you want to see a list of known issues before starting the upgrade process, then see My Oracle Support note 2022505.1.
WARNING:
Do not upgrade Enterprise Manager Cloud Control 12c Release 4 (12.1.0.4), 12c Release 3 (12.1.0.3), or 12c Release 2 (12.1.0.2) while it is undergoing a 2-system upgrade from its earlier release (10.2.0.5 or 11.1.0.1). Wait until the upgrade completes fully because there might be some standalone Management Agents in status pending state while the upgrade is in progress.
Note:
While upgrading, you might see an error message stating that some Management Agents are still in Activation Pending state, or that the Deferred Data Migration Process (DDMP) or Accrued Data Migration Process (ADMP) is not complete. This indicates that the Enterprise Manager system is still undergoing a 2-system upgrade from its earlier release to 12c Release 4 (12.1.0.4), 12c Release 3 (12.1.0.3), or 12c Release 2 (12.1.0.2).To resolve this issue, wait until the DDMP and ADMP jobs are complete, and all Management Agents are switched over from the earlier release to 12c Release 4 (12.1.0.4), 12c Release 3 (12.1.0.3), or 12c Release 2 (12.1.0.2). Then upgrade to 12c Release 5 (12.1.0.5).
If you are sure you do not want to switch over some Management Agents from the earlier release to 12c Release 4 (12.1.0.4), 12c Release 3 (12.1.0.3), or 12c Release 2 (12.1.0.2), then delete such unwanted Management Agents as described in Section 5.1.3, before you start the upgrade process.
Note:
After upgrading, you can choose to delete the old OMS home if you do not want it. For instructions, see Appendix K.Note:
If you see an error message stating that you have not copied the emkey, do the following:-
If your OMS is configured with a service name, then run the following command:
<OMS_HOME>/bin/emctl config emkey -copy_to_repos_from_file -repos_conndesc '"(DESCRIPTION=(ADDRESS_LIST=(ADDRESS=(PROTOCOL=TCP)(HOST=<>)(PORT=<>)))(CONNECT_DATA=(SERVICE_NAME=<>)))"' -repos_user <> [-repos_pwd <pwd> ] [-admin_pwd <pwd>] -emkey_file < emkey file> -
If your OMS is not configured with a service name, then run the following command:
<OMS_HOME>/bin/emctl config emkey -copy_to_repos_from_file -repos_host <host> -repos_port <port> -repos_sid <sid> -repos_user <username> [-repos_pwd <pwd> ] [-admin_pwd <pwd>] -emkey_file <emkey file>
Here, the Management Repository details are details of the existing or old Management Repository. You will be prompted for the administration server password and the repository password if you do not explicitly specify them in the command line.
Note:
If you are upgrading a multi-OMS environment, always start the upgrade process with the first OMS, where the Admin Server is running, and not with any of the additional OMS instances.To identify the OMS where the Admin Server is running, run the following command on the OMS home and verify if the output displays the Admin Server details.
$<OMS_HOME>/bin/emctl status oms -details
You should see a similar output:
Oracle Enterprise Manager Cloud Control 12c
Copyright (c) 1996, 2012 Oracle Corporation. All rights reserved
Enter Enterprise Manager Root (SYSMAN) Password :
Console Server Host : myhost.example.com
.
.
.
WLS Domain Information
Domain Name : GCDomain
Admin Server Host: myhost.example.com
.
.
.
-
Copy the following response file to an accessible location on your local host:
<Software_Location>/response/upgrade.rspIn this command,
<Software_Location>refers to the location where you have extracted the software kit (DVD, or downloaded software). -
Edit the response file and enter appropriate values for the variables described in Appendix A.
-
Invoke the installer:
./runInstaller -silent -responseFile <absolute_path>/upgrade.rspNote:
-
To invoke the installation wizard on UNIX platforms, run
runInstaller.To invoke on Microsoft Windows platforms, runsetup.exe. -
For information about the additional, advanced options you can pass while invoking the installer, refer to Section 5.2.1.
-
While upgrading on IBM AIX, if you see an error message stating that your JDK version in the middleware home is not of a supported version, then make sure you install the supported version mentioned in the message, and then invoke the installer passing the
-skipJDKValidationargument.For example,
./runInstaller -skipJDKValidation -
If a prerequisite check fails reporting a missing package, then make sure you install the required package, and retry the installation. The installer validates the package name as well as the version, so make sure you install the packages of the minimum versions mentioned in Oracle Enterprise Manager Cloud Control Basic Installation Guide. To understand the logic the installer uses to verify these packages, see Oracle Enterprise Manager Cloud Control Basic Installation Guide.
-
-
If you have additional OMS instances, then start upgrading each of them following Step (1) to Step (3) as outlined in Section 5.2 (this section.)
-
After upgrading all the OMS instances, upgrade the Management Agents, including the one that was installed with the first, old OMS (that is, central agent). For more information, refer to Chapter 6.
Note:
After upgrading the central agent, if you find the agent base directory of the upgraded central agent in the old Oracle Middleware home, and if you want to move it outside that old Oracle Middleware home, then follow the instructions outlined in the My Oracle Support note 1520010.1. -
After upgrading the Enterprise Manager system completely, if some central agents appear in Activation Pending state in the Enterprise Manager Cloud Control Console, then delete them by following these steps outlined in Section 13.13.2.
Note:
-
After upgrading, you can choose to delete the old OMS home if you do not want it. For instructions, see Appendix K.
-
If the Management Repository upgrade fails with the following error in the schemamanager logs, then restart the database, and then try the upgrade again.
ORA-04020: deadlock detected while trying to lock object SYSMAN.MGMT_GLOBAL -
If the upgrade fails because you did not apply the required database patches as described in Step 2 (d) of Section 4.1, then see My Oracle Support note 1568107.1 to verify the error in the log file, and to resolve the issue and proceed further.
Caution:
(Applicable only for 12.1.0.X to 12.1.0.5 Upgrade) If you have any JVM targets associated with the old OMS, then even after you refresh the WebLogic domain, on the WebLogic domain home page, you will continue see the JVM target that was associated with the old OMS. This is an expected behavior.
You can choose to either retain it for viewing historical data or delete it. To delete it, right-click the orphaned JVM target, and select Remove Target.
5.2.1 Advanced Installer Options Supported for Installing an Enterprise Manager System in Silent Mode
The following are some additional, advanced options you can pass while invoking the installer in silent mode:
-
(Applicable only for 2-system upgrade from 10.2.0.5 or 11.1.0.1) If you are upgrading on a host that has multiple host names (for example, virtual host), then pass the fully qualified host name using the
ORACLE_HOSTNAMEargument while invoking the installer.For example:
./runInstaller ORACLE_HOSTNAME=example.com -silent -responseFile <absolute_path>/upgrade.rsp -
After the installation ends successfully, the OMS and the Management Agent start automatically. If you do not want them to start automatically, then invoke the installer with
START_OMSandb_startAgentoptions, and set them totrueorfalsedepending on what you want to control.For example, if you do not want the Management Agent to start automatically, then run the following command:
./runInstaller START_OMS=true b_startAgent=false -silent -responseFile <absolute_path>/upgrade.rspTo understand the limitations involved with this advanced option, see Section 5.1.2.
5.3 Installing Enterprise Manager Cloud Control 12c Release 5 (12.1.0.5) Using the Software-Only Method in Graphical Mode
This section describes how you can install only the software binaries of Enterprise Manager 12c Cloud Control in graphical mode at one point, and upgrade them at a later point.
This upgrade approach is best suited for multi-OMS environments, as it minimizes the downtime of the OMS instances. This approach consists of three parts, mainly copying the software binaries, running the root.sh script, and configuring the software binaries. You can copy the software binaries on all the OMS hosts in parallel without shutting down the OMS instances. This not only saves time but also enables the earlier release of the OMS instances to remain up and running at this point. Once the software binaries are copied, you can shut down all the OMS instances, and configure the software binaries to upgrade the OMS instances, one after the other. Therefore, the downtime begins only when you start configuring the OMS instances, and not while copying the software binaries to the host.
In particular, this section covers the following:
WARNING:
Do not upgrade Enterprise Manager Cloud Control 12c Release 4 (12.1.0.4), 12c Release 3 (12.1.0.3), or 12c Release 2 (12.1.0.2) while it is undergoing a 2-system upgrade from its earlier release (10.2.0.5 or 11.1.0.1). Wait until the upgrade completes fully because there might be some standalone Management Agents in status pending state while the upgrade is in progress.
Note:
While upgrading, you might see an error message stating that some Management Agents are still in Activation Pending state, or that the Deferred Data Migration Process (DDMP) or Accrued Data Migration Process (ADMP) is not complete. This indicates that the Enterprise Manager system is still undergoing a 2-system upgrade from its earlier release to 12c Release 4 (12.1.0.4), 12c Release 3 (12.1.0.3), or 12c Release 2 (12.1.0.2).To resolve this issue, wait until the DDMP and ADMP jobs are complete, and all Management Agents are switched over from the earlier release to 12c Release 4 (12.1.0.4), 12c Release 3 (12.1.0.3), or 12c Release 2 (12.1.0.2). Then upgrade to 12c Release 5 (12.1.0.5).
If you are sure you do not want to switch over some Management Agents from the earlier release to 12c Release 4 (12.1.0.4), 12c Release 3 (12.1.0.3), or 12c Release 2 (12.1.0.2), then delete such unwanted Management Agents as described in Section 5.1.3, before you start the upgrade process.
Note:
After upgrading, you can choose to delete the old OMS home if you do not want it. For instructions, see Appendix K.Note:
If you see an error message stating that you have not copied the emkey, do the following:-
If your OMS is configured with a service name, then run the following command:
<OMS_HOME>/bin/emctl config emkey -copy_to_repos_from_file -repos_conndesc '"(DESCRIPTION=(ADDRESS_LIST=(ADDRESS=(PROTOCOL=TCP)(HOST=<>)(PORT=<>)))(CONNECT_DATA=(SERVICE_NAME=<>)))"' -repos_user <> [-repos_pwd <pwd> ] [-admin_pwd <pwd>] -emkey_file < emkey file> -
If your OMS is not configured with a service name, then run the following command:
<OMS_HOME>/bin/emctl config emkey -copy_to_repos_from_file -repos_host <host> -repos_port <port> -repos_sid <sid> -repos_user <username> [-repos_pwd <pwd> ] [-admin_pwd <pwd>] -emkey_file <emkey file>
Here, the Management Repository details are details of the existing or old Management Repository. You will be prompted for the administration server password and the repository password if you do not explicitly specify them in the command line.
Note:
If you are upgrading a multi-OMS environment, always start the upgrade process with the first OMS, where the Admin Server is running, and not with any of the additional OMS instances.To identify the OMS where the Admin Server is running, run the following command on the OMS home and verify if the output displays the Admin Server details.
$<OMS_HOME>/bin/emctl status oms -details
You should see a similar output:
Oracle Enterprise Manager Cloud Control 12c
Copyright (c) 1996, 2012 Oracle Corporation. All rights reserved
Enter Enterprise Manager Root (SYSMAN) Password :
Console Server Host : myhost.example.com
.
.
.
WLS Domain Information
Domain Name : GCDomain
Admin Server Host: myhost.example.com
.
.
.
5.3.1 Installing the Enterprise Manager Cloud Control 12c Release 5 (12.1.0.5) Software Binaries Now in Graphical Mode
To install the software binaries of Enterprise Manager Cloud Control, follow these steps:
-
Invoke the Enterprise Manager Cloud Control Installation Wizard on the host where your existing OMS is running.
<Software_Location>/runInstaller [-invPtrLoc <absolute_path_to_oraInst.loc>]Note:
-
In this command,
<Software_Location>refers to the location where you have extracted the software kit. -
To invoke the installation wizard on UNIX platforms, run
runInstaller.To invoke on Microsoft Windows platforms, runsetup.exe. -
-invPtrLocis not supported on Microsoft Windows.
Note:
When you invokerunInstallerorsetup.exe,if the Enterprise Manager Cloud Control Installation Wizard does not appear, then it is possible that you do not have access to the/stagedirectory.There is a classpath variable that the installation wizard computes for OPatch as
../stage/Components/,and when the TEMP variable is set to/tmp,the installation wizard tries to look for the opatch JAR file in the/tmp/../stagedirectory, which is equivalent to/stage.However, if you do not have the permission on/stage,then the installation wizard can hang. Under such circumstances, verify if you have access to the/stagedirectory. If you do not have access to it, then set the TEMP variable to a location where the install user has access, and then relaunch the installation wizard.Note:
While installing on IBM AIX, if you see an error message stating that your JDK version in the middleware home is not of a supported version, then make sure you install the supported version mentioned in the message, and then invoke the installer passing the-skipJDKValidationargument.For example,
./runInstaller -skipJDKValidation -
-
(Optional) On the My Oracle Support Details screen, enter your My Oracle Support credentials to enable Oracle Configuration Manager. If you do not want to enable Oracle Configuration Manager now, go to Step (3).
If the host from where you are running the installation wizard does not have a connection to the Internet, then enter only the e-mail address and leave the other fields blank. After you complete the installation, manually collect the configuration information and upload it to My Oracle Support.
Note:
Beginning with Enterprise Manager Cloud Control 12c Release 3 (12.1.0.3), My Oracle Support accesses support.oracle.com directly. This means that you must provide network access to this URL, or grant proxy access to it from any client that will access My Oracle Support. -
Click Next.
-
On the Software Updates screen, apply the latest software updates, including the latest PSU patches.
You can download the software updates in offline mode (if you do not have Internet connectivity) or online mode (if you have Internet connectivity). For instructions, see Oracle Enterprise Manager Cloud Control Advanced Installation and Configuration Guide.
-
Click Next.
-
On the Prerequisite Checks screen, check the status of the prerequisite checks run by the installation wizard, and verify whether your environment meets all the minimum requirements for a successful upgrade.
The installation wizard runs the prerequisite checks automatically when you come to this screen. It checks for the required operating system patches, operating system packages, and so on.
The status of the prerequisite check can be either Warning, Failed, or Succeeded.
If some checks result in Warning or Failed status, then investigate and correct the problems before you proceed with the upgrade. The screen provides details on why the prerequisites failed and how you can resolve them. After you correct the problems, return to this screen and click Rerun to check the prerequisites again.
-
Click Next.
Note:
If a prerequisite check fails reporting a missing package, then make sure you install the required package, and click Rerun. The installation wizard validates the package name as well as the version, so make sure you install the packages of the minimum versions mentioned in Oracle Enterprise Manager Cloud Control Basic Installation Guide. To understand the logic the installation wizard uses to verify these packages, see Oracle Enterprise Manager Cloud Control Basic Installation Guide. -
On the Installation Types screen, select Install software only.
-
Click Next.
-
On the Installation Details screen, do the following:
-
Enter or validate the Middleware home.
Note:
-
Upgrade to 12c Release 5 (12.1.0.5) is an out-of-place upgrade, therefore you must do one of the following:
-
Enter a new middleware home where the installer can automatically install Oracle WebLogic Server 11g Release 1 (10.3.6) and Java Development Kit 1.6.0.43.0 for you.
-
Enter a new middleware home where you have preinstalled Oracle WebLogic Server 11g Release 1 (10.3.6) and Java Development Kit 1.6.0.43.0. However, make sure this is a new middleware home meant for the Enterprise Manager system you are installing now, and not the middleware home you were using earlier for the previous release of Enterprise Manager system.
-
-
If you have Oracle WebLogic Server and JDK already preinstalled, then ensure that they are of the supported releases—Oracle WebLogic Server 11g Release 1 (10.3.6) and JDK 1.6.0.43.0. In this case, the installer detects them and displays the Middleware home where they are installed. Validate the path to this Middleware home. The installer detects and displays only those Middleware homes where Enterprise Manager is not already configured.
-
Ensure that the Middleware home you enter or validate here is used only for Enterprise Manager Cloud Control. Ensure that no other Oracle Fusion Middleware products or components are installed in the same Middleware home.
-
-
Enter the absolute path to the agent base directory, a location outside the Oracle Middleware home where the Management Agent can be installed. For example,
/oracle/agent. Ensure that this location is empty and has write permission. Also ensure that it is always maintained outside the Oracle Middleware home.Note:
This is a mandatory field although the Management Agent installed with the OMS is not required, and must be deinstalled as described in Step (15). -
Validate the host name. By default, the host name is the name of the host where the existing, earlier release of Enterprise Manager was installed. This is a non-editable field.
-
-
Click Next.
-
On the Review screen, review the details you provided for the selected installation type.
-
If you want to change the details, click Back repeatedly until you reach the screen where you want to make the changes.
-
After you verify the details, if you are satisfied, click Install to begin the installation process.
-
-
On the Install Progress screen, view the overall progress (in percentage) of the installation.
-
On the Finish screen, you should see information pertaining to the installation of Enterprise Manager. Review the information and click Close to exit the installation wizard.
-
Deinstall the Management Agent and delete the agent base directory you created in Step 10 (b). For instructions, see Oracle Enterprise Manager Cloud Control Advanced Installation and Configuration Guide.
The Management Agent you installed and the agent base directory you created in Step 10 (b) is essentially for a fresh installation, and is not used while upgrading Management Agents using the Agent Upgrade Console. The Agent Upgrade Console performs an out-of-place upgrade, and creates a new agent home in the existing agent base directory for every Management Agent that is upgraded.
For example, in Step 10 (b), you might have provided
/software/oracle/agent12105as the agent base directory. However, the old agent base directory might be/software/oracle/middleware/agent_base/,and the old agent home might be/software/oracle/middleware/agent_base/core/12.1.0.4.In this case, the Agent Upgrade Console that upgrades the Management Agent does not use the agent base directory/software/oracle/agent12105created in Step 10 (b). Instead, it creates a new agent home/software/oracle/middleware/agent_base/core/12.1.0.5in the existing agent base directory/software/oracle/middleware/agent_base/.Since the agent base directory you provided in Step 10 (b) is no longer required, you can deinstall the Management Agent and manually delete the agent base directory. -
If you have additional OMS instances, then copy the software binaries on those additional OMS hosts as well by following steps outlined in this section (Section 5.3.1).
5.3.2 Running the allroot.sh Script
(For UNIX Only) After you install the software binaries, log in as a root user in a new terminal and run the allroot.sh script from the OMS home:
$<OMS_HOME>/allroot.sh
If you have additional OMS instances, then run this script on those additional OMS hosts as well.
Note:
If you do not have the permission to run this script at this point, you can always run it after configuring the software binaries, but make sure you run it before you start upgrading the Management Agents.5.3.3 Configuring the Enterprise Manager Cloud Control 12c Release 5 (12.1.0.5) Software Binaries in Graphical Mode
To configure the software binaries of Enterprise Manager Cloud Control, follow these steps:
-
Invoke the installation wizard by running the following script:
$<MIDDLEWARE_HOME>/oms/sysman/install/ConfigureGC.sh [-invPtrLoc <absolute_path_to_oraInst.loc>]Note:
-
On Microsoft Windows, run
ConfigureGC.bat. -
While installing the software binaries as described in Section 5.3.1, if you had passed the argument
-invPtrLoc,then pass the same argument here as well. -
For information about the additional, advanced options you can pass while invoking the script, refer to Section 5.3.3.1.
-
-
On the Install Types screen, do the following:
-
Select Upgrade an Existing Enterprise Manager System, and then, select One System Upgrade.
-
Select the OMS home you want to upgrade.
-
-
Click Next.
-
On the Database Connection Details screen, do the following:
-
Enter the passwords for the SYS and SYSMAN user accounts of the database that houses the Management Repository for the selected OMS.
-
Confirm that you have backed up the Oracle Management Repository (Management Repository). As a prerequisite, you must back up the Management Repository before starting the upgrade process. If you have not already taken a backup, then do so immediately, and then return to the installer to continue with the upgrade.
Note:
For information about the various prerequisite checks that are run on the database at this point, see Oracle Enterprise Manager Cloud Control Basic Installation Guide. -
-
Click Next.
Note:
If you see an error about missing plug-ins, then do the following:-
Make a note of the plug-in version and plug-in update as shown in the missing plug-ins error message. The plug-ins displayed in the error message have the following format:
PluginID:PluginVersion:PluginUpdate -
Access the following Enterprise Manager download page on Oracle Technology Network (OTN):
http://www.oracle.com/technetwork/oem/grid-control/downloads/oem-upgrade-console-502238.html -
Expand the section that lists the software binaries and plug-ins for your upgrade path.
-
From the Download Plug-ins section, manually download the same plug-in version and the same or higher plug-in update as shown in the missing plug-ins error message. Store the plug-ins in an accessible location, and ensure that the location is meant only for these missing plug-ins.
-
Invoke the
ConfigureGC.shscript in the following way to install the downloaded plug-ins:<OMS_HOME>/sysman/install/ConfigureGC.sh -pluginLocation <absolute_path_to_plugin_sw>Proceed to the next step only after you have installed these missing plug-ins.
-
-
On the Plug-In Upgrade screen, review the plug-ins that will be automatically:
-
Upgraded when newer versions exist
-
Migrated when newer versions do not exist
-
Deployed when the plug-ins being upgraded have new dependencies, or when there are any new default plug-ins introduced with a release.
Here, newer versions refer to the newer versions of plug-ins available in the Enterprise Manager software (DVD, or downloaded software) that you are using to install.
Note:
Before you proceed to the next screen, stop all the associated OMS instances.$<OMS_HOME>/bin/emctl stop oms -allNote:
-
If the newer versions do not exist in the Enterprise Manager software that you are using, but exist on OTN, then you can choose to manually download them from OTN and upgrade your existing plug-ins, instead of having them automatically migrated by default. To do so, follow these steps:
-
Access the following Enterprise Manager download page on Oracle Technology Network (OTN):
http://www.oracle.com/technetwork/oem/grid-control/downloads/oem-upgrade-console-502238.html -
Expand the section that lists the software binaries and plug-ins for your upgrade path.
-
From the Download Plug-ins section, manually download the plug-ins and store them in an accessible location.
-
Invoke the installer with the following option, and pass the location where the plug-ins you downloaded are available:
$<MIDDLEWARE_HOME>/oms/sysman/install/ConfigureGC.sh -pluginLocation <absolute_path_to_plugin_software_location>
Once the newer versions of the plug-ins are made available, this screen lists those plug-ins as plug-ins that will automatically be upgraded.
-
-
If you see a message stating that you have unsupported plug-ins on the OMS or on some of the Management Agents, then follow the instructions outlined in the message to upgrade the plug-ins, and then retry upgrading the OMS.
-
-
Click Next.
-
On the Select Plug-ins screen, select the optional plug-ins you want to deploy in addition to the plug-ins that will automatically be upgraded while upgrading the OMS.
Note:
If you want to install any additional plug-ins that are not listed on this screen, then follow these steps:-
Access the following Enterprise Manager download page on Oracle Technology Network (OTN):
http://www.oracle.com/technetwork/oem/grid-control/downloads/oem-upgrade-console-502238.html -
Expand the section that lists the software binaries and plug-ins for your upgrade path.
-
From the Download Plug-ins section, manually download the plug-ins and store them in an accessible location.
-
Invoke the installer with the following option, and pass the location where the plug-ins you downloaded are available:
$<MIDDLEWARE_HOME>/oms/sysman/install/ConfigureGC.sh -pluginLocation <absolute_path_to_plugin_software_location>
-
-
Click Next.
-
On the Extend WebLogic Server Domain screen, do the following to create a new WebLogic domain and a new OMS instance base directory for the upgraded OMS:
-
Validate the AdminServer host name and its port, and the WebLogic user name, and enter the WebLogic user account password. This is required to create a new WebLogic domain
(GCDomain)on the same port and host name as the AdminServer used by the earlier release of the OMS you are upgrading.Note:
If you are upgrading an additional OMS, then enter the host name and port of the AdminServer configured for the first OMS that you have already upgraded, and then, enter the credentials for the existing WebLogic Server user account.The host name is the name of the host where the first OMS is running. To identify the port, check the value set to the parameter
AS_HTTPS_PORTin the following file:<ORACLE_HOME>/gc_inst/em/EMGC_OMS<n>/emgc.properties -
Enter the absolute path to the new OMS instance base directory
(gc_inst), which will be created for storing the configuration information related to the upgraded OMS. Thisgc_instdirectory must not be your oldgc_instdirectory of 12c Release 4 (12.1.0.4), so enter a new directory location. If you enter the oldgc_instdirectory, then the installer will display a warning that the directory is not empty.Make sure the path you enter leads up to the instance base directory, and is maintained outside the middleware home.
For example, if the 12.1.0.4 middleware home was
/u01/app/Oracle/Middleware,and the 12.1.0.4 OMS instance base directory was/u01/app/Oracle/gc_inst,then while upgrading to 12.1.0.5, if you entered the middle ware home as/u01/app/Oracle/Middleware12105,then enter the OMS instance base directory as/u01/app/Oracle/gc_inst12105.As a result, the directory name is unique and so is the directory location.Note:
If you are installing on an NFS-mounted drive and creating the OMS instance base directory (gc_inst) on that NFS-mounted drive, then after you install, move the lock files from the NFS-mounted drive to a local file system location. Modify the lock file location in the httpd.conf file to map to a location on a local file system. For instructions, refer to Section 5.1.4.Note:
If you want to change the Oracle WebLogic Server password or the Node Manager password, see My Oracle Support note 1450798.1.
-
-
Click Next.
-
On the Review screen, review the details you provided for the selected installation type.
-
If you want to change the details, click Back repeatedly until you reach the screen where you want to make the changes.
-
After you verify the details, if you are satisfied, click Configure to begin the installation process.
-
-
On the Install Progress screen, view the overall progress (in percentage) of the installation.
Note:
-
If a Configuration Assistant fails, the installer stops and none of the subsequent Configuration Assistants are run until the issue related to the failed Configuration Assistant is resolved. In this case, diagnose the issue, resolve it, and then, click Retry on the Install Progress screen to rerun the Configuration Assistants starting from the Configuration Assistant that failed.
However, if you accidentally exit the installer before clicking Retry, then do NOT restart the installer to reach the same screen; instead, invoke the
runConfig.shscript from the OMS home to rerun the Configuration Assistant in silent mode:$<OMS_HOME>/oui/bin/runConfig.sh ORACLE_HOME=<absolute_path_to_OMS_home> MODE=perform ACTION=configure COMPONENT_XML={encap_oms.1_0_0_0_0.xml}If the
runConfig.shscript fails, raise a service request and contact Oracle Support. -
If the Management Repository upgrade fails with the following error in the schemamanager logs, then restart the database, and then try the upgrade again.
ORA-04020: deadlock detected while trying to lock object SYSMAN.MGMT_GLOBAL -
If the upgrade fails because you did not apply the required database patches as described in Step 2 (d) of Section 4.1, then see My Oracle Support note 1568107.1 to verify the error in the log file, and to resolve the issue and proceed further.
-
-
On the Finish screen, you should see information pertaining to the installation of Enterprise Manager. Review the information and click Close to exit the installation wizard.
-
If you have additional OMS instances, then start upgrading each of them by following steps outlined in this section (Section 5.3.3).
-
After upgrading all the OMS instances, upgrade the Management Agents, including the one that was installed with the first, old OMS (that is, central agent).For more information, refer to Chapter 6.
Note:
After upgrading the central agent, if you find the agent base directory of the upgraded central agent in the old Oracle Middleware home, and if you want to move it outside that old Oracle Middleware home, then follow the instructions outlined in the My Oracle Support note 1520010.1. -
After upgrading the Enterprise Manager system completely, if some central agents appear in Activation Pending state in the Enterprise Manager Cloud Control Console, then delete them by following these steps outlined in Section 13.13.2.
Note:
After upgrading, you can choose to delete the old OMS home if you do not want it. For instructions, see Appendix K.Caution:
If you have any JVM targets associated with the old OMS, then even after you refresh the WebLogic domain, on the WebLogic domain home page, you will continue see the JVM target that was associated with the old OMS. This is an expected behavior.
You can choose to either retain it for viewing historical data or delete it. To delete it, right-click the orphaned JVM target, and select Remove Target.
5.3.3.1 Advanced Script Options Supported for Software-Only Upgrade to Enterprise Manager Cloud Control 12c Release 5 (12.1.0.5)
The following are some additional, advanced options you can pass while invoking the configureGC.sh script:
-
By default,
GCDomainis the default name used for creating the WebLogic Domain. To override this and use a custom WebLogic Domain name, invoke the script with theWLS_DOMAIN_NAMEoption, and enter a unique custom name.For example, if you want to use the custom name
EMDomain, then run the following command:$<MIDDLEWARE_HOME>/oms/sysman/install/ConfigureGC.sh WLS_DOMAIN_NAME=EMDomain -
After the configuration ends successfully, the OMS and the Management Agent start automatically. If you do not want them to start automatically, then invoke the script with
START_OMSandb_startAgentoptions, and set them totrueorfalsedepending on what you want to control.For example, if you do not want the Management Agent to start automatically, then run the following command:
$<MIDDLEWARE_HOME>/oms/sysman/install/ConfigureGC.sh START_OMS=true b_startAgent=falseTo understand the limitations involved with this advanced option, see Section 5.1.2.
5.4 Installing Enterprise Manager Cloud Control 12c Release 5 (12.1.0.5) Using the Software-Only Method in Silent Mode
This section explains how you can install only the software binaries of Enterprise Manager 12c Cloud Control in silent mode at one point, and upgrade them at a later point.
This upgrade approach is best suited for multi-OMS environments, as it minimizes the downtime of the OMS instances. This approach consists of three parts, mainly copying the software binaries, running the root.sh script, and configuring the software binaries. You can copy the software binaries on all the OMS hosts in parallel without shutting down the OMS instances. This not only saves time but also enables the earlier release of the OMS instances to remain up and running at this point. Once the software binaries are copied, you can shut down all the OMS instances, and configure the software binaries to upgrade the OMS instances, one after the other. Therefore, the downtime begins only when you start configuring the OMS instances, and not while copying the software binaries to the host.
In particular, this section covers the following:
WARNING:
Do not upgrade Enterprise Manager Cloud Control 12c Release 4 (12.1.0.4), 12c Release 3 (12.1.0.3), or 12c Release 2 (12.1.0.2) while it is undergoing a 2-system upgrade from its earlier release (10.2.0.5 or 11.1.0.1). Wait until the upgrade completes fully because there might be some standalone Management Agents in status pending state while the upgrade is in progress.
Note:
While upgrading, you might see an error message stating that some Management Agents are still in Activation Pending state, or that the Deferred Data Migration Process (DDMP) or Accrued Data Migration Process (ADMP) is not complete. This indicates that the Enterprise Manager system is still undergoing a 2-system upgrade from its earlier release to 12c Release 4 (12.1.0.4), 12c Release 3 (12.1.0.3), or 12c Release 2 (12.1.0.2).To resolve this issue, wait until the DDMP and ADMP jobs are complete, and all Management Agents are switched over from the earlier release to 12c Release 4 (12.1.0.4), 12c Release 3 (12.1.0.3), or 12c Release 2 (12.1.0.2). Then upgrade to 12c Release 5 (12.1.0.5).
If you are sure you do not want to switch over some Management Agents from the earlier release to 12c Release 4 (12.1.0.4), 12c Release 3 (12.1.0.3), or 12c Release 2 (12.1.0.2), then delete such unwanted Management Agents as described in Section 5.1.3, before you start the upgrade process.
Note:
After upgrading, you can choose to delete the old OMS home if you do not want it. For instructions, see Appendix K.Note:
If you see an error message stating that you have not copied the emkey, do the following:-
If your OMS is configured with a service name, then run the following command:
<OMS_HOME>/bin/emctl config emkey -copy_to_repos_from_file -repos_conndesc '"(DESCRIPTION=(ADDRESS_LIST=(ADDRESS=(PROTOCOL=TCP)(HOST=<>)(PORT=<>)))(CONNECT_DATA=(SERVICE_NAME=<>)))"' -repos_user <> [-repos_pwd <pwd> ] [-admin_pwd <pwd>] -emkey_file < emkey file> -
If your OMS is not configured with a service name, then run the following command:
<OMS_HOME>/bin/emctl config emkey -copy_to_repos_from_file -repos_host <host> -repos_port <port> -repos_sid <sid> -repos_user <username> [-repos_pwd <pwd> ] [-admin_pwd <pwd>] -emkey_file <emkey file>
Here, the Management Repository details are details of the existing or old Management Repository. You will be prompted for the administration server password and the repository password if you do not explicitly specify them in the command line.
Note:
If you are upgrading a multi-OMS environment, always start the upgrade process with the first OMS, where the Admin Server is running, and not with any of the additional OMS instances.To identify the OMS where the Admin Server is running, run the following command on the OMS home and verify if the output displays the Admin Server details.
$<OMS_HOME>/bin/emctl status oms -details
You should see a similar output:
Oracle Enterprise Manager Cloud Control 12c
Copyright (c) 1996, 2012 Oracle Corporation. All rights reserved
Enter Enterprise Manager Root (SYSMAN) Password :
Console Server Host : myhost.example.com
.
.
.
WLS Domain Information
Domain Name : GCDomain
Admin Server Host: myhost.example.com
.
.
.
5.4.1 Installing the Enterprise Manager Cloud Control 12c Release 5 (12.1.0.5) Software Binaries in Silent Mode
To install the software binaries of Enterprise Manager 12c Cloud Control, follow these steps:
-
Copy the following response file to an accessible location on your local host:
<Software_Location>/response/software_only.rspIn this command,
<Software_Location>refers to the location where you have extracted the software kit. -
Edit the response file and enter appropriate values for the variables described in Table 5-2.
-
Invoke the installer:
./runInstaller -silent -responseFile <absolute_path>/software_only.rsp [-invPtrLoc <absolute_path_to_oraInst.loc>]Note:
-
To invoke the installation wizard on UNIX platforms, run
runInstaller.To invoke on Microsoft Windows platforms, runsetup.exe. -
For information about the additional, advanced options you can pass while invoking the installer, refer to Section 5.2.1.
-
While installing on IBM AIX, if you see an error message stating that your JDK version in the middleware home is not of a supported version, then make sure you install the supported version mentioned in the message, and then invoke the installer passing the
-skipJDKValidationargument.For example,
./runInstaller -skipJDKValidation
-
-
Deinstall the Management Agent and delete the agent base directory you created. For instructions, see Oracle Enterprise Manager Cloud Control Advanced Installation and Configuration Guide.
The Management Agent you installed and the agent base directory you created is essentially for a fresh installation, and is not used while upgrading Management Agents using the Agent Upgrade Console. The Agent Upgrade Console performs an out-of-place upgrade, and creates a new agent home in the existing agent base directory for every Management Agent that is upgraded.
For example, in the response file, you might have provided
/software/oracle/agent12105as the agent base directory. However, the old agent base directory might be/software/oracle/middleware/agent_base/,and the old agent home might be/software/oracle/middleware/agent_base/core/12.1.0.4.In this case, the Agent Upgrade Console that upgrades the Management Agent does not use the agent base directory/software/oracle/agent12105created using the response file. Instead, it creates a new agent home/software/oracle/middleware/agent_base/core/12.1.0.5in the existing agent base directory/software/oracle/middleware/agent_base/.Since the agent base directory you provided in Step 10 (b) is no longer required, you can deinstall the Management Agent and manually delete the agent base directory. -
If you have additional OMS instances, then copy the software binaries on those additional OMS hosts as well by following steps outlined in this section (Section 5.4.1).
5.4.1.1 Editing the software_only.rsp Response File for Installing the Enterprise Manager Cloud Control 12c Release 5 (12.1.0.5) Software Binaries in Silent Mode
Table 5-2 describes what variables you must edit and how you must edit them in the software_only.rsp response file for installing the software binaries of Enterprise Manager Cloud Control.
Table 5-2 Editing the software_only.rsp Response File for Installing the Enterprise Manager Cloud Control 12c Release 5 (12.1.0.5) Software Binaries in Silent Mode
| Parameter | Data Type | Double Quotes Required for Values? | Description |
|---|---|---|---|
|
UNIX_GROUP_NAME |
String |
Yes |
(Required only when central inventory does not exist) Enter the name of the UNIX group you belong to. For example, |
|
INVENTORY_LOCATION |
String |
Yes |
(Required only when central inventory does not exist) Enter the absolute path to the Central Inventory. For example, |
|
SECURITY_UPDATES_VIA_MYORACLESUPPORT |
Boolean |
Yes |
|
|
DECLINE_SECURITY_UPDATES |
Boolean |
No |
|
|
INSTALL_UPDATES_SELECTION |
String |
Yes |
By default, this variable is set to
|
|
ORACLE_MIDDLEWARE_HOME_LOCATION |
String |
Yes |
Upgrade to 12c Release 5 (12.1.0.5) is an out-of-place upgrade, therefore you must do one of the following:
Ensure that the middleware location has write permission to create the Oracle homes for OMS and Management Agent. Note: Ensure that the Middleware home you enter here is used only for Enterprise Manager Cloud Control. Ensure that no other Oracle Fusion Middleware products or components are installed in the same Middleware home. |
|
AGENT_BASE_DIR |
String |
Yes |
Enter the absolute path to the agent base directory, a location outside the Oracle Middleware home where the Management Agent can be installed. For example, |
|
ORACLE_HOSTNAME (Applicable only for 2-system upgrade of 10.2.0.5 or 11.1.0.1) |
String |
Yes |
By default, the fully qualified name of the host on which you have invoked the installer, is considered.
|
|
FROM_LOCATION |
Not Applicable |
Not Applicable |
Ignore this parameter. |
|
DEINSTALL_LIST |
Not Applicable |
Not Applicable |
Ignore this parameter. |
|
REMOVE_HOMES |
Not Applicable |
Not Applicable |
Ignore this parameter. |
5.4.2 Running the allroot.sh Script
(For UNIX Only) After you install the software binaries, log in as a root user in a new terminal and run the allroot.sh script from the OMS home:
$<OMS_HOME>/allroot.sh
If you have additional OMS instances, then run this script on those additional OMS hosts as well.
Note:
If you do not have the permission to run this script at this point, you can always run it after configuring the software binaries, but make sure you run it before you start upgrading the Management Agents.5.4.3 Configuring the Enterprise Manager Cloud Control 12c Release 5 (12.1.0.5) Software Binaries in Silent Mode
To configure the software binaries of Enterprise Manager Cloud Control, follow these steps:
-
Copy the following response file to an accessible location on the host where you copied the software binaries of Enterprise Manager Cloud Control:
<Software_Location>/response/upgrade.rspIn this command,
<Software_Location>refers to the location where you have extracted the software kit. -
Edit the response file and enter appropriate values for the variables described in Appendix A.
-
Configure the software binaries by invoking the
ConfigureGC.shscript passing the response you edited in the previous step:$<MIDDLEWARE_HOME>/oms/sysman/install/ConfigureGC.sh -silent -responseFile <absolute_path>/upgrade.rsp [-invPtrLoc <absolute_path_to_oraInst.loc>]Note:
-
While installing the software binaries as described in Section 5.4.1, if you had passed the argument
-invPtrLoc, then pass the same argument here as well. -
For information about the additional, advanced options you can pass while invoking the script, refer to Section 5.3.3.1.
-
If a prerequisite check fails reporting a missing package, then make sure you install the required package, and retry the installation. The installer validates the package name as well as the version, so make sure you install the packages of the minimum versions mentioned in Oracle Enterprise Manager Cloud Control Basic Installation Guide. To understand the logic the installer uses to verify these packages, see Oracle Enterprise Manager Cloud Control Basic Installation Guide.
Note:
If you see an error about missing plug-ins, then do the following:-
Make a note of the plug-in version and plug-in update as shown in the missing plug-ins error message. The plug-ins displayed in the error message have the following format:
PluginID:PluginVersion:PluginUpdate -
Access the following Enterprise Manager download page on Oracle Technology Network (OTN):
http://www.oracle.com/technetwork/oem/grid-control/downloads/oem-upgrade-console-502238.html -
Expand the section that lists the software binaries and plug-ins for your upgrade path.
-
From the Download Plug-ins section, manually download the plug-ins and store them in an accessible location.
-
Invoke the
ConfigureGC.shscript in the following way to install the downloaded plug-ins:<OMS_HOME>/sysman/install/ConfigureGC.sh -pluginLocation <absolute_path_to_plugin_sw>
-
-
If you have additional OMS instances, then start upgrading each of them by following steps outlined in this section (Section 5.4.3).
-
After upgrading all the OMS instances, upgrade the Management Agents, including the one that was installed with the first, old OMS (that is, central agent).For more information, refer to Chapter 6.
Note:
After upgrading the central agent, if you find the agent base directory of the upgraded central agent in the old Oracle Middleware home, and if you want to move it outside that old Oracle Middleware home, then follow the instructions outlined in the My Oracle Support note 1520010.1. -
After upgrading the Enterprise Manager system completely, if some central agents appear in Activation Pending state in the Enterprise Manager Cloud Control Console, then delete them by following these steps outlined in Section 13.13.2.
Note:
-
After upgrading, you can choose to delete the old OMS home if you do not want it. For instructions, see Appendix K.
-
If the Management Repository upgrade fails with the following error in the schemamanager logs, then restart the database, and then try the upgrade again.
ORA-04020: deadlock detected while trying to lock object SYSMAN.MGMT_GLOBAL -
If the upgrade fails because you did not apply the required database patches as described in Step 2 (d) of Section 4.1, then see My Oracle Support note 1568107.1 to verify the error in the log file, and to resolve the issue and proceed further.
Caution:
(Applicable only for 12.1.0.X to 12.1.0.5 Upgrade) If you have any JVM targets associated with the old OMS, then even after you refresh the WebLogic domain, on the WebLogic domain home page, you will continue see the JVM target that was associated with the old OMS. This is an expected behavior.
You can choose to either retain it for viewing historical data or delete it. To delete it, right-click the orphaned JVM target, and select Remove Target.