6 Upgrading Oracle Management Agents
This chapter describes how you can upgrade your Enterprise Manager Cloud Control 12c Oracle Management Agents (Management Agents). This chapter contains the following sections:
6.1 Overview of 12c Management Agent Upgrade
If you are using Enterprise Manager Cloud Control 12c Release 4 (12.1.0.5) to manage your enterprise, Oracle strongly recommends that you upgrade all your Oracle Management Agents (Management Agents) to 12.1.0.5.
To upgrade your 12c Management Agents, you can either use the Upgrade Agents page of Agent Upgrade Console (which is part of the Enterprise Manager Cloud Control console), or use EM CLI. The Upgrade Agents page acts as a single-window solution to mass-upgrade your existing Management Agents to the latest version for which the software is available in Oracle Software Library (Software Library).
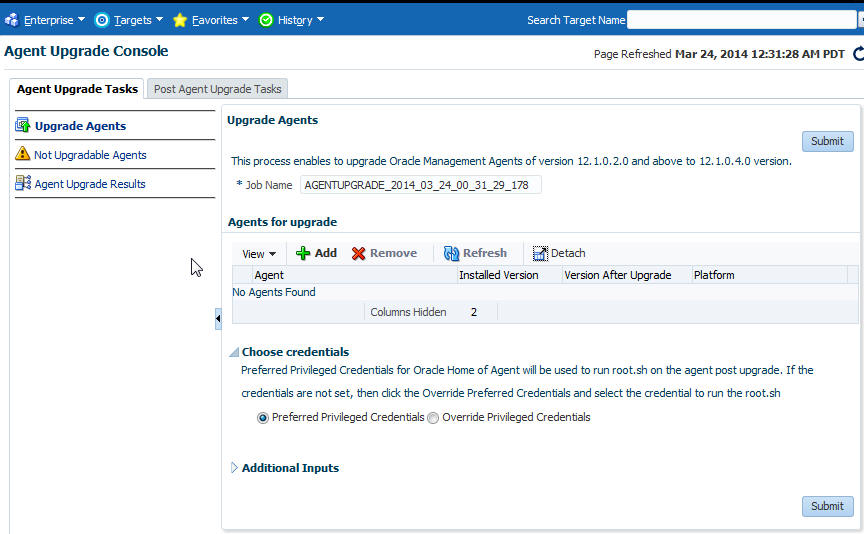
Agent Upgrade Console consists of the Agent Upgrade Tasks tab, and the Post Agent Upgrade Tasks tab. You can use the Agent Upgrade Tasks tab to upgrade 12c Management Agents, view the Management Agents that cannot be upgraded, and view the summary of Management Agent upgrade jobs. You can use the Post Agent Upgrade Tasks tab to clean up the old directories of upgraded 12c Management Agents, and view a summary of the Management Agent clean up jobs. To access the Agent Upgrade Console, from the Setup menu, select Manage Cloud Control, then select Upgrade Agents.
Figure 6-1 shows the Agent Upgrade Console.
Upgrading a Management Agent modifies its installation base directory structure. The following is an example of the installation base directory structure of a 12c Release 4 (12.1.0.4) Management Agent, when it is upgraded to 12c Release 5 (12.1.0.5):
Before Upgrade
<agent_base_directory>
    |_____sbin
    |_____core
         |_____12.1.0.4.0
    |_____plugins
    |_____agent_inst
    |_____agentimage.properties
    .
    .
    .
After Upgrade
<agent_base_directory>
    |_____sbin
    |_____backup_agtup
    |_____core
         |_____12.1.0.4.0
         |_____12.1.0.5.0
    |_____plugins
    |_____agent_inst
    |_____agentimage.properties
    .
    .
    .
Note:
-
When you upgrade a Management Agent, you cannot change the location of the agent base directory.
-
When you upgrade a Management Agent, the plug-ins installed on the Management Agent host are also upgraded by default, as long as the latest versions of these plug-ins exist in Oracle Software Library (Software Library). If the latest versions of these plug-ins do not exist in the Software Library, their old versions are retained.
-
(For Microsoft Windows hosts) If you upgrade a 12.1.0.x Management Agent and you want to install another Management Agent on the same host, which points to a different OMS, ensure that you specify the
s_agentSrvcNameparameter while installing the Management Agent, as described in the Oracle Enterprise Manager Cloud Control Advanced Installation and Configuration Guide.
6.2 Before You Begin Upgrading 12c Management Agents
Before you upgrade your 12c Management Agents, you must be aware of the following:
-
If your Oracle Management Service (OMS) is of version 12c Release 5 (12.1.0.5), you can use the Agent Upgrade Console or EM CLI to upgrade only 12c Release 2 (12.1.0.2), 12c Release 3 (12.1.0.3), 12c Release 4 (12.1.0.4) Management Agents, and not 12c Release 1 (12.1.0.1) Management Agents.
For information about the Management Agent versions that are supported on a 12.1.0.5 OMS, see Oracle Enterprise Manager Cloud Control Basic Installation Guide.
-
You must upgrade the central agent installed along with the old Oracle Management Service (OMS).
Management Agents, including the central agent installed on the OMS host, are not upgraded automatically while you upgrade your OMS to 12c Release 5 (12.1.0.5). Ensure that you upgrade the central agent installed on the OMS host immediately after upgrading the old OMS to 12.1.0.5.
-
You can upgrade a Management Agent using the Agent Upgrade Console or EM CLI even when you do not have preferred privileged credentials or non-privileged credentials set, or are not aware of the Management Agent credentials. Privileged credentials are only required to run the
root.shscript post-upgrade.If you upgrade a Management Agent as a user who does not have root privileges, or you upgrade a Management Agent without having preferred privileged credentials, a warning appears. You can ignore this warning during the upgrade. Later, you can log in to the Management Agent host as the root user, and run the
$<AGENT_BASE_DIR>/core/12.1.0.5.0/root.shscript. -
In some cases, the deployed version of a plug-in may not be supported on the upgraded version of a Management Agent. In these cases, ensure that you either undeploy the plug-ins that are not supported on the upgraded version of the Management Agent, or deploy versions of the plug-ins that are supported on the upgraded Management Agent.
For information on how to undeploy and deploy a plug-in, see Oracle Enterprise Manager Cloud Control Administrator's Guide.
-
In Enterprise Manager Cloud Control 12c Release 4 (12.1.0.5), you can save the Management Agent one-off patches that you want to apply on a particular version of the Management Agent software, such that these patches are automatically applied on the software whenever a new Management Agent of the same version is deployed, or an old Management Agent is upgraded to that version.
For information on how to do this, see Oracle Enterprise Manager Cloud Control Advanced Installation and Configuration Guide.
Also, you can apply one-off patches on a plug-in and create a custom patched plug-in, such that this custom patched plug-in is deployed on all the new Management Agents that you deploy, and all the old Management Agents that you upgrade.
For information on how to do this, see Oracle Enterprise Manager Cloud Control Administration Guide.
-
Upgrading Management Agents does not require Cygwin, PsExec, or any SSH connectivity tools, as Enterprise Manager uses the existing Management Agent - OMS communication channels to perform the upgrade.
-
You cannot specify a custom inventory location while upgrading Management Agents. The upgraded Management Agent uses the inventory location of the old Management Agent.
-
If you select a Management Agent installed on a cluster, or a shared Management Agent for upgrade, the set of related Management Agents, that is, the other Management Agents of the cluster or the shared Oracle Home are selected for upgrade automatically.
-
You cannot upgrade a Management Agent in the following scenarios:
-
The Management Agent is not up and running
-
The Management Agent is not secure
-
The Management Agent is not reachable
-
The new Management Agent software (of the same version as the OMS version) is not present in Oracle Software Library (Software Library)
-
The Management Agent Oracle home property is missing
-
The Management Agent is already undergoing an upgrade
-
-
Upgrading a lower release of Solaris by applying a kernel patch or a patch bundle is not equivalent to installing the actual Solaris 5.10 Update 9 image. Oracle Management Agent 12c Release 5 (12.1.0.5) was built, tested, and certified on a minimum update version of Solaris 5.10 Update 9, so Oracle recommends that you install Oracle Management Agent only on Solaris 5.10 Update 9, and not on any release that was upgraded using patches.
6.3 Prerequisites for Upgrading 12c Management Agents
Before you upgrade your 12c Management Agents, meet the following prerequisites:
-
If you want to upgrade a Management Agent running on a platform different from the OMS host platform, ensure that the latest Management Agent software for the platform is downloaded and applied in Software Library, using Self Update.
To access Self Update, from the Setup menu, select Extensibility, then select Self Update. To check whether the latest Management Agent software for a platform is downloaded and applied, click Agent Software, then check the Version and the Status columns for the required platform. The software version for the platform must be the same as the OMS version. The status must read Applied.
If the latest software is not downloaded and applied, select the software, then click Download to download it. After downloading the software, click Apply to apply the software. If the software has been downloaded, but not applied, click Apply to apply the software.
For more information on using Self Update to download and apply the latest Management Agent software for a platform, see Oracle Enterprise Manager Cloud Control Basic Installation Guide.
-
Ensure that the Management Agents you want to upgrade are up and running.
To verify if a Management Agent is up and running, from the Setup menu, select Manage Cloud Control, then select Agents. Check the Status column of the required Management Agent.
If the Management Agent is unreachable, click the Management Agent name to navigate to the Management Agent home page. Click the Agent Unreachable icon, and perform the recommended actions.
-
Ensure that the Management Agents you want to upgrade are secure.
To verify if a Management Agent is secure, from the Setup menu, select Manage Cloud Control, then select Agents. Check the Secure Upload column of the required Management Agent.
If the Management Agent is not secure, from the Agent menu, select Secure to secure it.
Also, you can run the following command to verify if a Management Agent is secure:
<EMSTATE>/bin/emctl status agent<EMSTATE>refers to the Management Agent instance directory, that is,<AGENT_BASE_DIRECTORY>/agent_instIf the Management Agent is secure, the Management Agent URL displayed is a HTTPS URL. However, if the Management Agent URL displayed is a HTTP URL, secure the Management Agent by running the following command:
<EMSTATE>/bin/emctl secure agent -
Ensure that OMS collections are run on all the Management Agents that you want to upgrade.
If OMS collections are not run on some Management Agents, they are not upgradable. These Management Agents are displayed on the Not Upgradable Agents page, with the reason displayed as Oracle Home Property Missing. For information on how to access this page, see Section 6.4.3.
To run OMS collections on a Management Agent that you want to upgrade, run the following command from the Management Agent host:
<EMSTATE>/bin/emctl control agent runCollection <TARGET_NAME>:oracle_home oracle_home_config<EMSTATE>refers to the Management Agent instance directory, that is,<AGENT_BASE_DIRECTORY>/agent_inst<TARGET_NAME>refers to the Management Agent target of target typeoracle_homethat is present in<EMSTATE>/sysman/emd/targets.xml -
Ensure that the old Management Agent does not come up during the Management Agent upgrade process.
You may have scheduled certain cron jobs, or configured certain notification managers that start up a Management Agent when it is down. The old Management Agent is shut down as part of the upgrade process. Ensure that this Management Agent is not brought up.
-
Ensure that the install user has read permissions on all the files present in Oracle Inventory, and write permissions on the Oracle Inventory directory.
To grant read permissions on all the files present in Oracle Inventory, run the following command as the install user:
chmod -R +r $<INVENTORY_LOCATION>To grant write permissions on the Oracle Inventory directory, run the following command as the install user:
chmod +rw $<INVENTORY_LOCATION> -
If the temporary directory (that is, the stage location) you specify and the agent base directory of the Management Agent you want to upgrade are present on the same disk, then ensure that the disk has at least 3 GB of free space. If they are present on different disks, ensure that the temporary directory has at least 2.1 GB of free space, and the agent base directory has at least 750 MB of free space.
6.4 Upgrading 12c Management Agents
This section describes the actions involved in upgrading Management Agents. It consists of the following:
6.4.1 Upgrading 12c Management Agents
This section describes the methods you can use to upgrade 12.1.0.x Management Agents. It consists of the following:
6.4.1.1 Upgrading 12c Management Agents using Agent Upgrade Console
To upgrade 12.1.0.x Management Agents using Agent Upgrade Console, follow these steps:
-
From the Setup menu, select Manage Cloud Control, then select Upgrade Agents.
-
For Job Name, accept the default job name, or enter a unique job name.
A unique job name enables you to identify the upgrade job, know details of its execution, and track its progress on the Agent Upgrade Status page.
The job name can have a maximum length of 64 characters. It can consist of alphanumeric and special characters, and can begin with either of these.
-
Click Add to select the Management Agents you want to upgrade.
In the Upgradable Agents window, search for the Management Agents you want to upgrade, using the Agent, Installed Version, Platform, and Group fields.
Select the Management Agents you want to upgrade. Click OK.
Important:
-
In this release, you cannot upgrade your 12c Release 2 (12.1.0.2) Management Agents to 12c Release 3 (12.1.0.3) or 12c Release 4 (12.1.0.4). You can only upgrade your 12c Release 2 (12.1.0.2), 12c Release 3 (12.1.0.3), and 12c Release 4 (12.1.0.4) Management Agents to 12c Release 5 (12.1.0.5).
-
If you select a Management Agent that is part of a particular group for upgrade, the other Management Agents of the group are not selected for upgrade by default. If you want to upgrade the other Management Agents of the group, you must select them in the Upgradable Agents window.
-
-
(Optional) For Pre-upgrade Script and Post-upgrade Script, enter the absolute path of the script that you want to run before and after the upgrade, respectively.
For example,
/scratch/software/oracle/configure.sh.The scripts you want to run must be present at the location you specify, on the Oracle Management Service (OMS) host (on all the OMS hosts in case of a multi-OMS environment), or on all the Management Agent hosts selected for upgrade. They can reside in a shared, NFS-mounted location accessible by the Management Agent hosts selected for upgrade.
If the script you want to run is present only on the OMS host, and not on the Management Agent hosts selected for upgrade, then select Script on OMS Host.
Note:
-
You can specify only one pre-upgrade script and one post-upgrade script per session.
-
Only shell scripts
(.sh)and batch(.bat)scripts are supported. You should run only shell scripts while upgrading Management Agents installed on Unix platforms, and only batch scripts while upgrading Management Agents installed on Microsoft Windows platforms. -
If you want to upgrade a Management Agent installed on a Unix platform and a Management Agent installed on a Microsoft Windows platform in the same session, ensure that you do not specify a pre-upgrade or a post-upgrade script. If you want to specify a pre-upgrade or a post-upgrade script for upgrading these Management Agents, upgrade the Management Agents installed on different platforms in different sessions.
-
-
(Optional) For Additional Parameters, enter the additional options you want to use for the upgrade.
For example, specify
-ignorePrereqsto skip running the prerequisite checks and directly perform the Management Agent upgrade. If you want to specify multiple additional parameters, separate them using a space.Refer to Section 6.4.2 for a list of parameters you can specify.
-
For Stage Location, accept the default stage location, or enter a custom location.
For example,
/tmp/software/oracle/EMStage.Ensure that the Management Agent install user has write permissions on the custom location you enter. The custom location you enter can be a shared, NFS-mounted location.
Note:
Ensure that the Management Agent host user has write permission in the custom location.The stage location is used to store temporary Management Agent upgrade files.
-
Click Submit.
Once you click Submit, a Management Agent upgrade job is created, which is sent to the Enterprise Manager job system. You are automatically taken to the Agent Upgrade Status page for the job, which displays the details of the job steps.
To view a summary of all the submitted Management Agent upgrade jobs, or search for and view a particular set of Management Agent upgrade jobs, use the Agent Upgrade Results page of the Agent Upgrade Console. To access this page, from the Setup menu, select Manage Cloud Control, then select Upgrade Agents. Click Agent Upgrade Results.
To revisit the Agent Upgrade Status page for a Management Agent upgrade job, click the name of the job on the Agent Upgrade Results page.
If you encounter an error during the Management Agent upgrade process, or if the Management Agent upgrade fails, refer to Section 6.6.
-
If the
root.shstep was skipped, or if this step failed, log in to the Management Agent host as the root user, navigate to$<AGENT_BASE_DIR>/core/12.1.0.5.0/and run theroot.shscript on the host manually.After
root.shis run, you can clean up your old Management Agents, as described in Section 6.4.4.
6.4.1.2 Upgrading 12c Management Agents using EM CLI
To upgrade 12.1.0.x Management Agents using EM CLI, follow these steps:
-
Log in to EM CLI from the
/bindirectory present within the OMS home:$<OMS_HOME>/bin/emcli login -username=<user_name>
For example,
/scratch/aime/Oracle/MW/oms/bin/emcli login -username=sysmanOnce you run this command, EM CLI will prompt you for a password. Enter the password for the user name you specified.
-
Synchronize EM CLI:
$<OMS_HOME>/bin/emcli sync
-
Run the
get_upgradable_agentsverb to obtain a list of the Management Agents that can be upgraded:$<OMS_HOME>/bin/emcli get_upgradable_agents [-agents] [-platforms] [-versions] [-groups] [-output_file]Note that the parameters mentioned in
[ ]are optional.For example,
$<OMS_HOME>/bin/emcli get_upgradable_agents -agents="abc%,xyz.domain.com:1243" -platforms="Linux x86,Microsoft Windows x64 (64-bit)" -versions="12.1.0.4.0" -output_file="/scratch/agents_file.txt"Use the
-output_fileoption to copy the list of upgradable Management Agents into a file. This file can be used later as an input parameter for theupgrade_agentsverb.To view more information on the syntax and the usage of the
get_upgradable_agentsverb, run the following command:$<OMS_HOME>/bin/emcli/help get_upgradable_agents
-
Run the
upgrade_agentsverb to upgrade your Management Agents:$<OMS_HOME>/bin/emcli upgrade_agents -agents | -input_file="agents_file:<absolute_location>" | -input_file="response_file:<absolute_location>" [-validate_only] [-pre_script_loc] [-pre_script_on_oms] [-post_script_loc] [-post_script_on_oms] [-job_name] [-override_credential] [-additional_parameters] [-stage_location]Note that the parameters mentioned in
[ ]are optional.Ensure that you specify all the Management Agents that you want to upgrade by using either
-agents,or-input_file="agents_file:<file_name>",or by specifyingagentsin a response file, and then using-input_file="response_file:<absolute_location>".For example,
$<OMS_HOME>/bin/emcli upgrade_agents -agents="abc%,xyz.domain.com:1243" -input_file="agents_file:/scratch/agents_file.txt" -input_file="response_file:/scratch/agent.rsp" -stage_location=/tmpUse the
-input_file="agents_file:<absolute_location>"option to specify a file containing the list of Management Agents that you want to upgrade. Use the-input_file="response_file:<absolute_location>"option to specify a response file containing all the upgrade parameters that you want to use. A response file contains parameters in name value pairs, as shown:job_name=UPGRADE_AGENT additional_parameters="-ignorePrereqs START_PRIORITY_LEVEL=98"
The parameters that you specify with the verb override the parameters that you specify in the response file.
To view more information on the syntax and the usage of the
upgrade_agentsverb, run the following command:$<OMS_HOME>/bin/emcli help upgrade_agents
If you encounter an error during the Management Agent upgrade process, or if the Management Agent upgrade fails, refer to Section 6.6.
-
To view the status of the submitted Management Agent upgrade jobs, run the
get_agent_upgrade_statusverb:$<OMS_HOME>/bin emcli get_agent_upgrade_status [-agent] [-job_name] [-status]Note that the parameters mentioned in
[ ]are optional.For example,
$<OMS_HOME>/bin/emcli get_agent_upgrade_status -status="Running"will display all the Management Agent upgrade jobs that are in progress.You can view the detailed job step status of a particular Management Agent that was part of a particular upgrade job by using the
get_agent_upgrade_statusverb with the-agentand the-job_nameoptions.For example,
$<OMS_HOME>/bin/emcli get_agent_upgrade_status -agent=abc.example.com:1243 -job_name=UPGRADE_AGT_13603If a particular Management Agent upgrade job failed, check the inputs and run the
upgrade_agentsverb again. If you want to specify a custom job name (using the-job_nameparameter) while retrying the verb, ensure that you provide a unique job name, and not the name of the job that failed. For Management Agent upgrade troubleshooting tips, see Section 6.6.To view more information on the syntax and the usage of the
get_agent_upgrade_statusverb, run the following command:$<OMS_HOME>/bin/emcli/help get_agent_upgrade_status
-
If the
root.shstep was skipped, or if this step failed, log in to the Management Agent host as the root user, navigate to$<AGENT_BASE_DIR>/core/12.1.0.5.0/and run theroot.shscript on the host manually.After
root.shis run, you can clean up your old Management Agents, as described in Section 6.4.4.
Note:
For more information on how to use the EM CLI verbs mentioned in this section, refer to Oracle Enterprise Manager Command Line Interface.6.4.2 Additional Parameters for 12c Management Agent Upgrade
Table 6-1 describes the additional parameters you can use while upgrading 12c Management Agents using Agent Upgrade Console, or EM CLI. You can enter more than one parameter, using a whitespace as a separator.
Table 6-1 List of Additional Parameters for 12c Management Agent Upgrade
| Parameter | Description |
|---|---|
|
-ignorePrereqs |
Skips running the prerequisite checks. Specify this parameter when you have already verified the prerequisites, and only want to perform the rest of the upgrade process. |
|
-debug |
Logs debug messages useful for debugging and resolving errors. |
|
START_PRIORITY_LEVEL (For Unix based hosts only) |
Use this parameter to specify the priority level of the Management Agent service when the host is started. This parameter accepts values between For example, If you do not include this parameter, it defaults to Important: If you had specified a value for this parameter while installing the Management Agent that you have selected for upgrade, ensure that you specify the same value while upgrading the Management Agent. |
|
SHUT_PRIORITY_LEVEL (For Unix based hosts only) |
Use this parameter to specify the priority level of the Management Agent service when the host is shut down. This parameter accepts values between For example, If you do not include this parameter, it defaults to Important: If you had specified a value for this parameter while installing the Management Agent that you have selected for upgrade, ensure that you specify the same value while upgrading the Management Agent. |
6.4.3 Viewing 12c Management Agents That Cannot Be Upgraded
You may not be able to upgrade certain 12c Management Agents using the Agent Upgrade Console or EM CLI. Table 6-2 describes the reasons for this.
Table 6-2 Why Some Management Agents Cannot Be Upgraded
| Reason | Description and Recommended Action |
|---|---|
|
Latest Agent Software Missing |
The latest Management Agent software of the OMS version is not available in Oracle Software Library. To upgrade a Management Agent for which the latest Management Agent software is not available, you need to first download and apply the latest software using the Self Update console, then use the Upgrade Agents page. To access the Self Update Console, from the Setup menu, select Extensibility, then select Self Update. To download the latest Management Agent software, click Agent Software, select the required software, then click Download. For more information on using the Self Update console to download and apply the latest Management Agent software, see Oracle Enterprise Manager Cloud Control Basic Installation Guide. |
|
Agent Unsecured |
The Management Agent is not secure. To upgrade a Management Agent which is not secure, you need to first secure the Management Agent, then use the Upgrade Agents page. To secure the Management Agent, from the Setup menu, select Manage Cloud Control, then select Agents. Click the required Management Agent name. From the Agent menu, click Secure. You can also run the following command to secure the Management Agent:
|
|
Oracle Home Property Missing |
The Oracle Home property for the Management Agent is missing. This property is required to obtain the platform of the Management Agent that you want to upgrade. For upgrading Shared Agents, this property plays a key role in maintaining the relationship between the Shared Agent and the Master Agent. It is also required for certain essential Management Agent lifecycle operations, such as patching. To upgrade a Management Agent for which the Oracle Home property is missing, first run OMS collections on the Management Agent. To run OMS collections on a Management Agent, run the following command from the Management Agent host:
|
|
Agent Unreachable |
The Management Agent is not reachable, that is, the Oracle Management Service (OMS) cannot communicate with the Management Agent. A Management Agent is generally unreachable when it is down, when it is blocked by the OMS, or when the Management Agent host is down. A Management Agent may also be unreachable due to network problems or certain other issues. To upgrade a Management Agent that is unreachable, you need to first restore communication between the OMS and the Management Agent. To restore communication between the OMS and the Management Agent, from the Setup menu, select Manage Cloud Control, then select Agents. Click the required Management Agent name to navigate to the Management Agent home page. Click the displayed error icon, and perform the recommended actions. |
|
Agent Pending Activation |
The Management Agent version is not 12c Release 2 (12.1.0.2) or later. You cannot upgrade 10g, 11g, or 12c Release 1 (12.1.0.1) Management Agents using the Upgrade Agents page. Deinstall these Management Agents and install fresh Management Agents on the hosts. For information on deinstalling Management Agents, refer to Oracle Enterprise Manager Cloud Control Advanced Installation and Configuration Guide. For information on installing fresh Management Agents, refer to Oracle Enterprise Manager Cloud Control Basic Installation Guide. |
You can use the Not Upgradable Agents page to search for and view a set of Management Agents that currently cannot be upgraded. To search for and view these Management Agents, follow these steps:
-
From the Setup menu, select Manage Cloud Control, then select Upgrade Agents.
-
Click Not Upgradable Agents.
-
Enter or select values for parameters you want to use to search for Management Agents. You can search for Management Agents using the Management Agent name, version, platform, and the reason why the Management Agent cannot be upgraded.
-
For Match, select All or Any to search for results that match all the search parameters, or any of the search parameters, respectively.
-
Click Search.
6.4.4 Performing Postupgrade Clean Up of Old Management Agents
When you upgrade your 12.1.0.x Management Agents, the old agent homes, old Oracle Home targets, and backup directories of the old Management Agents remain, and are not deleted automatically. To delete these post upgrade and free up disk space, you can clean up the old Management Agents using Agent Upgrade Console or EM CLI.
Important:
Ensure that you perform clean up only on those Management Agents that were upgraded successfully. For information on verifying whether a Management Agent was upgraded successfully, see Section 6.5.1.This section describes the methods you can use to clean up 12.1.0.x Management Agents after upgrading them. It consists of the following:
-
Performing Postupgrade Clean Up of Old Management Agents Using Agent Upgrade Console
-
Performing Postupgrade Clean Up of Old Management Agents Using EM CLI
6.4.4.1 Performing Postupgrade Clean Up of Old Management Agents Using Agent Upgrade Console
To clean up the old directories of your old Management Agents using the Clean Up Agents page of the Agent Upgrade Console, follow these steps:
-
From the Setup menu, select Manage Cloud Control, then select Upgrade Agents.
-
Click Post Agent Upgrade Tasks.
-
To change the default clean up job name, enter a unique value for Job Name.
A unique job name enables you to identify the clean up job, know details of its execution, and track its progress.
The job name can have a maximum length of 64 characters. It can consist of alphanumeric and special characters, and can begin with either of these.
-
Click Add to add Management Agents for clean up.
-
In the Agents for Clean Up window, search for the Management Agents you want to clean up, using the Agent, Platform, Installed Version, and Group fields.
-
Select the Management Agents you want to clean up. Click OK.
-
Click Submit.
6.4.4.2 Performing Postupgrade Clean Up of Old Management Agents Using EM CLI
To clean up the old directories of your old Management Agents using EM CLI, follow these steps:
-
Log in to EM CLI from the
/bindirectory present within the OMS home:$<OMS_HOME>/bin/emcli login -username=<user_name>
For example,
/scratch/aime/Oracle/MW/oms/bin/emcli login -username=sysmanOnce you run this command, EM CLI will prompt you for a password. Enter the password for the user name you specified.
-
Synchronize EM CLI:
$<OMS_HOME>/bin/emcli sync
-
Run the
get_signoff_agentsverb to obtain a list of the Management Agents for which clean up can be performed:$<OMS_HOME>/bin/emcli get_signoff_agents [-agents] [-platforms] [-versions] [-groups] [-output_file]Note that the parameters mentioned in
[ ]are optional.For example,
$<OMS_HOME>/bin/emcli get_signoff_agents -output_file="/scratch/signoff_agents_file.txt"Use the
-output_fileoption to copy the output of theget_signoff_agentsverb into a file, which you can later use as an input parameter for thesignoff_agentsverb.To view more information on the syntax and the usage of the
get_signoff_agentsverb, run the following command:$<OMS_HOME>/bin/emcli help get_signoff_agents
-
Run the
signoff_agentsverb to clean up your Management Agents:$<OMS_HOME>/bin/emcli/signoff_agents -agents | -input_file="agents_file:<absolute_location>" | -input_file="response_file:<absolute_location>" [-job_name]Note that the parameters mentioned in
[ ]are optional.Ensure that you specify all the Management Agents that you want to clean up by using either
-agents,or-input_file="agents_file:<file_name>",or by specifyingagentsin a response file, and then using-input_file="response_file:<absolute_location>".For example,
$<OMS_HOME>/bin/emcli signoff_agents -agents="abc%,xyz.domain.com:1243" -input_file="agents_file:/scratch/signoff_agents_file.txt" -input_file="response_file:/scratch/agent.rsp" -job_name=CLEAN_UP_12103Use the
-input_file="agents_file:<absolute_location>"option to specify a file containing the list of Management Agents that you want to clean up. Use the-input_file="response_file:<absolute_location>"option to specify a response file containing all the parameters that you want to use. A response file contains parameters in name value pairs, as shown:agents=abc%,xyz% job_name=CLEAN_UP_AGT_121050
The parameters that you specify with the verb override the parameters that you specify in the response file.
To view more information on the syntax and the usage of the
signoff_agentsverb, run the following command:$<OMS_HOME>/bin/emcli help signoff_agents
Note:
For more information on how to use the EM CLI verbs mentioned in this section, refer to Oracle Enterprise Manager Command Line Interface.6.4.5 Viewing 12c Management Agent Upgrade Clean Up Jobs
You can use the Clean Up Agents page or EM CLI to delete the old agent homes, old Oracle Home targets, and backup directories of your old Management Agents, after upgrading them. Once you select the Management Agents you want to clean up and click Submit on the Clean Up Agents page, or run the signoff_agents EM CLI verb, a Management Agent clean up job is created, which is sent to the Enterprise Manager job system. You can use the Clean Up Agent Results page, or the get_signoff_status EM CLI verb to search for and view a particular set of Management Agent clean up jobs.
This section describes the methods you can use to view a particular set of Management Agent clean up jobs. It consists of the following:
-
Viewing 12c Management Agent Upgrade Clean Up Jobs Using Agent Upgrade Console
-
Viewing 12c Management Agent Upgrade Clean Up Jobs Using EM CLI
6.4.5.1 Viewing 12c Management Agent Upgrade Clean Up Jobs Using Agent Upgrade Console
To view a particular set of Management Agent clean up jobs using the Clean Up Agent Results page of the Agent Upgrade Console, follow these steps:
-
From the Setup menu, select Manage Cloud Control, then select Upgrade Agents.
-
Click Post Agent Upgrade Tasks.
-
Click Clean Up Agent Results.
-
Enter or select values for parameters that you want to use to search for Management Agent clean up jobs. You can search for these jobs using the job name, the Management Agents that were part of the clean up, and the status of the job.
-
For Match, select All or Any to search for results that match all the search parameters, or any of the search parameters, respectively.
-
Click Search.
6.4.5.2 Viewing 12c Management Agent Upgrade Clean Up Jobs Using EM CLI
To view a particular set of Management Agent clean up jobs using EM CLI, follow these steps:
-
Log in to EM CLI from the
/bindirectory present within the OMS home:$<OMS_HOME>/bin/emcli login -username=<user_name>
For example,
/scratch/aime/Oracle/MW/oms/bin/emcli login -username=sysmanOnce you run this command, EM CLI will prompt you for a password. Enter the password for the user name you specified.
-
Synchronize EM CLI:
$<OMS_HOME>/bin/emcli sync
-
Run the
get_signoff_statusverb to view a particular set of Management Agent clean up jobs:$<OMS_HOME>/bin/emcli get_signoff_status [-agent] [-job_name] [-status]Note that the parameters mentioned in
[ ]are optional.For example,
$<OMS_HOME>/bin/emcli get_signoff_status -status="Success"displays the Management Agent clean up jobs that succeeded.To view more information on the syntax and the usage of the
get_signoff_statusverb, run the following command:$<OMS_HOME>/bin/emcli help get_signoff_status
Note:
For more information on how to use the EM CLI verbs mentioned in this section, refer to Oracle Enterprise Manager Command Line Interface.6.5 After Upgrading 12c Management Agents
This section describes the various tasks you can perform after upgrading your Management Agents. It consists of the following:
6.5.1 Verifying 12c Management Agent Upgrade
This section describes how to verify the 12c Management Agent upgrade. It consists of the following sections:
6.5.1.1 Verifying 12c Management Agent Upgrade Using the Enterprise Manager Console
After you upgrade your Management Agents, follow these methods to verify the upgrade using the Enterprise Manager console:
-
From the Setup menu, select Manage Cloud Control, then select Upgrade Agents. Click Agent Upgrade Results. Verify that the job you created to upgrade the Management Agents succeeded.
-
From the Setup menu, select Manage Cloud Control, then select Agents. Click the name of a Management Agent that you want to verify the upgrade for, and verify the Management Agent version. The Management Agent version after the upgrade must be the same as the OMS version.
Also, on the Agents page, verify that the Management Agent is up and running, is not blocked, and is not under blackout.
-
From the Setup menu, select Manage Cloud Control, then select Agents. Click the name of the Management Agent that you want to verify the upgrade for. From the Agent menu, select Configuration, then select Last Collected. In the Configuration Properties tab, ensure that none of the configuration properties mention the old Management Agent home.
6.5.1.2 Verifying 12c Management Agent Upgrade Using EM CLI
After you upgrade your Management Agents, follow these methods to verify the upgrade using EM CLI:
-
Run the
get_agent_upgrade_statusverb to verify that the job you created to upgrade the Management Agents succeeded. This is described in detail in Step 5 of Section 6.4.1.2. -
Run the
get_agent_propertiesverb to verify the version of the Management Agent and its configuration properties after the upgrade:$<OMS_HOME>/bin/emcli get_agent_properties -format=csv -agent_name=<agent_host_name>:<agent_port>
For example,
$<OMS_HOME>/bin/emcli get_agent_properties -format=csv -agent_name=abc.example.com:1872 -
Run the
get_targetsverb to verify the status of the Management Agent (it should be up and running, and not be blocked, under blackout, etc.):$<OMS_HOME>/bin/emcli get_targets -format="name:csv" -targets=<agent_host_name>:<agent_port>:oracle_emd -alerts
For example,
$<OMS_HOME>/bin/emcli get_targets -format="name:csv" -targets=abc.example.com:3872:oracle_emd -alerts
6.5.2 Moving Central Agent Base Directory Outside Oracle Middleware Home (After Upgrading 12c Central Agent)
After upgrading the central agent, if the agent base directory of the upgraded central agent resides within the Oracle Middleware home, and you want to move it outside the Oracle Middleware home, then see Appendix G.
Important:
-
Moving the agent base directory is recommended only for the central agent, and not for the other Management Agents.
-
Moving the agent base directory is not supported on a host that is running on Microsoft Windows.
6.6 Troubleshooting 12c Management Agent Upgrade
Table 6-3 describes how to troubleshoot certain errors you may encounter while upgrading your Management Agents.
Table 6-3 Troubleshooting Oracle Management Agent Upgrade
| Problem | Troubleshooting Tip |
|---|---|
|
When you click Submit on the Upgrade Agents page, you encounter an error mentioning that |
Do one of the following:
|
|
When you click Submit on the Upgrade Agents page, you encounter an error mentioning that |
Do one of the following:
|
|
When you click Submit on the Upgrade Agents page, you encounter an error mentioning that |
Do one of the following:
|
|
When you click Submit on the Upgrade Agents page, the Upgrade Agents step fails. |
Diagnose the problem by following these steps:
|
|
The Management Agent cannot be upgraded as the 32-bit Management Agent software for the host platform is not present in Software Library. |
You may encounter this error while upgrading Management Agents that run on the Oracle Enterprise Linux 4.x, Red Hat Enterprise Linux 4.x, and SUSE Linux Enterprise 10 64-bit platforms. If you encounter this error, click OK. Download and apply the latest 32-bit Management Agent software for these platforms, using the Self Update console, then upgrade the Management Agent. For information on using the Self Update console to download and apply the latest Management Agent software, refer to Oracle Enterprise Manager Cloud Control Basic Installation Guide. |
|
The links on the Agent Upgrade Status page or the Agent Upgrade Results page are not working. |
Diagnose the problem by viewing the following logs:
|
|
A job step in the Management Agent upgrade process hangs or is executed multiple times. |
Diagnose the problem by viewing the following log:
|
|
EM CLI log in or synchronization fails. |
Diagnose the problem by viewing the following log:
|
|
The upgraded Management Agent is blocked. |
Raise an Oracle Support service request. Do not resynchronize the Management Agent. |