4 Administering WSRP with Oracle WebCenter 11g
Oracle WebLogic Server: Effective with JD Edwards EnterpriseOne Tools Release 8.98.4, Oracle WebLogic Server 10.3.x is supported as a producer.
This chapter covers administrative tasks such as:
-
Section 4.1, "Configuring Oracle WebCenter Portal for EnterpriseOne"
-
Section 4.3, "Adding Portlets from the WSRP Producer to a Page"
4.1 Configuring Oracle WebCenter Portal for EnterpriseOne
Oracle WebLogic Administration Server needs to be running in order to register a WSRP producer. The Oracle WebCenter Enterprise Manager is part of the Oracle WebLogic Administration Server. They both use the same admin port.
4.1.1 Starting the WebLogic Node Manager
Starting Node Manager on a machine that hosts Managed Servers allow you to start and stop the Managed Servers remotely using the Administration Console or the command line. Node Manager can also automatically restart a Managed Server after an unexpected failure.
The steps below are for UNIX and Microsoft Windows platforms, respectively.
Note:
Normally the Node Manager is running with the default port 5556.►To start Node Manager on UNIX Systems:
Start the Node Manager by running this script:
MW_Home/wlserver_10.3/server/bin/startNodeManager.sh
To start Node Manager on Microsoft Windows Systems:
Start the Node Manager by running this script:
MW_Home\wlserver_10.3\server\bin\startNodeManager.cmd
4.1.2 Starting the WebLogic Administration Server
The steps below are for UNIX and Microsoft Windows platforms, respectively.
4.1.2.1 Starting WebLogic Administration on UNIX Systems
To start WebLogic Administration on UNIX Systems:
-
Run this script in the directory where you create your new domain: startWebLogic.sh - The default location is: MW_HOME/user_projects/domains/your_domain/bin.
-
Before the server is started, you will be prompted for the WebLogic Admin Server user and password. If you do not want the server to prompt for user and password, you can create a boot.properties in this folder: MW_HOME/user_projects/domains/your_domain/servers/AdminServer/security. You might need to create the security folder if it does not exist.
4.1.2.2 Starting WebLogic Administration on Microsoft Windows Systems
To start WebLogic Administration on Microsoft Windows Systems:
-
Run this script in the directory where you create your new domain: startWebLogic.cmd The default location is: MW_HOME\user_projects\domains\your_domain
-
Before the server is started, you will be prompted for the WebLogic Admin Server user and password. If you do not want the server to prompt for user and password, you can create a boot.properties in this folder: MW_HOME\user_projects\domains\your_domin\servers\AdminServer\security You might need to create the security folder if it does not exist.
4.1.2.3 Modifying the boot.properties file
To modify the boot.properties file:
The boot.properties should contain two entries. For example:
-
username=weblogic
-
password=Welcome1
You should replace the username and password entries with values that are valid for your installation.
Note:
Both parameters (username and password) must be entered in lowercase.The information in this file will be encrypted after the first use. You can use the same file for other managed server configuration.
4.1.3 Associate a Machine to a Server
In order to start a managed server from the Administration Console, you must first create a machine and then associate the managed server with that machine.
-
Login to the Oracle WebLogic Administration Console. For example:
http://host:7001/console
-
Navigate to Environment > Machines.
-
Click the Lock & Edit button.
-
Click the New button.
-
Click the New button.
-
Enter a machine name. For example: Machine-WC .
-
Select the machine name you just created, select Target tab, and associate this machine to your managed servers.
-
Click the Activate Changes button.
4.1.4 Starting the Oracle WebCenter Portal
Once a managed server is associated to a machine, you can select the server to start.
-
Navigate to Environment > Servers.
-
Select the Control tab.
-
Select the Managed Server you want to start.
-
Click the Start button.

4.1.5 Verifying Configuration File Settings
WSRP Producer registration will fail unless these JD Edwards configuration settings are correctly set. Edit these settings through EnterpriseOne Server Manager.
Enter a valid Enterprise user and a valid environment in the JDBJ Bootstrap Session:
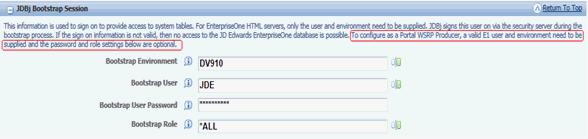
Enter a correct Path Code and Default Environment. Compression must be off on the WSRP producer.

4.2 Registering the WSRP Producer
EnterpriseOne WSRP Portlets can be registered using Enterprise Manager or WebCenter Console.
4.2.1 Registering a New WSRP Producer for Oracle WebCenter Using Enterprise Manager
To register a New WSRP Producer for Oracle WebCenter Using Enterprise Manager:
-
Open a browser.
-
Enter the Enterprise Manager URL. For example:
http://host:7001/em
Note:
The port number is the same as the WebLogic Admin Console. -
Enter the Admin user and password.
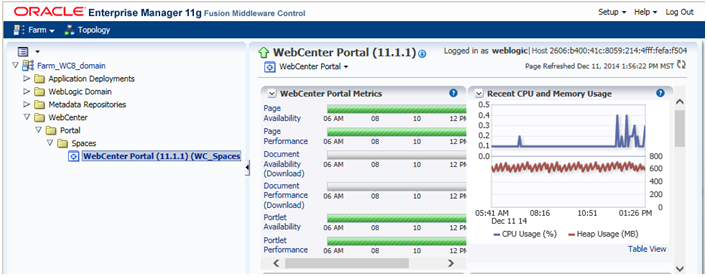
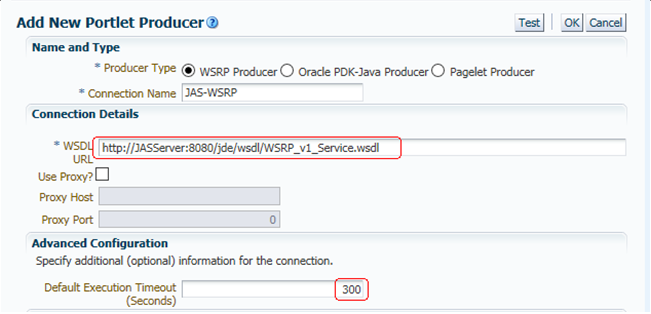
Below is an example image of the Enterprise Manager console:
-
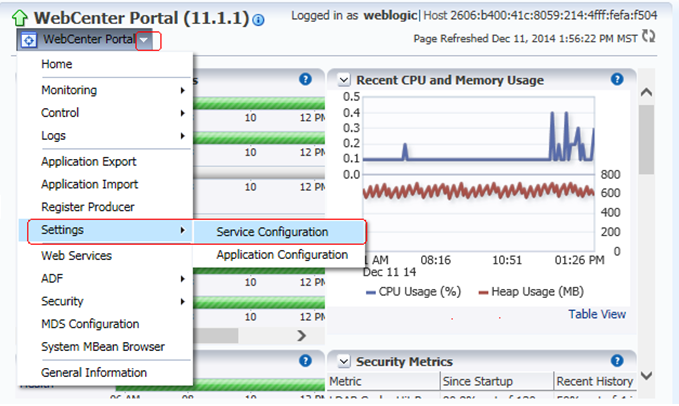
From the node structure in the left pane, expand WebCenter > WebCenter Spaces and then click on webcenter (WC_Spaces).
-
Click the WebCenter drop down menu and select Settings -> Service Configuration.
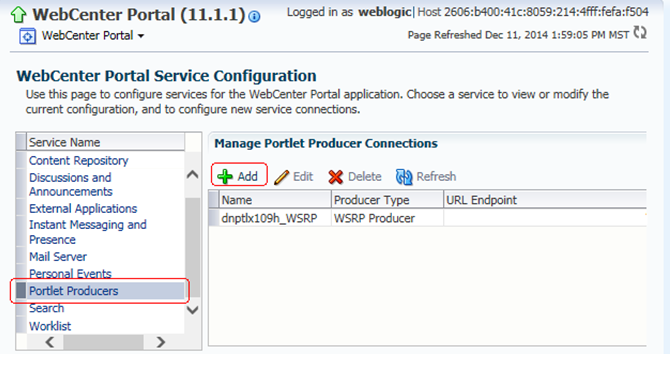
-
Select Portlet Producers and then click Add.
-
On Add Portlet Producer Connection, enter the WSRP URL where the EnterpriseOne HTML web server is running.
For WebLogic Server:
If the web server is running on the WebLogic Server, then you would follow this format:
http://<host>:<port>/jde/wsdl/WSRP_v1_Service.wsdl
Note:
If you are planning to use the SSL configuration, you must import the certificate from the WSRP producer to WebCenter Portal keystore. -
On Add Portlet Producer Connection, increase the Default Execute Timeout to about 300 seconds; otherwise the registration might fail due to a network problem.
4.2.2 Registering a New WSRP Producer for Oracle WebCenter Using WebCenter Console
You can also register a Portlet Producer from the WebCenter Console instead of using the Enterprise Manager Console as described in the previous section. You must sign on as a WebCenter Administrator:
http://host:8888/webcenter
To register a Portlet Producer from the WebCenter:
-
Login to WebCenter Portal.

-
Select Administration tab - Tools and Services - Portlet Producers.
-
Click Register to add a new producer or Edit to change the settings for a existing producer.
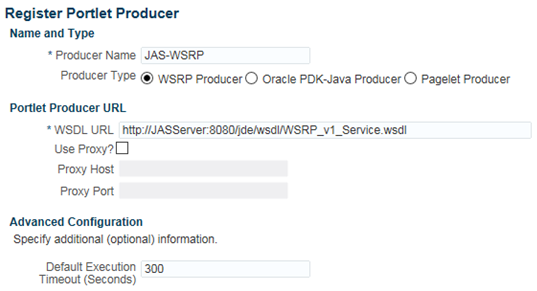
-
Enter the WSDL and click the Test button to verify the server connection.
-
Set the default execution timeout to 300 seconds. Adjust this value based on your network traffic.
-
Once the producer is registered, you can return to your page and add the portlet from this producer.
4.2.3 Reviewing the Existing WSRP Registration on Your System
To review the existing WSRP registration on your system:
-
On the WebCenter Portal dropdown menu, select Settings > Service Configuration.
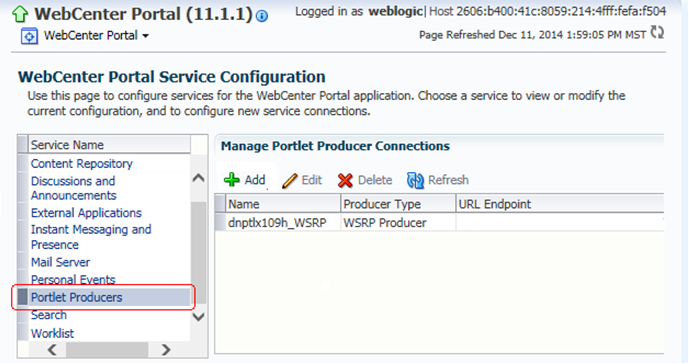
-
On WebCenter Service Configuration, select Portlet Producers to display all of the existing Producers.
4.3 Adding Portlets from the WSRP Producer to a Page
Once the WSRP Producer is registered, you are now ready to add the EnterpriseOne Portlets to Oracle WebCenter Portal.
► To create a JD Edwards EnterpriseOne user on WebCenter:
Note:
In order to access JD Edwards EnterpriseOne Portlets, this user must be a valid JD Edwards EnterpriseOne user. If you have configured an external LDAP server, then users must be added from the LDAP server.-
Create a JD Edwards EnterpriseOne user on WebCenter from the Administration Console.
-
Open a browser, access the Oracle WebLogic Server Administration Console. For example:
http://host:port/console
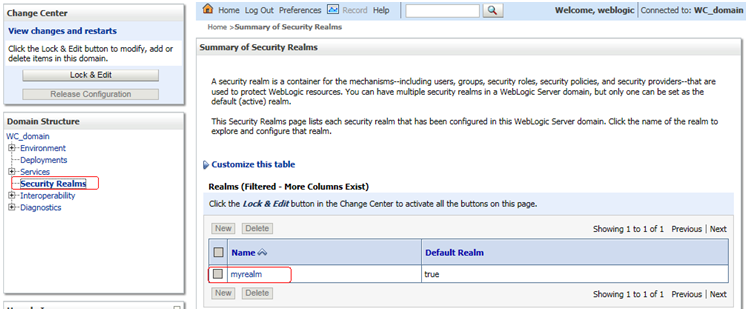
-
Navigate to Security Realms > myrealm.
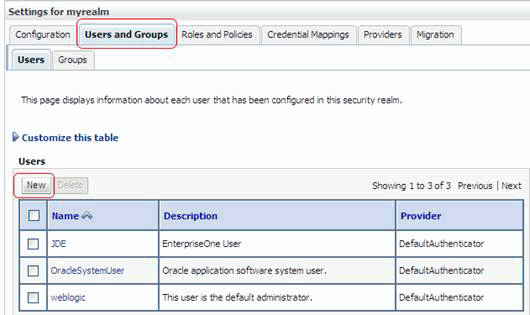
-
Select the Users and Groups tab.
-
Click the New button and enter the new user information.
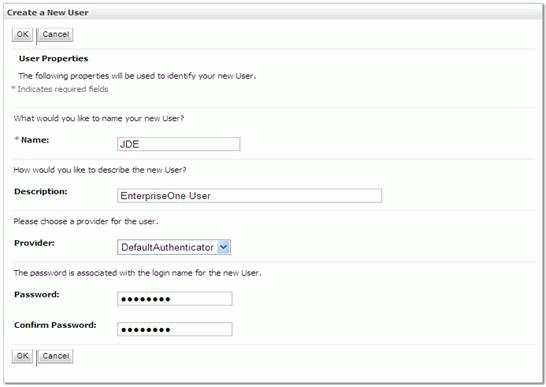
-
Select your LDAP provider. Select DefaultAuthenticator for the default embedded OID server.
-
Click the OK button to save the information.
4.3.1 Accessing the Oracle WebCenter
► To access the Oracle WebCenter:
-
From a browser, access your WebCenter URL. For example: http://host:8888/webcenter where 8888 is the default WebCenter port.
-
Enter the user and password. In order to access EnterpriseOne Portlets, this user must be an EnterpriseOne user.
-
Select Create Page from the Page Actions option on upper right.
-
Select the Page option.
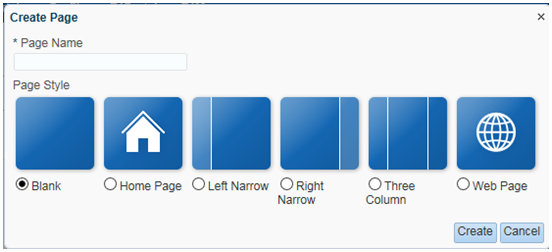
-
Enter the Page Name and select the Page Style, and then click Create.
-
An empty page will be created.
-
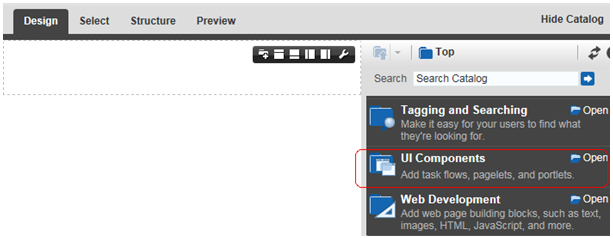
Select the UI Components from the Catalog Search panel.
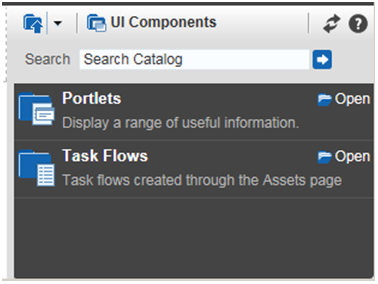
-
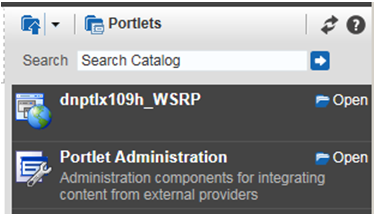
On Catalog, select the Portlets component.
-
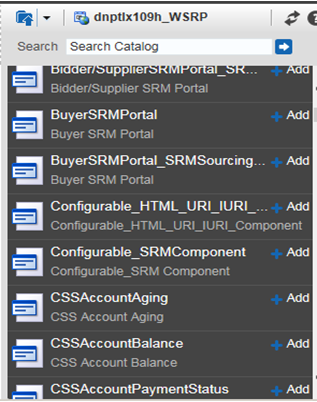
Select your Producer from the list.
-
Select the EnterpriseOne Portlet from the list and click Add.
-
Select the Edit icon (wrench button in the top right corner of the portlet) for each portlet and use the pulldown to change the value for Render Portlet In I Frame to True from the Display Option tab, where the default is value is set to Auto.
Note:
You must change this setting for each portlet. -
When the values for each portlet are changed, click the Save button.
-
Click the Close button.
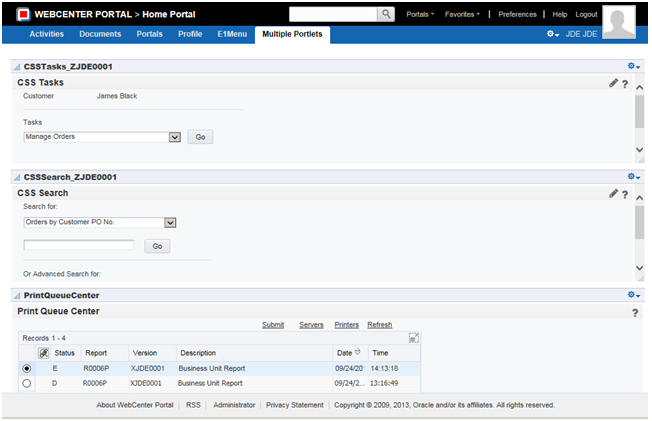
This completes the steps necessary to access the JD Edwards EnterpriseOne portlets. An example screen is shown below.
4.3.2 Additional Requirements for the E1Menu Portlet
The E1Menu portlet should not be associated with any other portlets on the same page.
Additional settings are required for the E1Menu portlet on Oracle WebCenter Portal.
To add these additional settings:

-
Select the Edit icon from the page (not the one from the portlet).
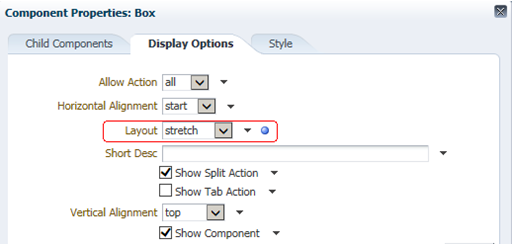
-
Change the Layout to stretch from the Display Options tab.
-
Click Apply.
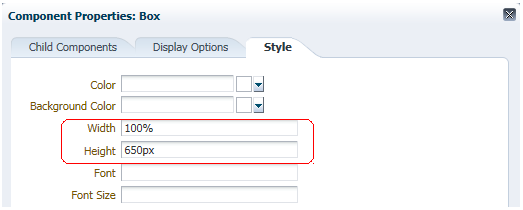
-
Change the Width to 100% and Height to 650px (you can adjust the height value based on your display size).
-
Click Apply and click OK.
-
Click Save and Close.

-
Launch the E1Menu Portlet and verify the configuration.