6 Administering JD Edwards EnterpriseOne on a Windows Server Cluster
Oracle's JD Edwards EnterpriseOne supports Microsoft Cluster services as a server cluster. This chapter does not cover Network Load Balancing Clusters.
Configuration of Microsoft Server Cluster has changed with Oracle's JD Edwards EnterpriseOne 9.1. This information is valid beginning with JD Edwards EnterpriseOne 9.1 and should not be used with previous releases. For more information about how to install and set up a Microsoft Server Cluster, see the appropriate Microsoft documentation.
This chapter contains the following topics:
6.1 Prerequisites
Before you complete the tasks in this chapter:
-
Partition the disk array to logically divide the software components. Typically, you need to set up these partitions:
-
A partition that contains the cluster software.
-
A partition that contains the JD Edwards EnterpriseOne software.
-
A partition that contains the database management system (DBMS) software and database if these reside on the cluster system.
-
-
Configure the network, which includes setting up connections among servers, workstations, and printers.
-
Set up the cluster according to the Microsoft documentation for the Window Server version you are using.
-
JD Edwards EnterpriseOne requires a static IP address assigned to a virtual server name. The virtual server name is used as the JD Edwards EnterpriseOne enterprise server name or application server name in the cluster.
Although you need only one network card in each node, you should use two cards to ensure redundancy. One network card communicates with the public network, and the second card connects between nodes. This setup enables the cluster to remain active when the primary node loses the network connection. If you use only one network card, when a node loses the network connection, that node also loses the connection to other nodes in the cluster.
-
If the database and Oracle's JD Edwards EnterpriseOne are both running on the cluster, they can be configured to run on separate nodes. To accomplish this, separate JD Edwards EnterpriseOne resources and database resources into different groups. Also, be sure that JD Edwards EnterpriseOne and the database do not share disk resources. JD Edwards EnterpriseOne resources need to be in the same group as the cluster network name and cluster IP address. This can be the cluster group.
When the JD Edwards EnterpriseOne and database groups are in separate groups, the database group must be online before bringing the JD Edwards EnterpriseOne resources online.
If you do not require JD Edwards EnterpriseOne and database resources to run on separate nodes, place all database and JD Edwards EnterpriseOne resources in the cluster group.
See Also:
-
Starting the Windows Enterprise Server in the JD Edwards EnterpriseOne Installation Guide.
-
"Managing Server Jobs" in the JD Edwards EnterpriseOne Tools System Administration Guide.
6.2 Upgrading JD Edwards EnterpriseOne in a Microsoft Windows Server Cluster Environment
If you are already running JD Edwards EnterpriseOne in a cluster but are upgrading to JD Edwards EnterpriseOne 8.9 or later, you must change the cluster configuration for the cluster to operate properly. JD Edwards EnterpriseOne 8.9 and later releases require use of an IP address and a network name separate from the cluster IP address and network name.
Note:
In previous releases, the cluster network name and IP address were used for the JD Edwards EnterpriseOne enterprise server name.A Microsoft Windows Server 2008 Server Failover Cluster or Microsoft Windows Server 2008 R2 Failover Cluster requires an IP address and network name separate from the cluster IP address and network name for JD Edwards EnterpriseOne. Because the cluster name exists in JD Edwards EnterpriseOne ini files and tables, the recommended solution is to rename the cluster and create new resources for the JD Edwards EnterpriseOne group using the old cluster name and a different IP address. This requires changing the static IP address associated with the old cluster name to avoid an IP address conflict. Refer to the Microsoft documentation about renaming a cluster. After the cluster is renamed, continue with these instructions.
6.3 Setting Up JD Edwards EnterpriseOne on a Microsoft Windows 2008 Server Failover Cluster
This section explains how to set up JD Edwards EnterpriseOne on a Microsoft Windows 2008 Server Failover Cluster. The example in this section pertains to a two node cluster configuration.
Note:
JD Edwards EnterpriseOne executables (such as runube) running from a command line on a Microsoft Windows Cluster server node on Microsoft Windows 2008 and later releases, return the node name instead of the cluster name for the enterprise server name. This happens because the executable is not a defined resource in Microsoft Windows Cluster Services.This creates an issue when trying to retrieve the job in JD Edwards EnterpriseOne. To resolve this problem, add the following setting to the jde.ini file of the enterprise server. You can add this setting to any location, but it is recommended that you add it after the [DEBUG] section:
[CLUSTER]
PrimaryNode=Cluster Name
To set up JD Edwards EnterpriseOne on a Microsoft Windows 2008 Server Cluster:
-
Consult the JD Edwards EnterpriseOne MTRs to determine the appropriate Microsoft Windows OS level. Install the OS on each node. Do not use domain controllers for a JD Edwards EnterpriseOne cluster configuration.
Note:
For MTRs, see document 745831.1 (JD Edwards EnterpriseOne Minimum Technical Requirements Reference) on My Oracle Support:https://support.oracle.com/epmos/faces/DocumentDisplay?id=745831.1 -
Follow the appropriate Microsoft documentation for specific instructions on activating Microsoft Server Cluster Software.
-
Install JD Edwards EnterpriseOne on a shared disk on the cluster. All nodes will share a single copy of JD Edwards EnterpriseOne. The name used for the JD Edwards EnterpriseOne enterprise server will be the virtual name created in the Prerequisites section.
-
Open Failover Cluster Management from Administrative Tools.
-
Right-click the cluster name and select "Configure a Service or Application." If the Before you Begin page appears, click ='Next. On the "Select Service or Application" screen, select Generic Service from the list.
-
On the Select Service screen, select JD Edwards EnterpriseOne network service, and then click Next.
-
On the Client Access Point screen, change the Name field to the JD Edwards EnterpriseOne virtual name created earlier.
-
On the Select Storage screen, select the drive shown, which is the disk where JD Edwards EnterpriseOne is installed.
-
On the Replicate Registry Settings screen, click Next.
-
The next screen is the Confirmation screen. Review your configuration for errors and warnings. Make any necessary changes or if everything looks good, select Next.
-
When the Summary screen appears and indicates the configuration was a success, click Finish.
-
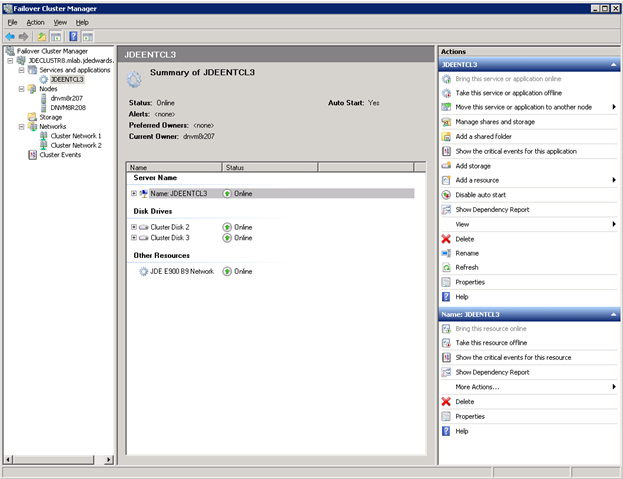
Using Failover Cluster Manager, bring the JD Edwards EnterpriseOne Service online. The JD Edwards EnterpriseOne service has three parts the Server Name, the Disk Drives, and Other Resources, which is the JD Edwards EnterpriseOne Network service. All three parts must be online.
-
Run porttest. If porttest is successful, then you can install the service on secondary nodes.
-
Using Failover Cluster Manager, bring only the JD Edwards EnterpriseOne Network service offline; leave the Server Name and Disk Drives online. Move the JD Edwards EnterpriseOne service to the secondary node.
-
On the secondary node, open a command prompt. Change the directory to the JD Edwards EnterpriseOne system\bin32 directory. Install the JD Edwards EnterpriseOne service by typing jdesnet –i in the command prompt. This will install the JD Edwards EnterpriseOne service.
-
Using Failover Cluster Manager, bring the JD Edwards EnterpriseOne Network service online.
-
Run porttest.
-
Repeat steps 14-17 for each additional node in the cluster where JD Edwards EnterpriseOne will run.
6.4 Setting Up JD Edwards EnterpriseOne on a Microsoft Windows 2008 R2 Server Failover Cluster
This section explains how to set up JD Edwards EnterpriseOne on a Microsoft Windows 2008 R2 Server Failover Cluster. The example in this section pertains to a two node cluster configuration.
Note:
JD Edwards EnterpriseOne executables (such as runube) running from a command line on a Microsoft Windows Cluster server node on Microsoft Windows 2008 and later releases, return the node name instead of the cluster name for the enterprise server name. This happens because the executable is not a defined resource in Microsoft Windows Cluster Services.This creates an issue when trying to retrieve the job in JD Edwards EnterpriseOne. To resolve this problem, add the following setting to the jde.ini file of the enterprise server. You can add this setting to any location, but it is recommended that you add it after the [DEBUG] section:
[CLUSTER]
PrimaryNode=Cluster Name
To set up JD Edwards EnterpriseOne on a Microsoft Windows 2008 R2 Server Failover Cluster:
-
Consult the JD Edwards EnterpriseOne MTRs to determine the appropriate Microsoft Windows OS level. Install the OS on each node. Do not use domain controllers for a JD Edwards EnterpriseOne cluster configuration.
Note:
For MTRs, see document 745831.1 (JD Edwards EnterpriseOne Minimum Technical Requirements Reference) on My Oracle Support:https://support.oracle.com/epmos/faces/DocumentDisplay?id=745831.1 -
Follow the appropriate Microsoft documentation for specific instructions on activating Microsoft Server Cluster Software.
-
Install JD Edwards EnterpriseOne on a shared disk on the cluster. All nodes will share a single copy of JD Edwards EnterpriseOne. The name used for the JD Edwards EnterpriseOne enterprise server will be the virtual name created in the Prerequisites section.
-
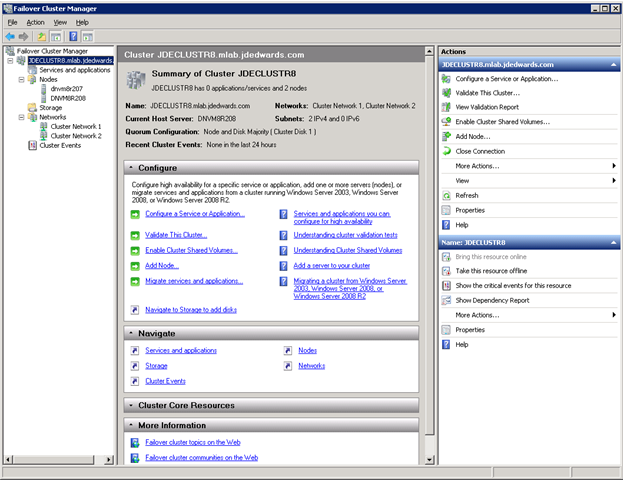
Open Failover Cluster Management from Administrative Tools. Click Start /Administrative Tools / Failover Cluster Management. Start the Failover Cluster Management on the node that owns the shared disk used by EnterpriseOne Enterprise Server.
Description of the illustration sw7001.png
In the above example, the cluster JDECLUSTR8 has been created with two nodes: DNVM8R208 and DNVM8R207.
6.4.1 Installing EnterpriseOne 9.1 JDENET service
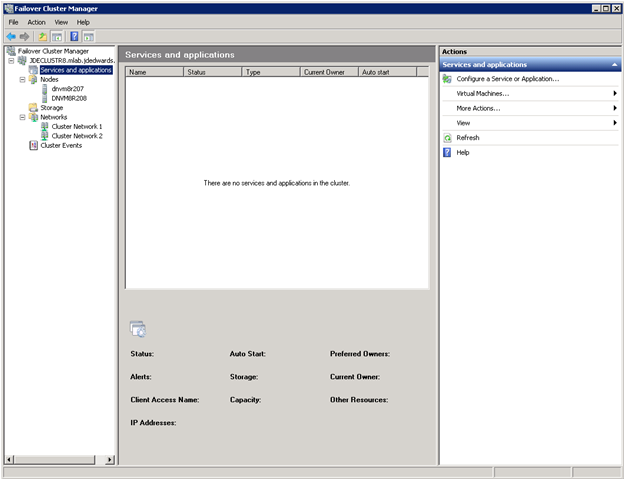
To install the EnterpriseOne 9.1 JDENET service:
Description of the illustration sw7002.png
-
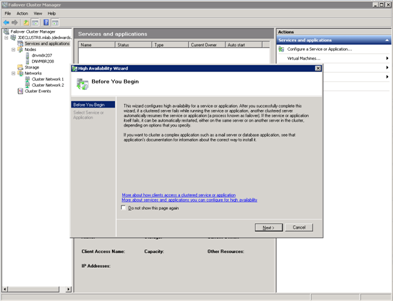
Highlight Services and Applications under the cluster name, then right click and select Configure a Service or Application.
Description of the illustration sw7003.png
-
Select Next.
Description of the illustration sw7004.png
-
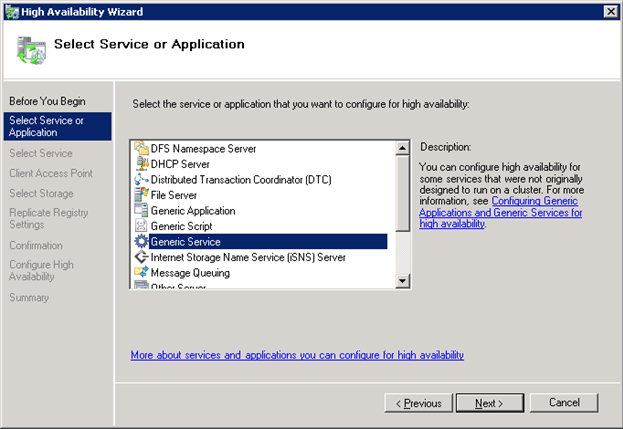
Select Generic Service. Click Next.
Description of the illustration sw7005.png
-
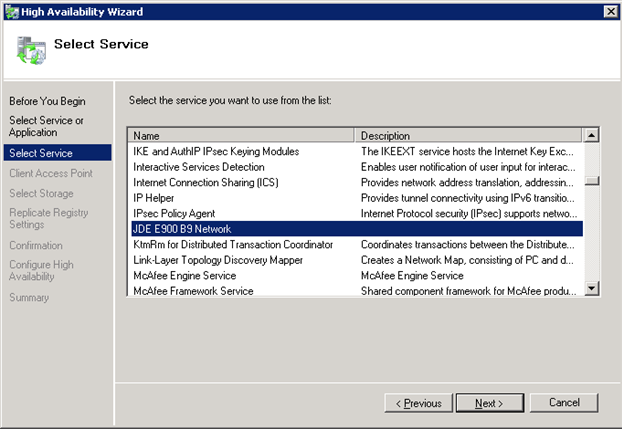
Scroll down and select the JDE Network Service. Click Next.
Description of the illustration sw7006.png
-
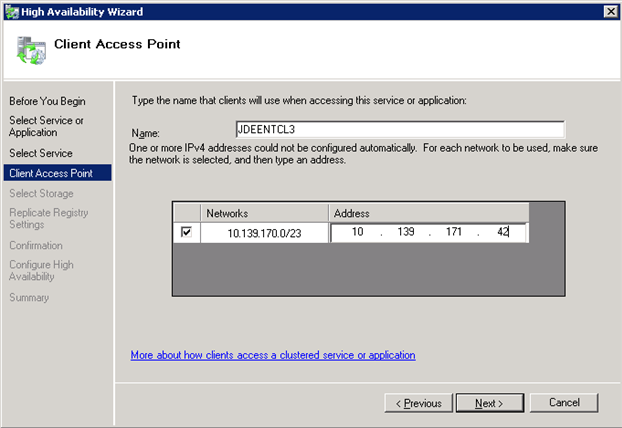
Change the Name to the virtual name you have created for EnterpriseOne and change the IP address so that it reflects the IP address of the virtual name you are using. Select Next.
Description of the illustration sw7007.png
-
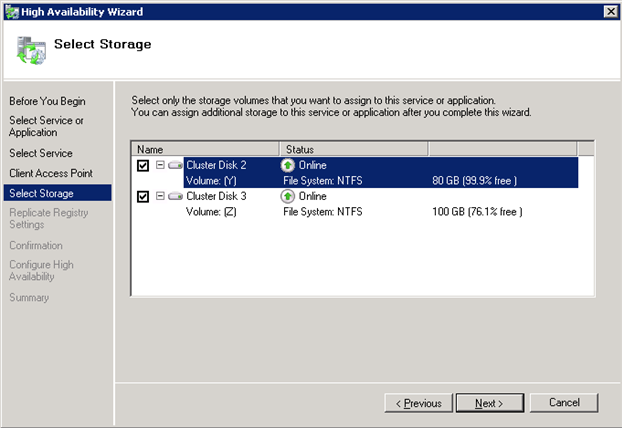
Select the disk where EntepriseOne is installed. Click Next.
Description of the illustration sw7008.png
-
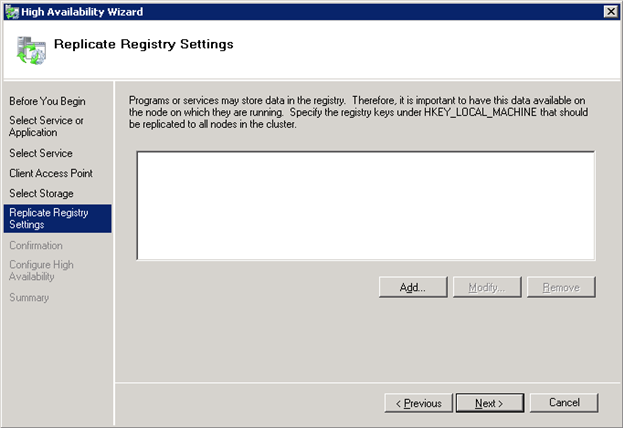
Select Add.

Description of the illustration sw7009.png
-
Add the registry service entry for JDENET (HKEY_LOCAL_MACHINE\. Click OK.
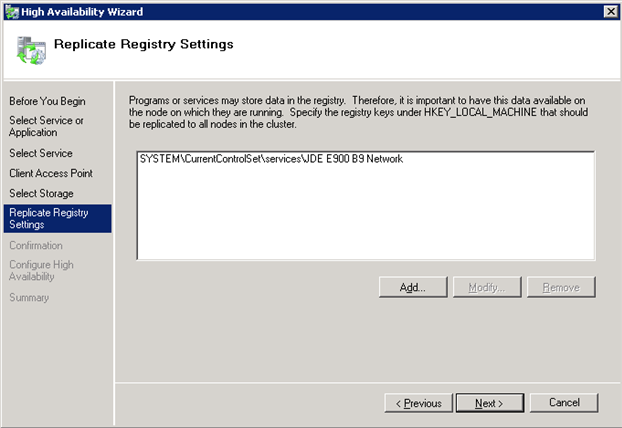
Description of the illustration sw7010.png
-
Click Next.
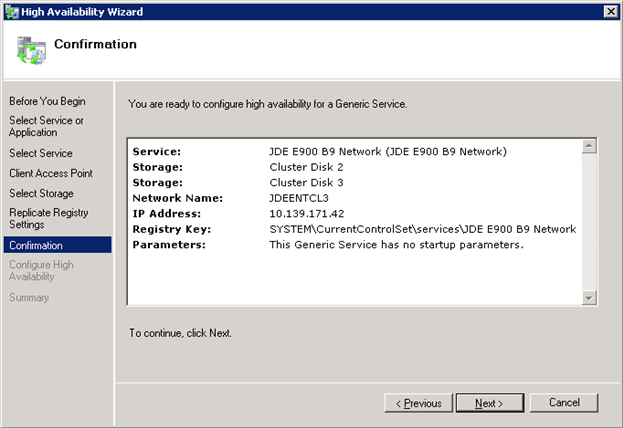
Description of the illustration sw7011.png
-
Click Next.
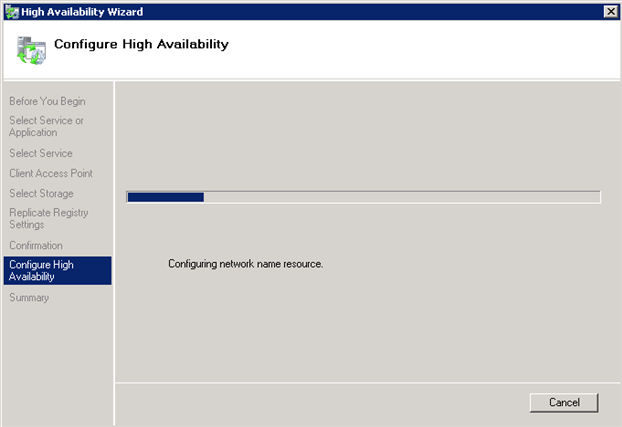
Description of the illustration sw7012.png
-
Configuring the High Availability.
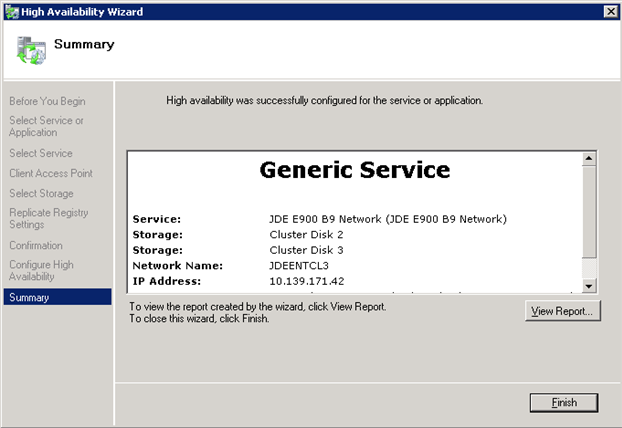
Description of the illustration sw7013.png
-
Click Finish.
-
Click Next.
Description of the illustration sw7014.png
-
The configuration steps will follow. When prompted, click Finish.
-
The JDE net service should be online. Right click on the JDE network resource and select Properties. On the general tab verify that ”Use Network Name” is selected. On the Dependencies tab verify that the EnterpriseOne disk is listed as a dependent, if it is not add it.
-
The jdenet service will need to be manually added to each additional node in the cluster. Move the EnterpriseOne cluster to another node in the cluster. The EnterpriseOne service does not need to be running on the node.
-
Open a command prompt by right clicking the Command Prompt icon and select run as Administrator. Go to the EnterpriseOne Tools system\bin32 directory then type ”jdesnet –i”. This will install the jdenet service on the node. This will need to be done on each node in the cluster where EnterpriseOne will run. If you need to update the firewall as well (See: Firewall Requirements for Windows Server 2008 R2 Failover Cluster and EnterpriseOne in this document) do it after installing the service.
6.4.2 Firewall Requirements for Windows Server 2008 R2 Failover Cluster and EnterpriseOne
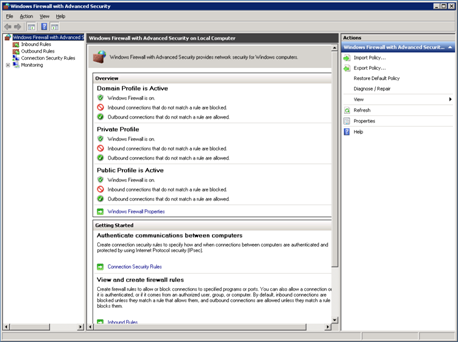
If the Windows Firewall is turned on for Domain Profiles, then you will need to add the jdesnet.exe and the jdenet_n.exe executables to the Windows Firewall on all nodes.
On the node that is active with EnterpriseOne running, go to Start / All Programs / Windows Firewall with Advanced Security.
Description of the illustration sw7015.png
-
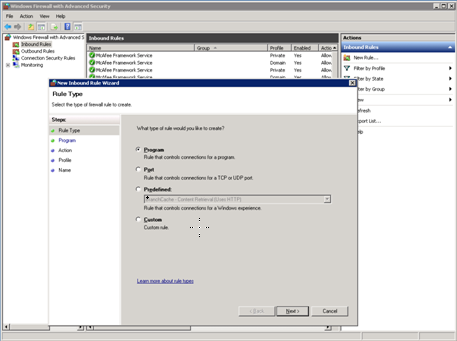
Select InBound rules. Right click and select New Rule.
Description of the illustration sw7016.png
-
Select the Program radio button.
-
Click Next.
Description of the illustration sw7017.png
-
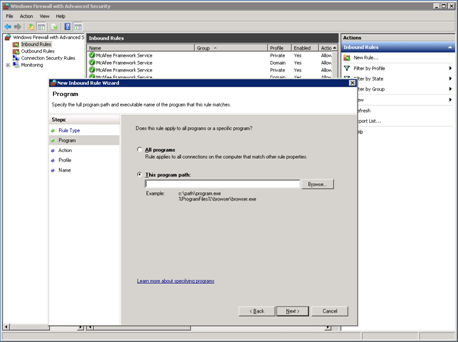
Select This Program Path. Drill down to the JDEDWARDS/E900/DDP/System/bin directory and select jdenet_n.exe.
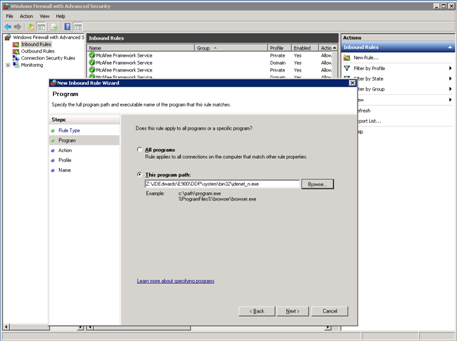
Description of the illustration sw7018.png
-
Click Next.
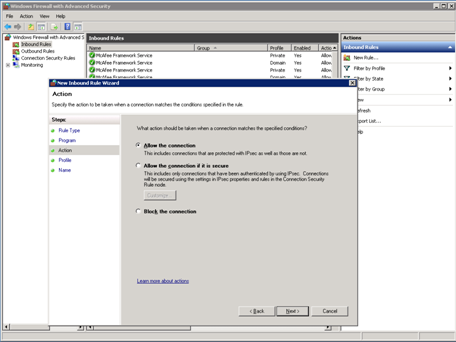
Description of the illustration sw7019.png
-
Select the Allow the connection radio button. Click Next.
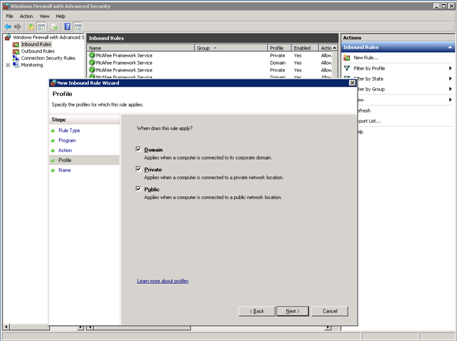
Description of the illustration sw7020.png
-
All of the radio buttons should be selected: Domain, Private and Public. If this does meet your company's security requirements you may have to make adjustments.
-
Click Next.
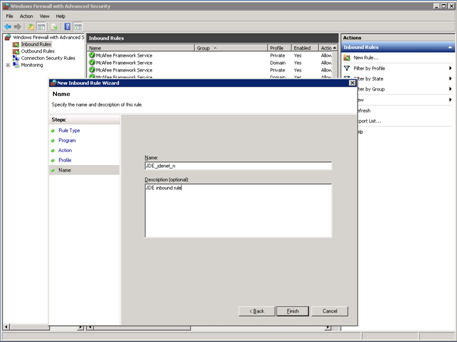
Description of the illustration sw7021.png
-
Give your rule a name. In this example, JDE_jdenet_n is used. Add a description.
-
Click Finish.
-
Repeat steps 1 through 11 and select jdesnet.exe instead of jdenet_n.exe.
-
Repeat steps 1 through 12 for each node in your cluster. The node you are working on must be the active node for EnterpriseOne in order to access the shared disk where the EnterpriseOne software resides.
6.4.3 Troubleshooting
If you are logged into an EnterpriseOne web or fat client at the time of a cluster failover, it may be necessary to back out of the application or even log off and log on to the EnterpriseOne client to reconnect.
Do Not use EnterpriseOne Server Manager to bring up or bring down the EnterpriseOne jdenet service. Use the Failover Cluster Manager.