B Extending Mobile Application Archives
This appendix contains the following topics:
B.1 Before You Begin
To use mobile application archives, in addition to the prerequisites described in Section 3.2, "Prerequisites" in this guide, perform the following tasks.
-
Download the JD Edwards EnterpriseOne mobile application archive (.maa) files from the JD Edwards Update Center on My Oracle Support (
https://support.oracle.com/). In the Update Center, enter "EnterpriseOne Mobile Enterprise Applications" in the Type field to locate the MAAs. -
Remember that to deploy to the Apple store or to your own enterprise store for iOS, you will need an Apple development profile.
-
You must read the "JD Edwards EnterpriseOne Mobile Archive Restricted Use Notice" in the JD Edwards EnterpriseOne Licensing Information User Manual before using JD Edwards EnterpriseOne mobile archives.
Important:
The Oracle MAF extension for JDeveloper must be the same version that was used to create the mobile application archive.-
MAA files developed with version 2.1 require the use of Oracle MAF extension 2.1, which is included in the JDE_Mobile_Framework_2.1 package on the Update Center.
-
MAA files created with version 2.0 require the use of Oracle MAF extension 2.0, which is included in the JDE_Mobile_Framework_2.0 package on the Update Center.
To verify the version of the Oracle MAF extension:
-
In JDeveloper click the Help menu, About, and then click the Extensions tab.
-
In the "find" field, type
mafand then press Enter. Scroll to the right to check the version.
-
B.2 Understanding Mobile Application Archives
A mobile application archive (MAA) is a specially built JDeveloper project that enables developers to take an existing MAF application and generate their own application binary (apk or ipa) files. Developers can choose to customize the application and then sign it and deploy it with their own distribution profile. You can use an archive to generate a mobile application that you can deploy and manage locally in your environment without having to download mobile applications from an online web app store.
You can partially customize an MAA to suit your particular business needs. To do so, you copy the archive, customize it, and then publish it as your own "new" application. For iOS, you must publish it with a different application ID in order to install it with your own iOS development profile.
B.3 Generating a New Application from the Deployment Profile
To create a custom copy of an MAA:
-
In JDeveloper, select the File menu > New > Application.
-
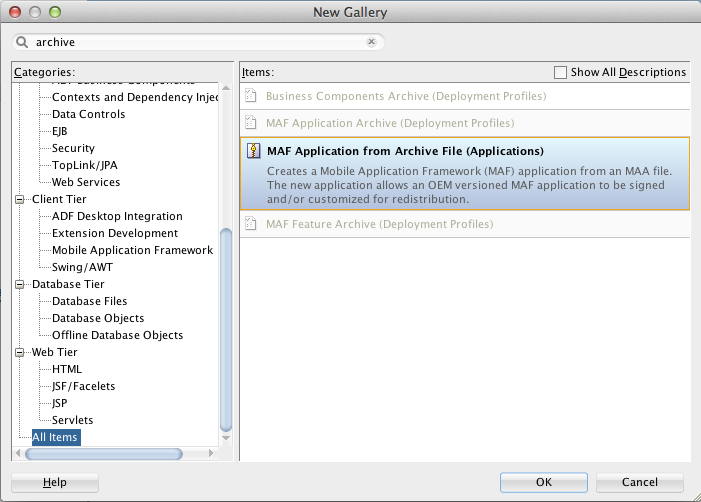
On New Gallery, select MAF Application from Archive File (Applications) and click OK.
-
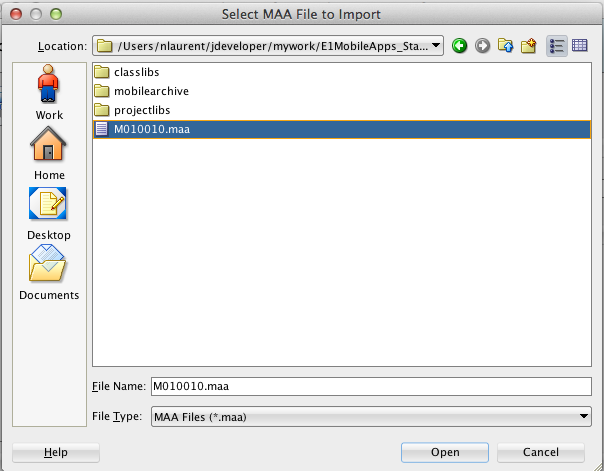
On Select MAA File to Import, select the .maa file that you want to customize, and then click Open.
-
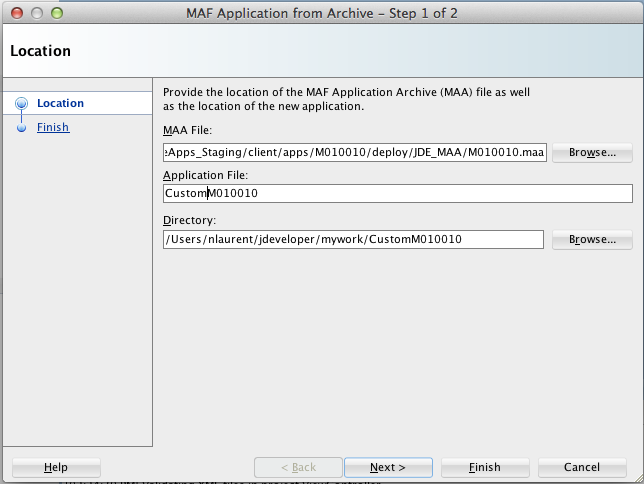
On "MAF Application from Archive - Step 1 of 2," modify the name of the application in the Application File field.
-
Click Next, and then click Finish.
-
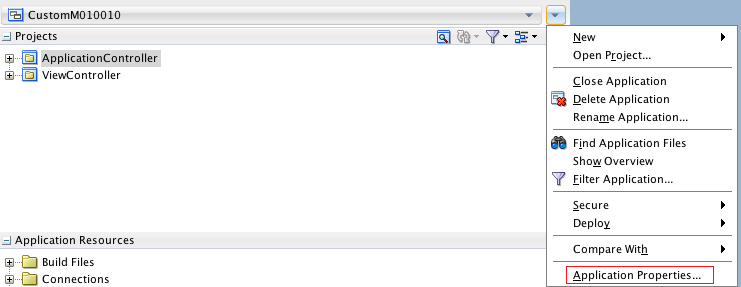
Click the drop-down menu next to the new application, and select Application Properties.
-
Navigate to Libraries and Classpath.
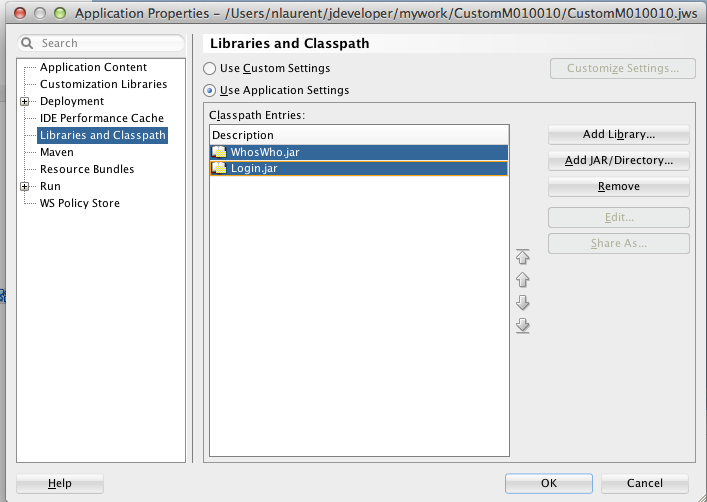
-
On Libraries and Classpath, select the entries listed, and then click the Remove button to delete them.
-
Click Add JAR/Directory.
-
On Add Archive or Directory, select the ExternalLibs folder.
-
Highlight all entries to add them, and then click Open.
This points both JAR files to the right location.
-
Click OK to save it.
-
Right-click ApplicationController and select Project Properties.
-
On Libraries and Classpath, click the check box next to JDEMobileFramework.jar, and then click the Remove button to remove it.
-
Select Add JAR/Directory.
-
On Add Archive or Directory, select the ExternalLibs folder, and then click Open.
-
Select JDEMobileFramework.jar and click Open.
This points the JDEMobileFramework.jar to the correct location.
-
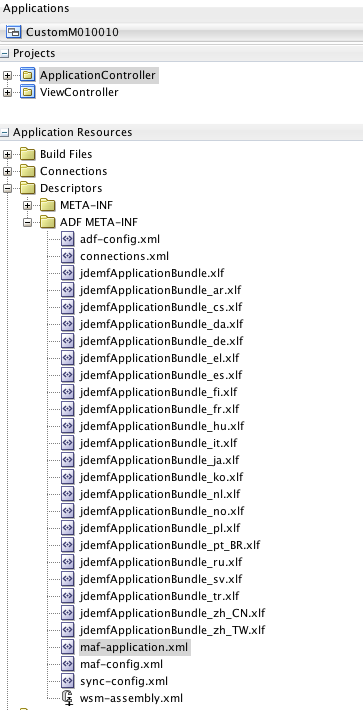
Under Application Resources, open the maf-application.xml.
-
Change the Name and Id of the application. Use the ID associated with your Apple Distribution Profile.
This ensures that the application will not overwrite or interfere with the original application when deployed.
-
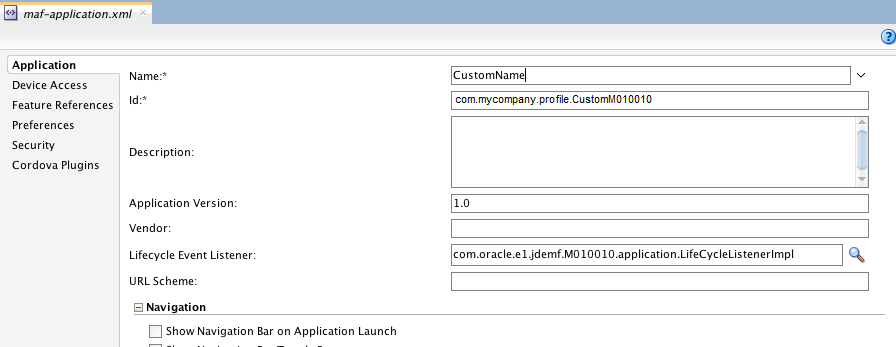
Create a new deployment profile that will use the new name and Id. To do so:
-
Right-click the application and select Properties.
-
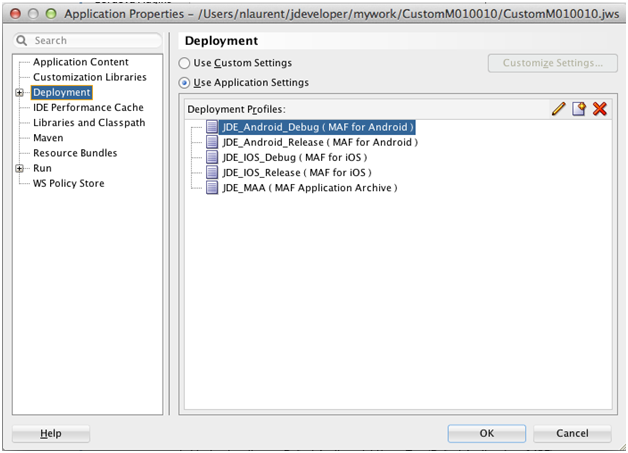
On Application Properties, select Deployment, and then click the "new" icon.
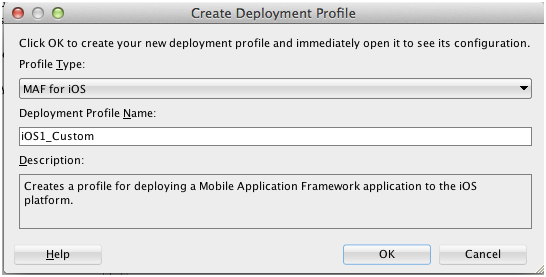
-
Select MAF for iOS (or MAF for Android) and give your profile a name, for example iOS1_Custom. Click OK.
The Profile Properties dialog box displays the application and deployment details:
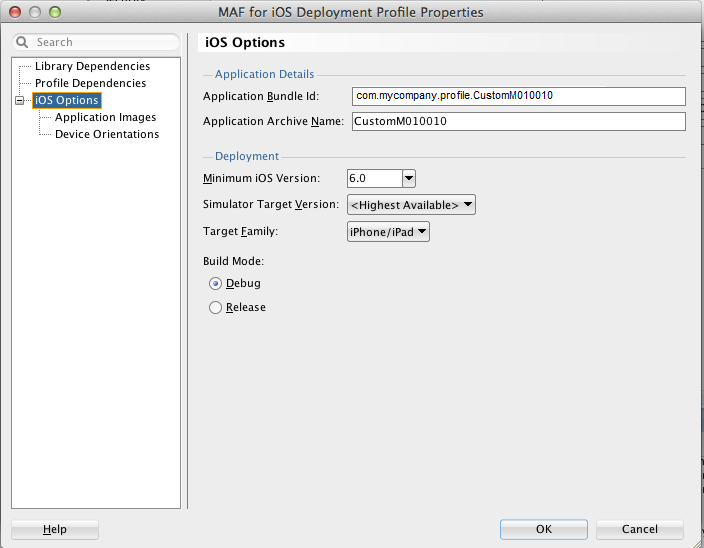
Description of the illustration ''maa_ios_options.png''
-
Click OK.
-
-
Use the new deployment profile to deploy and test the application in the simulator/emulator.
If simulator tests are successful, you can generate distribution packages to deploy the application to devices or stores.
B.4 Customization Options
This section describes the features you can customize in an MAA.
B.4.1 Customizing the Application Icons and Splash Screens
The application icon represents the application on the home screen of the device. The following diagram shows the icon size requirements for iOS 6 and iOS 7:
Description of the illustration ''icon_sizes.png''
For Android, these are the size requirements for the application icon:
-
XHDPI: 96 x 96px
-
HDPI: 72 x 72px
-
MDPI: 48 x 48px
-
LDPI: 24 x 24px
The launch image or splash screen appears immediately after the application is started.
The following diagram shows the sizes that are required to override the launch image for iOS 6 and iOS 7:
Description of the illustration ''launch_icon_sizes.png''
For Android, these are the size requirements for the application splash screen:
-
LDPI: Portrait: 200 x 320px. Landscape: 320 x 200px.
-
MDPI: Portrait: 320 x 480px. Landscape: 480 x 320px.
-
HDPI: Portrait: 480 x 800px. Landscape: 800 x 480px.
-
XHDPI: Portrait: 720 x 1280px. Landscape: 1280 x 720px.
The deployment profile contains all the application and launch screen configurations. Modify the definitions in the deployment profile to use your custom icons and deploy with that profile.
The following example shows the iOS deployment profile properties for application images:
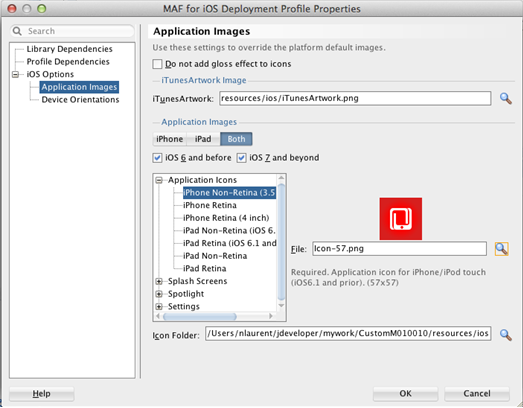
Description of the illustration ''ios_appimage_prop.png''
The following example shows the Android deployment profile properties for application images:
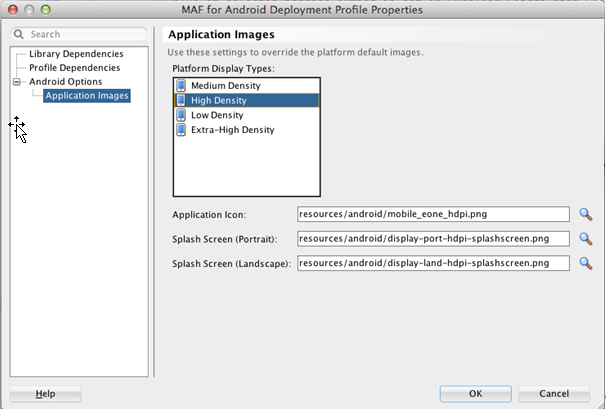
Description of the illustration ''android_img_prop.png''
B.4.2 Customizing the Brand Images
An Oracle JD Edwards logo image will appear on the configuration screen, login screen, and on error screens when there are connection issues. A second logo image appears on the springboard.
Do not use the logo images provided by Oracle; they are provided for example purposes only. If you do not insert an image, a question mark (?) appears where the image should be.
To override the login logo in your custom application, replace the image in the following location with an image of the same name and dimensions (242x87):
ViewController/public_html/images/jde_transparent_no_jde_small.png
To override the springboard logo in your custom application, replace the image in the following location with an image of the same name and dimensions (242x87).
ViewController/public_html/images/jde_transparent_springboard.png
Tip:
For the springboard, you should use a transparent image that works well on a dark background.Additionally, there might be other logo icons depending on the specific application you are customizing. These icons are located in the ViewController/public_html folder. To determine which image you need to replace, you must view the amx page where it appears and determine the name and location of the image file.
B.4.3 Customizing the End User License Agreement (EULA)
Users can access the EULA from the Legal Terms link on the springboard. The EULA is included in the application in a feature ending in EULA. To change the content of the EULA, modify the eula.amx page within the EULA feature.
See "JD Edwards EnterpriseOne Mobile Archive Restricted Use Notice" in the JD Edwards EnterpriseOne Licensing Information User Manual for a list of terms that must be included in the EULA.
The delivered page includes HTML formatted text within a <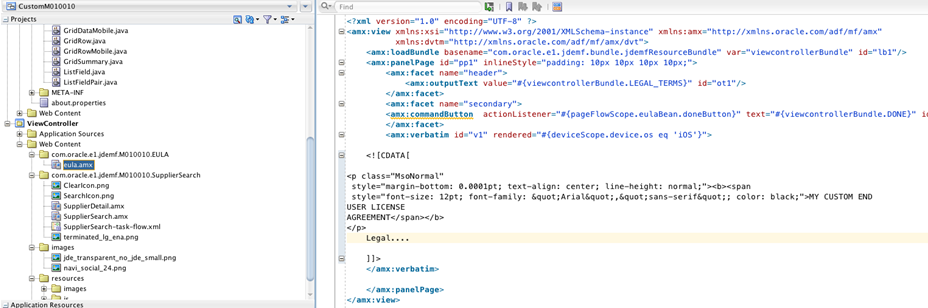
Description of the illustration ''eula_amxformat.png''
B.4.4 Customizing the About Page
The About page is accessed from the About link on the springboard. The About page contains the following information:
-
Application name and version (displayed on the General tab).
-
Mobile application ID (displayed on the Advanced tab).
The information on the About page is configured in the mobile application and is stored in the about.properties file. In JDeveloper, you can open the about.properties file, which is included in the mobile download files from Oracle Software Delivery Cloud, and view the details of the About page.
Important:
The mobile application ID is also part of the security configuration for the application. This ID corresponds to an Object Management Workbench (OMW) application object in EnterpriseOne. The security for the mobile application is inherited from the EnterpriseOne security configured for the OMW object of this name. If you modify this value in the mobile application, you must:-
Create a corresponding object in OMW.
-
Use Security Workbench to configure application security for the new object.
B.4.5 Customizing the Pages
You can customize an amx page in the ViewController by reformatting, moving fields, hiding fields (rendered=false), and changing the look of the page in general.
You can change labels on the page by directly entering a new text value for the label or by modifying the associated translation string in the translation bundles. The bundles are located in the com.oracle.e1.jdemf.bundle package of the Application Controller.
important:
When performing these types of customizations, do not remove any property listeners or action listeners, otherwise you risk compromising the application functionality.B.5 Extension Options
This section describes how you can extend an MAA to:
-
Display additional data.
-
Remove existing fields or data.
-
Include new pages.
B.5.1 Displaying Additional Data
To display additional data in an MAA, you have to configure additional service calls to retrieve the data from EnterpriseOne. You use Java code to enable the MAA to perform additional service calls.
Example B-1 Adding Additional Data to the Supplier Search Mobile Application
This is an example of the address, URL, and phones details for a supplier in the Supplier Search application:
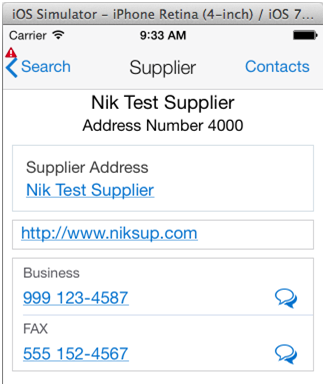
Description of the illustration ''supplier_detail.png''
You can use Java code to add category code information from the EnterpriseOne Address Book record to this Supplier details page.
The Address Number is the key to this information. When a record is selected, the address number of that record is used to fetch the category codes. So in the SupplierSearch.amx page, a new setPropertyListener is added when a list item is selected. The new setPropertyListener is highlighted in bold in this example code:
<amx:listView var="row" value="#{bindings.rowset1.collectionModel}" fetchSize="#{bindings.rowset1.rangeSize}"
                  inlineStyle="position:absolute; top:72px; bottom:0; left:0; right:0; border-top:1px solid #BBBBBB;" id="lv1">
      <amx:listItem id="li1" action="Detail">
        <amx:tableLayout width="100%" id="tl2">
          <amx:rowLayout id="rl3">
            <amx:cellFormat width="10px" rowSpan="2" id="cf7"/>
            <amx:cellFormat width="100%" height="28px" id="cf8">
              <amx:outputText value="#{row.SAlphaName_26.bindings.value.inputValue}" id="ot4" truncateAt="30"/>
            </amx:cellFormat>
          </amx:rowLayout>
          <amx:rowLayout id="rl2">
            <amx:cellFormat width="100%" height="12px" id="cf5">
              <amx:outputText value="#{viewcontrollerBundle1.ADDRESS_NUMBER} #{row.mnAddressNumber_25.bindings.value.inputValue}"
                              styleClass="adfmf-listItem-captionText" id="ot3" truncateAt="30"/>
            </amx:cellFormat>
          </amx:rowLayout>
        </amx:tableLayout>
        <amx:setPropertyListener id="spl4" from="#{bindings.searchName.inputValue ne '' ? 'true' : 'false'}"
                                 to="#{pageFlowScope.searchExecuted}"/>
        <amx:setPropertyListener id="spl5" from="#{row.rowKey}" to="#{pageFlowScope.selectedRowKey}"/>
        <amx:setPropertyListener id="spl6" from="#{row.mnAddressNumber_25.bindings.value.inputValue}" to="#{pageFlowScope.selectedABNumber}"/>
        <amx:actionListener id="al1" binding="#{bindings.processSelectedSupplier.execute}"/>
      </amx:listItem>
You must create objects for storing the category code data retrieved from the Address Book. Use the AIS Client Class Generator to generate the classes necessary. If you have not already installed and configured the AIS Client Class Generator, see Installing the AIS Client Class Generator Extension for JDeveloper and Configuring the AIS Client Class Generator in this guide.
When naming the package, make sure to use a custom package name in the configuration so there are no conflicts with existing classes from the original application:
Description of the illustration ''custom_java_pckg.png''
Category code 4 and 5 will be retrieved from the Address Book. The field IDs for these fields are 363 and 366, as shown here:
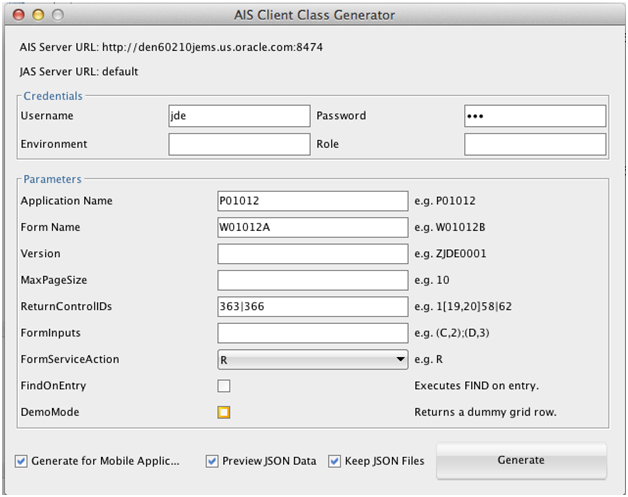
Description of the illustration ''ab_control_ids.png''
After verifying the JSON includes category codes 4 and 5, generate the classes.
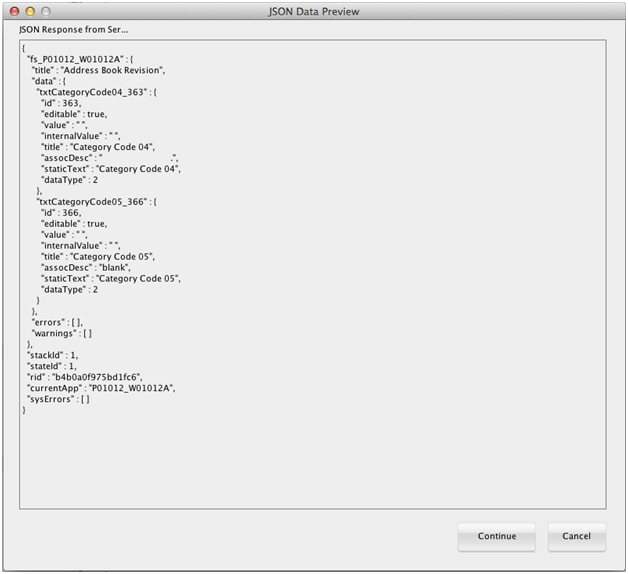
Description of the illustration ''json_data_preview.png''
After refreshing the project, the classes are displayed, as shown here:
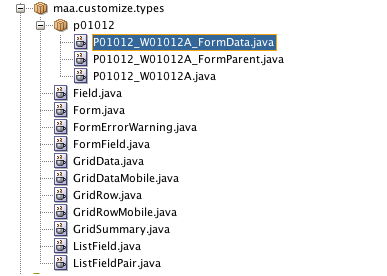
Description of the illustration ''java_classes.png''
After the objects are created to hold the category code data and the selectedABNumber is set when the row is selected, the fetch for the category codes can be written. Add a new class in the ApplicationController project, in the application package. See the code example below for the content of the class. After the class is complete, create a Data Control from it.
package com.oracle.e1.jdemf.M010010.application;

import com.oracle.e1.jdemf.FormRequest;
import com.oracle.e1.jdemf.JDERestServiceException;
import com.oracle.e1.jdemf.JDERestServiceProvider;
import com.oracle.e1.jdemf.M010010.formservicetypes.p04012.P04012_W04012D_FormParent;
import maa.customize.types.p01012.P01012_W01012A_FormParent;
import oracle.adfmf.framework.api.AdfmfJavaUtilities;
import oracle.adfmf.framework.api.JSONBeanSerializationHelper;
import oracle.adfmf.framework.exception.AdfException;
import oracle.adfmf.java.beans.PropertyChangeListener;
import oracle.adfmf.java.beans.PropertyChangeSupport;
import oracle.adfmf.json.JSONObject;

public class ExtendAppDC {

    private P01012_W01012A_FormParent catCodeParent = new P01012_W01012A_FormParent();
    private PropertyChangeSupport propertyChangeSupport = new PropertyChangeSupport(this);

    public ExtendAppDC() {
        super();
    }

    public void setCatCodeParent(P01012_W01012A_FormParent catCodeParent) {
        P01012_W01012A_FormParent oldCatCodeParent = this.catCodeParent;
        this.catCodeParent = catCodeParent;
        propertyChangeSupport.firePropertyChange("catCodeParent", oldCatCodeParent, catCodeParent);
    }

    public P01012_W01012A_FormParent getCatCodeParent() {
        return catCodeParent;
    }

    public void getCatCodesForSupplier(){

        //value of selected address number is set in Supplier Search page when the row is selected.
        String selectedABNumber = (String)AdfmfJavaUtilities.evaluateELExpression("#{pageFlowScope.selectedABNumber}");

        //call P01012_W01012A form to get category codes 4 and 5
        FormRequest formRequest = new FormRequest();

        formRequest.setReturnControlIDs("21|363|366");
        formRequest.setFormName("P01012_W01012A");
        formRequest.setFormServiceAction(formRequest.ACTION_READ);
        formRequest.addToFISet("12",selectedABNumber);

        try{

        // For POST request, set data payload is header delimited with | and service input class
        JSONObject jsonObject = (JSONObject)JSONBeanSerializationHelper.toJSON(formRequest);
        String postData = jsonObject.toString();

        String response = JDERestServiceProvider.jdeRestServiceCall(postData, "POST", "formservice");

            catCodeParent = (P01012_W01012A_FormParent)JSONBeanSerializationHelper.fromJSON(P01012_W01012A_FormParent.class, response);

            //remove the associated description when it is a .
if(catCodeParent.getFs_P01012_W01012A().getData().getTxtCategoryCode04_363().getAssocDesc() != null &&
               catCodeParent.getFs_P01012_W01012A().getData().getTxtCategoryCode04_363().getAssocDesc().trim().equals("."))
            {
                catCodeParent.getFs_P01012_W01012A().getData().getTxtCategoryCode04_363().setAssocDesc("");
            }

            if(catCodeParent.getFs_P01012_W01012A().getData().getTxtCategoryCode05_366().getAssocDesc() != null &&
               catCodeParent.getFs_P01012_W01012A().getData().getTxtCategoryCode05_366().getAssocDesc().trim().equals("."))
            {
                catCodeParent.getFs_P01012_W01012A().getData().getTxtCategoryCode05_366().setAssocDesc("");
            }
        }
        catch (JDERestServiceException e)
        {
            JDERestServiceProvider.handleServiceException(e);
        }
        catch(Exception e)
        {
            throw new AdfException(e.getMessage(), AdfException.ERROR);
        }

    }

    public void addPropertyChangeListener(PropertyChangeListener l) {
        propertyChangeSupport.addPropertyChangeListener(l);
    }

    public void removePropertyChangeListener(PropertyChangeListener l) {
        propertyChangeSupport.removePropertyChangeListener(l);
    }
}
Next, the getCatCodesForSupplier() method is invoked from the amx executable bindings, as shown here:

Description of the illustration ''get_catcodes_method.png''
The two fields from the DataControl are added to the detail page in a panelFormLayout after the listview with the phones, as shown here:
  </amx:listView>
        <amx:panelFormLayout labelPosition="topStart" fieldHalign="start">
        <amx:panelLabelAndMessage label="Category 4" id="plam2">
          <amx:outputText value="#{bindings.assocDesc.inputValue}" id="ot3"/>
        </amx:panelLabelAndMessage>
        <amx:panelLabelAndMessage label="Category 5" id="plam3">
          <amx:outputText value="#{bindings.assocDesc1.inputValue}" id="ot5"/>
        </amx:panelLabelAndMessage>
      </amx:panelFormLayout>
The associated description for each field in EnterpriseOne is used for each field value in the mobile application. The following example shows the result of customizing the mobile application to show the two category code values. The labels in this example are generic, you can make the label appropriate for what the value is in your customization:
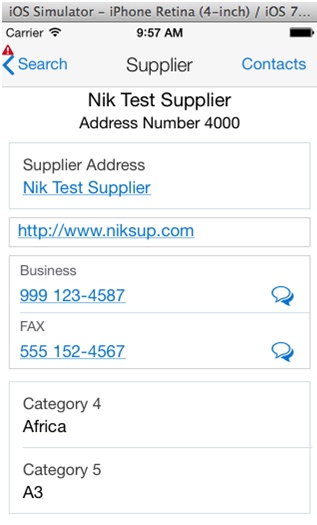
Description of the illustration ''catcodes_displayed.png''
B.5.2 Removing Data from Pages
For each field you want to remove, set the rendered property for that field to false in the SupplierDetail.amx page. The field will not appear in the mobile application, and the space for that field will be reclaimed as if the field was never there.
B.5.3 Adding New Pages
You can add new forms and navigation actions, as well as a new link or button to navigate to the new forms. Refer to the Oracle MAF documentation for these types of modifications:
http://docs.oracle.com/middleware/mobile200/mobile/index.html