22 FTP on the IBM i
This chapter provides instructions on setting up FTP on your IBM i Enterprise Server for JD Edwards EnterpriseOne. Using FTP is an alternate method to transfer the unwrapped .jar file from a Microsoft Windows-machine to the IBM i machine.
This chapter includes the following tasks:
22.1 Setting up FTP on the IBM i
-
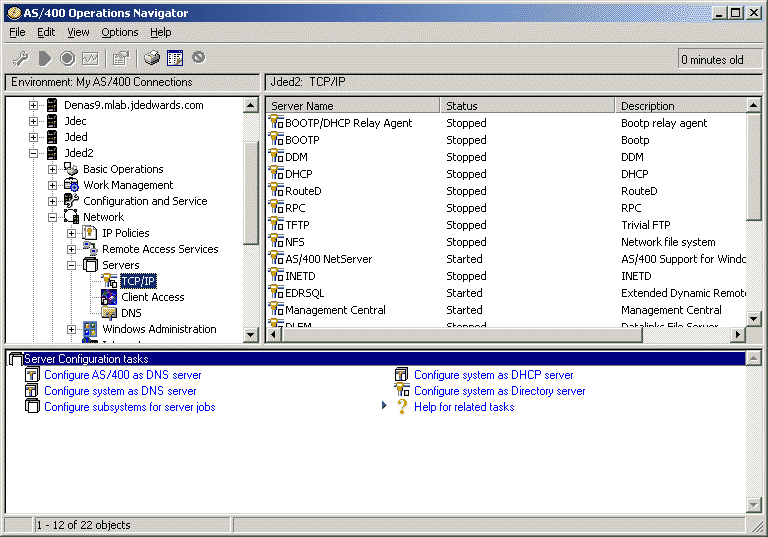
Use the AS\400 Operations Navigator to open your IBM i machine node and navigate to Network > Servers > TCP\IP.
-
If the DDM server is not already started, you can manually start it using the Operations Navigator. In the right-hand pane of the Operations Navigator, in the Server Name column, highlight DDM, right-click, and choose Start.
-
Configure the FTP server. In the right-hand pane of the Operations Navigator, in the Server Name column, highlight the FTP server, right click, and choose Properties.
-
On FTP Properties, select the Initial Formats tab.
-
With the Initial Formats tab selected, ensure the following checkboxes are enabled:
Checkbox Description File naming format Path Working directory Use user's home directory File listing format UNIX listing format -
Click OK to save the changes and exit the FTP Properties.
22.2 Starting the FTP Server
-
Use the AS\400 Operations Navigator to open your IBM i machine node and navigate to Network > Servers > TCP\IP.
-
In the right-hand pane of the Operations Navigator, highlight FTP, right click, and choose Start.
22.3 Copying assembly.dat to the IBM i IFS Directory (optional)
If you are not able to copy the install image from your Windows client to your IBM i because the assembly.dat file is too large, alternatively you can use FTP to transfer that file into the IFS directory.
On the Microsoft Windows client where you ran the IBM i Wrapper install:
-
Start a command window (Run | cmd), then enter this command:
ftp machine_name
where machine_name is the name of your IBM i machine.
Enter a valid IBM i user and password when prompted to do so.
-
To indicate you want to use the IFS instead of the standard file system on the IBM i, enter this command:
cd \
Note:
This command specifies you want to put files into the IFS without changing any system settings on your IBM i, as would be the case if you entered aquote site namefmt 1command. -
In Microsoft Windows Explorer, drill down to the
assembly.datfile in your install image on the Microsoft Windows client.For example, the
assembly.datfile might be in a location similar to this:d:\disk1\install\data\E910-3ffd45216a0d2fb17cd87deda05\9.1.000 -
In the command window type this command (but do not press Enter):
lcd
Note:
Do not press Enter at this point. Continue with the steps below to finish populating thelcdcommand. -
Drag the location of the
assembly.datfrom Microsoft Windows Explorer results from Step 3 into the command window to append thelcdcommand begun in Step 4, and then press Enter to execute thelcdcommand.Your completed command will look similar to this:
lcd d:\disk1\install\data\E910-3ffd45216a0d2fb17cd87deda05\9.1.000
-
In the command window type this command (but do not press Enter):
cd
Note:
Do not press Enter at this point. Continue with the steps below to finish populating thecdcommand. -
In Microsoft Windows Explorer, copy the location of the
assembly.daton the Microsoft Windows box from the Address bar and paste the results to append thecdcommand.Your completed command will look similar to this:
cd address_copied_from_Windows_Explorer
-
In the command window, enter this command:
bin
-
In the command window, enter this command:
put assembly.dat
-
Using Microsoft Windows Explorer, verify that the size and number of files match in the Microsoft Windows install image and the IBM i install image.