C Security and Demo Data Configuration
For JD Edwards EnterpriseOne, the demo data that is loaded in the DV910 environment has configuration for both the Mobile Server and One View Reporting applications.
This appendix describes these topics:
-
Section C.2, "Understanding Users for the Mobile Application"
-
Section C.3, "Understanding Default Passwords for Database Users"
-
Section C.11, "Changing the Admin Password with the P98OWSEC Security Application"
-
Section C.13, "Working with the Oracle Business Intelligence Publisher Schema Password"
C.1 Licensing Considerations
The Oracle VM Templates for JD Edwards EnterpriseOne may include demonstration data and sample content, including but not limited to applications, forms, reports, report templates, EnterpriseOne Pages, One View Reporting artifacts, Watch Lists, data queries, portlets or other types of supplementary content. Usage of this content is governed by your applicable license agreement with Oracle, as described in the ”Agreement terms for Oracle Linux, Oracle VM Server and Oracle VM Manager” under ”Section D: Terms for Use of Other Oracle Programs” which is accessible on the Oracle Software Delivery Cloud at this link:
https://edelivery.oracle.com/EPD/GetUserInfo/get_form?caller=LinuxWelcome
C.2 Understanding Users for the Mobile Application
For use with the Mobile application, the P98OWSEC application was used to add the following users with access to the demo data:
-
EMSMGR
-
MPA07
-
MRSS06
Caution:
Although the above users are added, they are disabled by default. You must enable these users in order to use the associated demo data for the Mobile or OVR applications.C.3 Understanding Default Passwords for Database Users
The Oracle VM templates installation includes the following database users, which are set with default passwords. The expiration for these database users is reset during the configuration of the Oracle VM for the Database Server.
-
PS910DTA
-
PS910CTL
-
PS910
-
TESTDTA
-
TESTCTL
-
DV910
-
CRPDTA
-
CRPCTL
-
PY910
-
DD910
-
OL910
-
SVM910
-
SY910
-
DEVUSER
-
APPLEAD
-
JDEDBA
-
JDE
-
OVR_BIPLATFORM
-
OVR_MDS
C.4 Considerations for Securing Database Users
Refer to ”Working with Database Security” in the JD Edwards EnterpriseOne Applications Installation Guide for UNIX with Oracle. This section details how to override the path code user for use with the Installation workbench. The same procedure can be used on the Enterprise Server to change the password settings.
C.5 Securing the Miscellaneous Users
For working with the EnterpriseOne VM templates, it is recommended that you disable (lock) certain users at the database level. If you configure Enterprise Manager for your Oracle 11g database, you can use it to lock these users. Otherwise, you can use the following sqlplus statements:
alter user APPLEAD account lock;
alter user PRODUSER account lock;
alter user DEVUSER account lock;
alter user JDEDBA account lock;
C.6 Securing Package Build Users
It is recommended that you secure your users for EnterpriseOne package builds. To change the password for the PS910, PY910 and DV910 users:
-
Add a security override for the user.
-
Change the password with the EnterpriseOne P98OWSEC security application.
-
Change the password on the database.
C.7 Securing the ESU Users
It is recommended that you secure your users that can apply EnterpriseOne ESUs. To change the password for the PS910DTA, CRPDTA and TESTDTA users:
-
Add a security override for the user.
-
Change the password with the EnterpriseOne P98OWSEC security application.
-
Change the password on the database.
C.8 Securing Other Users
It is recommended that you secure other JD Edwards EnterpriseOne users, which include PS910CTL, CRPCTL, TESTCTL, DD910, OL912, SVM910 and SY910user. To do so, you should change the password on the database.
C.9 Securing the JDE User
It is recommended that you secure the JDE user for EnterpriseOne using these steps:
-
Change the password with the EnterpriseOne P98OWSEC security application.
-
Change the password on the database.
-
Edit the
jde.inifile.
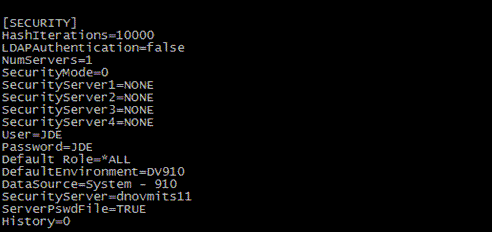
The [SECURITY] section of the jde.ini file would appear as shown in the following example:
C.10 Adding a Security Override
To add a Security Override for a user:
-
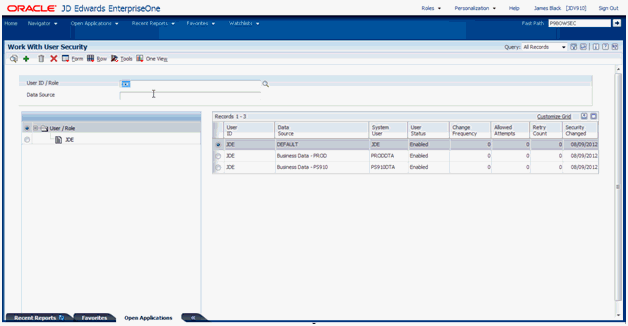
Logon to the P98OWSEC application.
-
On Work With User Security, locate and select the JDE user for the DEFAULT data source.
-
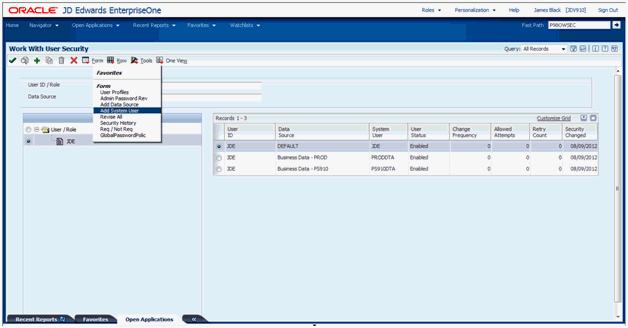
Select the Form exit and choose Add System User.
-
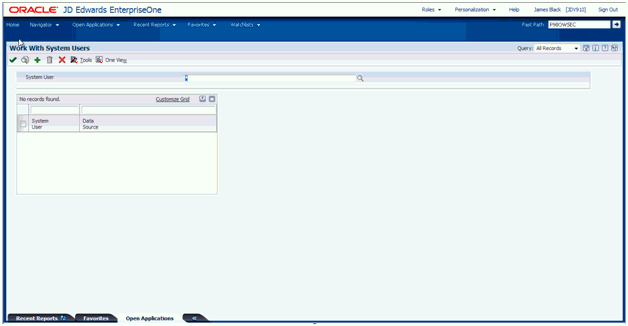
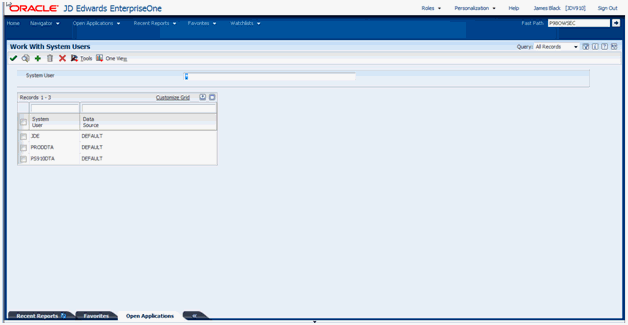
Click the Find icon to display the current list of System users, as shown in the example below.
-
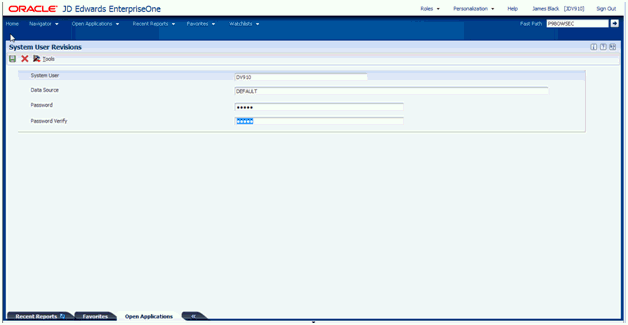
On Work With System Users, click the Add icon.
-
On System User Revisions, complete the fields for the user you want to add. In the above example, the fields are completed for the DV910 user.
-
Click the Save icon.
-
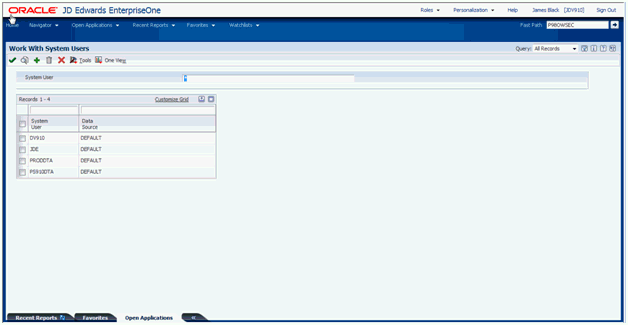
Click the Find icon again to confirm the added user is displayed in the list of System users list. For example, if you just added the DV910 user the list would be as shown in the following example:
-
From the P98OWSEC screen click the Add icon to add the new system user to JDE.
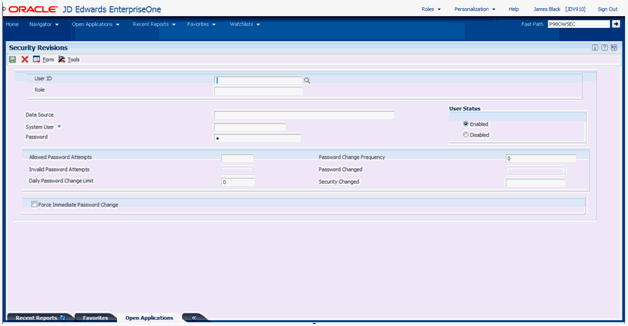
The Security Revisions screen is displayed.
-
On Security Revisions, select the JDE user for the User ID.
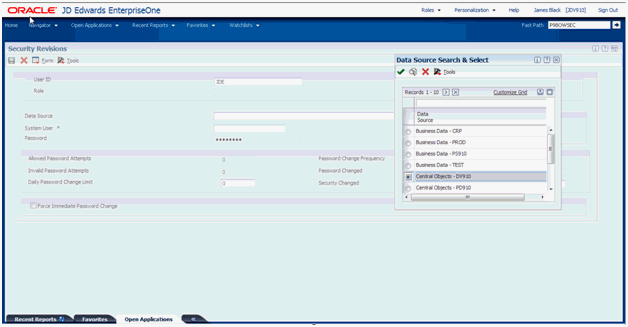
Select the Data Source for the user, which in this case is Central Objects - DV910. Then select the System User to match Data Sources in this case the DV910 user. In this case for adding the DV910 user, the completed form is shown above.
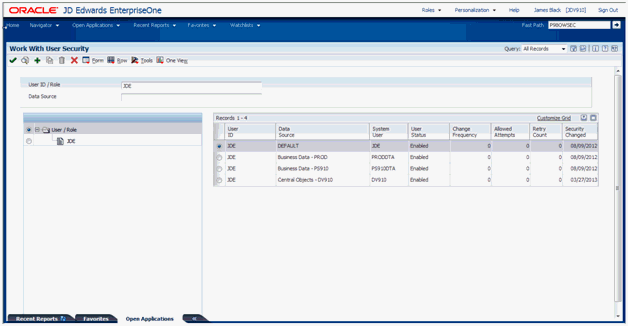
As shown in the example above, when you return to the P98OWSEC screen a row is displayed for the newly-added JDE user for DV910.
-
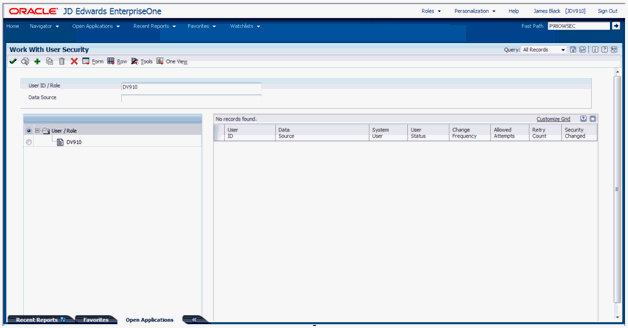
On Work With User Security, enter the user in this case the DV910 in the User ID /Role text box for the P98OWSEC application.
-
Click the Find icon.
-
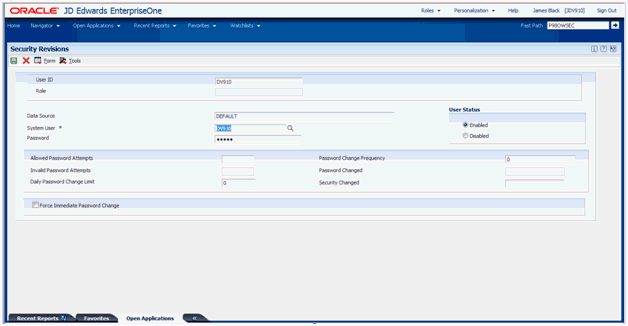
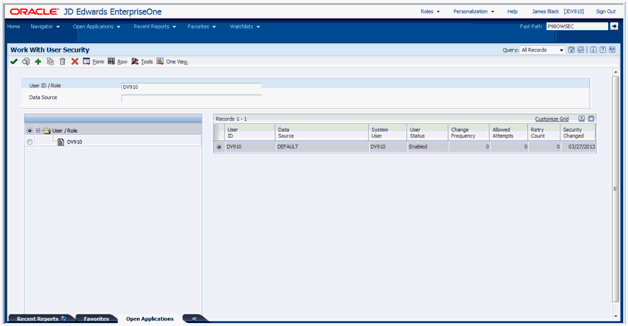
On Security Revisions, click the Add icon and enter the user, which in this case is DV910, enter DEFAULT for the Data Source, and enter the user for the SYSTEM user, which in this case is DV910.
As shown in the following example, when you return to the P98OWSEC a row is displayed for the newly-added user, which in this case is DV910.
This completes setup a security override.
C.11 Changing the Admin Password with the P98OWSEC Security Application
To change the Admin password with the JD Edwards EnterpriseOne P98OWSEC security application:
-
Log in to the EnterpriseOne system as the JDE user.
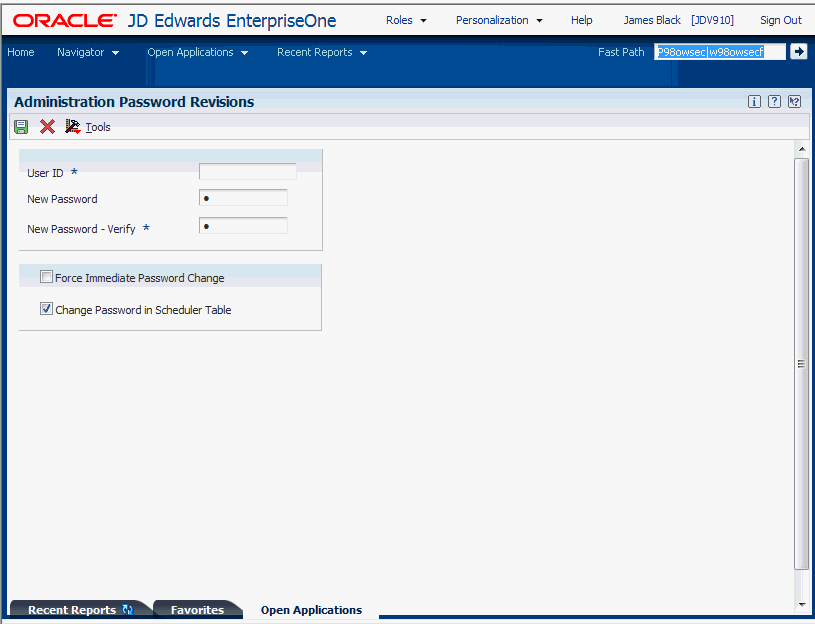
-
Fast path to the P98OWSEC|W98OWSECF application.
-
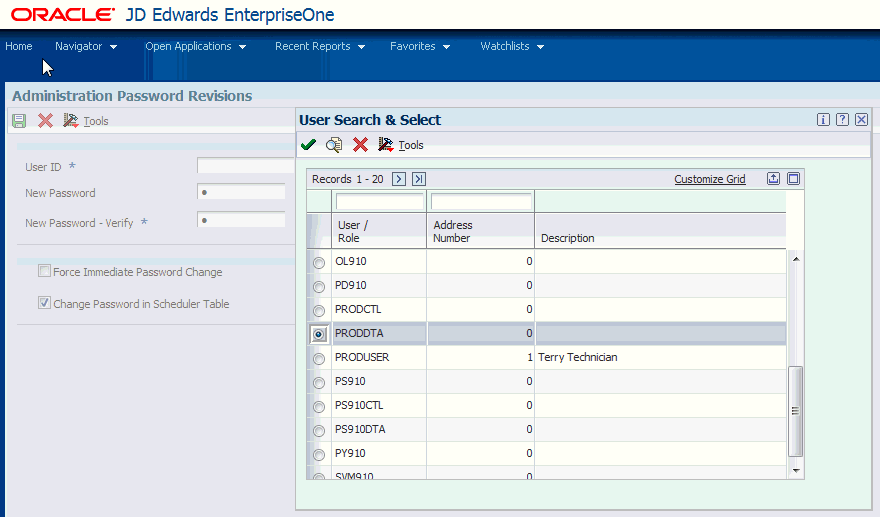
On Administration Password Revisions, locate and select the user ID that you want to change. In this example, the selected user ID is PRODDTA.
-
On Administration Password Revisions, enter the new password and verify it.
-
Exit the security application to save your changes.
C.12 Changing the User Password in the Database
To change the user password in the database, execute the following SQL statement as the sysdba user on the ovsorcl database:
alter <user> sys identified by <new password>;
Substitute the <user> with the user id and <new password> with the new password.
C.13 Working with the Oracle Business Intelligence Publisher Schema Password
There are two database schemas associated with Oracle Business Intelligence Publisher (BI Publisher), MDS and BIPLATFORM. These schemas are created with a prefix during the Repository Creation Utility (RCU) process.
There are two steps to change these passwords:
C.13.1 Step 1: Modify the Schema Password from the Database
To modify the schema password from the database:
-
Use
sqlplusto log on to the database as the sysdba user. -
Enter the following commands to update the password:
  alter user prefix_MDS identified by <new_password>;
        alter user prefix_BIPLATFORM identified by <new_password>;
        commit;
C.13.2 Step 2: Modify the Data Source Connection Information from the WebLogic Administration Console
To modify the data source connection information from the WebLogic Administration Console:
-
Log on to the WebLogic Administration Console.
-
Select Data Sources from Services.

-
From the list of Data Sources, click on the name the mds-owsm data source in order to display the Settings.

-
On Settings for mds-owsm, select the Connection Pool tab.
-
Click the Lock and Edit button.
Caution:
Ensure the schema that you are editing (prefix_MDS or prefix_BIPLATFORM), if they have different password. -
Enter the new password in the Password and Confirm Password fields.
-
Repeat Steps 3 through 6 above for both of these data sources:
EPMSystemRegistry
bip_datasource
-
Click the Activate Changes button.
-
You must restart all servers for the changes to take affect.