6 Working with VM Guests
This chapter discusses these topics:
-
Section 6.1, "Creating a VM Guest from the JD Edwards EnterpriseOne Application Template"
-
Section 6.2, "Starting and Configuring the JD Edwards EnterpriseOne VM Guest Image"
6.1 Creating a VM Guest from the JD Edwards EnterpriseOne Application Template
In order to get a functional VM Guest, you must use the procedure in this section to clone each template that you imported.
-
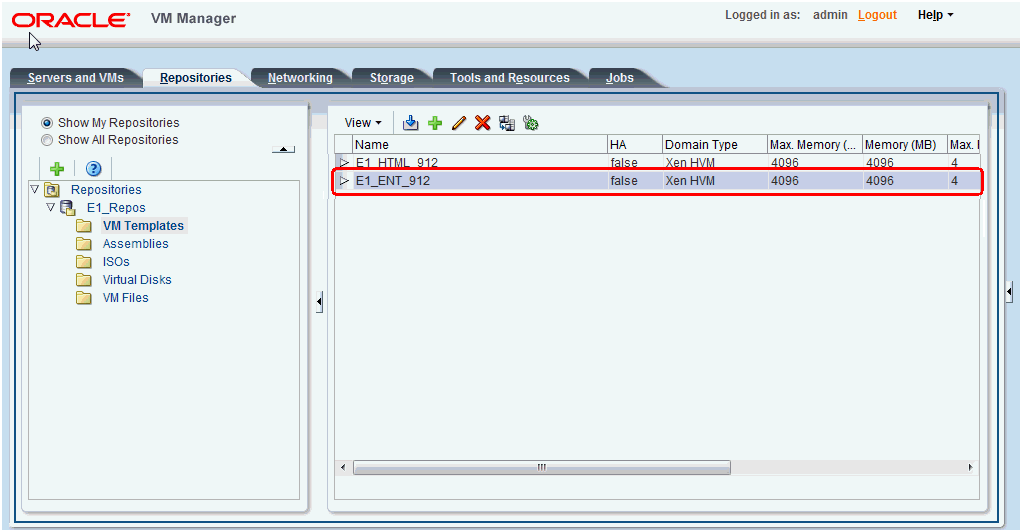
On Oracle VM Manager, on the Repositories tab, select the JD Edwards EnterpriseOne template that you want to clone.
-
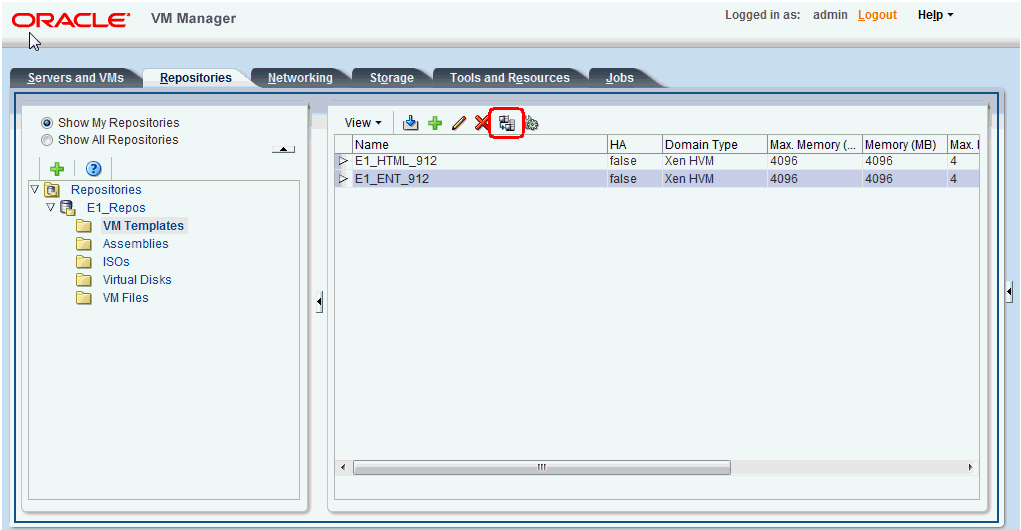
Click the Clone or Move icon.
-
On the Close or Move Template<name> popup, in the left pane select the radio button for this option:
-
Create a clone of this Template (Click 'Next' to continue)
-
-
Click the Next button.
-
On the second Close or Move Template<name> popup, complete these fields:
-
Clone to a:
Click the Virtual Machine radio button.
-
Clone Count
Set the count value to 1.
-
Clone Name
Enter a name for the clone. For example, E1_ENT_914_SVR.
-
Target Server Pool
Use the pulldown to select a target server pool. For example, dnptovm200_server_pool.
-
Description
Enter a description for the clone.
Note:
The Advanced Clone Options are not used for JD Edwards EnterpriseOne OVM.
-
-
Click the OK button.
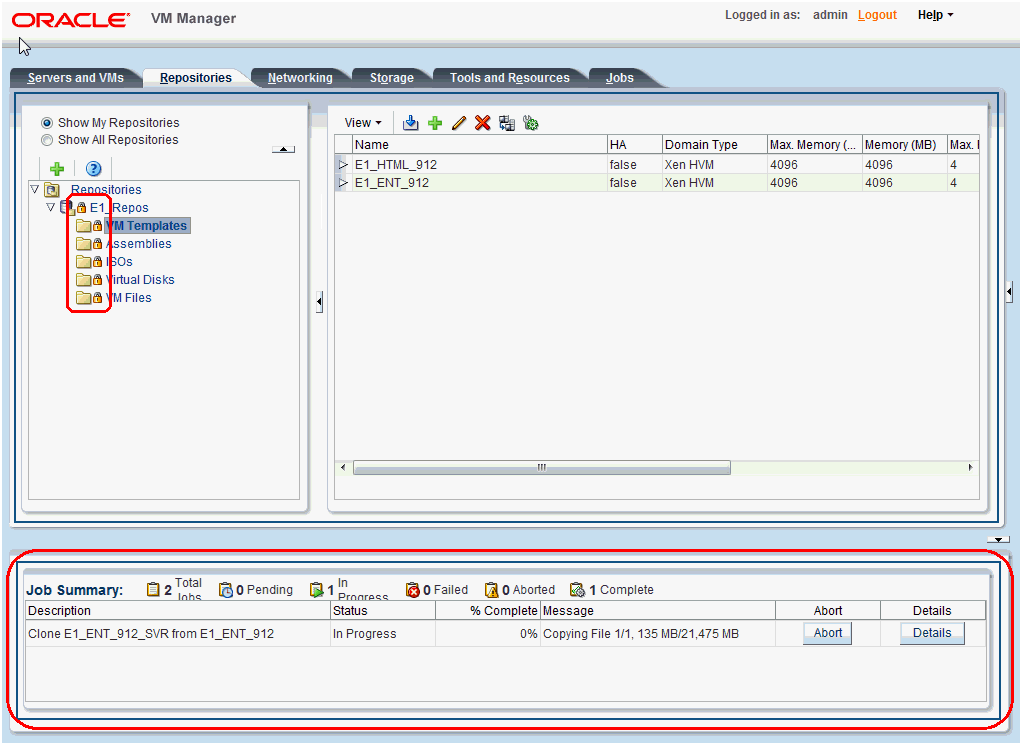
With the Repositories tab selected, the Job Summary in the lower pane indicates the status and progress of the template cloning. In the upper left pane, Lock icons are displayed indicating that all files in the Repository are locked for changes. The Oracle VM Manager is still functional, but no changes to the Repository are allowed during cloning process.
-
Check the progress of the cloning process by selecting the Jobs tab. This may take several hours depending on the type of disk configuration you have.
-
Verify that when the cloning process completes that the new clone shows up as a new VM guest in the server pool as shown in the following example.

-
Repeat the cloning process for each of the EnterpriseOne templates:
-
Enterprise Server
-
Database Server
Note:
If you are not implementing the database server with an Oracle VM Template, and instead are using a non-virtualized database, you can will not have a virtualized database server to clone. -
HTML Server
-
BI Publisher Server
Note:
This is an optional step that is only required if you are implementing the JD Edwards EnterpriseOne OneView Reporting (OVR) application on a BIP server. -
Mobile Server
Note:
This is an optional step that is only required if you are implementing the JD Edwards EnterpriseOne Mobile application on a BSSV server. -
AIS Server
Note:
This is an optional step that is only required if you are implementing the JD Edwards EnterpriseOne AIS server. -
Server Manager
Note:
This is an optional step that is only required if you are implementing the JD Edwards EnterpriseOne Server Manager.
-
-
For applicable servers (see Note below), restart the Server Manager agent by executing the
restartAgentscript in this directory:/u01/jdedwards/jde_home/SCHFA/bin/restartAgentNote:
This step is not applicable to the BIP or Mobile servers (and Server Manager itself) because they do not use Server Manager agents. -
After all three Templates for JD Edwards EnterpriseOne are cloned and the Server Manager agents are restarted you can proceed to the next section to start the VMs and configure the Virtual NIC and network.
Caution:
During the initial startup of the JD Edwards EnterpriseOne server templates, it is very important that properly configure the Virtual NIC and the network as described in the following section of this guide.
6.2 Starting and Configuring the JD Edwards EnterpriseOne VM Guest Image
After you have cloned all the JD Edwards EnterpriseOne templates in the VM Guest, you can start and configure the VMs using these steps:
-
Boot the VM
Refer to the section entitled: Section 6.2.1, "Boot the VM".
-
Log in as the root user and boot the VM for the first time to automatically run the
EOne_cfg.kshscript.Refer to the section entitled: Section 6.2.2, "Boot the VM for the First Time to Automatically Run the EOne_cfg.ksh Script"
-
After the VM boots, check the
/var/logconfiguration logs.Refer to the section entitled: Section 6.2.3, "Checking the Configuration Log Files"
You must perform these steps for each of the three JD Edwards EnterpriseOne servers: Enterprise, Database, and HTML
6.2.1 Boot the VM
Use this procedure to boot the VM.
-
On Oracle VM Manager, open the Servers and VM tab and select the Server pool and then the host machine on which the VM guest is configured.
-
Click the Start icon (green triangle).
The VM Guests status will change from Stopped to Starting and then Running.
6.2.2 Boot the VM for the First Time to Automatically Run the EOne_cfg.ksh Script
Logged on as the root user, when you boot the VM for the first time the, the system automatically runs the EOne_cfg.ksh script to complete the server configuration using the parameters you entered using the config.sh script.
-
On Oracle VM Manager, with the Servers and VMs tab selected, while the VM guest is starting, select the Console icon to connect to the starting VM machine for the highlighted VM. In this example, that VM is E1_ENT_SVR.
The start up messages are displayed on the console.
-
Login into the VM as the root user. The root user account has been configured to determine what type of EnterpriseOne application image and also the associated hostname and IP and upon successful login displays that information.
6.2.3 Checking the Configuration Log Files
Use this procedure to check the configuration log files. These log files were creating when the VM was booted for the first time. At that time the system ran the EOne_cfg.ksh script passing the -syn option.
-
Change to this directory:
/var/log -
The table below lists the log files that are available for each JD Edwards EnterpriseOne VM template. For each template you installed, you should inspect the log files to verify that they installed correctly.
| JD Edwards EnterpriseOne VM Template | Log File(s) |
|---|---|
| Oracle Database | update_dba_cfg.log
|
| Enterprise Server | EOne_update_jde_ini.log |
| HTML Server | EOne_update_wls_cfg.log |
| BI Publisher (BIP) Server | EOne_update_ovr_cfg.log |
| Mobile Server | EOne_update_mbl_cfg.log |
| Application Interface Services (AIS) Server | EOne_update_ais_cfg.log |
| Server Manager | EOne_update_sm_cfg.log |